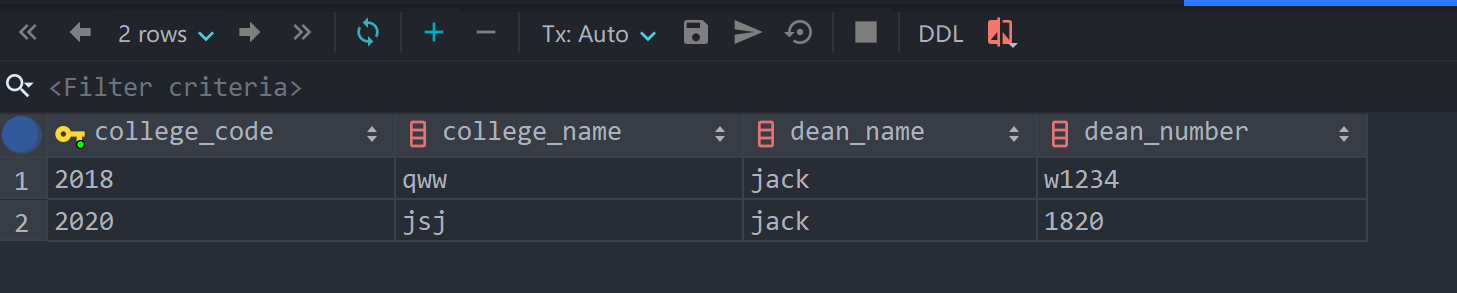
1.使用Mysql建立一张表
- 主要字段包括学院代码、学院名称、院长姓名、院长工号等
2.项目结构
3.进行配置Spring boot,连接到Mysql
- 对pom.xml依赖进行导入
- 使用阿里巴巴开源的druid的数据库连接池进行链接
- 将application.properties文件重命名为application.yml
- 在application.yml配置数据库的信息
server:
  port: 8881
  servlet:
    context-path: /ex02
spring:
  datasource:
    name: druidDataSource
    type: com.alibaba.druid.pool.DruidDataSource
    driver-class-name: com.mysql.cj.jdbc.Driver
    #自己的数据库Ip地址和数据库名,账号及密码
    url: jdbc:mysql://localhost:3306/college?useUnicode=true&characterEncoding=UTF8&serverTimezone=UTC
    username: root
    password: 99150704
    druid:
      #监控统计拦截的过滤器 不加监控界面sql无法统计 wall用于防火墙
      filters: stat,wall,log4j,config
      #最大连接数
      max-active: 100
      #初始化大小
      initial-size: 1
      #获取连接最大等待时间
      max-wait: 60000
      min-idle: 1
      #间隔多久检测一次需要关闭的空闲连接 毫秒
      time-between-eviction-runs-millis: 60000
      #连接在连接池中最小生存的时间,毫秒
      min-evictable-idle-time-millis: 300000
      validation-query: select 'x'
      test-while-idle: true
      test-on-borrow: false
      test-on-return: false
      pool-prepared-statements: true
      max-open-prepared-statements: 50
      max-pool-prepared-statement-per-connection-size: 20
      web-stat-filter:
        exclusions: "*.js,*.gif,*.jpg,*.png,*.css,*.ico,/druid/*"
        url-pattern: /*
      stat-view-servlet:
        #白名单IP
        allow: 127.0.0.1
        #黑名单IP
        deny: 192.168.0.106
        #登录账号和密码
        login-username: ex02
        login-password: springboot
        #启用重置数据功能
        reset-enable: true
  jpa:
    database-platform: org.hibernate.dialect.MySQL5InnoDBDialect
    show-sql: true
  thymeleaf:
    cache: false
    suffix: .html
    encoding: UTF-8
    servlet:
      content-type: text/html
    mode: HTML5
 <dependency>
            <groupId>org.springframework.boot</groupId>
            <artifactId>spring-boot-starter-thymeleaf</artifactId>
        </dependency>
        <dependency>
            <groupId>net.sourceforge.nekohtml</groupId>
            <artifactId>nekohtml</artifactId>
            <version>1.9.22</version>
        </dependency>

<!-- 数据库连接池 -->
        <dependency>
            <groupId>com.alibaba</groupId>
            <artifactId>druid-spring-boot-starter</artifactId>
            <version>1.1.10</version>
        </dependency>
        <dependency>
            <groupId>log4j</groupId>
            <artifactId>log4j</artifactId>
            <version>1.2.17</version>
        </dependency>
- 在resources文件夹下添加log4j.properties的属性文件,避免报错,内容如下
log4j.rootLogger=debug, stdout, R
log4j.appender.stdout=org.apache.log4j.ConsoleAppender
log4j.appender.stdout.layout=org.apache.log4j.PatternLayout
log4j.appender.stdout.layout.ConversionPattern=%5p - %m%n
log4j.appender.R=org.apache.log4j.RollingFileAppender
log4j.appender.R.File=firestorm.log
log4j.appender.R.MaxFileSize=100KB
log4j.appender.R.MaxBackupIndex=1
log4j.appender.R.layout=org.apache.log4j.PatternLayout
log4j.appender.R.layout.ConversionPattern=%p %t %c - %m%n
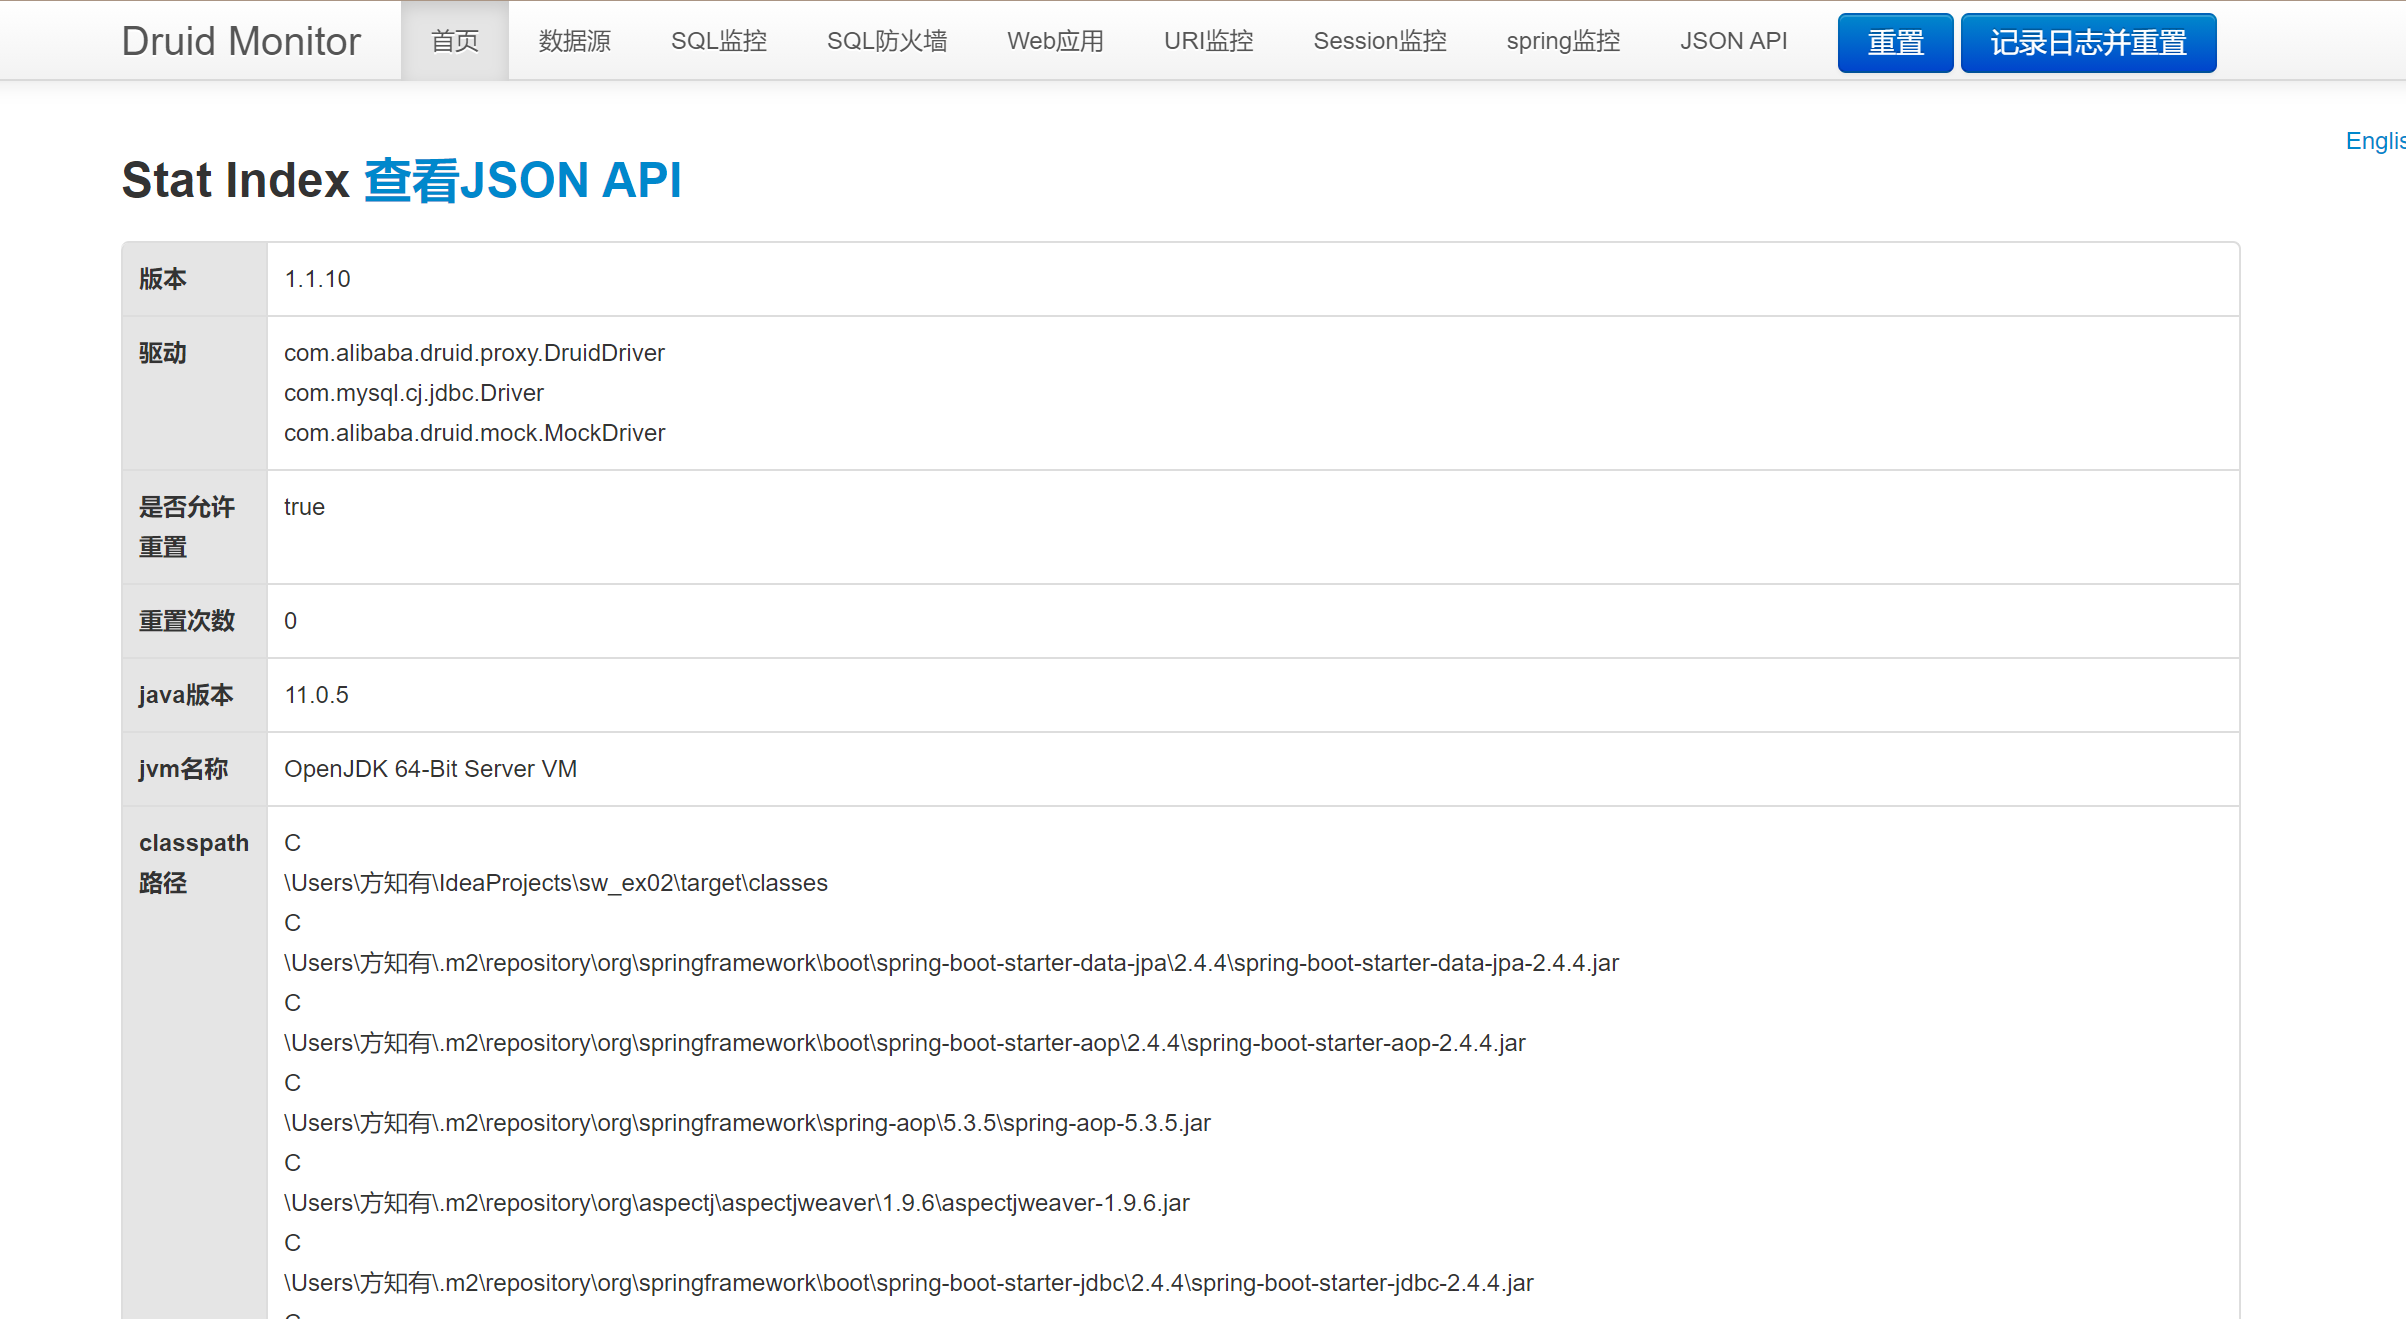
- 启动项目,访问druid控制台
- 账号、密码为配置文件设置的
4.使用JPA+postman进行增删改查数据
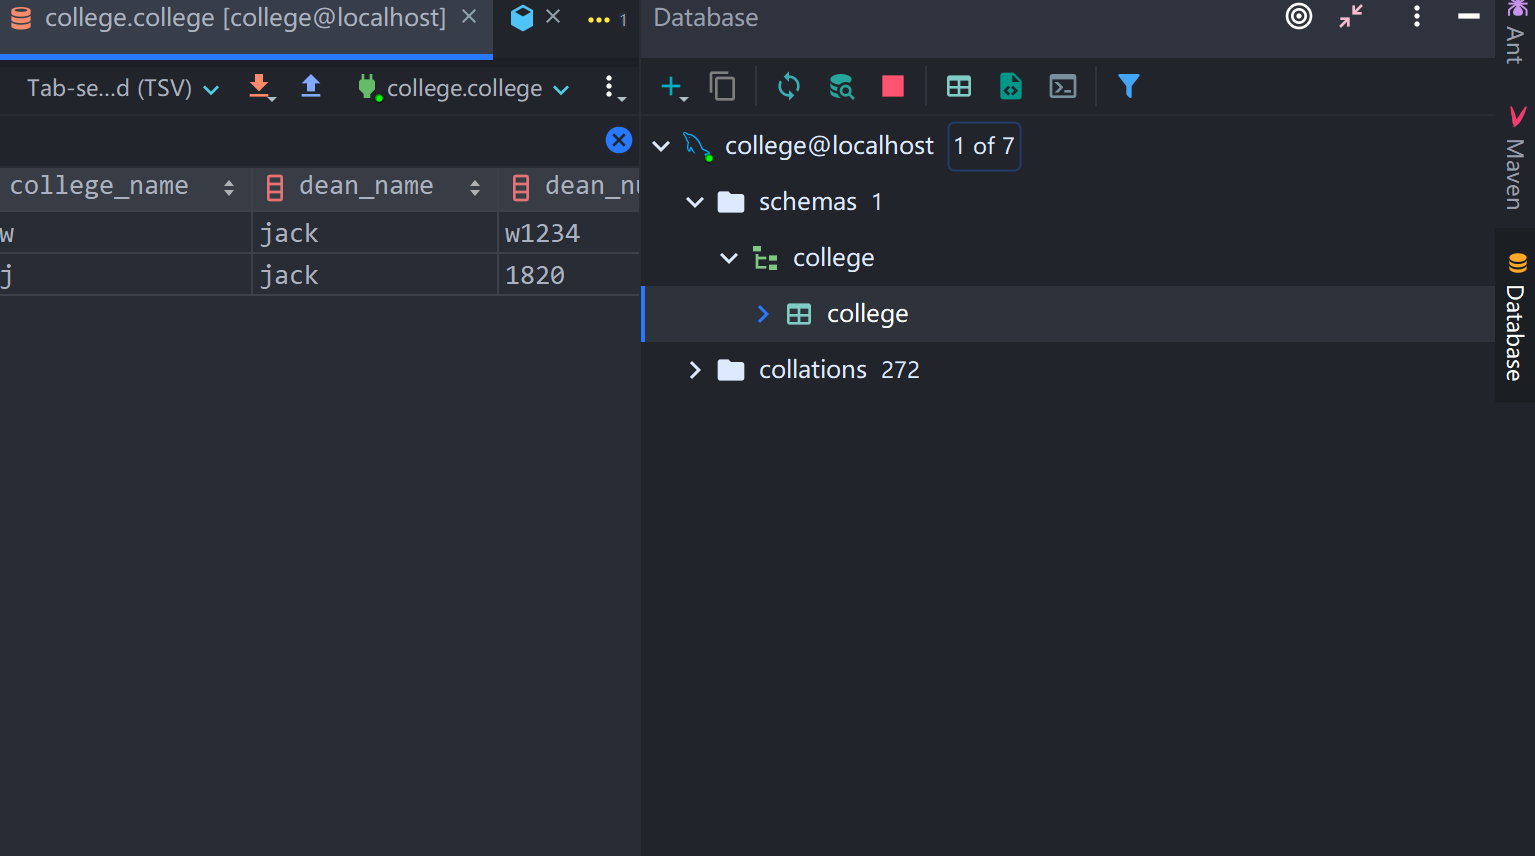
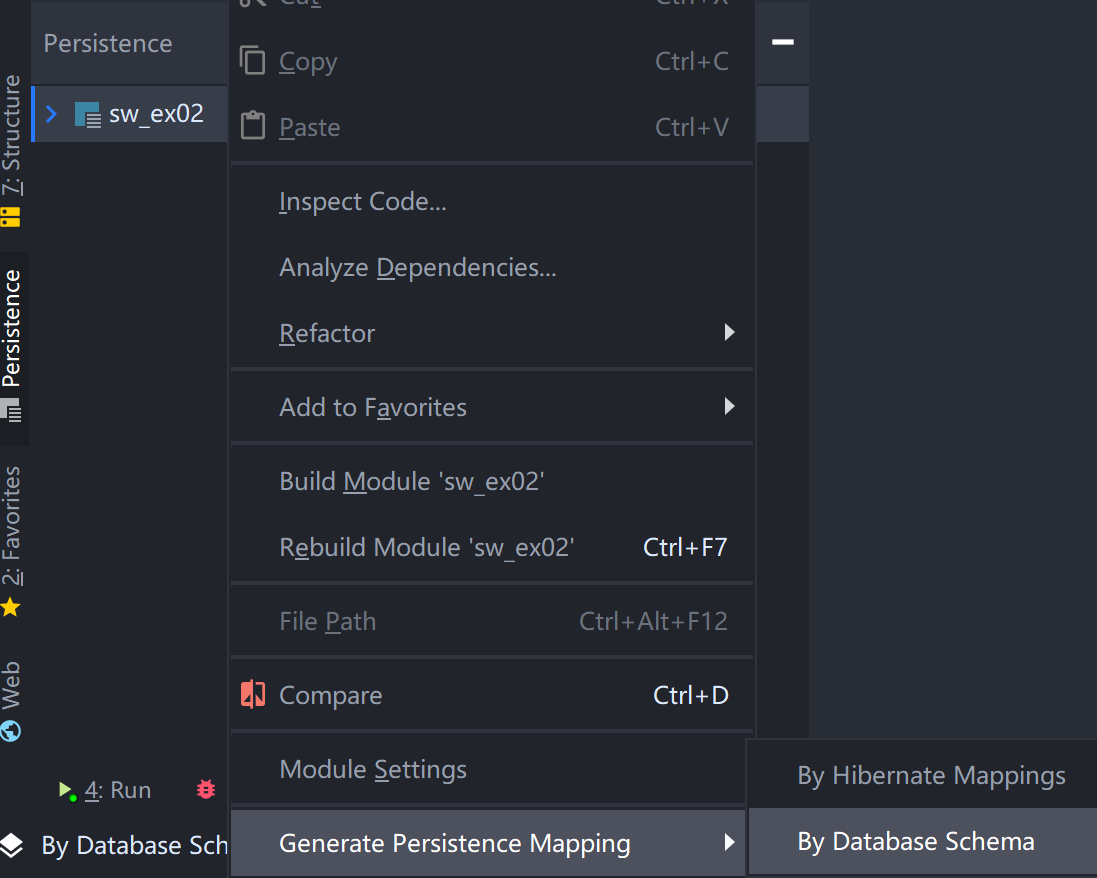
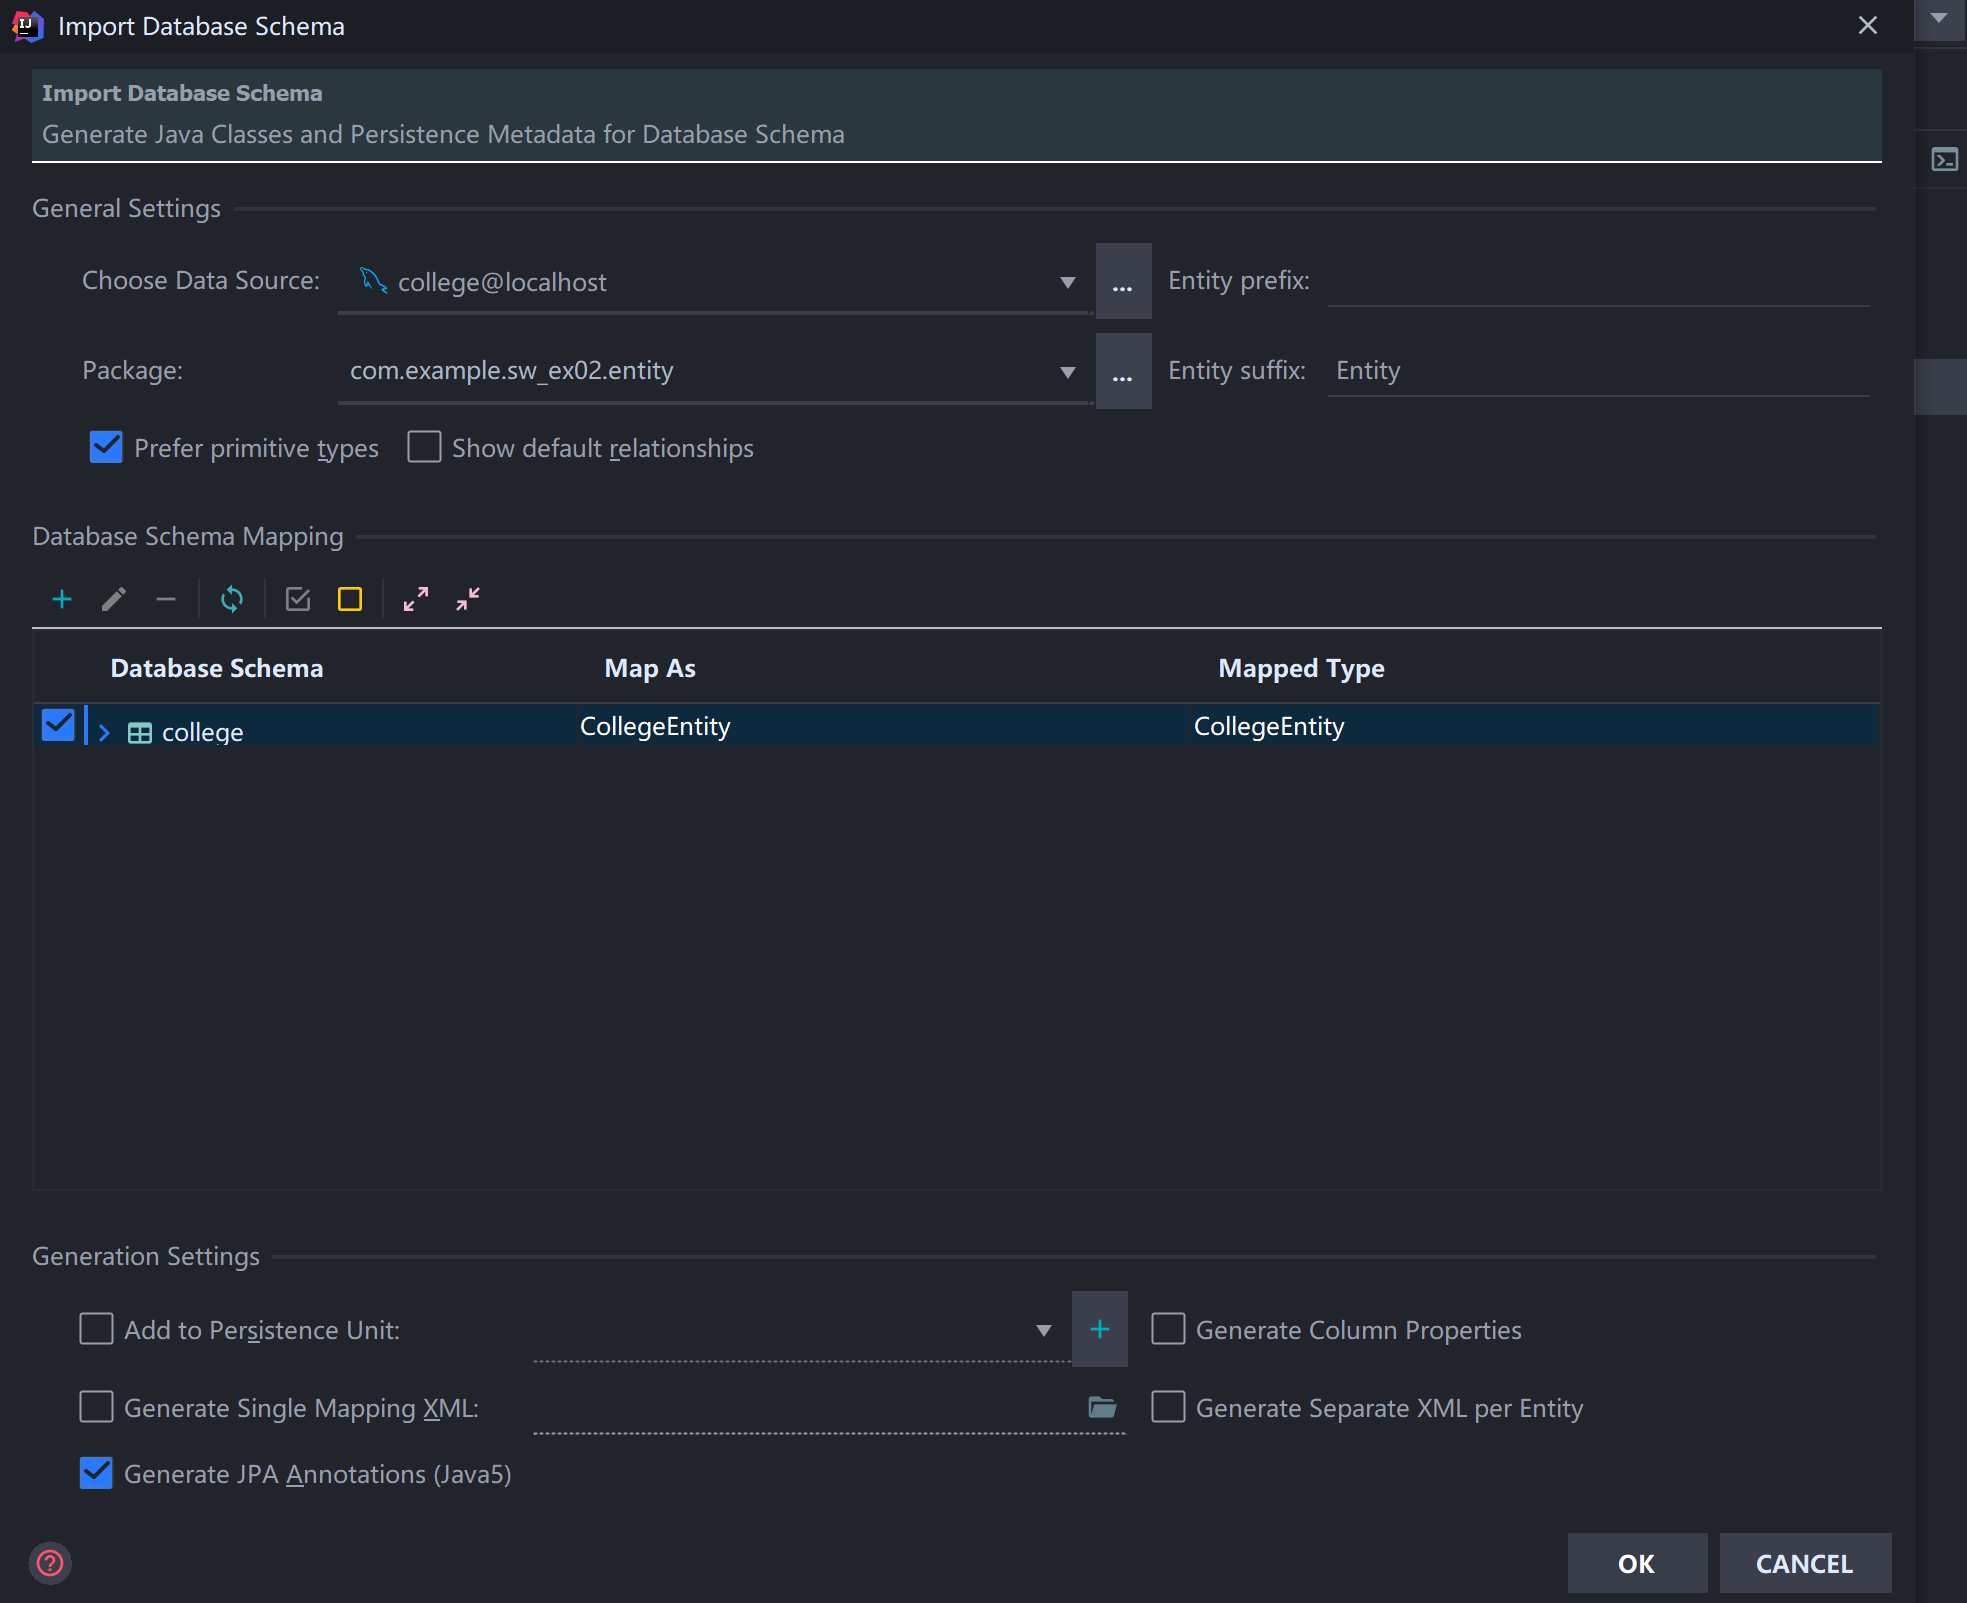
- 使用idea中的datasource连接mysql数据库
①新建实体类包,映射的实体类代码如下:
package com.example.sw_ex02.entity;

import com.fasterxml.jackson.annotation.JsonProperty;

import javax.persistence.*;
import java.util.Objects;

@Entity
@Table(name = "college", schema = "college", catalog = "")
public class CollegeEntity {
    private String collegeCode;
    private String collegeName;
    private String deanName;
    private String deanNumber;

    @Id
    @Column(name = "college_code")
    public String getCollegeCode() {
        return collegeCode;
    }
    //springboot解析器在解析json过程中出现问题,因字段名驼峰命名无法匹配字段名导致,进行注解添加
    @JsonProperty(value = "college_code")
    public void setCollegeCode(String collegeCode) {
        this.collegeCode = collegeCode;
    }

    @Basic
    @Column(name = "college_name")
    public String getCollegeName() {
        return collegeName;
    }
    @JsonProperty(value = "college_name")
    public void setCollegeName(String collegeName) {
        this.collegeName = collegeName;
    }

    @Basic
    @Column(name = "dean_name")
    public String getDeanName() {
        return deanName;
    }
    @JsonProperty(value = "dean_name")
    public void setDeanName(String deanName) {
        this.deanName = deanName;
    }

    @Basic
    @Column(name = "dean_number")
    public String getDeanNumber() {
        return deanNumber;
    }
    @JsonProperty(value = "dean_number")
    public void setDeanNumber(String deanNumber) {
        this.deanNumber = deanNumber;
    }

    @Override
    public boolean equals(Object o) {
        if (this == o) return true;
        if (o == null || getClass() != o.getClass()) return false;
        CollegeEntity that = (CollegeEntity) o;
        return Objects.equals(collegeCode, that.collegeCode) &&
                Objects.equals(collegeName, that.collegeName) &&
                Objects.equals(deanName, that.deanName) &&
                Objects.equals(deanNumber, that.deanNumber);
    }

    @Override
    public int hashCode() {
        return Objects.hash(collegeCode, collegeName, deanName, deanNumber);
    }
}
②新建Repository包,创建CollegeRepository接口
package com.example.sw_ex02.repository;

import com.example.sw_ex02.entity.CollegeEntity;
import org.springframework.data.jpa.repository.JpaRepository;

public interface CollegeRepository extends JpaRepository<CollegeEntity,String> {
}
③编写CollegeService层方法,实现增删改查的业务逻辑实现
package com.example.sw_ex02.service;

import com.example.sw_ex02.entity.CollegeEntity;
import com.example.sw_ex02.repository.CollegeRepository;
import org.springframework.beans.factory.annotation.Autowired;
import org.springframework.stereotype.Service;

import java.util.List;

@Service
public class CollegeServiceImpl {

    @Autowired
    private CollegeRepository collegeRepository;

    /***
     * @description 查询所有用户
     */
    public List<CollegeEntity> getCollegeList(){
        return collegeRepository.findAll();
    }

    /***
     * @description 查询单个用户
     */
    public CollegeEntity getCollege(String code){
        return collegeRepository.findById(code).get();
    }

    /***
     * @description 创建用户
     */
    public CollegeEntity insertCollege(CollegeEntity collegeEntity){
        collegeEntity.setCollegeCode("");
        collegeEntity.setCollegeName("");
        collegeEntity.setDeanName("");
        collegeEntity.setDeanNumber("");
        return collegeRepository.save(collegeEntity);
    }

    /***
     * @description 修改用户
     */
    public CollegeEntity updateCollege(CollegeEntity collegeEntity){
        CollegeEntity collegeEntity1=collegeRepository.findById(collegeEntity.getCollegeCode()).get();

        if(collegeEntity1==null){
            return null;
        }

        collegeEntity1.setCollegeName(collegeEntity.getCollegeName());
        collegeEntity1.setDeanNumber(collegeEntity.getDeanNumber());
        collegeEntity1.setDeanName(collegeEntity.getDeanName());

        return collegeRepository.save(collegeEntity1);
    }

    /***
     * @description 删除用户
     */
    public boolean deleteCollege(String code){
        try {
            collegeRepository.deleteById(code);
        }catch (Exception e){
            e.printStackTrace();
            return false;
        }
        return true;
    }
}
④编写CollegeController,实现数据的增删改查
package com.example.sw_ex02.controller;

import com.example.sw_ex02.entity.CollegeEntity;
import com.example.sw_ex02.service.CollegeServiceImpl;
import org.springframework.beans.factory.annotation.Autowired;
import org.springframework.web.bind.annotation.*;

import java.util.List;

@RestController
@RequestMapping("college")
public class CollegeController {

    @Autowired
    private CollegeServiceImpl collegeService;

    /***
     * @description 查询所有用户
     */
    @GetMapping
    public List<CollegeEntity> getAllCollege(){
        return collegeService.getCollegeList();
    }

    /***
     * @description 查询单个用户
     */
    @GetMapping("{code}")
    public CollegeEntity getCollege(@PathVariable("code")String code){
        return collegeService.getCollege(code);
    }

    /***
     * @description 创建用户
     */
    @PostMapping
    public CollegeEntity insertCollege(@RequestBody CollegeEntity collegeEntity){
       return collegeService.insertCollege(collegeEntity);
    }

    /***
     * @description 修改用户
     */
    @PatchMapping
    public CollegeEntity updateCollege(@RequestBody CollegeEntity collegeEntity){
        return collegeService.updateCollege(collegeEntity);
    }

    /***
     * @description 删除用户
     */
    @DeleteMapping("{code}")
    public boolean deleteCollege(@PathVariable("code")String code){
        collegeService.deleteCollege(code);
        return true;
    }
}
⑤启动验证
- 在启动类上面添加JPA注解,启动项目
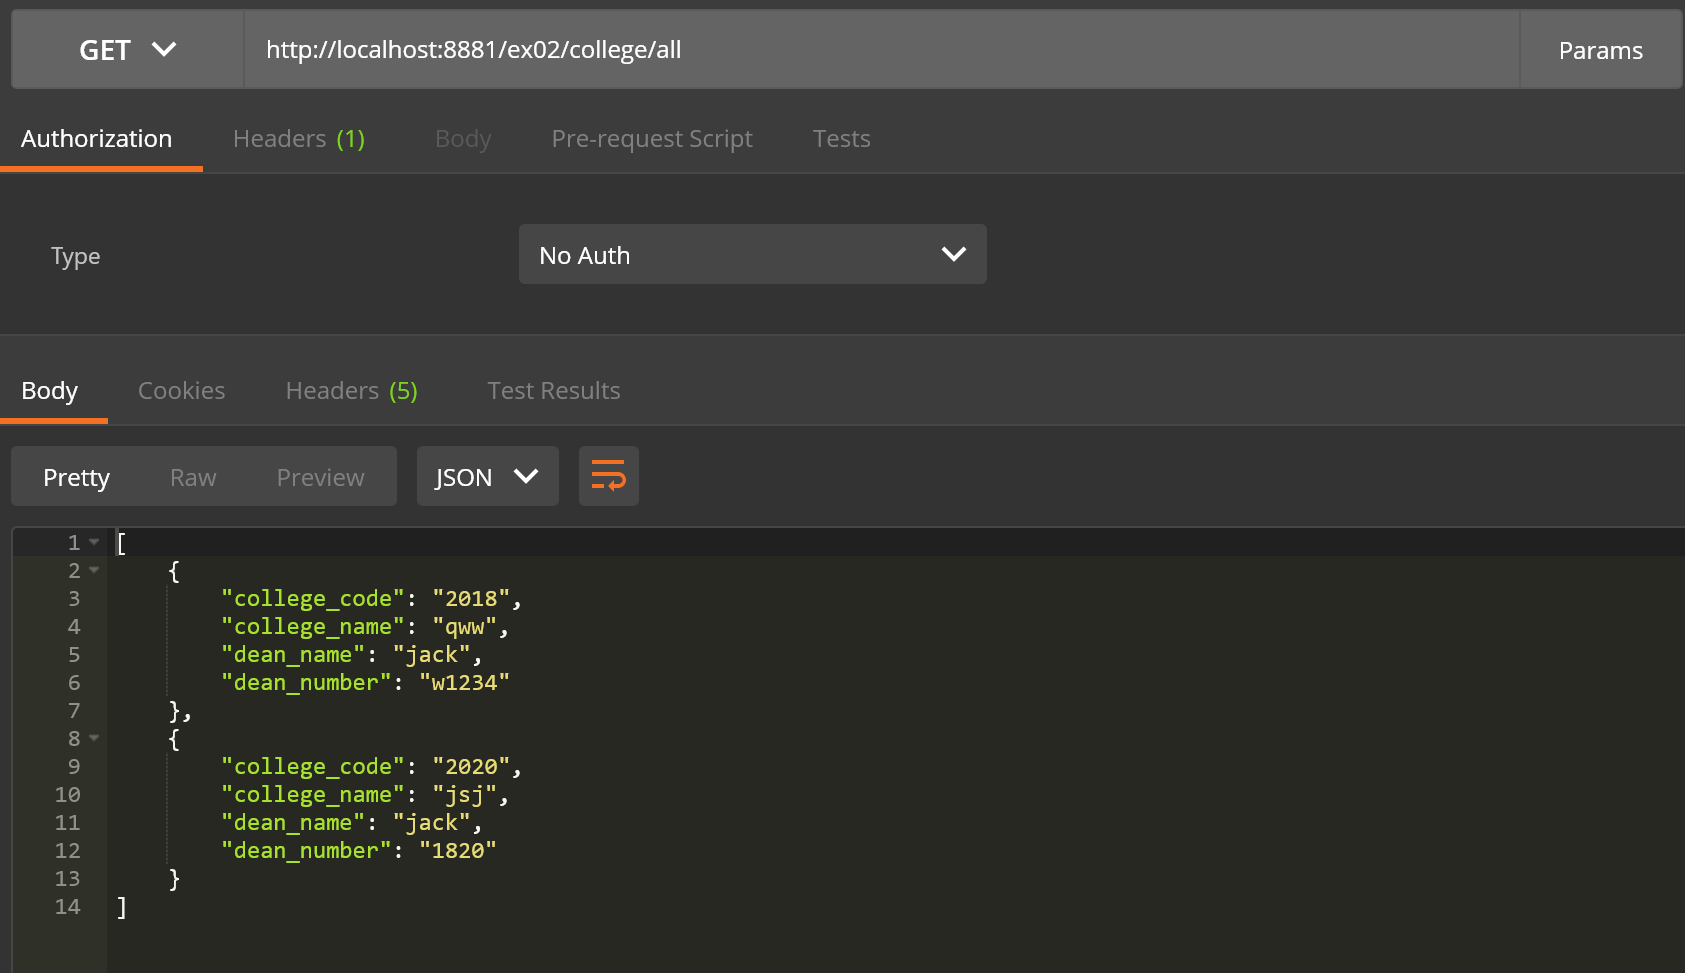
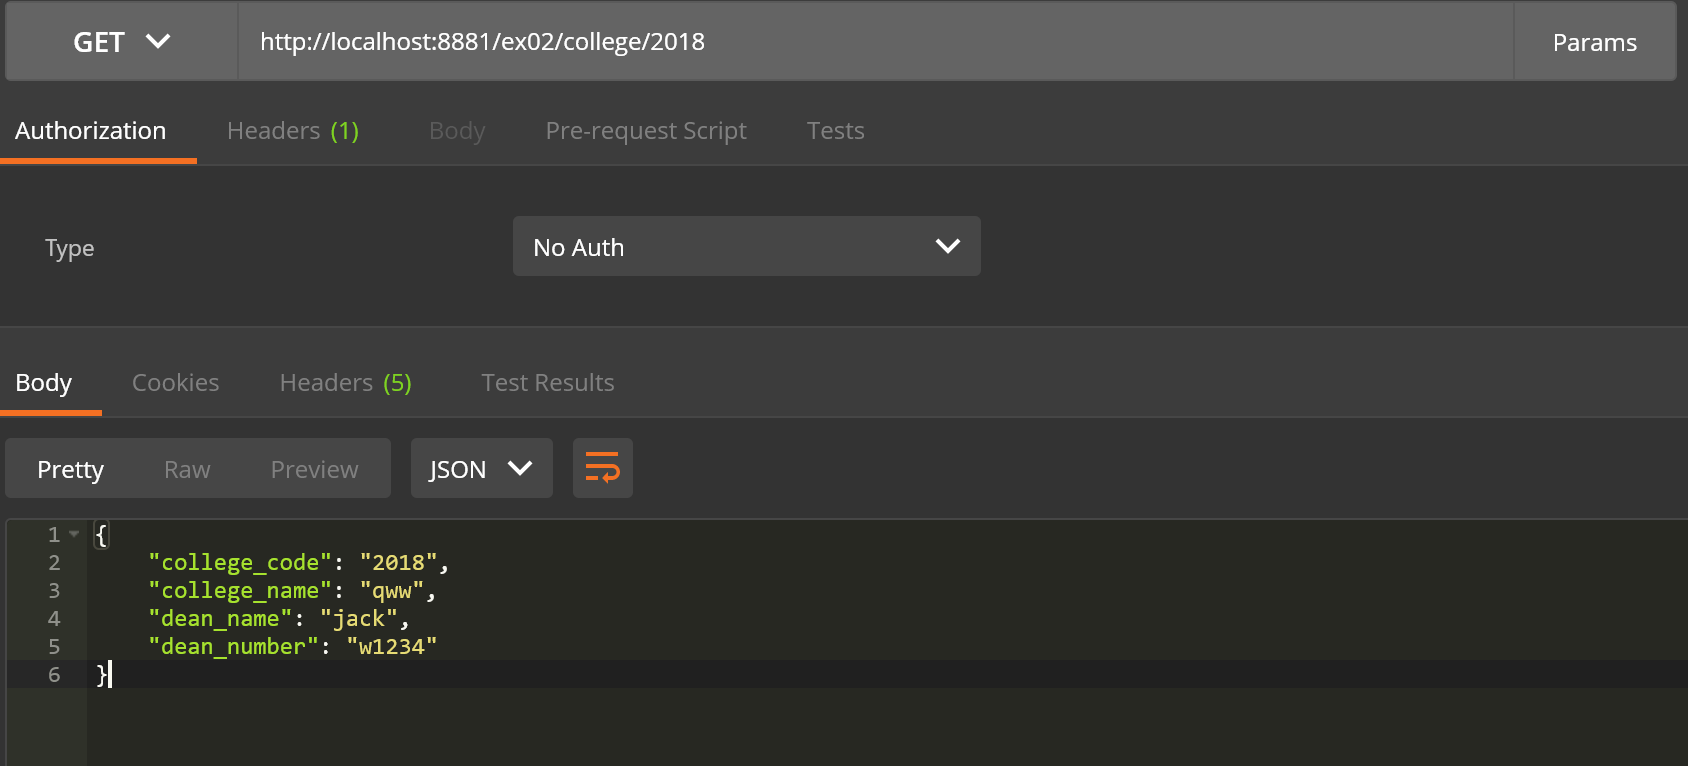
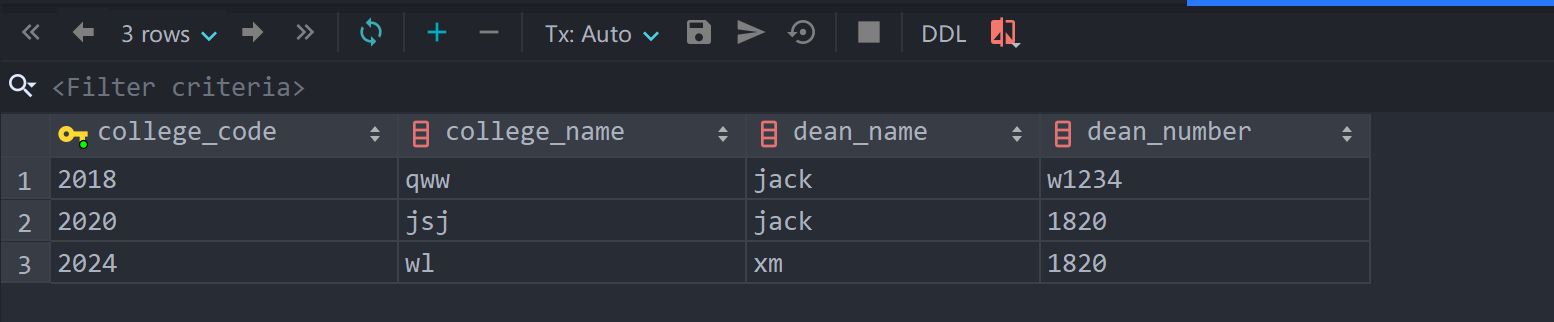
- 显示数据库的内容,并可以依据url后缀的不同进行数据查询
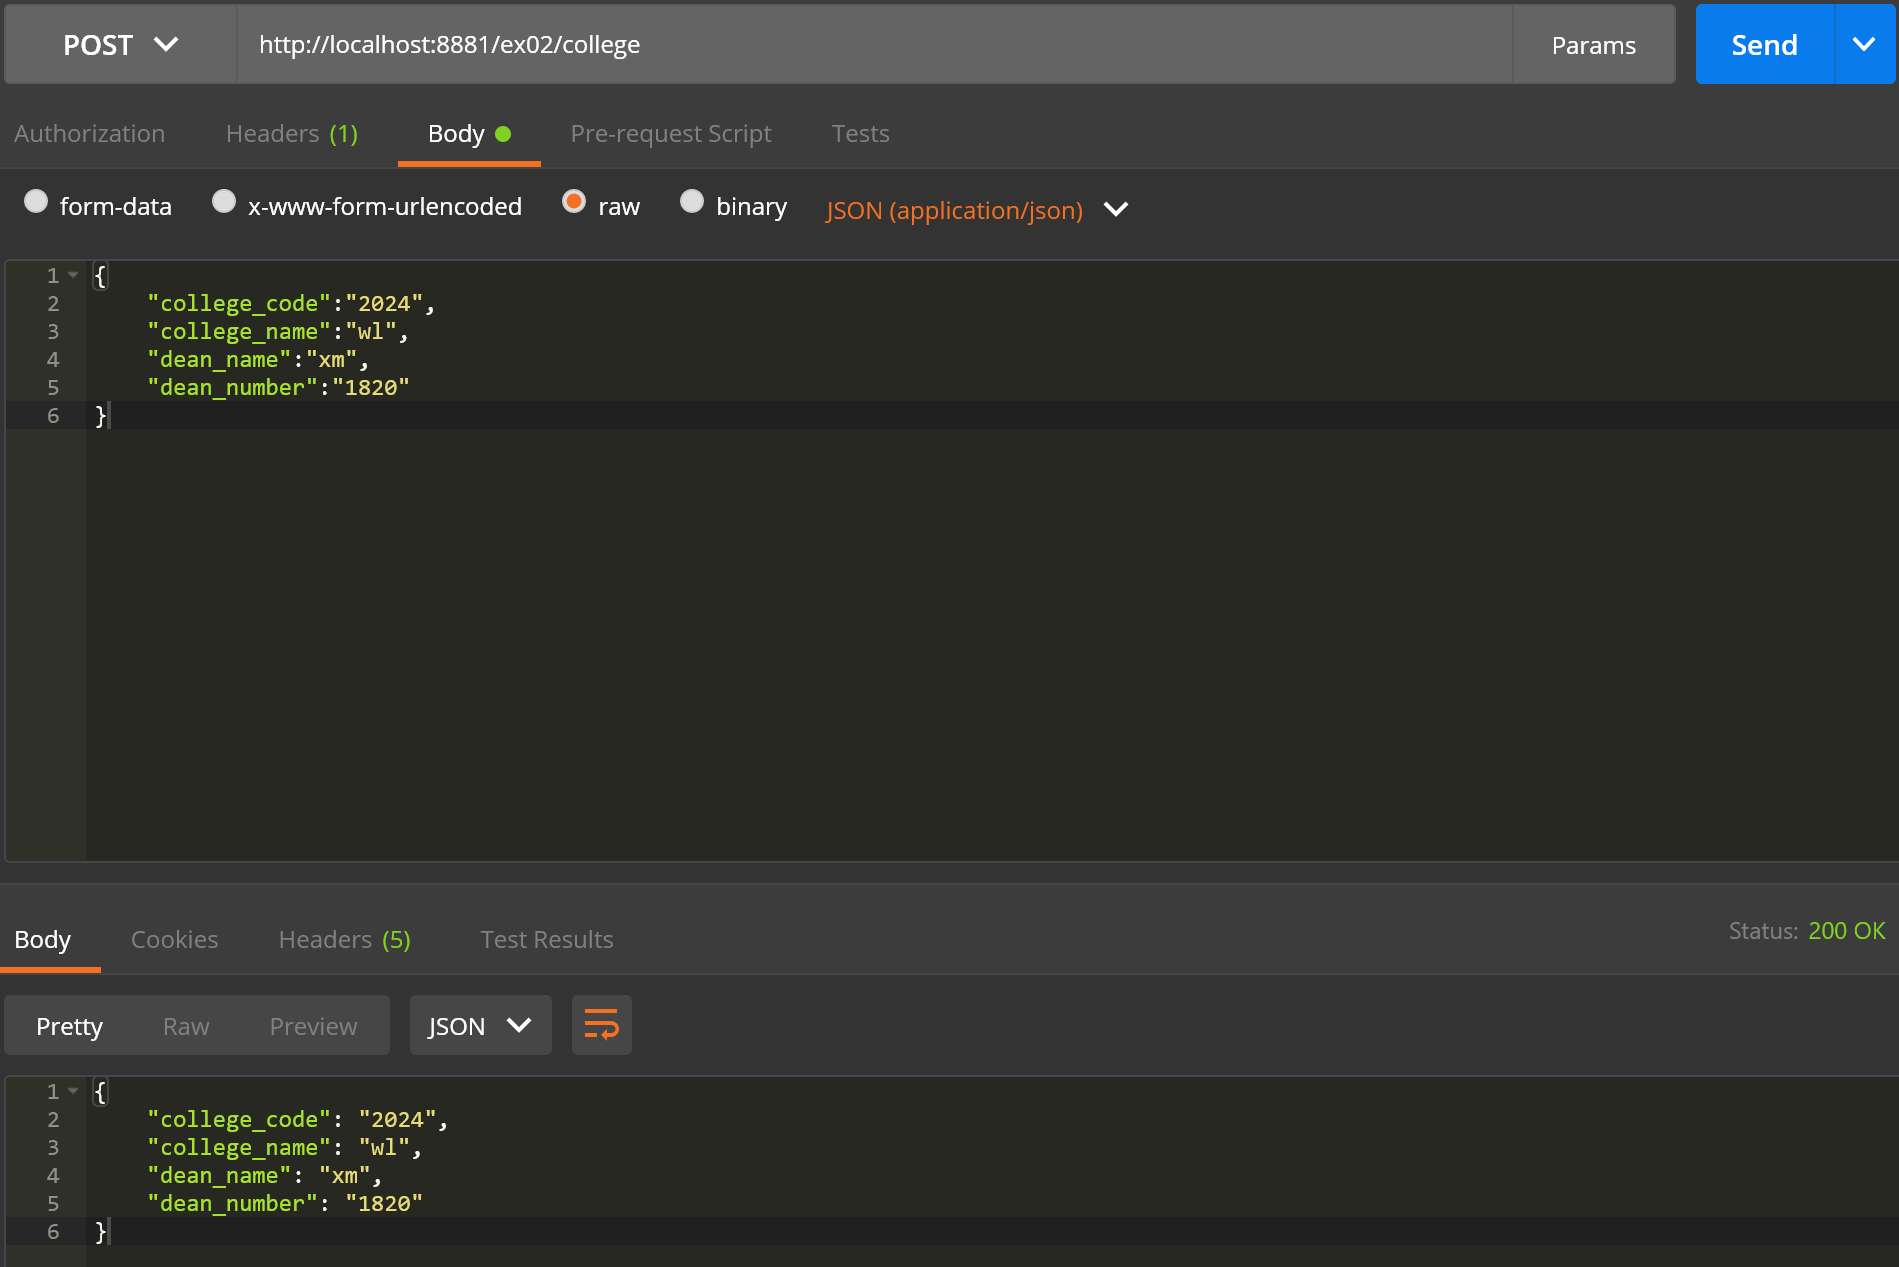
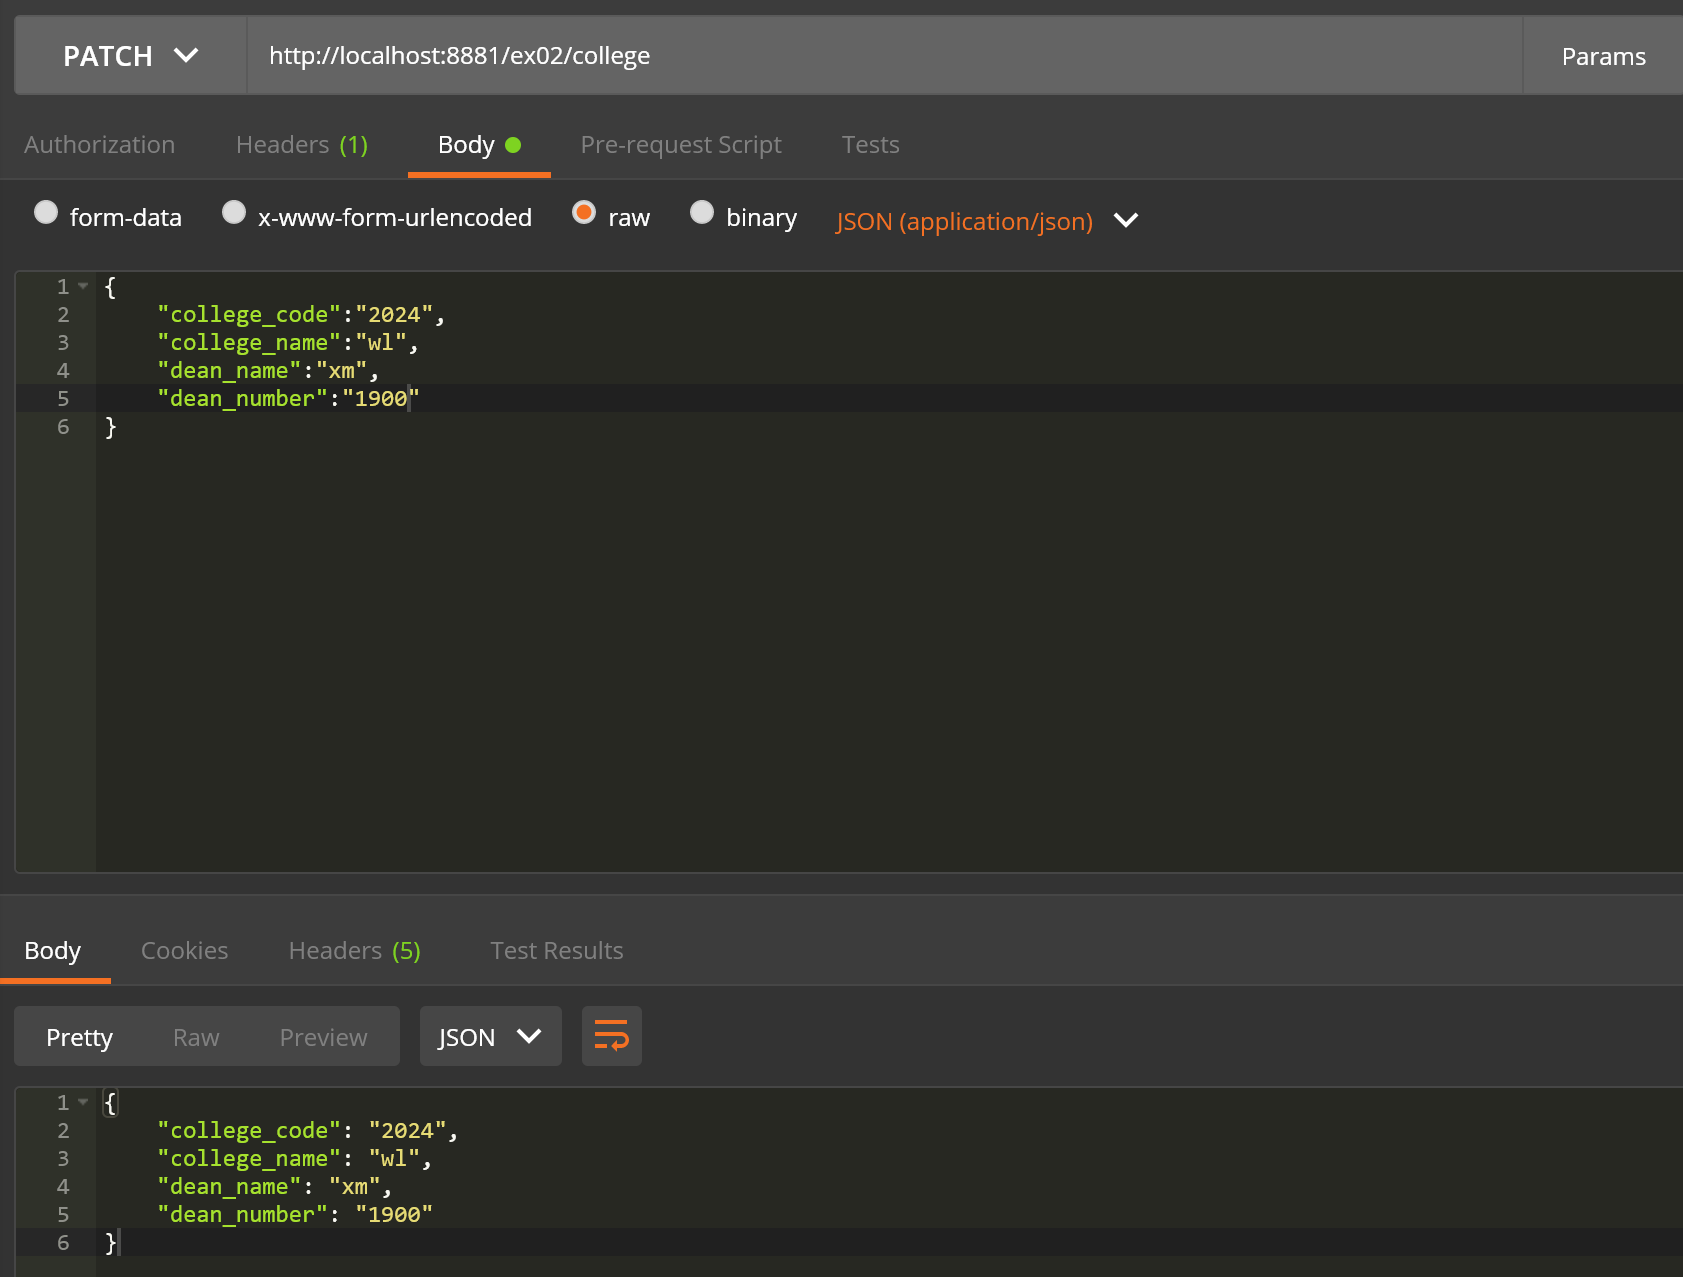
- 使用postman接口测试工具调用api接口对数据进行删除、添加、修改
- 查:
- 增:注意数据的传送格式
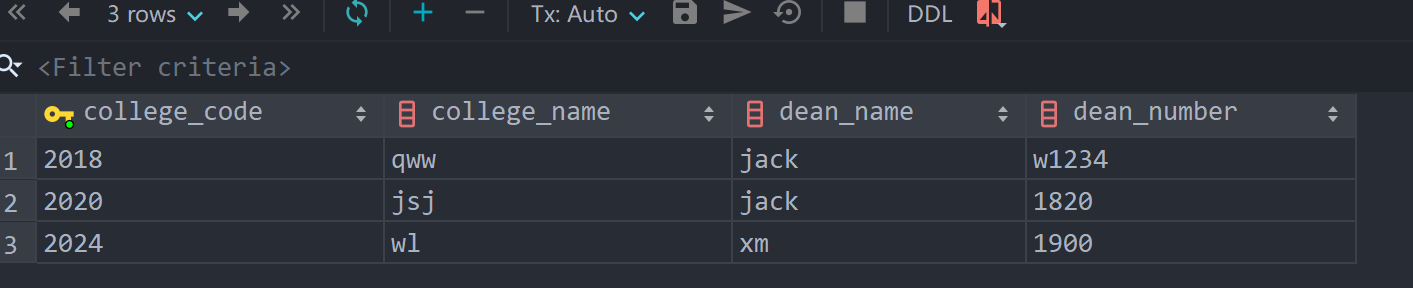
- 修改:注意数据的传送格式
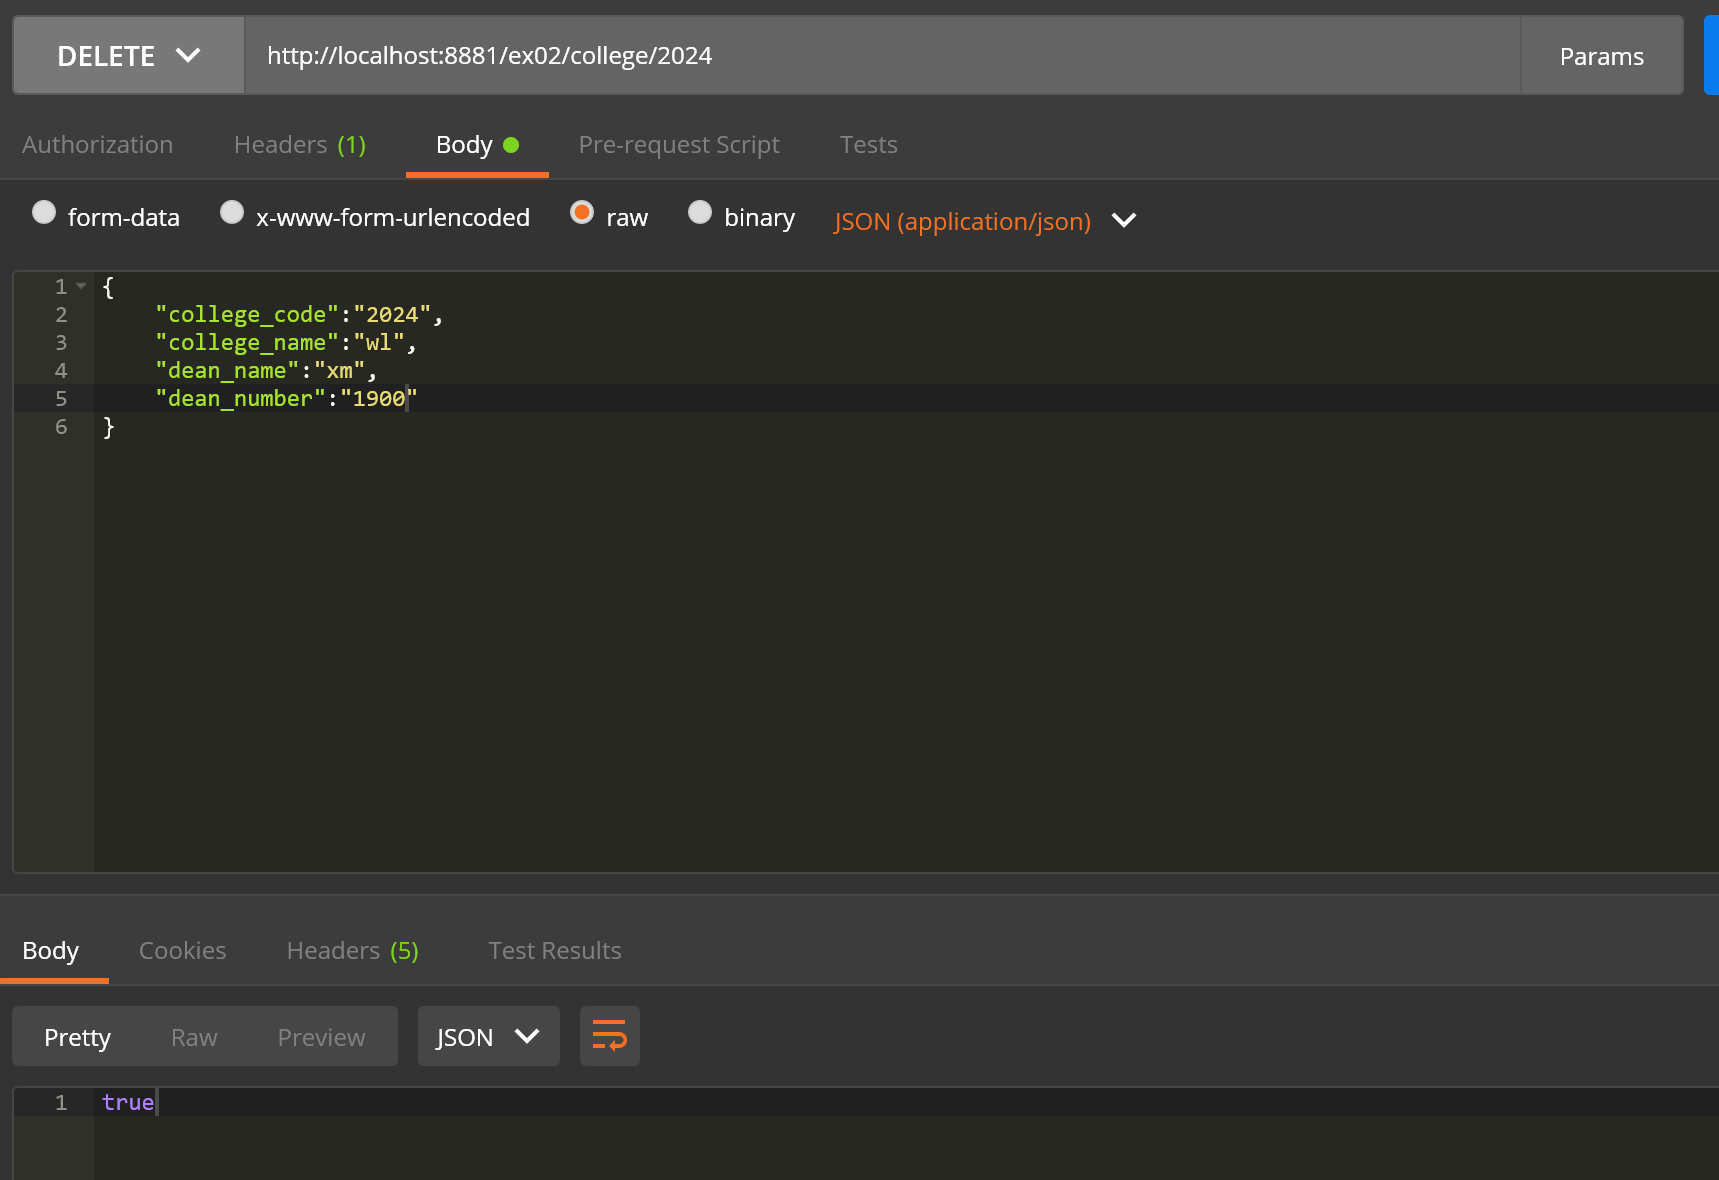
- 删除:
⑥问题小结
- spring boot对Json数据的转换存在问题,会将返回的数据转换成null,在实体类中添加注解即可解决
4.使用模板引擎进行数据的增删改查
①使用idea连接数据库,进行映射创建实体类
②编写增删改查的业务逻辑代码
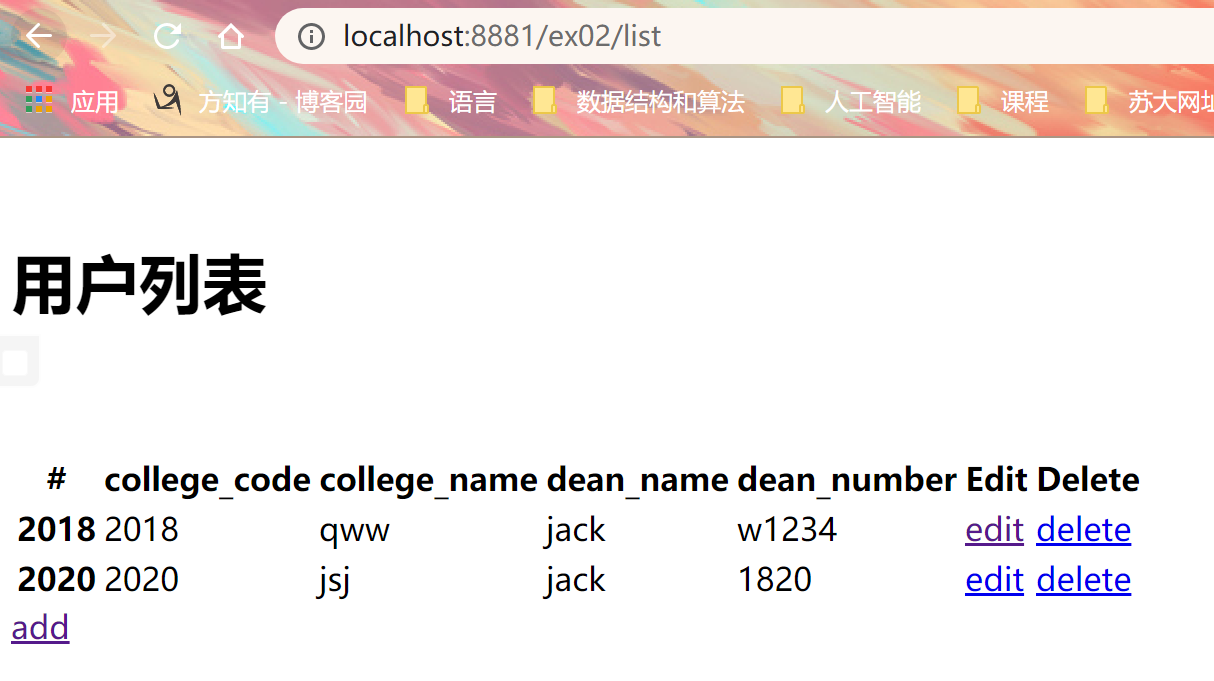
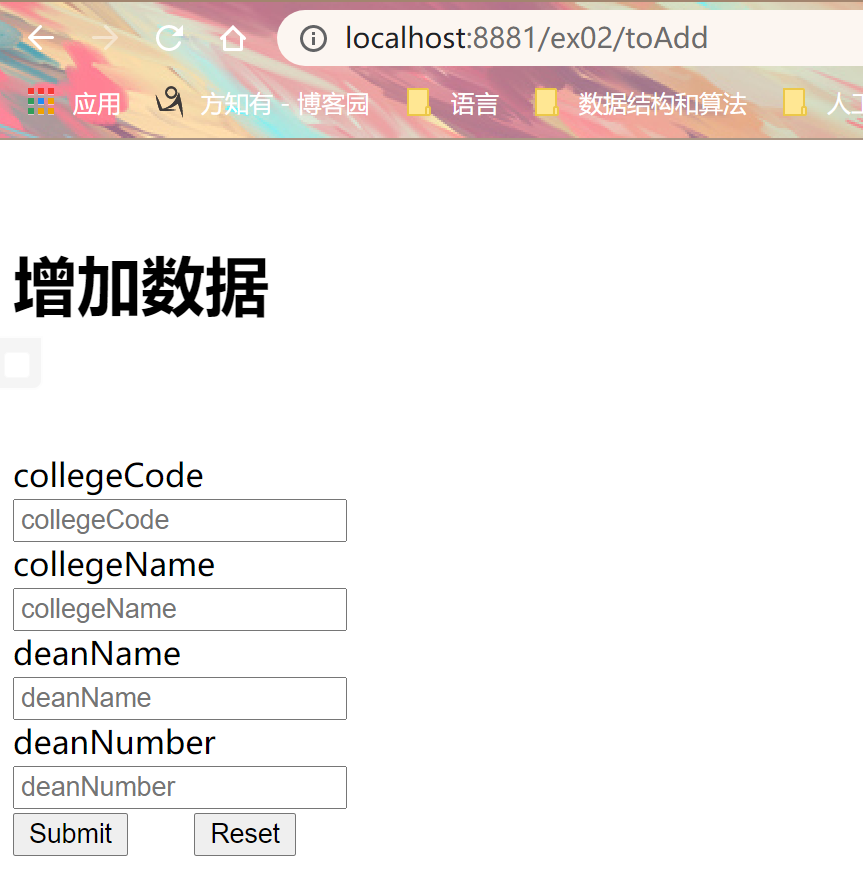
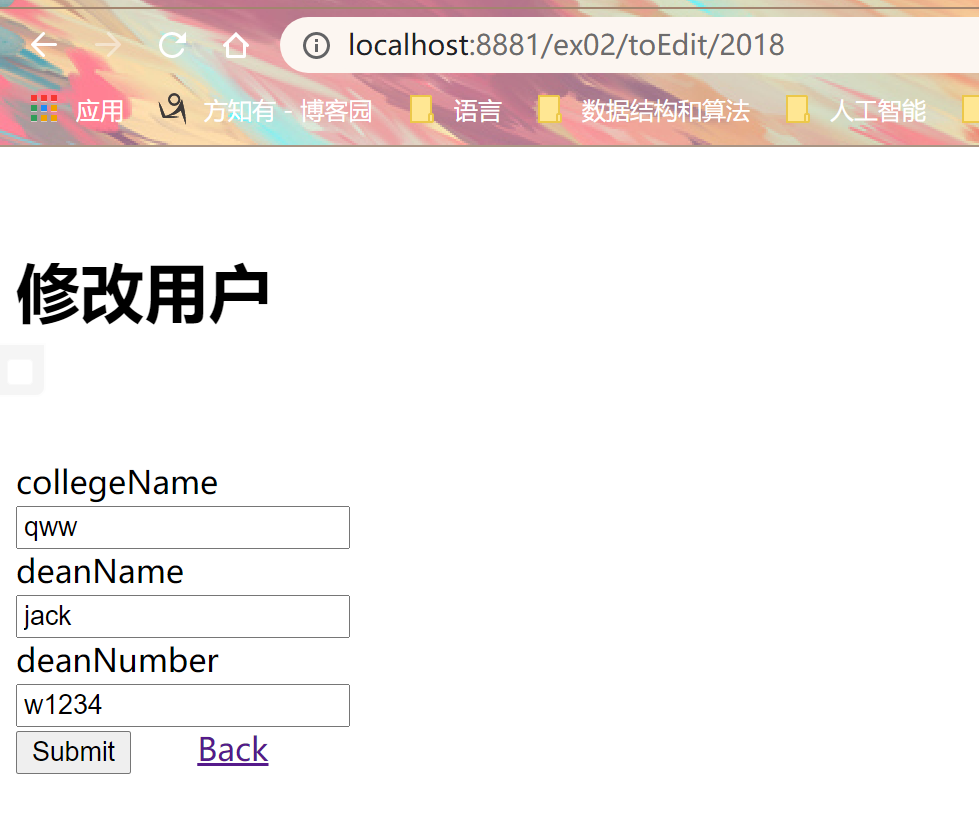
③在目录/resources下创建文件夹tempates,添加html文件,list页面、toAdd页面、toEdit页面,进行网页的增删改查
<!DOCTYPE html>
<html lang="en" xmlns:th="http://www.thymeleaf.org">
<head>
    <meta charset="UTF-8"/>
    <title>userList</title>
    <!--thymeleaf表达式,th:href="@{/css/bootstrap.css}"@表示后面的是一个链接-->
    <link rel="stylesheet" th:href="@{/css/bootstrap.css}"/>
</head>
<body class="container">
<br/>
<h1>用户列表</h1>
<br/><br/>
<div class="with:80%">
    <table class="table table-hover">
        <thead>
        <tr>
            <th>#</th>
            <th>college_code</th>
            <th>college_name</th>
            <th>dean_name</th>
            <th>dean_number</th>
            <th>Edit</th>
            <th>Delete</th>
        </tr>
        </thead>
        <tbody>
        <!--each来进行for循环求值-->
        <tr  th:each="collegeEntity : ${collegeEntites}">
            <th scope="row" th:text="${collegeEntity.collegeCode}">1</th>
            <td th:text="${collegeEntity.collegeCode}">neo</td>
            <td th:text="${collegeEntity.collegeName}">neo</td>
            <td th:text="${collegeEntity.deanName}">Otto</td>
            <td th:text="${collegeEntity.deanNumber}">6</td>
            <td><a th:href="'/ex02/toEdit/'+${collegeEntity.collegeCode}">edit</a></td>
            <td><a th:href="'/ex02/delete/'+${collegeEntity.collegeCode}">delete</a></td>
        </tr>
        </tbody>
    </table>
</div>
<div class="form-group">
    <div class="col-sm-2 control-label">
        <a href="/toAdd" th:href="@{/toAdd}" class="btn btn-info">add</a>
    </div>
</div>

</body>
</html>
<!DOCTYPE html>
<html lang="en" xmlns:th="http://www.thymeleaf.org">
<head>
<meta charset="UTF-8"/>
<title>college</title>
<!--利用thymeleaf表达式获取css路径,bootstrap给button提供样式-->
<link rel="stylesheet" th:href="@{/css/bootstrap.css}"/>
</head>
<body class="container">
<br/>
<h1>增加数据</h1>
<br/><br/>
<div class="with:80%">
<form class="form-horizontal" th:action="@{/edit}" method="post">
<div class="form-group">
<label for="collegeCode" class="col-sm-2 control-label">collegeCode</label>
<div class="col-sm-10">
<input type="text" class="form-control" name="collegeCode" id="collegeCode" placeholder="collegeCode"/>
</div>
</div>
<div class="form-group">
<label for="collegeName" class="col-sm-2 control-label" >collegeName</label>
<div class="col-sm-10">
<input type="text" class="form-control" name="collegeName" id="collegeName" placeholder="collegeName"/>
</div>
</div>
<div class="form-group">
<label for="deanName" class="col-sm-2 control-label">deanName</label>
<div class="col-sm-10">
<input type="text" class="form-control" name="deanName" id="deanName" placeholder="deanName"/>
</div>
</div>
<div class="form-group">
<label for="deanNumber" class="col-sm-2 control-label">deanNumber</label>
<div class="col-sm-10">
<input type="text" class="form-control" name="deanNumber" id="deanNumber" placeholder="deanNumber"/>
</div>
</div>
<div class="form-group">
<div class="col-sm-offset-2 col-sm-10">
<input type="submit" value="Submit" class="btn btn-info" />
<input type="reset" value="Reset" class="btn btn-info" />
</div>
</div>
</form>
</div>
</body>
</html>
<!DOCTYPE html>
<html lang="en" xmlns:th="http://www.thymeleaf.org">
<head>
<meta charset="UTF-8"/>
<title>college</title>
<link rel="stylesheet" th:href="@{/css/bootstrap.css}"/>
</head>
<body class="container">
<br/>
<h1>修改用户</h1>
<br/><br/>
<div class="with:80%">
<form class="form-horizontal" th:action="@{/edit}" th:object="${college}" method="post">
<input type="hidden" name="collegeCode" th:value="*{collegeCode}" />
<div class="form-group">
<label for="collegeName" class="col-sm-2 control-label" >collegeName</label>
<div class="col-sm-10">
<input type="text" class="form-control" name="collegeName" id="collegeName" th:value="*{collegeName}" placeholder="collegeName"/>
</div>
</div>
<div class="form-group">
<label for="deanName" class="col-sm-2 control-label">deanName</label>
<div class="col-sm-10">
<input type="text" class="form-control" name="deanName" id="deanName" th:value="*{deanName}" placeholder="deanName"/>
</div>
</div>
<div class="form-group">
<label for="deanNumber" class="col-sm-2 control-label">deanNumber</label>
<div class="col-sm-10">
<input type="text" class="form-control" name="deanNumber" id="deanNumber" th:value="*{deanNumber}" placeholder="deanNumber"/>
</div>
</div>
<div class="form-group">
<div class="col-sm-offset-2 col-sm-10">
<input type="submit" value="Submit" class="btn btn-info" />
<a href="/list" th:href="@{/list}" class="btn btn-info">Back</a>
</div>
</div>
</form>
</div>
</body>
</html>
④编写CollegeController,实现数据的增删改查
package com.example.sw_ex02.controller;

import com.example.sw_ex02.entity.CollegeEntity;
import com.example.sw_ex02.service.CollegeServiceImpl;
import org.springframework.stereotype.Controller;
import org.springframework.ui.Model;
import org.springframework.web.bind.annotation.*;

import javax.annotation.Resource;
import java.util.List;

@Controller
public class CollegeControllerThymeleaf {

    @Resource
    CollegeServiceImpl collegeService;

    /***
     * @description 将"/"自动重定向到"/list"
     * @return 跳转到‘/list’页面
     */
    @RequestMapping("/thymeleaf")
    public String index(){
        return "redirect:/list";
    }

    /***
     * @description 将"/"自动重定向到"/list"
     * @return 跳转到‘/list’页面
     */
    @RequestMapping("/list")
    public String list(Model model){
        List<CollegeEntity> collegeEntities=collegeService.getCollegeList();
        model.addAttribute("collegeEntites",collegeEntities);
        return "college/list";
    }

    /*
     * @Discription:跳转到增加用户页面
     */
    @RequestMapping(value = "/toAdd")
    public String toAdd(){
        return "college/collegeAdd";
    }

    /*
     * @param  "/add"链接
     * @return  重定向到/list页面
     * @Discription: 保存实体到数据库,然后返回到list界面
     */
    @RequestMapping(value = "/add")
    public String add(CollegeEntity collegeEntity){
        collegeService.save(collegeEntity);
        return "redirect:/list";
    }

    /*
     * @param  /toEdit链接进入该程序
     * @return 查询出数据以后,跳转到编辑界面
     * @Discription:跳转到编辑页面对数据进行编辑
     */
    @RequestMapping(value="/toEdit/{code}")
    public String toEdit(Model model,@PathVariable("code")String code) {
        CollegeEntity collegeEntity = collegeService.findCollegeById(code);
        model.addAttribute("college", collegeEntity);
        return "college/collegeEdit";
    }

    /*
     * @param  "/edit"链接进入该程序
     * @return 重定向到"/list"链接
     * @Discription:更新数据库中的数据以后跳转到list
     */
    @RequestMapping(value = "/edit")
    public String edit(CollegeEntity collegeEntity){
        collegeService.edit(collegeEntity);
        return "redirect:/list";
    }

    /*
     * @param  "/delete"链接进入该方法
     * @return  重定向到"/list"
     * @Discription: 删除某一个数据后定向到"/list"
     */
    @RequestMapping(value="/delete/{code}")
    public String delete(@PathVariable("code")String code){
        collegeService.delete(code);
        return "redirect:/list";
    }
}
⑤启动验证
- 在浏览器输入相应url,页面显示数据库中表的数据,在网页上对表进行增删改查
⑥问题小结
- 在进行模板引擎进行增删改查的时候,要注意链接的正确
- 注意GET与POST请求的区别
- GET - 从指定的资源请求数据
- POST - 向指定的资源提交要被处理的数据
- 了解@RequestMapping注解
- 设置请求地址
- 设置请求的类型,依据请求类型的不同,函数进行不同的操作
5.mybatis-数据库查询
①进行mybatis的配置
<!-- mybatis 集成 -->
        <dependency>
            <groupId>org.mybatis.spring.boot</groupId>
            <artifactId>mybatis-spring-boot-starter</artifactId>
            <version>2.0.1</version>
        </dependency>
        <!-- mybatis自动生成插件 -->
        <dependency>
            <groupId>org.mybatis.generator</groupId>
            <artifactId>mybatis-generator-core</artifactId>
            <version>1.3.5</version>
        </dependency>
        <!-- mybatis自动分页插件 -->
        <dependency>
            <groupId>com.github.pagehelper</groupId>
            <artifactId>pagehelper-spring-boot-starter</artifactId>
            <version>1.2.10</version>
        </dependency>
#mybatis
mybatis:
  type-aliases-package: com.example.sw_ex02.entity
  mapper-locations: com.example.sw_ex02.Mapper/*.xml
  configuration:
    map-underscore-to-camel-case: true
#配置控制台打印日志Debug,用来查看sql写没写错
logging:
  level:
    com.jd.mapper: debug
②依据前面所述导入实体类
③在com.example.xxx下创建Mapper文件夹
package com.example.sw_ex02.Mapper;

import com.example.sw_ex02.entity.CollegeEntity;
import org.apache.ibatis.annotations.Mapper;

import java.util.List;

@Mapper
public interface CollegeMapper {
    List<CollegeEntity> getAllCollege();
}
- 创建xxxx(与接口文件名字相同).xml文件,在该文件中,使用SQL语句进行对接口文件中的函数进行相应的实现
<?xml version="1.0" encoding="UTF-8"?>
<!DOCTYPE mapper
        PUBLIC "-//mybatis.org//DTD Mapper 3.0//EN"
        "http://mybatis.org/dtd/mybatis-3-mapper.dtd">
<mapper namespace="com.example.sw_ex02.Mapper.CollegeMapper">
    <select id="getAllCollege" resultType="com.example.demo.entity.CollegeEntity">
        select * from college;
    </select>
</mapper>
④在service文件夹下创建相关的逻辑业务实现
package com.example.sw_ex02.service;

import com.example.sw_ex02.Mapper.CollegeMapper;
import com.example.sw_ex02.entity.CollegeEntity;
import com.example.sw_ex02.repository.CollegeRepository;
import org.springframework.beans.factory.annotation.Autowired;
import org.springframework.stereotype.Service;

import java.util.List;

@Service
public class CollegeServiceImpl {

    @Autowired(required = false)
    private CollegeMapper collegeMapper;

    //mybatis-查询数据
    public List<CollegeEntity> ListCollege(){
        return collegeMapper.getAllCollege();
    }
}
⑤在conrtoller下创建文件,实现xxxxController,进行数据的操作
package com.example.sw_ex02.controller;

import com.example.sw_ex02.service.CollegeServiceImpl;
import org.springframework.beans.factory.annotation.Autowired;
import org.springframework.web.bind.annotation.RequestMapping;
import org.springframework.web.bind.annotation.RestController;

@RestController
@RequestMapping("/mybatis")
public class CollegeControllerMybatis {

    @Autowired
    private CollegeServiceImpl collegeService;

    @RequestMapping("/all")
    public String getAllCollege(){
        return collegeService.ListCollege().toString();
    }
}
⑧启动验证,输入url进行验证
6.小结