1.创建项目并生成package.json
$ mkdir webpack-demo0 && cd webpack-demo0
$ npm init -y
$ npm install lodash --save-dev
生成的package.json
{
  "name": "webpack-demo0",
  "version": "1.0.0",
  "description": "",
  "main": "index.js",
  "scripts": {
    "test": "echo "Error: no test specified" && exit 1"
  },
  "keywords": [],
  "author": "",
  "license": "ISC",
  "dependencies": {
    "lodash": "^4.17.4"
  }
}
webpack.config.js
const path = require('path');

module.exports = {
  entry: './src/index.js',
  output: {
    filename: 'bundle.js',
    path: path.resolve(__dirname, 'dist')
  }
};
index.html
<!DOCTYPE html>
<html>
  <head>
    <meta charset="utf-8">
    <title></title>
  </head>
  <body>
    <script src="./dist/bundle.js" charset="utf-8"></script>
  </body>
</html>
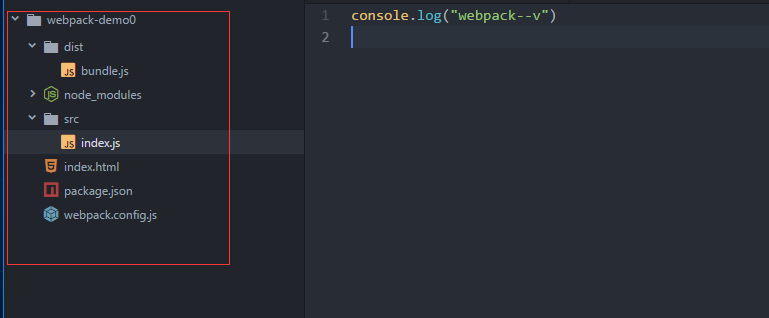
在index.js里面随便写点什么
//index.js
console.log("webpack--v")
调整一下,项目结构大概是这个样子
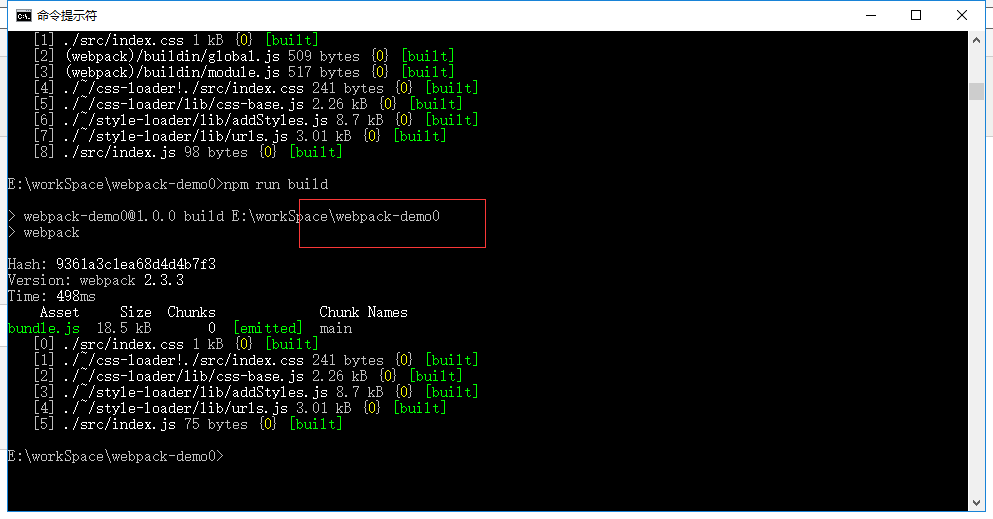
编译运行

打开index.html
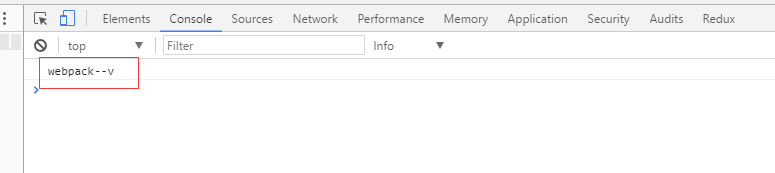
这就完成了一个很简单的webpack配置,基本上到这里没什么用,完善一下
加载css的配置
$ npm install --save-dev style-loader css-loader
修改一下webpack.config.js
const path = require('path');

module.exports = {
  entry: './src/index.js',
  output: {
    filename: 'bundle.js',
    path: path.resolve(__dirname, 'dist')
  },
  moudles:{
    rules:[
     test:/.css$/,//匹配css文件的正则
      use: ['style-loader','css-loader']
    ]
  }
};
安装一下插件
$ npm install --save-dev style-loader css-loader
src目录下添加一个index.css
.test{
  color: red;
  font-size: 20px;
  font-weight: bold;
}
修改一下index.js
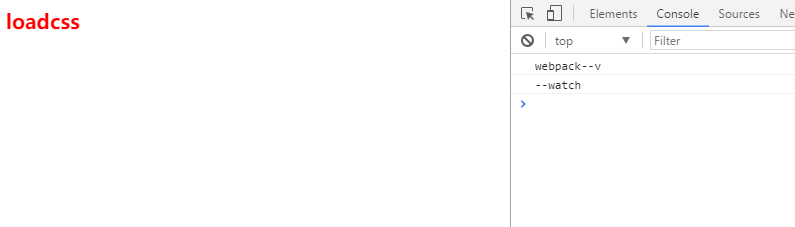
import './index.css'
console.log("webpack--v")
console.log("--watch")
为了看出效果,在修改一下index.html
<!DOCTYPE html>
<html>
  <head>
    <meta charset="utf-8">
    <title></title>
  </head>
  <body>
    <div class="test">
      loadcss
    </div>
    <script src="./dist/bundle.js" charset="utf-8"></script>
  </body>
</html>
添加 npm script-->package.json
"scripts": {
"test": "echo "Error: no test specified" && exit 1",
"build": "webpack"
},
重新 刷新一下网页
加载图片配置
$ npm install --save-dev file-loader
//webpack.config.js
{
         test: /.(png|svg|jpg|gif)$/,
         use: [
           'file-loader'
         ]
 }
字体文件
{
         test: /.(woff|woff2|eot|ttf|otf)$/,
         use: [
           'file-loader'
         ]
}
完毕。。
最后再完善一下,装几个webpack插件
$ npm install webpack-dev-server --save
$ npm install webpack --save
$ npm install html-webpack-plugin
在webpack.config.js中配置一下插件
const path = require('path');
const htmlWebpackPlugin = require('html-webpack-plugin')
// const CleanWebpackPlugin = require('clean-webpack-plugin');
const webpack = require('webpack');
module.exports = {
  entry: './src/index.js',
  output: {
    filename: 'bundle.js',
    path: path.resolve(__dirname, 'dist')
  },
  module: {
    rules:[
      {
        test:/.css$/,
        use:['style-loader','css-loader']
      },
      {
        test:/.(png|svg|jpg|gif)$/,
        use:['file-loader']
      },
      {
        test:/.(woff|woff2|eot|ttf|otf)/,
        use:['file-loader']
      },
      {
        test:/.(csv|tsv)$/,
        use:['csv-loader']
      },
      {
        test:/.xml$/,
        use:['xml-loader']
      }
    ]
  },
  plugins:[
    // new CleanWebpackPlugin(['dist']),

    new htmlWebpackPlugin({
      title:'output manager',
      template:'./index.html'
    }),
    new webpack.HotModuleReplacementPlugin()
  ]
};
在package.json中添加几条常用指令
{
  "name": "webpack-demo0",
  "version": "1.0.0",
  "description": "",
  "main": "index.js",
  "scripts": {
    "test": "echo "Error: no test specified" && exit 1",
    "build": "webpack",
    "clean": "rimraf dist/*",
    "start": "webpack-dev-server --open"
  },
  "keywords": [],
  "author": "",
  "license": "ISC",
  "dependencies": {
    "lodash": "^4.17.4",
    "webpack": "^3.5.5"
  },
  "devDependencies": {
    "css-loader": "^0.28.5",
    "style-loader": "^0.18.2"
  }
}
修改一下index.html
<!DOCTYPE html>
<html>
  <head>
    <meta charset="utf-8">
    <title></title>
  </head>
  <body>
    <div class="test">
      loadcss
    </div>
    <script src="bundle.js" charset="utf-8"></script>
  </body>
</html>
真正完毕!!
运行一下npm start看一下效果