博客为日常工作学习积累总结:
1.安装gitlub
sudo yum install -y curl policycoreutils-python openssh-server openssh-clients
-
sudo systemctl enable sshd
-
sudo systemctl start sshd
-
-
sudo yum install postfix
-
-
-
-
-
sudo systemctl enable postfixsudo systemctl start postfix
-
wget https://mirrors.tuna.tsinghua.edu.cn/gitlab-ce/yum/el7/gitlab-ce-10.0.0-ce.0.el7.x86_64.rpm
rpm -ivh gitlab-ce-10.0.0-ce.0.el7.x86_64.rpm
修改配置文件:
[root@git ~]# vim /etc/gitlab/gitlab.rb
13 external_url 'http://192.168.50.184'
[root@git ~]# gitlab-ctl reconfigure
访问:http://192.168.50.184/
设置密码:*****
设置账号:root
2.命令练习
查看运行的组件
gitlab-ctl start
gitlab-ctl stop
gitlab-ctl restart
gitlab-ctl show-config
[root@git ~]# gitlab-ctl status
run: gitaly: (pid 17810) 984s; run: log: (pid 17480) 1043s
run: gitlab-monitor: (pid 17847) 983s; run: log: (pid 17697) 1013s
run: gitlab-workhorse: (pid 17824) 984s; run: log: (pid 17545) 1037s
run: logrotate: (pid 17607) 1025s; run: log: (pid 17606) 1025s
run: nginx: (pid 17571) 1031s; run: log: (pid 17570) 1031s
run: node-exporter: (pid 17676) 1019s; run: log: (pid 17675) 1019s
run: postgres-exporter: (pid 17905) 982s; run: log: (pid 17761) 999s
run: postgresql: (pid 17305) 1082s; run: log: (pid 17304) 1082s
run: prometheus: (pid 17855) 983s; run: log: (pid 17736) 1005s
run: redis: (pid 17233) 1090s; run: log: (pid 17232) 1090s
run: redis-exporter: (pid 17720) 1008s; run: log: (pid 17719) 1008s
run: sidekiq: (pid 17462) 1046s; run: log: (pid 17461) 1046s
run: unicorn: (pid 17423) 1052s; run: log: (pid 17422) 1052s
查看组件日子:
[root@git ~]# gitlab-ctl tail nginx
[root@git ~]# cd /var/log/gitlab/
3.管理员界面操作
小扳手的图标:admin area
第一步:创建用户组:
创建项目组java
第二步:创建用户:
创建用户pm,dev1,dev2
第三步:创建项目:
创建项目app1
第四步:配置公钥:linux系统拉取代码配置方式
[root@git ~]# ssh-keygen
配置公钥:一个公钥全网只能一个用户使用
在用户属性里面配置
[root@git~]# cd .ssh/
[root@git .ssh]# cat id_rsa.pub
用所属者新建
创建文件新建分支:
用dev1操作:
git clone git@192.168.50.184:java/app1.git
进入克隆的项目app1里面git pull拉取代码
[root@git app1]# ls
[root@git app1]# git pull
remote: Counting objects: 3, done.
remote: Total 3 (delta 0), reused 0 (delta 0)
Unpacking objects: 100% (3/3), done.
From 192.168.50.184:java/app1
* [new branch] master -> origin/master
第五步:配置公钥:windows系统拉取代码配置方式
安装bash shell Git-2.15.1.2-64-bit.exe
到目录右键选择git bash here F:git
ssh-keygen
加到dev2里面,配置公钥,
git clone git@192.168.50.184:java/app1.git
第六步:配置deploy_keys给jenkins用:
第七步:pm新建里程碑分配开发任务:
第八步:dev1接受开发任务准备开发:
新建分支:创建分支后就会切换
[root@git app1]# git checkout -b shouye
Switched to a new branch 'shouye'
[root@git app1]# git status
On branch shouye
nothing to commit, working tree clean
写页面:
[root@git app1]# vim index.html
<h1>welcome to beijing</h1>
提交到本机仓库:
[root@git app1]# git add .
[root@git app1]# git commit -m "shouye"
[shouye fbee400] shouye
1 file changed, 1 insertion(+)
create mode 100644 index.html
提交到远程仓库:分支名
[root@git app1]# git push origin shouye
Counting objects: 3, done.
Delta compression using up to 2 threads.
Compressing objects: 100% (2/2), done.
Writing objects: 100% (3/3), 296 bytes | 0 bytes/s, done.
Total 3 (delta 0), reused 0 (delta 0)
remote:
remote: To create a merge request for shouye, visit:
remote: http://192.168.50.184/java/app1/merge_requests/new?merge_request%5Bsource_branch%5D=shouye
remote:
To 192.168.50.184:java/app1.git
* [new branch] shouye -> shouye
pm界面操作将首页分支merge到master分支
开发第二个工作任务
切换到主分支更新代码
[root@git app1]# git checkout master
Switched to branch 'master'
Your branch is up-to-date with 'origin/master'.
[root@git app1]# git pull
remote: Counting objects: 1, done.
remote: Total 1 (delta 0), reused 0 (delta 0)
Unpacking objects: 100% (1/1), done.
From 192.168.50.184:java/app1
c404246..c99e8c7 master -> origin/master
Updating c404246..c99e8c7
Fast-forward
index.html | 1 +
1 file changed, 1 insertion(+)
create mode 100644 index.html
创建news分支
[root@git app1]# git checkout -b news
Switched to a new branch 'news'
[root@git app1]# vim news.html
news center
可自动关闭issues
[root@git app1]# git add .
[root@git app1]# git commit -m "close #2"
[news 30bf4e7] close #2
1 file changed, 1 insertion(+)
create mode 100644 news.html
[root@git app1]# git status
On branch news
nothing to commit, working tree clean
[root@git app1]# git merge news
Already up-to-date.
[root@git app1]# git log
[root@git app1]# git push origin master
Everything up-to-date
开发的角色不能将代码推送到主分支
[root@git app1]# git status
On branch news
nothing to commit, working tree clean
[root@git app1]# git push origin news
[root@git ~]# mkdir -p /data/backups/gitlab
修改代码备份的位置
272 gitlab_rails['backup_path'] = "/data/backups/gitlab"
放开代码备份天数
280 gitlab_rails['backup_keep_time'] = 604800
从新加载配置文件
[root@git ~]# gitlab-ctl reconfigure
重启gitlab
[root@git ~]# gitlab-ctl restart
给备份目录加git权限
[root@git ~]# ll /data/backups/
total 0
drwx------ 2 git root 6 Apr 12 16:12 gitlab
[root@git ~]# chown -R git.git /data/backups/gitlab
[root@git ~]# ll /data/backups/
total 0
drwx------ 2 git git 6 Apr 12 16:12 gitlab
定时任务crontab中加入
[root@git ~]# crontab -e
no crontab for root - using an empty one
0 2 * * * /usr/bin/gitlab-rake gitlab:backup:create
[root@git ~]# ls /data/backups/gitlab/
1555057701_2019_04_12_10.0.0_gitlab_backup.tar
[root@git ~]# date -d @1555057701
Fri Apr 12 16:28:21 CST 2019
恢复备份数据:
gitlab-ctl stop unicorn
gitlab-ctl stop sidekiq
gitlab-rake gitlab:backup:restore BACKUP=
[root@git ~]# gitlab-ctl stop unicorn
ok: down: unicorn: 1s, normally up
[root@git ~]# gitlab-ctl stop sidekiq
ok: down: sidekiq: 0s, normally up
[root@git ~]# gitlab-rake gitlab:backup:restore BACKUP=1555057701_2019_04_12_10.0.0
两个yes恢复OK
[root@git ~]# ls /var/opt/gitlab/git-data/repositories/java/
app1.git
重启gitlab
[root@git ~]# gitlab-ctl restart
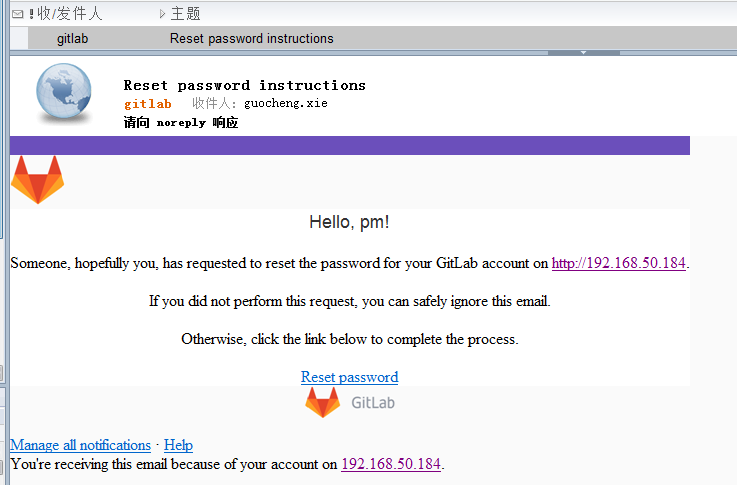
配置邮件及ldap认证:
https://blog.csdn.net/chanjingyue/article/details/80523600
gitlab汉化:
https://blog.csdn.net/qq_40025218/article/details/81360794