1.照例登陆http://start.spring.io/ ,改个项目名(Artifact),然后下载导入Eclipse

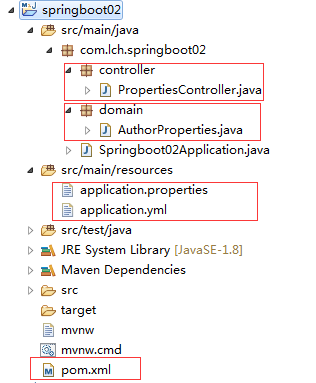
2. 项目结构如下,
在pom中添加web依赖(不添加,就找不到RestController这个注解要导入的包了)
1 <dependency>
2             <groupId>org.springframework.boot</groupId>
3             <artifactId>spring-boot-starter-web</artifactId>
4         </dependency>
3.编写2个配置文件,一个是application.properties,如下:
1 server.port=9090
2 server.servlet.context-path=/spring-boot
3 #server.context-path=/helloboot
4 book.author.name=tom
一个是application.yml ,如下
1 book:
2  author:
3   name1: JACKSON
4. 在com.lch.springboot02.domain 包下创建一个AuthorProperties 类,读取配置文件信息(同时读取2个配置文件,实际证明,springboot是可以同时读取两种格式的配置文件中的配置信息的),使用注解@Value("${配置文件中的属性名}")来读取配置文件,并设置对应属性接收,还需要设置set get方法
 1 package com.lch.springboot02.domain;
 2
 3 import org.springframework.beans.factory.annotation.Value;
 4 import org.springframework.stereotype.Component;
 5
 6 @Component
 7 public class AuthorProperties {
 8
 9     @Value("${book.author.name}")
10     private String authorName;
11
12     @Value("${book.author.name1}")
13     private String authorName1;
14
15
16     public String getAuthorName() {
17         return authorName;
18     }
19
20     public void setAuthorName(String authorName) {
21         this.authorName = authorName;
22     }
23
24     public String getAuthorName1() {
25         return authorName1;
26     }
27
28     public void setAuthorName1(String authorName1) {
29         this.authorName1 = authorName1;
30     }
31 }
5. 在com.lch.springboot02.controller 包下建立contorller类 PropertiesController ,把读取到的配置信息返回给前台显示,这里需要注入 AuthorProperties 的实例
 1 package com.lch.springboot02.controller;
 2
 3 import org.springframework.beans.factory.annotation.Autowired;
 4 import org.springframework.web.bind.annotation.RequestMapping;
 5 import org.springframework.web.bind.annotation.RestController;
 6
 7 import com.lch.springboot02.domain.AuthorProperties;
 8
 9 @RestController // 使用这个注解必须在pom中引入web模块的依赖!
10 public class PropertiesController {
11     @Autowired
12     AuthorProperties properties;
13
14     @RequestMapping("/hello")
15     public String hello() {
16         return "hello spring-boot";
17     }
18
19     @RequestMapping("/author")
20     public String author() {
21         return "the author name is: " + properties.getAuthorName() + ", the author name1 is: " + properties.getAuthorName1();
22     }
23
24 }
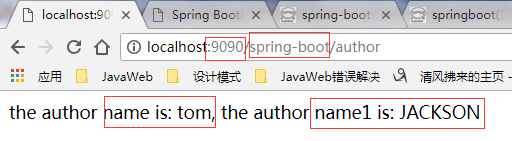
6. 启动应用,访问:http://localhost:9090/spring-boot/author ,结果如下:
之所以是这个请求路径,控制台告诉了我们:

在上一个入门例子中,应用默认端口是8080,context path 是空,这里发生了变化,这是因为springboot读取到了application.properties中配置的端口号和上下文路径(
server.port=9090 server.servlet.context-path=/spring-boot ),并进行了应用.
注意:spring boot 2.0.0的ContextPath配置有变化: server.servlet.context-path=/XXX ,之前是server.context-path=/xxx
在前端页面展示的结果中,看到了name1的值也有,说明application.yml配置文件中的信息也读取到了。
例子下载地址:
https://github.com/liuch0228/springboot.git