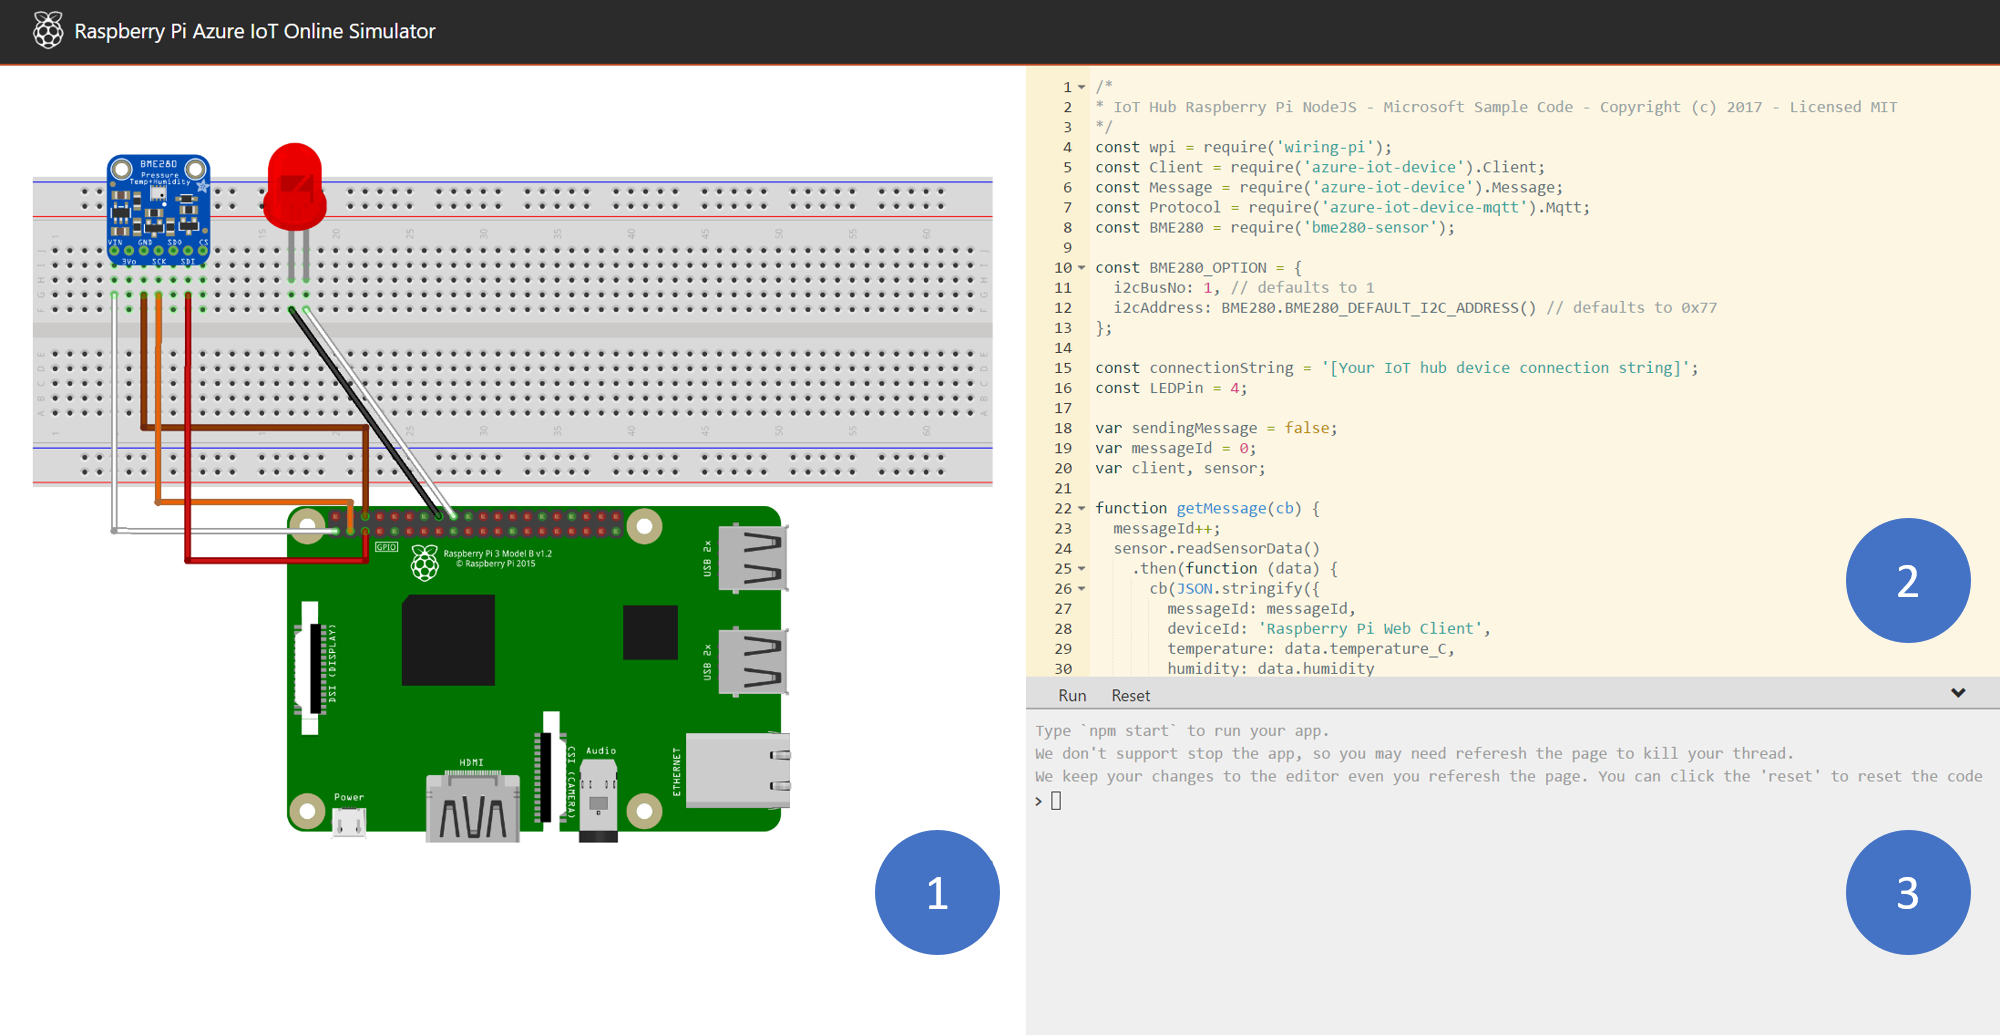
Overview of Raspberry Pi web simulator
Click the button to launch Raspberry Pi online simulator.
There are three areas in the web simulator.
- Assembly area - The default circuit is that a Pi connects with a BME280 sensor and an LED. The area is locked in preview version so currently you cannot do customization.
- Coding area - An online code editor for you to code with Raspberry Pi. The default sample application helps to collect sensor data from BME280 sensor and sends to your Azure IoT Hub. The application is fully compatible with real Pi devices.
- Integrated console window - It shows the output of your code. At the top of this window, there are three buttons.
- Run - Run the application in the coding area.
- Reset - Reset the coding area to the default sample application.
- Fold/Expand - On the right side there is a button for you to fold/expand the console window.
Note
The Raspberry Pi web simulator is now available in preview version. We'd like to hear your voice in the Gitter Chatroom. The source code is public on Github.
Create an IoT hub
-
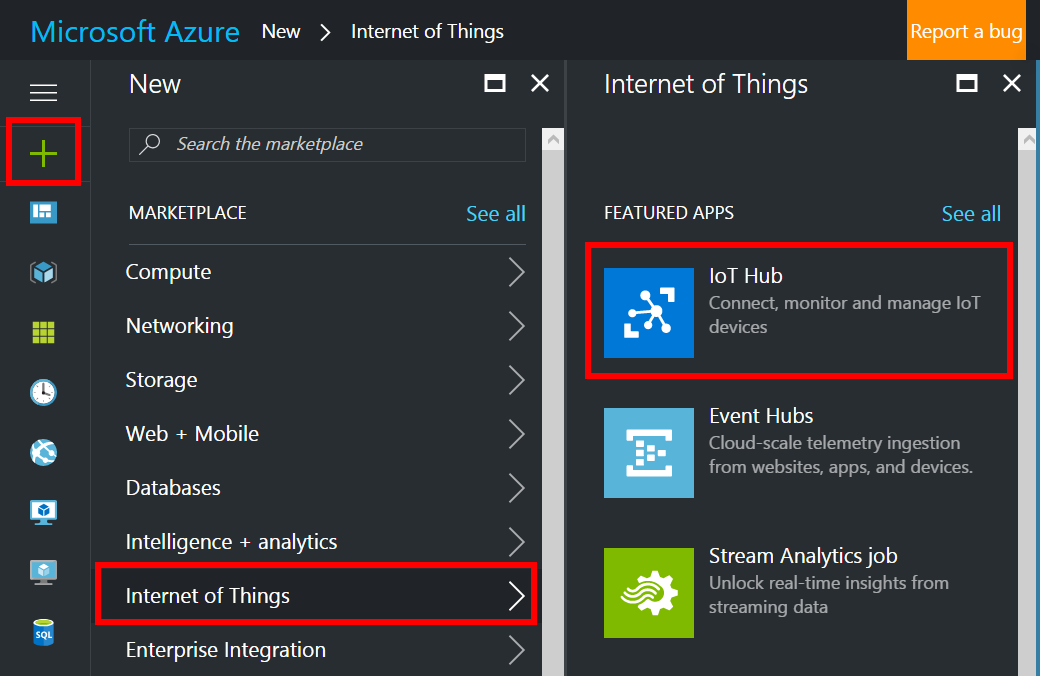
In the Azure portal, click New > Internet of Things > IoT Hub.
-
In the IoT hub pane, enter the following information for your IoT hub:
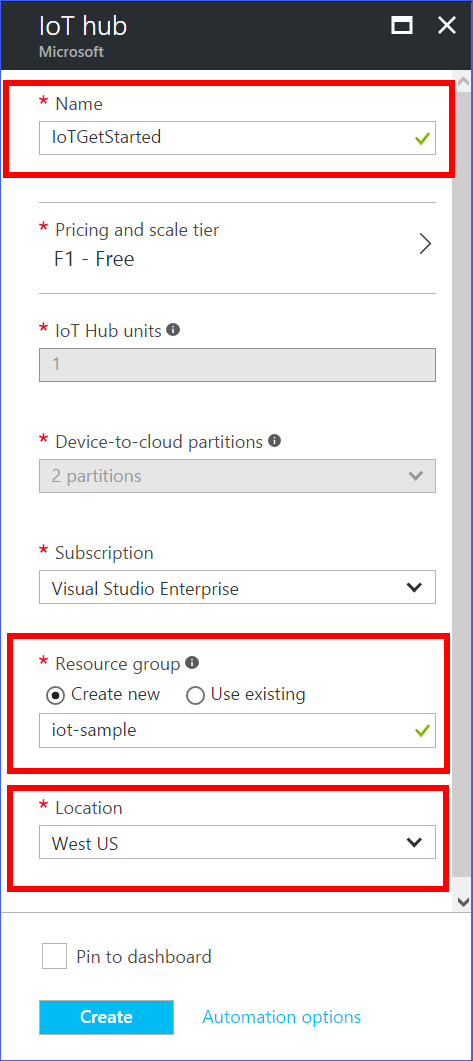
Name: Enter the name of your IoT hub. If the name you enter is valid, a green check mark appears.
Pricing and scale tier: Select the F1 - Free tier. This option is sufficient for this demo. For more information, see the Pricing and scale tier.
Resource group: Create a resource group to host the IoT hub or use an existing one. For more information, see Use resource groups to manage your Azure resources.
Location: Select the closest location to you where the IoT hub is created.
Pin to dashboard: Select this option for easy access to your IoT hub from the dashboard.
Important
-
The IoT hub will be publicly discoverable as a DNS endpoint, so make sure to avoid any sensitive information while naming it.
-
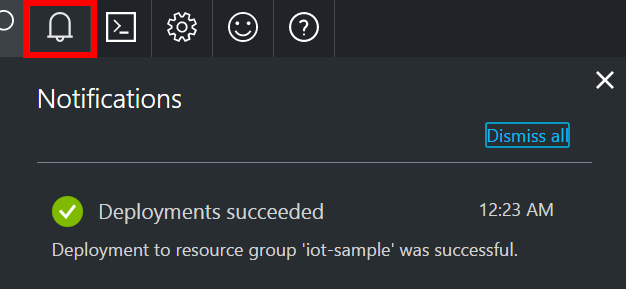
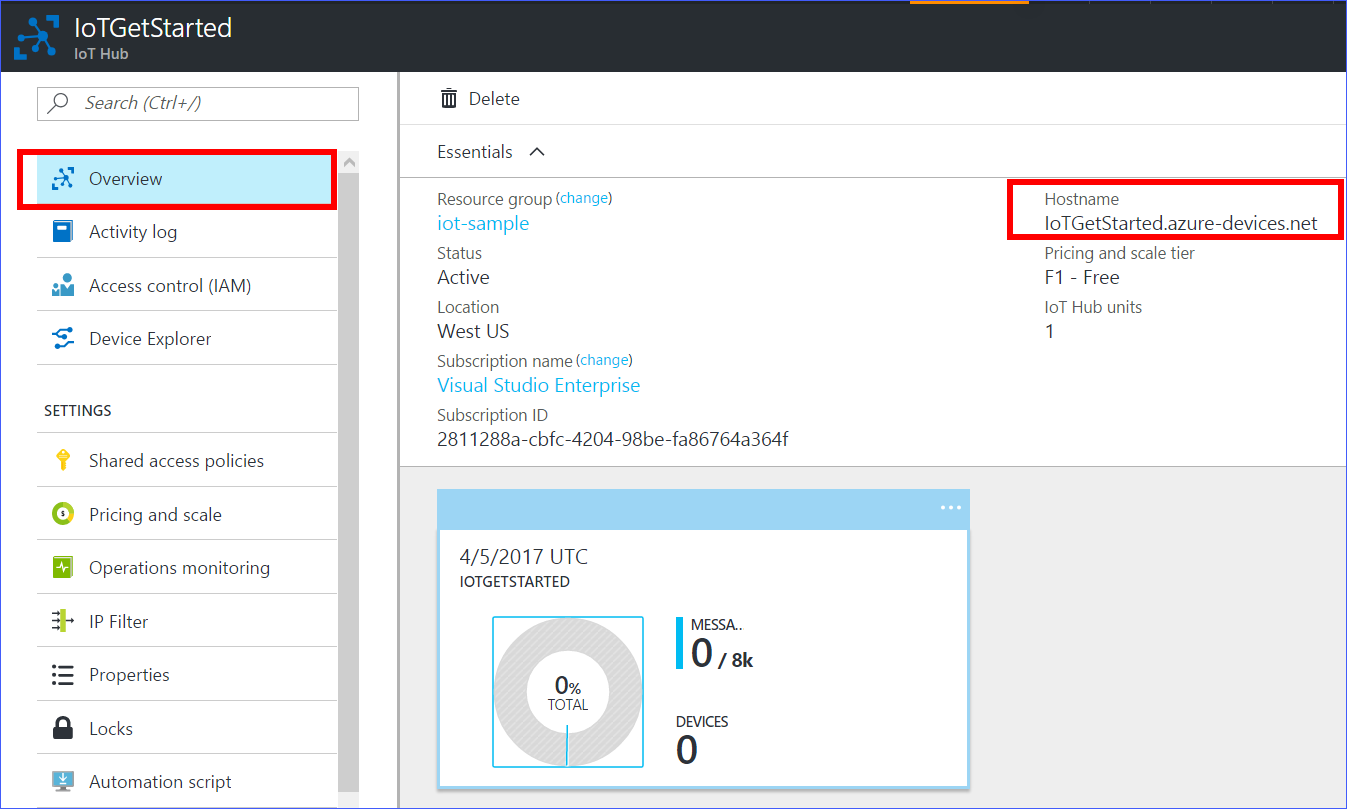
Click Create. Your IoT hub might take a few minutes to create. You can see progress in the Notifications pane.
-
After your IoT hub is created, click it on the dashboard. Make a note of the Hostname, and then click Shared access policies.
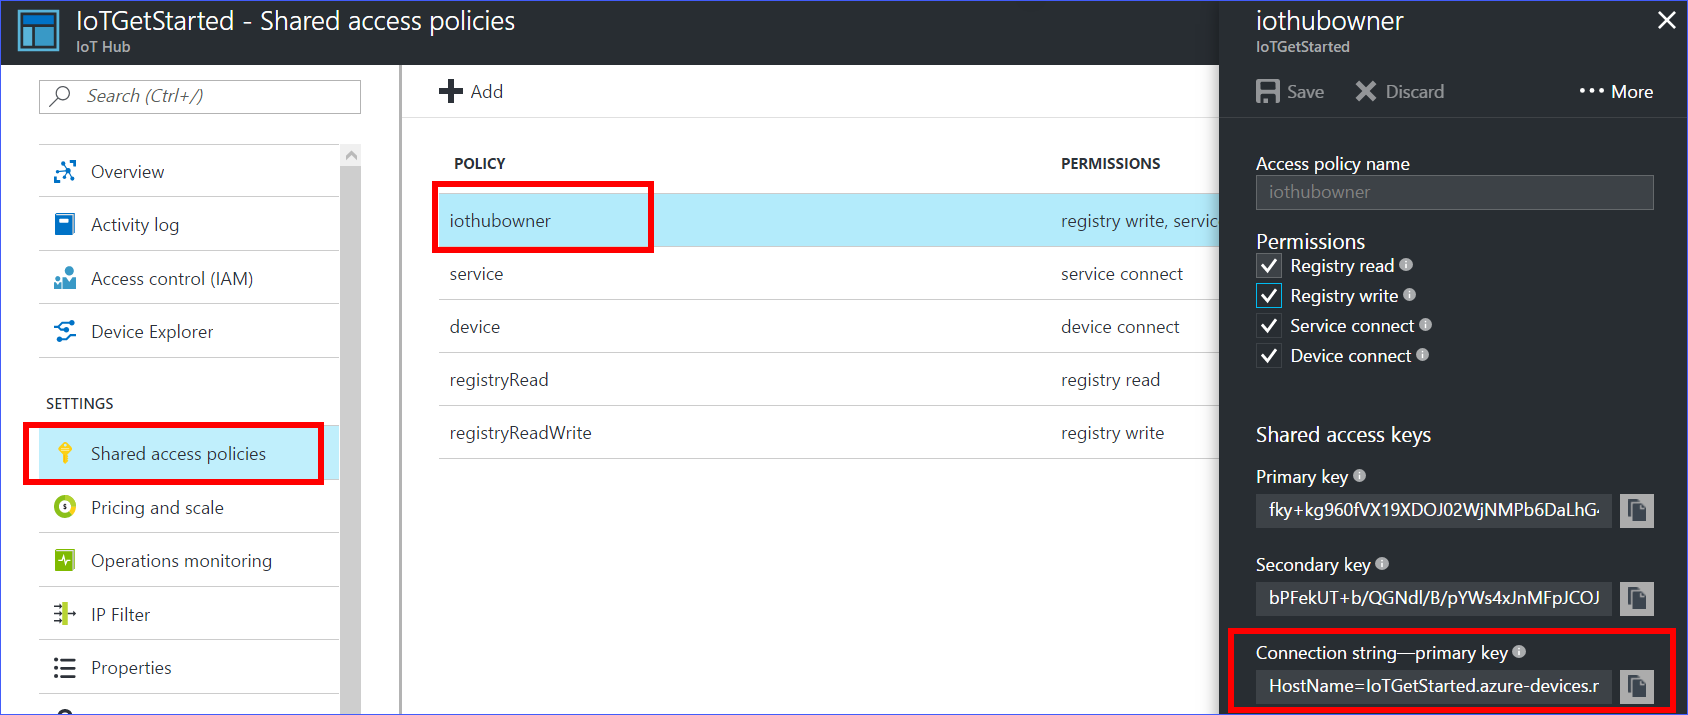
-
In the Shared access policies pane, click the iothubowner policy, and then copy and make a note of the Connection string of your IoT hub. For more information, see Control access to IoT Hub.
Note
You will not need this iothubowner connection string for this set-up tutorial. However, you may need it for some of the tutorials on different IoT scenarios after you complete this set-up.
Register a device in the IoT hub for your device
-
In the Azure portal, open your IoT hub.
-
Click Device Explorer.
-
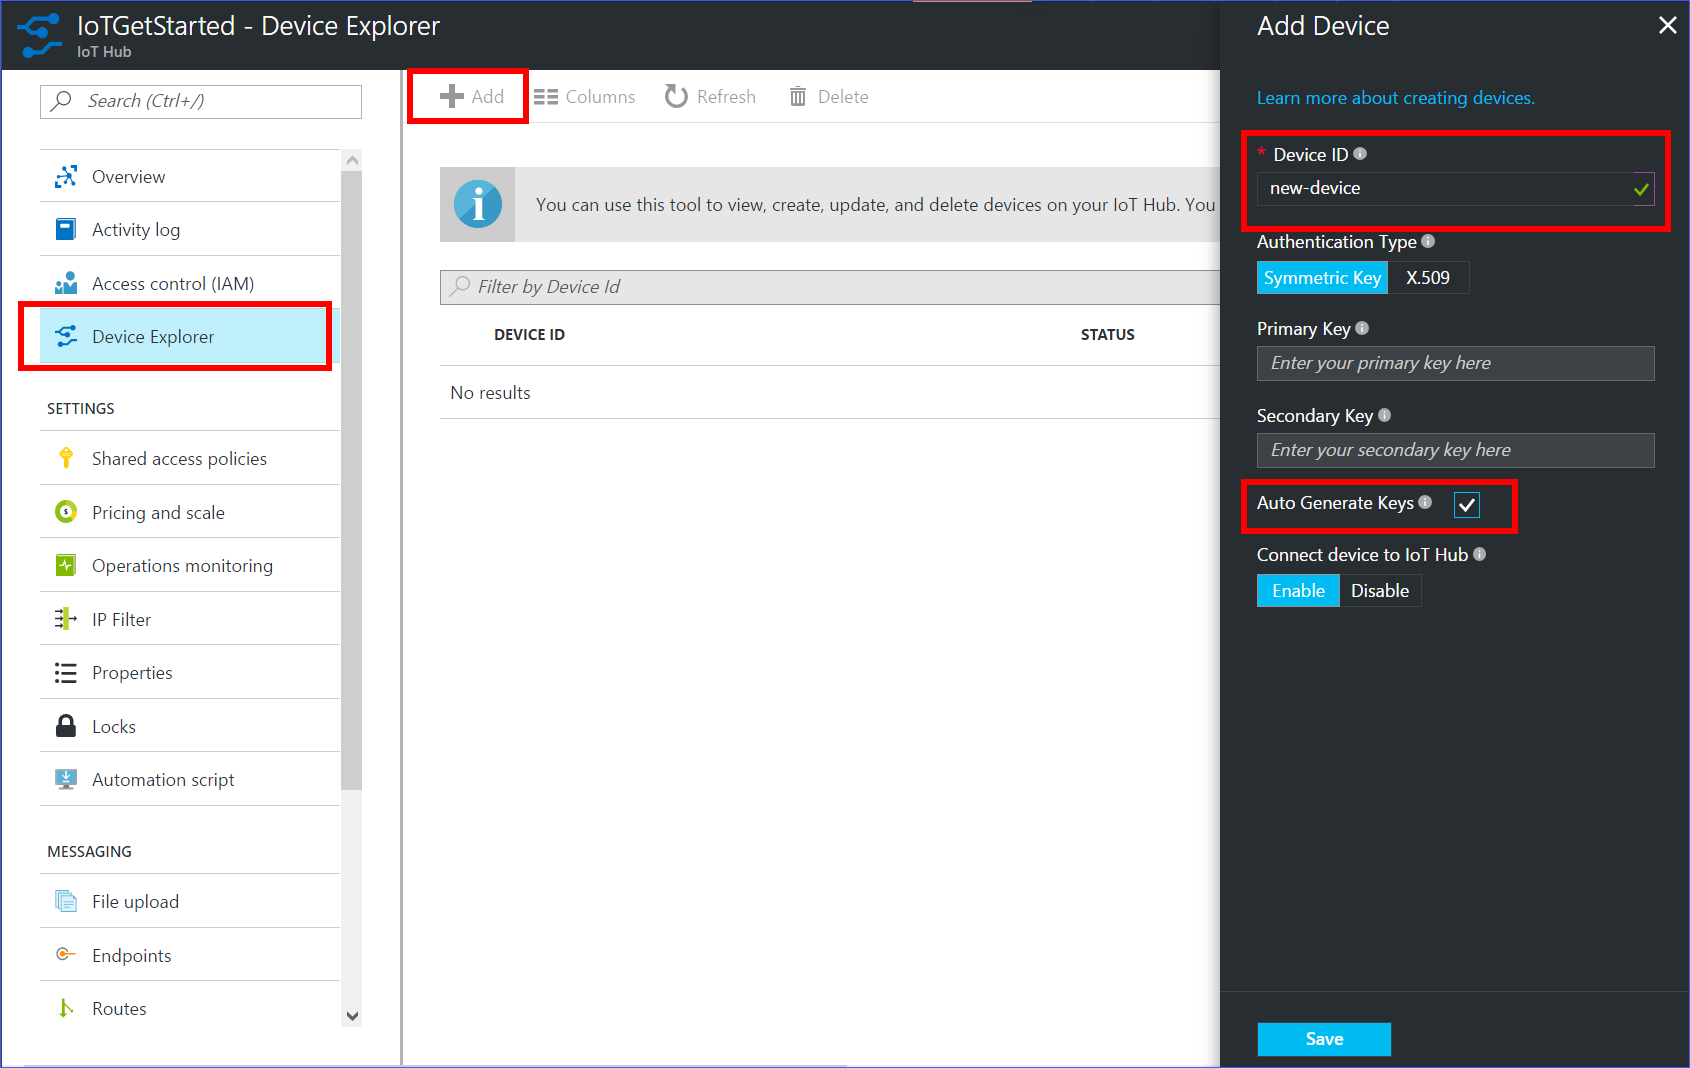
In the Device Explorer pane, click Add to add a device to your IoT hub. Then do the following:
Device ID: Enter the ID of the new device. Device IDs are case sensitive.
Authentication Type: Select Symmetric Key.
Auto Generate Keys: Select this check box.
Connect device to IoT Hub: Click Enable.
Important
-
The device ID may be visible in the logs collected for customer support and troubleshooting, so make sure to avoid any sensitive information while naming it.
-
Click Save.
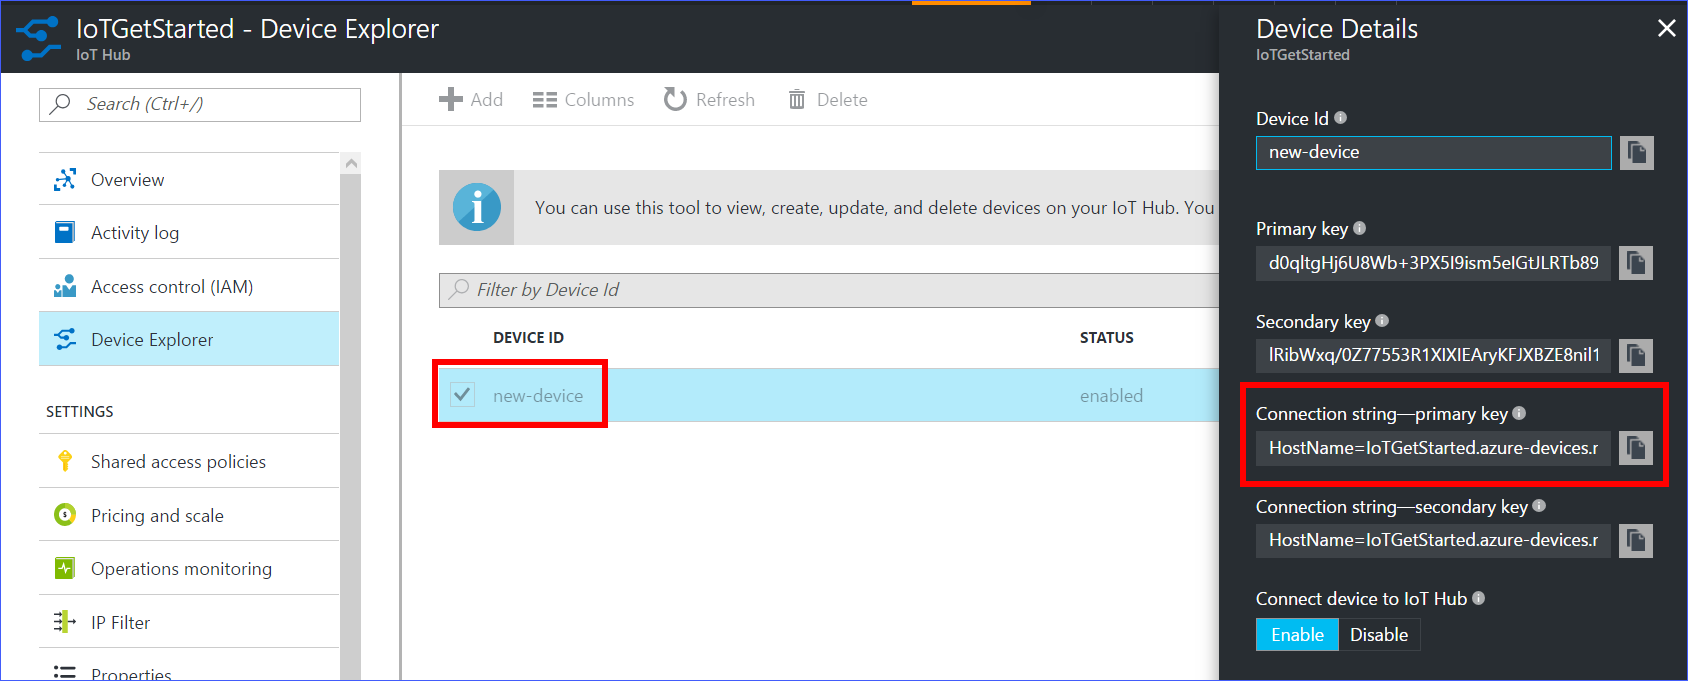
- After the device is created, open the device in the Device Explorer pane.
-
Make a note of the primary key of the connection string.
Run a sample application on Pi web simulator
-
In coding area, make sure you are working on the default sample application. Replace the placeholder in Line 15 with the Azure IoT hub device connection string.

-
Click Run or type
npm startto run the application.
You should see the following output that shows the sensor data and the messages that are sent to your IoT hub 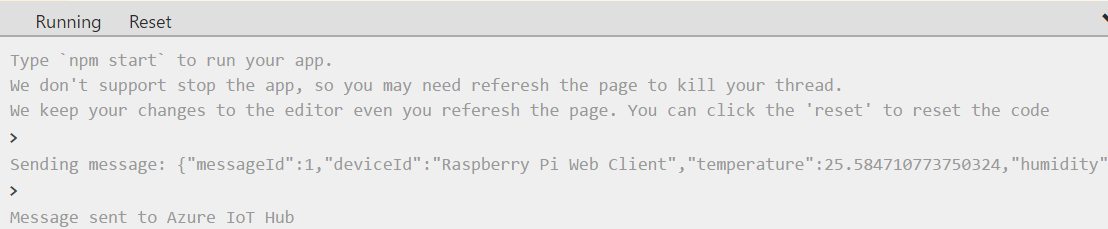
Next steps
You’ve run a sample application to collect sensor data and send it to your IoT hub.
To continue to get started with Azure IoT Hub and to explore other IoT scenarios, see the following:
- Manage cloud device messaging with iothub-explorer
- Save your Azure IoT hub messages to Azure data storage
- Use Power BI to visualize real-time sensor data from your IoT hub
- Use the Web Apps feature of Azure App Service to visualize real-time sensor data from your IoT hub
- Forecast weather by using the sensor data from your IoT hub in Azure Machine Learning
- Manage devices with iothub-explorer
- Use Logic Apps for remote monitoring and notifications