这里该记到vue的组件了,组件基础篇
1.vue组件的基本书写方式
Vue.component('button-counter', {
  data: function () {
    return {
      count: 0
    }
  },
  template: '<button v-on:click="count++">You clicked me {{ count }} times.</button>'
})
上面定义了一个名为button-counter的组件,其内容就是最下面红字所示的那样,下面就是使用这个组件了:
//创建Vue实例
new Vue({ el: '#components-demo' })

//在Vue实例中用这个组件
<div id="components-demo">
  <button-counter></button-counter>
</div>
你可能看到了,定义这个组件的时候,数据data是通过函数的形式返回的,一个组件的 data 选项必须是一个函数,因此
每个实例可以维护一份被返回对象的独立的拷贝。所以当我们像下面这样复用组件的时候,他们的count值是互不干扰的。
<div id="components-demo">
  <button-counter></button-counter>
  <button-counter></button-counter>
  <button-counter></button-counter>
</div>
注意:像上面那样通过Vue.component注册一个组件是全局注册,所谓全局注册,就是说这样的组件可以应用在任意的Vue
实例中。
2.数据传递之Prop
//定义一个名为“blog-post”的组件
Vue.component('blog-post', {
            props: ['title','content'],
            template: "<div ><h3>{{ title }}</h3><div v-html='content'></div></div>"
        })
//实例化一个Vue对象
        new Vue({
            el: '#blog-post-demo',
            data: {
                posts: [
                { id: 1, title: 'My journey with Vue',content:'<span style="color:red;">hello</span>' },
                { id: 2, title: 'Blogging with Vue' ,content:'<span style="color:blue;">hello</span>' },
                { id: 3, title: 'Why Vue is so fun' ,content:'<span style="color:black;">hello</span>' },
                ]
            }
        })
那么,接下来,我们就可以去使用这个组件了,因为要使用实例化Vue对象的数据,那么我们就必须将这个组件放在数据
生效的Vue组件绑定的DOM下了,上面显然是要放在ID为blog-post-demo的标签下,so:
<div id="blog-post-demo">
        <blog-post v-for="post in posts" v-bind:key="post.id" v-bind:title="post.title" v-bind:content = "post.content"></blog-post>
</div>
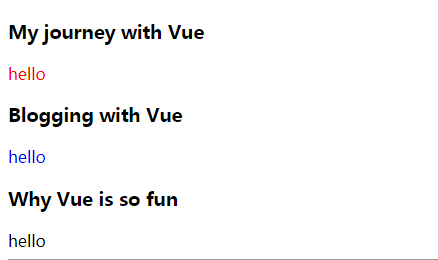
我们看到,通过prop属性中申明的变量名,我们向该组件绑定了两个变量。这里需要区分的是v-bind:title,现在举个栗子:
//改了下组件模板,其余不变
template: "<div ><h3 v-bind:title='title'>標題</h3><div v-html='content'></div></div>"
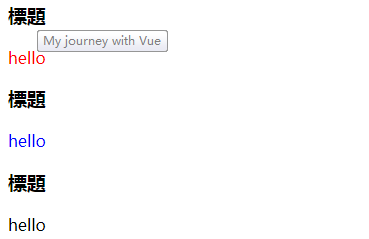
在使用组件的时候,v-bind:title="post.title",这里的红字title是为title变量赋值;
对于模板,第一种模板中{{ title }}这是调用变量title,第二种模板中v-bind:title='title',前面的title是title属性,后面的title是为title
属性赋值!所以,你看的三个红字title都是变量,不要混淆。
注意:我想你可能也注意到了红色背景的div标签,这是因为在Vue中每个组件必须只有一个根元素!所以,我们选择用一个父
标签将实际内容包起来来解决这个问题。
3.为组件绑定自定义事件
//定义组件,数据传递只通过post变量
    Vue.component('blog-post', {
            props: ['post'],
            template: `
            <div class="blog-post">
                <h3>{{ post.title }}</h3>
                <button v-on:click="$emit('enlarge-text')">
                    Enlarge text
                </button>
                <div v-html="post.content"></div>
            </div>
            `
        })
//实例化一个Vue对象,并提供数据和方法
        new Vue({
            el: '#blog-post-demo',
            data: {
                posts: [
                { id: 1, title: 'My journey with Vue',content:'<span style="color:red;">hello</span>' },
                { id: 2, title: 'Blogging with Vue' ,content:'<span style="color:blue;">hello</span>' },
                { id: 3, title: 'Why Vue is so fun' ,content:'<span style="color:black;">hello</span>' },
                ],
                postFontSize: 1
            },
            methods: {
                enlarge: function () {
                    this.postFontSize += 0.1;
                }
            }
        })
接下来就是调用这个组件了:
  <div id="blog-post-demo">
        <div :style="{ fontSize: postFontSize + 'em' }">
            <blog-post
            v-for="post in posts"
            v-bind:key="post.id"
            v-bind:post="post"
            v-on:enlarge-text="enlarge"
            ></blog-post>
        </div>
    </div>
蓝底是向这个组件内部传递数据变量(这里只能传递唯一的变量post,这在props中已经定义)和方法;
至于方法,我是这么记忆的,在组件标签属性上声明为这个组件绑定enlarge-text事件(自定义事件),这个事件调用
Vue实例的enlarge方法,然后模板内部定义,当button按钮单击的时候就会触发enlarge-text事件,于是,两两嵌套实
现了,当button按钮单击的时候触发Vue实例的method(enlarge方法)。
4.组件绑定v-model
之前我们都知道,v-model的写法,像这样:
<input v-model="searchText">
<p>{searchText}<p>
如此这般,input输入的值就会传给变量searchText,并且p标签得到响应,及时地显示出来,那么在组件当中怎么来用呢?
官网教程这么写的:
//定义组件
Vue.component('custom-input', {
  props: ['value'],
  template: `
    <input
      v-bind:value="value"
      v-on:input="$emit('input', $event.target.value)"
    >
  `
})

//声明vue实例
new Vue({
        el: '#app1',
        data: {
            msg:'aaa'
        }
    })

//引用模板
<div id="app1">
        <custom-input v-model="msg" ></custom-input>
        {{msg}}
</div>
刚看的时候很是不解,因为v-model可以直接读取vue实例中的变量值,那么在组件声明中,为什么还要用props,以及在
模板中使用v-bind:value=‘value’?用意是什么,因为教程上没有作特别说明,所以在自己的几番探索之后,得出结论:
①上面红字的value是固定写法,用来传递vue实例中的变量,并根据引用组件时候定义的v-model值来动态改变模板
标签初始化时候的value属性值(亲测,换成其他字段初始化的时候模板标签的value属性值无效)
②v-model不仅仅可以起到绑定vue实例中变量的效果,还可以将绑定的变量通过props传到组件内部的模板上,然后在
模板内部使用v-model传来的数据。
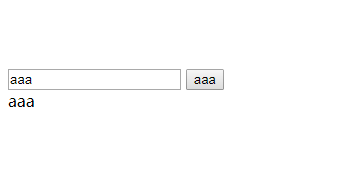
针对第二点,我对模板作了修改,其他照旧:
Vue.component('custom-input', {
            props: ['value'],
            template: `
            <div class="custom">
            <input
            v-bind:value="value"
            v-on:input="$emit('input', $event.target.value)"
            >
            <button >{{value}}</button>
            </div>
            `
        })
然后,前台渲染如下: