创建第一个Vagrant虚拟环境以及工程(续集):
(8) Provisioning:
通常情况下Box只做最基本的设置,而不是一次到位的设置好所有的环境。Vagrant通常使用chef或者Puppet来做进一步的环境搭建。
回到刚才创建的index.html,我们需要安装Apache。我们下面用Puppet来完成这一设置。
1. 在项目的根目录下创建文件夹manifests,然后在该文件家中创建Puppet的配置文件default.pp,该文件内容如下:
# Basic Puppet Apache manifestclass apache {exec { 'apt-get update':command => '/usr/bin/apt-get update'}package { "apache2":ensure => present,}service { "apache2":ensure => running,require => Package["apache2"],}}include apache
2. 在Vagrantfile里添加对Puppet provisioning的支持:
Vagrant::Config.rundo|config|config.vm.box="base"# Enable the Puppet provisionerconfig.vm.provision:puppetend
(9) 运行Project
为了使puppet的配置生效,如果不重启虚机,则需要执行vagrant reload命令。
$ vagrant reload
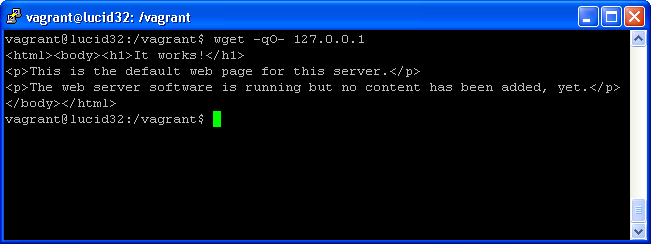
因为没有配置port forwarding,所以你还不能从本地浏览器查看Project的输出。只能SSH到虚拟机上查看127.0.0.1的输出:
 |
(10) 进行端口映射
修改Vagrantfile, 添加本地端口和虚机端口的映射关系, 然后执行vagrant reload, 然后你就可以通过本地浏览器来访问:http://localhost:4567.
Vagrant::Config.run do |config|# Forward guest port 80 to host port 4567config.vm.forward_port 80, 4567end
 |