1、新建Maven Web 工程;
2、添加相关的依赖包(Spring MVC、tomcat插件等),具体的pom.xml文件如下
<project xmlns="http://maven.apache.org/POM/4.0.0" xmlns:xsi="http://www.w3.org/2001/XMLSchema-instance"
  xsi:schemaLocation="http://maven.apache.org/POM/4.0.0 http://maven.apache.org/maven-v4_0_0.xsd">
  <modelVersion>4.0.0</modelVersion>
  <groupId>com.cvicse.ump</groupId>
  <artifactId>scgs</artifactId>
  <packaging>war</packaging>
  <version>0.0.1-SNAPSHOT</version>
  <name>scgs Maven Webapp</name>
  <url>http://maven.apache.org</url>
  <!-- 全局变量定义处 -->
  <properties>
    <version.spring>4.3.0.RELEASE</version.spring>
  </properties>

  <!-- 项目依赖包 -->
  <dependencies>

      <!-- 单元测试依赖包 -->
    <dependency>
      <groupId>junit</groupId>
      <artifactId>junit</artifactId>
      <version>3.8.1</version>
      <scope>test</scope>
    </dependency>

    <!-- servlet接口包-运行环境包 -->
    <dependency>
        <groupId>javax.servlet</groupId>
        <artifactId>javax.servlet-api</artifactId>
        <version>3.1.0</version>
        <scope>provided</scope>
    </dependency>

     <!-- Spring MVC相关依赖包 -->
     <dependency>
      <groupId>org.springframework</groupId>
      <artifactId>spring-webmvc</artifactId>
      <version>${version.spring}</version>
    </dependency>
    <dependency>
      <groupId>org.springframework</groupId>
      <artifactId>spring-context-support</artifactId>
      <version>${version.spring}</version>
    </dependency>
    <dependency>
      <groupId>org.springframework</groupId>
      <artifactId>spring-jdbc</artifactId>
      <version>${version.spring}</version>
    </dependency>

  </dependencies>


  <build>

    <plugins>
          <!-- 配置java7位编译环境 -->
          <plugin>
                <groupId>org.apache.maven.plugins</groupId>
                <artifactId>maven-compiler-plugin</artifactId>
                <version>2.3.2</version>
                <configuration>
                    <source>1.7</source>
                    <target>1.7</target>
                </configuration>
            </plugin>

            <!-- 添加Tomcat插件 -->
            <plugin>
                <groupId>org.apache.tomcat.maven</groupId>
                <artifactId>tomcat7-maven-plugin</artifactId>
                <version>2.2</version>
                <!-- Config: contextPath and Port (Default - /HelloSpringMVC : 8080) -->
                <!-- <configuration> <path>/</path> <port>8899</port> </configuration> -->
            </plugin>


      </plugins>


    <finalName>scgs</finalName>
  </build>
</project>
3、修改web.xml文件,添加springMVC的servlet,如下
<?xml version="1.0" encoding="UTF-8"?>
<web-app xmlns="http://xmlns.jcp.org/xml/ns/javaee"
         xmlns:xsi="http://www.w3.org/2001/XMLSchema-instance"
         xsi:schemaLocation="http://xmlns.jcp.org/xml/ns/javaee http://xmlns.jcp.org/xml/ns/javaee/web-app_3_1.xsd"
         version="3.1">
  <!-- 当前项目名 -->
  <display-name>Archetype Created Web Application</display-name>

  <servlet>
      <servlet-name>springMVC-dispatcher</servlet-name>
      <servlet-class>org.springframework.web.servlet.DispatcherServlet</servlet-class>
      <init-param>
          <param-name>contextConfigLocation</param-name>
          <param-value>classpath:springmvc/spring-servlet.xml</param-value>
      </init-param>
      <load-on-startup>1</load-on-startup>
  </servlet>


  <servlet-mapping>
      <servlet-name>springMVC-dispatcher</servlet-name>
      <url-pattern>/</url-pattern>
  </servlet-mapping>


</web-app>
4、新建SpringMVC相关的配置,spring-servlet.xml
<?xml version="1.0" encoding="UTF-8"?>
<beans xmlns="http://www.springframework.org/schema/beans"
    xmlns:xsi="http://www.w3.org/2001/XMLSchema-instance" xmlns:context="http://www.springframework.org/schema/context"
    xmlns:mvc="http://www.springframework.org/schema/mvc"
    xsi:schemaLocation="http://www.springframework.org/schema/mvc http://www.springframework.org/schema/mvc/spring-mvc-4.0.xsd
        http://www.springframework.org/schema/beans http://www.springframework.org/schema/beans/spring-beans-4.0.xsd
        http://www.springframework.org/schema/context http://www.springframework.org/schema/context/spring-context-4.0.xsd">


    <!-- 配置自动扫描的包 -->
    <context:component-scan base-package="com.cvicse.ump.scgs.controller"></context:component-scan>

    <!-- 加载静态资源 -->
    <mvc:annotation-driven></mvc:annotation-driven>
    <mvc:default-servlet-handler />

    <!-- 配置视图解析器 -->
    <bean class="org.springframework.web.servlet.view.InternalResourceViewResolver">
        <property name="prefix" value="/WEB-INF/result/"></property>
        <property name="suffix" value=".jsp"></property>
    </bean>


</beans>
5、新建结果展示的界面,hello.jsp
<%@ page language="java" contentType="text/html; charset=UTF-8"
    pageEncoding="UTF-8"%>
<!DOCTYPE html PUBLIC "-//W3C//DTD HTML 4.01 Transitional//EN" "http://www.w3.org/TR/html4/loose.dtd">
<html>
<head>
<meta http-equiv="Content-Type" content="text/html; charset=UTF-8">
<title>Result Page</title>
</head>
<body>

This is the result Page of Hello.

</body>
</html>
6、新建控制器,HelloController.java
package com.cvicse.ump.scgs.controller;

import org.springframework.stereotype.Controller;
import org.springframework.web.bind.annotation.RequestMapping;

@Controller("helloController")
@RequestMapping("/contrller")
public class HelloController {

    @RequestMapping("hello")
    public String hello(){
        System.out.println("hello is called..");
        return "hello";
    }

}
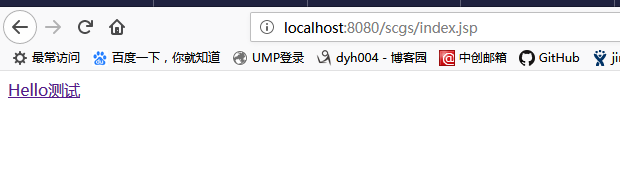
7、新建导航页,index.jsp
<%@ page language="java" contentType="text/html; charset=UTF-8"
    pageEncoding="UTF-8"%>
<!DOCTYPE html PUBLIC "-//W3C//DTD HTML 4.01 Transitional//EN" "http://www.w3.org/TR/html4/loose.dtd">
<html>
<head>
<meta http-equiv="Content-Type" content="text/html; charset=UTF-8">
<title>SpringMVC导航页</title>
</head>
<body>

<a href="contrller/hello">Hello测试</a><br><br>
</body>
</html>
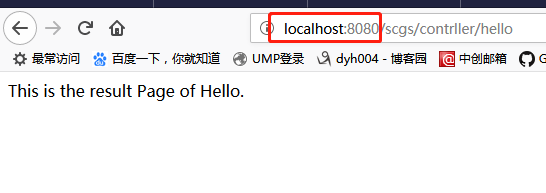
运行效果:
点击超链接,跳转至页面