上篇博文对Spring的工作原理做了个大概的介绍,想看的同学请出门左转。今天详细说几点。
(一)Spring IoC容器及其实例化与使用
Spring IoC容器负责Bean的实例化、配置和组装工作有两个接口:BeanFactory和ApplicationContext。其中ApplicationContext继承于BeanFactory,对企业级应用开发提供了更多的支持。在实际应用中都是用该接口。
1)实例化Spring容器(主要有四种)
1.ClassPathXmlApplicationContext: 在类路径下寻找配置XML文件实例化容器。
ApplicationContext act = new ClassPathXmlApplicationContext("hellobean.xml");
2.FileSystemXmlApplicationContext:在文件系统路径下寻找配置文件来实例化容器。
ApplicationContext act=new FileSystemXmlApplicationContext("d:/beans.xml");
3.XmlWebApplicationContext:从Web应用目录WEB-INF中的XML配置文件实例化容器。(小编未能实现成功,请实现成功的同学指教)
WebApplicationContext wctx = new XmlWebApplicationContext();
4.在web.xml配置文件中,通过配置监听器实例化容器。(假定已经配置了Spring的配置文件)
在web.xml中注册Spring提供的Servlet监视器,它会在当前Web应用被加载时将Spring的ApplicationContext保存到ServletContext对象中。
Spring配置文件可指定多个,之间用逗号隔开。
//在网页中通过request对象或其他方式,获取Web服务器容器
  ServletContext sc=request.getServletContext();
//利用spring框架提供的静态方法,从Web服务器中获取Spring容器
  WebApplicationContext wact=WebApplicationContextUtils.getRequiredWebApplicationContext(sc);
2)生成Bean实例
Spring容器通过getBean()方法,从容器中获取所管理的对象。
例如:
HelloBeans student=(HelloBeans)wctx.getBean("stu1");
(二)基于XML文件方式的Bean配置
在java容器中形成Bean称为装配。
Bean的装配形式有两种:基于XML文件的方式和基于注解的方式。
基于XML文件的方式就是用一个XML文件对Bean信息实施配置。主要有两部分:命名空间、Bean及有关信息的配置。
4种配置Bean的方法:
例子:定义两个实体类
public class Address {
    private String city;
    private String school;
    //无参构造器
    public Address(){
        this.city="taian";
        this.school="nongda";
    }
    //有参构造器
    public Address(String city,String school){
        this.city=city;
        this.school=school;
    }
    //省略了setter/getter方法
}
public class Student {
    private String name;
    private int age;
    Address address;
    //默认构造器
    public Student(){}
    //有参构造器
    public Address(String name,int age,Address address){
        this.name=name;
        this.age=age;
        this.address=address;
    }
    //省略了setter/getter方法
}
第1种配置方法,利用带参数的构造器注入:
<bean name="a1" class="com.edu.bean.Address">
<constructor-arg index="0" type="java.lang.String" value="北京"/>
<constructor-arg index="1" type="java.lang.String" value="清华"/>
</bean>
第2种配置方法,利用无参构造器注入:
<bean name="a2" class="com.edu.bean.Address"/>
第3种配置方法,利用属性的setter方法注入:
<bean name="a3" class="com.edu.bean.Address">
<property name="city" value="北京"></property>
<property name="school" value="清华"></property>
</bean>
第4种配置方法,利用属性的setter方法注入引用属性:
<bean name="addr" class="com.edu.bean.Address">
<property name="city" value="北京"></property>
<property name="school" value="清华"></property>
</bean>


<bean name="ss" class="com.edu.bean.Student">
<property name="name" value="张三"></property>
<property name="age" value="20"></property>
<property name="address" ref="addr"></property>
</bean>
(三)Spring表达式——SpEL(Spring Expression Lanuage)
使用“#{...}”作为定界符。所有在大括号中的字符都将被认为是SpEL。SpEL为Bean的属性动态赋值提供了便利。
以下示例每一组两条语句均为等价表示:
<property name="count" value="#{5}"></property>
<property name="count" value="5"></property>

<property name="address" value="#{addr}"></property>
<property name="address" ref="addr"></property>

<property name="address" value="#{addr.city}"></property>
(四)基于注解方式的Bean配置
先说个例子:
打开eclipse,建立java web工程如下:
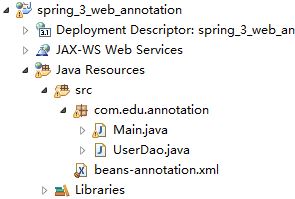
注意:除常规web项目导入包外,另需导入aop方面的jar包(放在lib目录下)
其中,UserDao类:
package com.edu.annotation;

import org.springframework.stereotype.Service;

@Service(value="abc")
public class UserDao {

    public void save(){
        System.out.println("保存数据完成!");
    }
}
beans-annotation.xml:
<?xml version="1.0" encoding="UTF-8"?>
<beans xmlns="http://www.springframework.org/schema/beans"
    xmlns:xsi="http://www.w3.org/2001/XMLSchema-instance"
    xmlns:context="http://www.springframework.org/schema/context"
    xsi:schemaLocation="http://www.springframework.org/schema/beans
        http://www.springframework.org/schema/beans/spring-beans.xsd
        http://www.springframework.org/schema/context
        http://www.springframework.org/schema/context/spring-context.xsd">

    <context:component-scan base-package="com.edu.annotation"/>

</beans>
用于测试的主类Main:
package com.edu.annotation;

import org.springframework.context.ApplicationContext;
import org.springframework.context.support.ClassPathXmlApplicationContext;

public class Main {

    public static void main(String[] args) {

        ApplicationContext act = new ClassPathXmlApplicationContext("beans-annotation.xml");
        UserDao userDao=(UserDao)act.getBean("abc");
        userDao.save();

    }

}
运行结果为:保存数据完成!
从例子中我们可以看到,基于注解方式和基于XML方式Bean配置作用相同。
在java的实现类中,Spring提供了在类内进行Bean定义的标注(写在类名上一行),从而标识该类创建Bean,让Spring管理。
为了便于分类管理,基于注解方式的Bean配置分为4类:
1.@Component:基本注解(通用Bean标注)
2.@Respository:标识持久层组件
3.@Service:标识服务层(业务层)组件
4.@Controller:标识表现层组件
当一个类(组件被标注为Bean后),每一个Bean都有一个标识名称(给Bean命名)。分两种:
1.若没有在注解中指定,则实行Spring的默认命名策略:使用非限定类名,将类名的第一个字母小写;
2.若在注解中指定(使用value属性),就像例子中一样,则使用指定名称。
使用基于注解的Bean装配时的几点注意:
1.beans-annotation.xml中命名空间和不使用时的不同;
2.需导入aop的jar包。
更多详细的基于注解的Bean装配,请各位移步官网自行查看,这里不再赘述。
本篇参考书籍《Java EE框架开发技术与案例教程》