使用idea搭建springcloud
Eureka注册中心的搭建
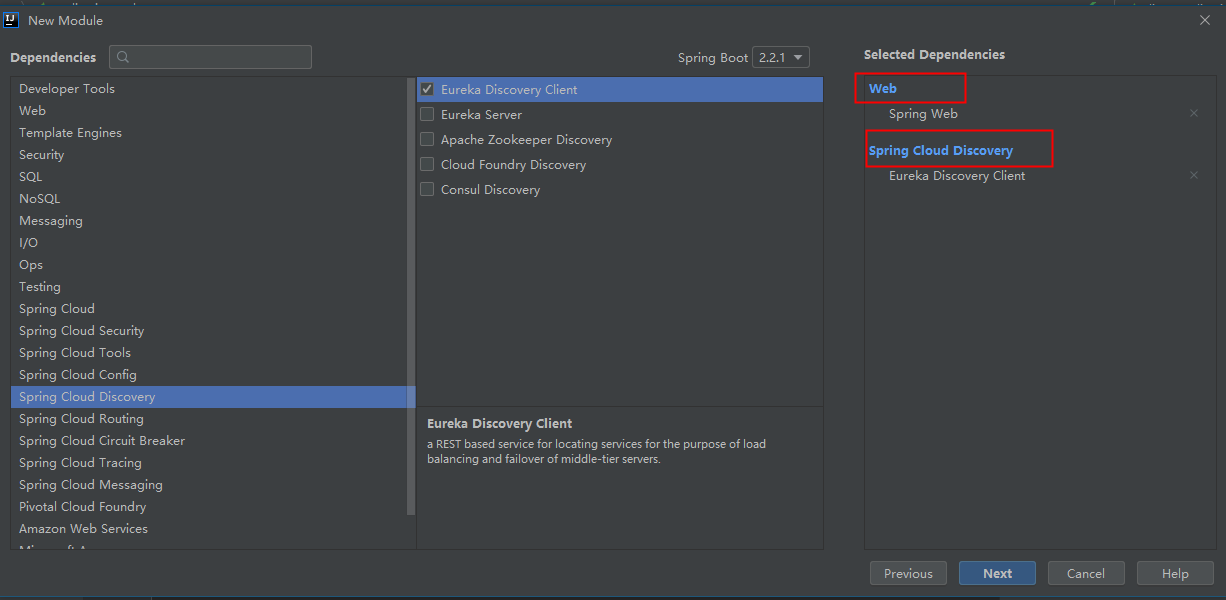
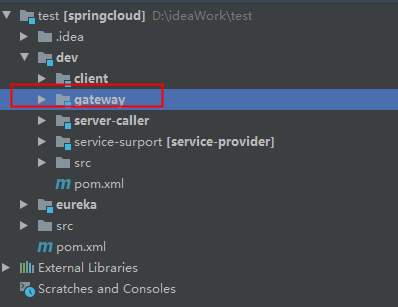
一).创建module
1.![1574059959112]
1574059959112.png)


二).pom.xml文件
<?xml version="1.0" encoding="UTF-8"?>
<project xmlns="http://maven.apache.org/POM/4.0.0" xmlns:xsi="http://www.w3.org/2001/XMLSchema-instance"
         xsi:schemaLocation="http://maven.apache.org/POM/4.0.0 https://maven.apache.org/xsd/maven-4.0.0.xsd">
    <modelVersion>4.0.0</modelVersion>
    <parent>
        <groupId>org.springframework.boot</groupId>
        <artifactId>spring-boot-starter-parent</artifactId>
        <version>2.2.1.RELEASE</version>
        <relativePath/> <!-- lookup parent from repository -->
    </parent>
    <groupId>com.springcloud</groupId>
    <artifactId>test</artifactId>
    <version>0.0.1-SNAPSHOT</version>
    <name>test</name>
    <description>Demo project for Spring Boot</description>

    <properties>
        <java.version>1.8</java.version>
        <spring-cloud.version>Hoxton.RC2</spring-cloud.version>
    </properties>

    <dependencies>
        <!-- 注册中心jar包依赖 -->
        <dependency>
            <groupId>org.springframework.cloud</groupId>
            <artifactId>spring-cloud-starter-netflix-eureka-server</artifactId>
        </dependency>

        <dependency>
            <groupId>org.springframework.boot</groupId>
            <artifactId>spring-boot-starter-test</artifactId>
            <scope>test</scope>
            <exclusions>
                <exclusion>
                    <groupId>org.junit.vintage</groupId>
                    <artifactId>junit-vintage-engine</artifactId>
                </exclusion>
            </exclusions>
        </dependency>
    </dependencies>

    <dependencyManagement>
        <dependencies>
            <dependency>
                <groupId>org.springframework.cloud</groupId>
                <artifactId>spring-cloud-dependencies</artifactId>
                <version>${spring-cloud.version}</version>
                <type>pom</type>
                <scope>import</scope>
            </dependency>
        </dependencies>
    </dependencyManagement>

    <build>
        <plugins>
            <plugin>
                <groupId>org.springframework.boot</groupId>
                <artifactId>spring-boot-maven-plugin</artifactId>
            </plugin>
        </plugins>
    </build>

    <repositories>
        <repository>
            <id>spring-milestones</id>
            <name>Spring Milestones</name>
            <url>https://repo.spring.io/milestone</url>
        </repository>
    </repositories>

</project>
三) .yml文件
#注册中心的名字
spring:
  application:
    name: my-eureka

#服务端口
server:
  port: 10211

#注册中心相关配置
eureka:
  server:
    # 配置关闭自我保护,并按需配置Eureka Server清理无效节点的时间间隔(5000ms)。
    enable-self-preservation: false
    eviction-interval-timer-in-ms: 5000
  client:
    # 不将自己注册到注册中心
    register-with-eureka: false #fasle:
    # 因为自己是注册中心,因此不用检索服务信息
    fetch-registry: false        #true: Cannot execute request on any know server
    # 注册中心的地址
    service-url:
      defaultZone: http://localhost:10211/eureka/
  instance:
    prefer-ip-address: true
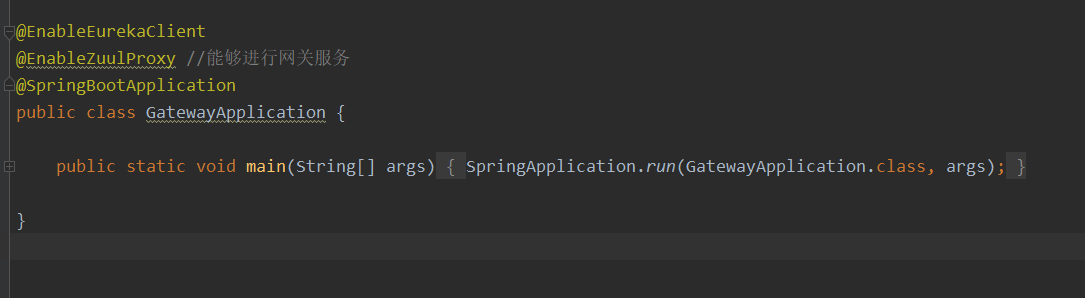
四).启动类加入 @EnableEurekaService注解
//注册中心
@EnableEurekaServer
@SpringBootApplication
public class TestApplication {

    public static void main(String[] args) {
        SpringApplication.run(TestApplication.class, args);
    }

}
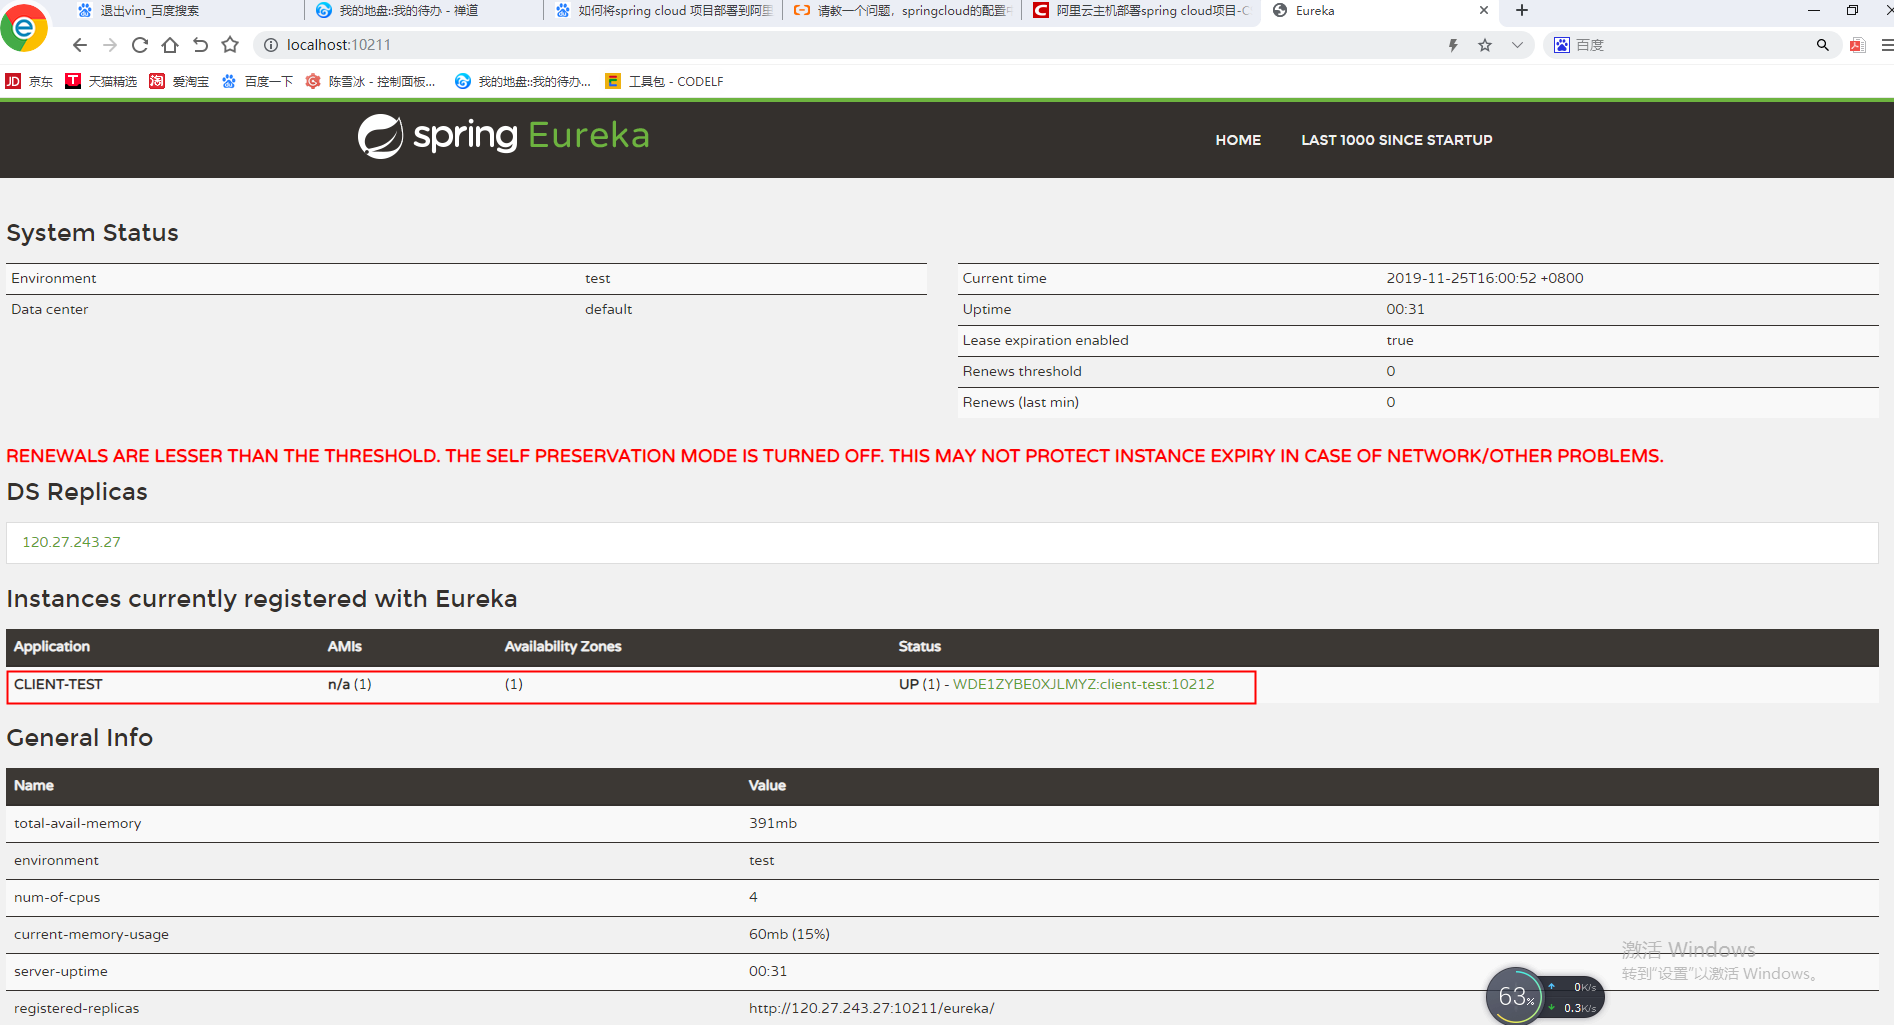
五).检验是否搭建成功
localhost:10211
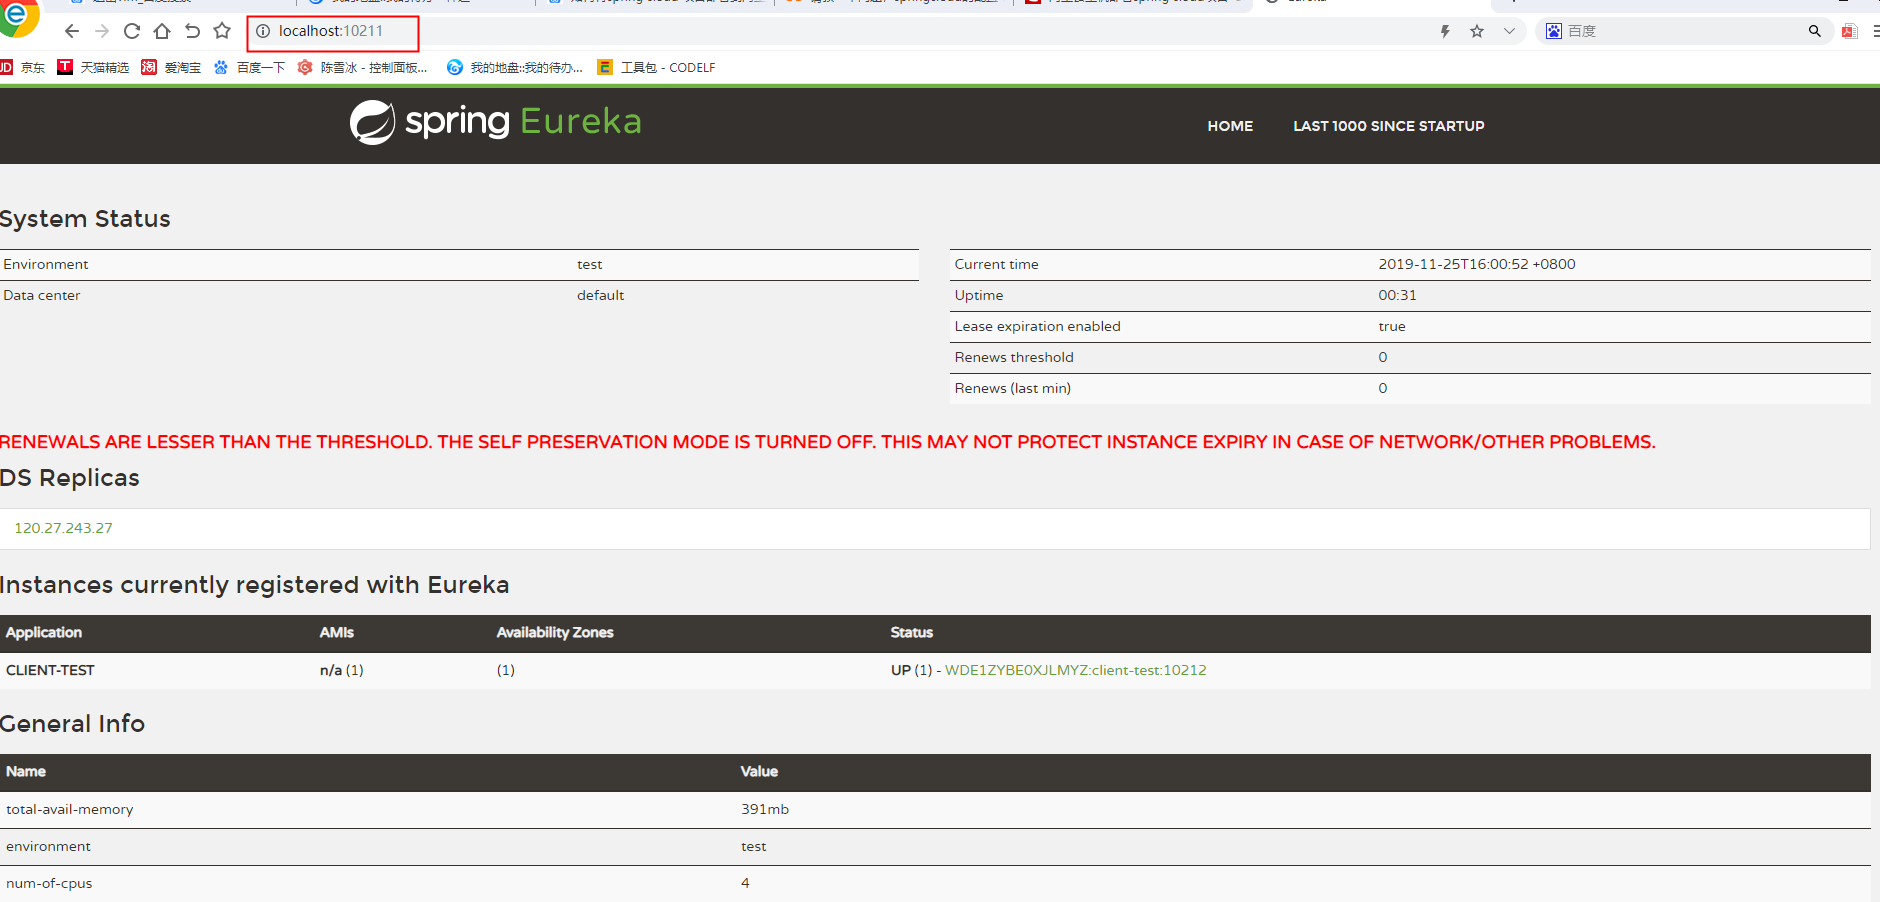
构建服务,将服务注册到注册中心
一).构建模型:
注:构建模型时要将web组件和spring cloud discovery组件给选上,否则服务注册不到注册中心

二).application.yml
spring:
  application:
    name: client-test

#服务端口
server:
  port: 10212

# 注册中心地址
eureka:
  client:
    service-url:
      defaultZone: http://localhost:10211/eureka/
  instance:
    prefer-ip-address: true
三).启动类加入EnableEurekaClient注解
package com.own.client;

import org.springframework.boot.SpringApplication;
import org.springframework.boot.autoconfigure.SpringBootApplication;
import org.springframework.cloud.netflix.eureka.EnableEurekaClient;

@EnableEurekaClient
@SpringBootApplication
public class ClientApplication {

    public static void main(String[] args) {
        SpringApplication.run(ClientApplication.class, args);
    }

}
四).开启启动类将服务注册到注册中心
根据注册中心实现服务与服务之间的调用
参考:https://blog.csdn.net/weixin_40170892/article/details/99644429
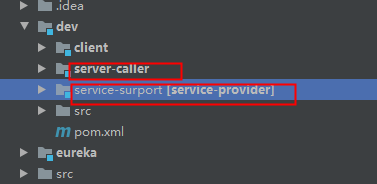
一).搭建服务
首先,我们搭建两个服务。server-provider(服务调用者),server-caller(服务调用者)
搭建服务的过程与上文构建服务,将服务注册注册到注册中心的做法一致。
二).server-caller(服务调用者)需要添加如下配置
1).在pom.xml中引入fegin的jar包依赖
 <!-- feign微服务调用 -->
        <dependency>
            <groupId>org.springframework.cloud</groupId>
            <artifactId>spring-cloud-starter-ope nfeign</artifactId>
        </dependency>
pom.xml如下
<?xml version="1.0" encoding="UTF-8"?>
<project xmlns="http://maven.apache.org/POM/4.0.0" xmlns:xsi="http://www.w3.org/2001/XMLSchema-instance"
         xsi:schemaLocation="http://maven.apache.org/POM/4.0.0 https://maven.apache.org/xsd/maven-4.0.0.xsd">
    <modelVersion>4.0.0</modelVersion>
    <parent>
        <groupId>org.springframework.boot</groupId>
        <artifactId>spring-boot-starter-parent</artifactId>
        <version>2.2.1.RELEASE</version>
        <relativePath/> <!-- lookup parent from repository -->
    </parent>
    <groupId>com.own</groupId>
    <artifactId>server-caller</artifactId>
    <version>0.0.1-SNAPSHOT</version>
    <name>server-caller</name>
    <description>服务调用者</description>

    <properties>
        <java.version>1.8</java.version>
        <spring-cloud.version>Hoxton.RC2</spring-cloud.version>
    </properties>

    <dependencies>
        <dependency>
            <groupId>org.springframework.boot</groupId>
            <artifactId>spring-boot-starter-web</artifactId>
        </dependency>
        <dependency>
            <groupId>org.springframework.cloud</groupId>
            <artifactId>spring-cloud-starter-netflix-eureka-client</artifactId>
        </dependency>

        <!-- feign微服务调用 -->
        <dependency>
            <groupId>org.springframework.cloud</groupId>
            <artifactId>spring-cloud-starter-openfeign</artifactId>
        </dependency>

        <dependency>
            <groupId>org.springframework.boot</groupId>
            <artifactId>spring-boot-starter-test</artifactId>
            <scope>test</scope>
            <exclusions>
                <exclusion>
                    <groupId>org.junit.vintage</groupId>
                    <artifactId>junit-vintage-engine</artifactId>
                </exclusion>
            </exclusions>
        </dependency>
    </dependencies>

    <dependencyManagement>
        <dependencies>
            <dependency>
                <groupId>org.springframework.cloud</groupId>
                <artifactId>spring-cloud-dependencies</artifactId>
                <version>${spring-cloud.version}</version>
                <type>pom</type>
                <scope>import</scope>
            </dependency>
        </dependencies>
    </dependencyManagement>

    <build>
        <plugins>
            <plugin>
                <groupId>org.springframework.boot</groupId>
                <artifactId>spring-boot-maven-plugin</artifactId>
            </plugin>
        </plugins>
    </build>

    <repositories>
        <repository>
            <id>spring-milestones</id>
            <name>Spring Milestones</name>
            <url>https://repo.spring.io/milestone</url>
        </repository>
    </repositories>

</project>
2).启动类加入注解@EnableFeignClient,@EnableEurekaClient
@EnableFeignClients //允许服务调用
@EnableEurekaClient //允许注册到注册中心
@SpringBootApplication
public class ServerCallerApplication {

    public static void main(String[] args) {
        SpringApplication.run(ServerCallerApplication.class, args);
    }

}
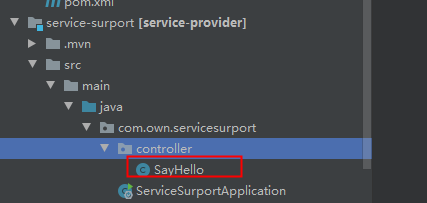
三).在server-provider(服务提供者)中定义被调用的方法
在controller下定义一个sayHello类,该类中有一个sayHello方法,返回一个hello
/**
 * @ Author:chenxuebing
 * @ Date:2019/11/25 17:30
 * @ Description:服务提供者提供打招呼的服务
 */
@Controller
public class SayHello {
    @RequestMapping("/hello")
    @ResponseBody
    public String sayHello(){
        return "hello";
    }
}
四).在server-caller()(服务调用者)中调用server-provider(服务提供者)的sayHello方法
实现:
1).首先,需要提供一个接口,接口中的方法与server-provider(服务提供者)的方法 一样,但只声明不实现。

2).其次,在接口上加入注解@FeignClient("引用的服务名称"),在这里我给我的引用服务起名为server-provider,那么就是@FeignClient(value = "server-provider")
服务调用者接口声明的特点是:
1).方法声明和server-provider的方法声明相同
2)请求方式也相同,例如:post、get、put...
3).对应的请求映射路径也相同
4).加入@FeignClient(value = "被调用的服务"),声明被调用的服务
/**
 * @ Author:chenxuebing
 * @ Date:2019/11/26 9:10
 * @ Description:调用service-provider的SayHello类的方法
 */

/**
 * 调用者的接口方法是被调用者方法的声明,映射路径与被调用者方法的映射路径相同
 */
@FeignClient(value = "server-provider") //调用的服务名称
public interface SayHelloCaller {
    @RequestMapping("/hello")
    public String sayHello();
}
好啦,这下我们就可以写一个controler来测试一下我们是否能成功调用。
controler中类的定义如下:
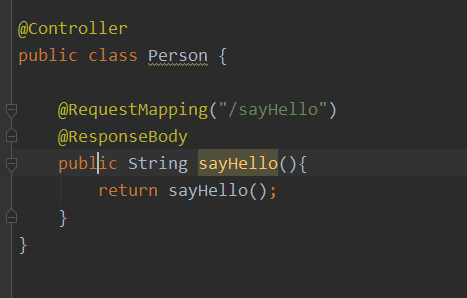
定义一个Person的控制类,该类可以调用server-provider(服务调用者)的sayHello方法,具有向别说hello的功能。

/**
 * @ Author:chenxuebing
 * @ Date:2019/11/26 9:30
 * @ Description:打招呼的一个对象
 */

@Controller
public class Person {
    @Autowired
    private SayHelloCaller caller;
    @RequestMapping("/sayHello")
    @ResponseBody
    public String sayHello(){
        return caller.sayHello();
    }
}
注意在使用服务间调用的一个坑!!!
堆栈溢出错误:

为什么会这样呢? 唔、、、我好艰难啊! 掉眼泪。。哇哇 哇
因为我在控制器里边声明的方法和server-provider中的方法是同名的,都是sayHello(),然后我就天真的直接写了return sayHello();这当然不行啦!!!这相当于递归操作呀,调用的是自己的sayHello(), sayHello()方法跑不出去,当然会报stackOverflowError(堆栈溢出错误)。
正确的做法是:---》
你应该使用@Authowire将接口sayHelloCaller注入,调用它的sayHello()呀!,我真是蠢到爆了! bang!

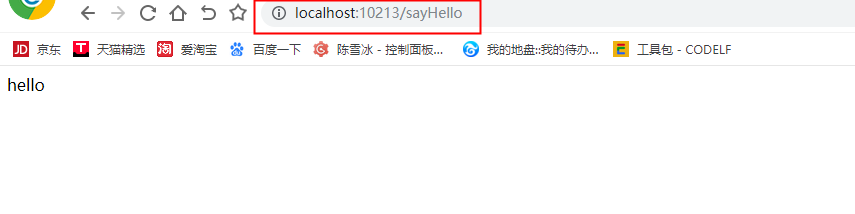
五).测试是否能成功调用
好啦,开启服务调用咱们看运行结果:
我在项目配置的server-provider的端口号是:10214,server-caller配置的端口号是10213,由下图可见,我们在server-caller服务中成功的访问了server-provider提供的sayHello服务。
使用Zuul网关实现服务的分发
一).使用idea构建Zull模块
web、spring cloud Discovery zull模块都选上
创建好模块如下:
二).配置网关服务
1).配置application.yml文件
设置路由映射路径:
zuul:
  routes:
    api-a: #用来区分不同服务的一个名字,可以随便取
       path: /client/** #zuul网关访问服务的一个路径
       serviceId: client-test #所要访问的服务对应的注册中心的名称
spring:
  application:
    name: gateway
server:
  port: 10215
zuul:
  routes:
    # 面向服务的路由
    api-a:
      path: /client/**
      serviceId: client-test #client-test 对应的是注册中心的服务的名称

      #服务分发的方式是这样的,我们通过localhost:10215/client访问,实际是将地址映射到了client-test这个服务的地址上

    # 传统的路由
    api-b-url:
      path: /caller/**
      #由传统的路由模式,我们可以知道用户访问的路由路径为localhost:10215/caller,将服务映射到了http://localhost:10213
      url: http://localhost:10213/
eureka:
  client:
    service-url:
      defaultZone: http://localhost:10211/eureka/
2).在启动类上加上注解@EnabelZullProxy
三).由zuul来控制服务的访问
测试,通过gateway(网关服务)来访问,上文的client(测试将服务注册到注册中心),server-caller(服务调用者)这两个服务。
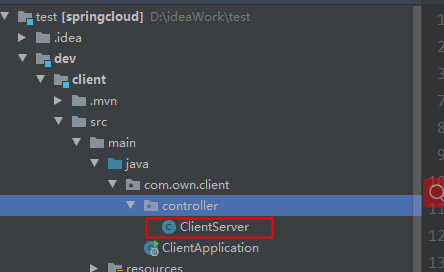
1).client服务中定义一个controller类,类名为ClientServer,类中定义一个sayHello()方法
/**
* @ Author:chenxuebing
* @ Date:2019/11/26 11:53
* @ Description:client端的服务
*/
@Controller
public class ClientServer {
@RequestMapping("/sayhello")
@ResponseBody
public String sayHello(){
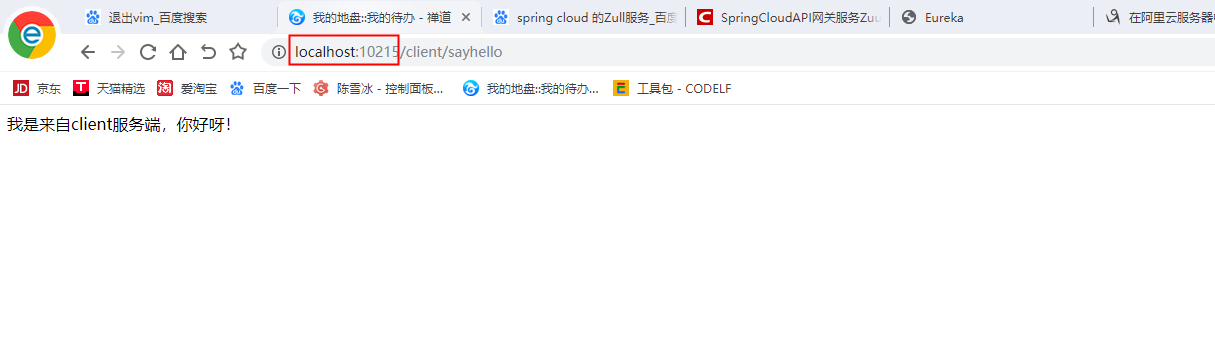
return "我是来自client服务端,你好呀!";
}
}
2).server-caller服务也定义controller类,类名为CallerServer,类中也定义衣蛾sayHello()方法
/**
 * @ Author:chenxuebing
 * @ Date:2019/11/26 13:35
 * @ Description:调用者服务端
 */
@Controller
public class CallerServer {
    @RequestMapping("/sayhello")
    @ResponseBody
    public String sayHello(){
        return "我是来自caller的服务端,你好呀!";
    }
}
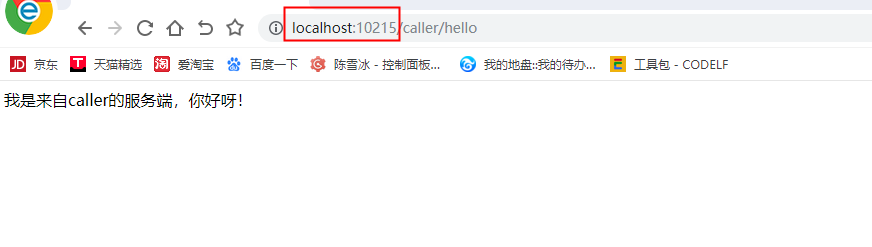
四).测试由zull来分发服务
三个服务:
gateway(网关服务): 端口号10215
client(测试注册中心服务): 端口号10216
server-caller(服务调用):端口号10213
由gateway分发对client、 server-caller服务的访问
测试:访问client的sayHello()方法
通过网关地址locallhost:10215/client 进行访问, client将地址映射到serviceId上对应的client服务对应的地址。
测试:访问server-caller的sayHello()方法
通过localhost:10215/caller进行访问,caller将地址映射到url对应的server-caller服务对应的服务地址。