CPF NetCore跨平台UI框架
系列教程
CPF 入门教程 - 样式和动画(三)
用样式可以对内部元素进行批量设置属性。
CPF里采用CSS作为样式描述。为什么用css描述样式?因为css结构简单明了。
Xaml和CSS的简单对比
<Style TagetType="Button">
  <Setter Property="Background" value="Red"></Setter>
  ......
</Style>
等同于
Button{
  Background:red;
  ......
}
css明显比xaml简洁
CPF中的css支持的选择器
TextBlock { Foreground:rgb(255,0,0);} 选择所有TextBlock类型的元素,类型不继承判断,比如自定义控件继承Button,那样式用Button的时候这个自定义控件不会应用该样式
.test{Foreground:rgb(255,0,0);} 选择所有包含test 类名的元素,类名通过Classes属性添加
#test{Foreground:rgb(255,0,0);} 选择所有Name属性为test的元素
[IsMouseOver=true]{…} 添加触发器
Button TextBlock{…} Button里的后代为TextBlock的元素,
Button>TextBlock{…} Button直接子元素为TextBlock的元素,
自定义类型要支持css设置,需要实现string的隐式转换,同时重写ToString,使格式一致
        public static implicit operator 自定义对象(string n)
        {
            return Parse(n);//自己写字符串解析和创建自定义对象
        }
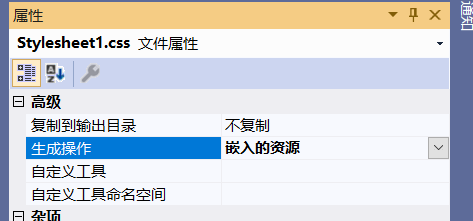
在窗体里调用 LoadStyleFile("res://ConsoleApp1/Stylesheet1.css"); 加载样式文件,一般样式文件内嵌,内嵌文件用res://开头访问

定义一个按钮样式
Button {
    BorderFill: #DCDFE6;
    IsAntiAlias: True;
    CornerRadius: 4,4,4,4;
    Background: #FFFFFF;
}

    Button[IsMouseOver=true] {
        BorderFill: rgb(198,226,255);
        Background: rgb(236,245,255);
        Foreground: rgb(64,158,255);
    }

    Button[IsPressed=true] {
        BorderFill: rgb(58,142,230);
    }
运行效果

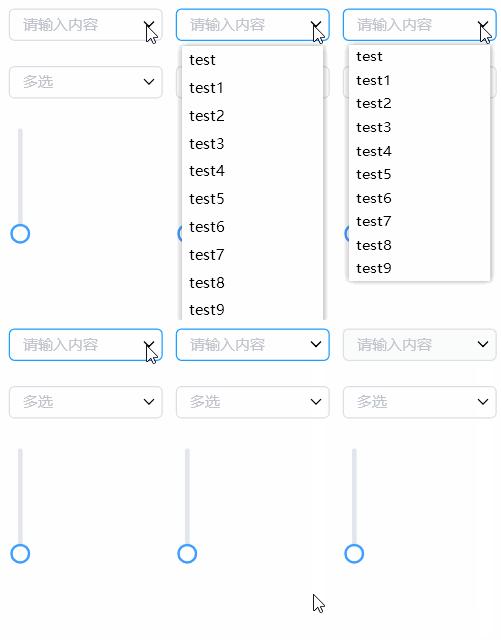
定义下拉框动态展开效果
@keyframes comboboxDropDown {
    0% {
        RenderTransform: scale(1,0.1);
    }

    100% {
        RenderTransform: scale(1,1);
    }
}

#DropDownPanel {
    RenderTransformOrigin: 50%,0;
}

#DropDownPopup[Visibility=Visible] #DropDownPanel {
    animation-name: comboboxDropDown;
    animation-duration: 0.1s;
    animation-iteration-count: 1;
    animation-fill-mode: forwards;
}

css里定义的动画,暂时不支持缓动效果,比如加速,减速,回弹等等
C#里使用动画
            RenderTransformOrigin = "100%,0";
            RenderTransform = new GeneralTransform { ScaleX = 0.1f };
            this.TransitionValue(a => a.RenderTransform, new GeneralTransform { ScaleX = 1 }, TimeSpan.FromSeconds(0.1f));
一般简单的动画直接使用TransitionValue方法就行,对某个属性过渡到某个值
如果要做复杂的动画,就需要用Storyboard,Timelines里可以添加动画播放流程,可以分成多段,流程值是0-1,意思就是这次的结束时间,开始是上一段的结束,最后一个必须是1,里面可以加不同KeyFrames ,定义不同属性的变换
             var storyboard = new Storyboard
                {
                    Timelines =
                    {
                        new Timeline(1)
                        {
                            KeyFrames =
                            {
                                new KeyFrame<SolidColorFill>{ Property=nameof(Control.Background), Value="0,0,0,100" }
                            }
                        }
                    }
                };
            }
            storyboard.Start(mask, TimeSpan.FromSeconds(0.3), 1, EndBehavior.Reservations);