spring入门案例之AOP(四)
什么是AOP
AOP(Aspect-OrientedProgramming,面向切面编程),可以说是OOP(Object-Oriented Programing,面向对象编程)的补充和完善。OOP引入封装、继承和多态性等概念来建立一种对象层次结构,用以模拟公共行为的一个集合。当我们需要为分散的对象引入公共行为的时候,OOP则显得无能为力。也就是说,OOP允许你定义从上到下的关系,但并不适合定义从左到右的关系。例如日志功能。日志代码往往水平地散布在所有对象层次中,而与它所散布到的对象的核心功能毫无关系。对于其他类型的代码,如安全性、异常处理和透明的持续性也是如此。这种散布在各处的无关的代码被称为横切(cross-cutting)代码,在OOP设计中,它导致了大量代码的重复,而不利于各个模块的重用。
而AOP技术则恰恰相反,它利用一种称为“横切”的技术,剖解开封装的对象内部,并将那些影响了多个类的公共行为封装到一个可重用模块,并将其名为“Aspect”,即方面。所谓“方面”,简单地说,就是将那些与业务无关,却为业务模块所共同调用的逻辑或责任封装起来,便于减少系统的重复代码,降低模块间的耦合度,并有利于未来的可操作性和可维护性。AOP代表的是一个横向的关系,如果说“对象”是一个空心的圆柱体,其中封装的是对象的属性和行为;那么面向方面编程的方法,就仿佛一把利刃,将这些空心圆柱体剖开,以获得其内部的消息。而剖开的切面,也就是所谓的“方面”了。然后它又以巧夺天功的妙手将这些剖开的切面复原,不留痕迹。
一 AOP的基本概念
- (1)Aspect(切面):通常是一个类,里面可以定义切入点和通知
- (2)JointPoint(连接点):程序执行过程中明确的点,一般是方法的调用
- (3)Advice(通知):AOP在特定的切入点上执行的增强处理,有before,after,afterReturning,afterThrowing,around
- (4)Pointcut(切入点):就是带有通知的连接点,在程序中主要体现为书写切入点表达式
- (5)AOP代理:AOP框架创建的对象,代理就是目标对象的加强。Spring中的AOP代理可以使JDK动态代理,也可以是CGLIB代理,前者基于接口,后者基于子类
通知方法:
- 前置通知:在我们执行目标方法之前运行(@Before)
- 后置通知:在我们目标方法运行结束之后 ,不管有没有异常(@After)
- 返回通知:在我们的目标方法正常返回值后运行(@AfterReturning)
- 异常通知:在我们的目标方法出现异常后运行(@AfterThrowing)
- 环绕通知:动态代理, 需要手动执行joinPoint.procced()(其实就是执行我们的目标方法执行之前相当于前置通知, 执行之后就相当于我们后置通知(@Around)
二 Spring AOP
Spring中的AOP代理还是离不开Spring的IOC容器,代理的生成,管理及其依赖关系都是由IOC容器负责,Spring默认使用JDK动态代理,在需要代理类而不是代理接口的时候,Spring会自动切换为使用CGLIB代理,不过现在的项目都是面向接口编程,所以JDK动态代理相对来说用的还是多一些。
三 话不多说直接上代码:
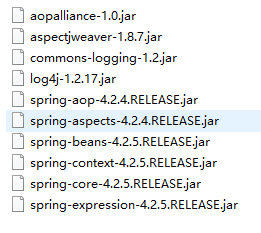
1、所需要的jar包:
我们举个房东收房租的例子:
带租客看房
谈价格
签合同
收房租
交钥匙
这是一个房东要做的事情,当我们使用了SpringAOP我们就会只关注签合同和收房租,而两头的事情我们交给中介:
定义一个房东类:
package demo9.pojo;

import org.springframework.stereotype.Component;

/**
 * @Author 杜坡
 * @Date 2020/7/2 9:36
 * @Version 1.0
 */
    @Component("landlord")
    public class Landlord {

        public void service() {
        // 仅仅只是实现了核心的业务功能
        System.out.println("签合同");
        System.out.println("收房租");
        }
    }
定义中介类:
package demo9.pojo;


import org.aspectj.lang.annotation.After;
import org.aspectj.lang.annotation.Aspect;
import org.aspectj.lang.annotation.Before;
import org.springframework.stereotype.Component;

/**
 * @Author dupo
 * @Date 2020/7/2 9:38
 * @Version 1.0
 */
@Component
@Aspect
public class Broker {
    @Before("execution(* demo9.pojo.Landlord.service())")
    public void before(){
        System.out.println("带租客看房");
        System.out.println("谈价格");
    }

    @After("execution(* demo9.pojo.Landlord.service())")
    public void after(){
        System.out.println("交钥匙");
    }
}
编写xml:
<?xml version="1.0" encoding="UTF-8"?>
<beans xmlns="http://www.springframework.org/schema/beans"
       xmlns:xsi="http://www.w3.org/2001/XMLSchema-instance"
       xmlns:context="http://www.springframework.org/schema/context"
       xmlns:aop="http://www.springframework.org/schema/aop"
       xsi:schemaLocation="http://www.springframework.org/schema/beans
     http://www.springframework.org/schema/beans/spring-beans.xsd
    http://www.springframework.org/schema/context
    https://www.springframework.org/schema/context/spring-context.xsd
    http://www.springframework.org/schema/aop
    https://www.springframework.org/schema/aop/spring-aop.xsd">


    <context:component-scan base-package="demo9.pojo" />
    <context:component-scan base-package="demo9.pojo" />

    <!--全局扫描-->
   <!-- <context:component-scan base-package="demo9.pojo*"></context:component-scan>-->
    <!--开启aop注解  -->
    <aop:aspectj-autoproxy/>
</beans>
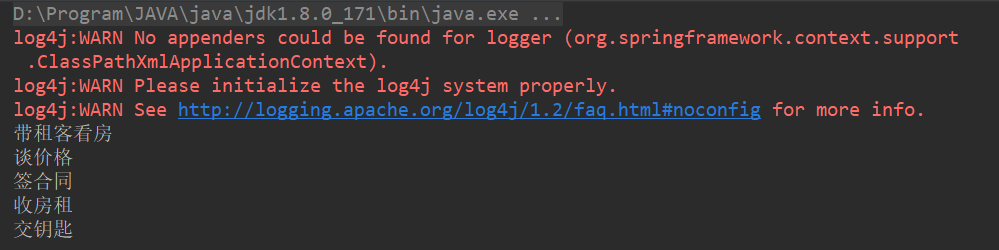
测试:

打印输出:
我们来简化一下:修改中介类:
package demo9.mapper;


import org.aspectj.lang.ProceedingJoinPoint;
import org.aspectj.lang.annotation.*;
import org.springframework.stereotype.Component;

/**
 * @Author dupo
 * @Date 2020/7/2 9:38
 * @Version 1.0
 */
@Component
@Aspect
public class Broker {
    @Pointcut("execution(* demo9.mapper.Landlord.service2())")
    public  void Iservice(){
        System.out.println("————————————切点—————————————");
    }
    /*
    * 环绕通知
    * */
  @Around("Iservice()")
    public  void around(ProceedingJoinPoint joinPoint){
      System.out.println("————————————前置通知—————————————");
      System.out.println("带租客看房");
      System.out.println("谈价格");

      try {
          joinPoint.proceed();
      } catch (Throwable throwable) {
          throwable.printStackTrace();
      }
      System.out.println("————————————后置通知—————————————");
      System.out.println("交钥匙");
  }
}
打印输出:

使用环绕通知简化:
package demo9.mapper;


import org.aspectj.lang.ProceedingJoinPoint;
import org.aspectj.lang.annotation.*;
import org.springframework.stereotype.Component;

/**
 * @Author dupo
 * @Date 2020/7/2 9:38
 * @Version 1.0
 */
@Component
@Aspect
public class Broker {
    @Pointcut("execution(* demo9.mapper.Landlord.service2())")
    public  void Iservice(){
        System.out.println("————————————切点—————————————");
    }
    /*
    * 环绕通知
    * */
  @Around("Iservice()")
    public  void around(ProceedingJoinPoint joinPoint){
      System.out.println("————————————前置通知—————————————");
      System.out.println("带租客看房");
      System.out.println("谈价格");

      try {
          joinPoint.proceed();
      } catch (Throwable throwable) {
          throwable.printStackTrace();
      }
      System.out.println("————————————后置通知—————————————");
      System.out.println("交钥匙");
  }
}
每次别忘记修改xml:

打印输出:

最后我附上整体的结构:

测试代码:
package demo9.junit;

import demo9.pojo2.Landlord;
import org.junit.Test;
import org.springframework.context.ApplicationContext;
import org.springframework.context.support.ClassPathXmlApplicationContext;

/**
 * @Author
 * @Date 2020/7/2 9:48
 * @Version 1.0
 */
public class AopTest {
    ApplicationContext applicationContext = new ClassPathXmlApplicationContext("aop.xml");
    @Test
    public void aopTeat(){

        demo9.pojo.Landlord landlord = (demo9.pojo.Landlord)applicationContext.getBean("landlord", demo9.pojo.Landlord.class);
        landlord.service();
    }

    @Test
    public void aopTest(){

        Landlord landlord = (Landlord)applicationContext.getBean("landlord1",Landlord.class);
        landlord.service1();
    }
    /*
    * 使用环绕通知代替前置通知和后置通知
    * */
    @Test
    public void resoutTest(){
        demo9.mapper.Landlord landlord = (demo9.mapper.Landlord)applicationContext.getBean("landlord2", demo9.mapper.Landlord.class);
        landlord.service2();
    }

}