第二天内容:想来想去玩个ssm小demo吧
1.创建表
2..引入相关mybatis 数据库jar:
<!--mybatis  -->
<dependency>
  <groupId>org.mybatis.spring.boot</groupId>
  <artifactId>mybatis-spring-boot-starter</artifactId>
  <version>1.1.1</version>
</dependency>
<dependency>
  <groupId>mysql</groupId>
   <artifactId>mysql-connector-java</artifactId>
  <version>5.1.44</version>
</dependency>
3.在application.properties文件中 配置数据库驱动
spring.datasource.url=jdbc:mysql://localhost/springboot
spring.datasource.username=root
spring.datasource.password=root
spring.datasource.driver-class-name=com.mysql.jdbc.Driver

4.编写三层 bean

beans
package com.chinasoft.bean;

public class User {

    private Integer id;
    private String name;
    public Integer getId() {
        return id;
    }
    public void setId(Integer id) {
        this.id = id;
    }
    public String getName() {
        return name;
    }
    public void setName(String name) {
        this.name = name;
    }
}
dao
package com.chinasoft.dao;

import java.util.List;

import org.apache.ibatis.annotations.Mapper;
import org.apache.ibatis.annotations.Select;

import com.chinasoft.bean.User;

@Mapper //集成mybatis
public interface UserDao {
    @Select("select id ,name from user_tba")  //也可以写配置文件形式,通过配置读取sql,我这里就不多讲了
    public List<User> getUser();

     @Update("UPDATE user_tba SET name = #{name} WHERE id =#{id}")
         int updateById(User user);

         @Insert("insert INTO  user_tba (name) values(#{name})")
          void insert(User user);

         @Delete("DELETE FROM  user_tba WHERE id = #{id} ")
         int delete(Long id);


}
Service
package com.chinasoft.service;

import java.util.List;

import com.chinasoft.bean.User;

public interface UserService {
   public List<User> getUser();
    int updateById(User user);
    void insert(User user);
    int delete(Long id);
}
ServiceImpl
package com.chinasoft.service;

import java.util.List;

import org.springframework.beans.factory.annotation.Autowired;
import org.springframework.stereotype.Service;

import com.chinasoft.bean.User;
import com.chinasoft.dao.UserDao;
@Service
public class UserServiceImpl implements UserService {
    @Autowired
    private UserDao userdao;


    @Override
    public List<User> getUser() {
        return userdao.queryAll();
    }

    @Override
    public int updateById(User user) {
        return userdao.updateById(user);
    }

    @Override
    public void insert(User user) {
        userdao.insert(user);
    }

    @Override
    public int delete(Long id) {
        return userdao.delete(id);
    }


}
Contorller
package com.chinasoft.controller;

import java.util.List;

import org.springframework.beans.factory.annotation.Autowired;
import org.springframework.stereotype.Controller;
import org.springframework.web.bind.annotation.RequestMapping;
import org.springframework.web.bind.annotation.ResponseBody;

import com.chinasoft.bean.User;
import com.chinasoft.service.UserService;

@Controller
//@RestClientTest
public class HelloSpringBootContorller {
    @Autowired
    private UserService userService;

    @RequestMapping(value ={"/show"})
    @ResponseBody
    public List<User>  getUser(){
        List<User> user = userService.getUser();
         return user;
    }
    @RequestMapping(value ={"/update"})
      public void updateUser(){
        User user = new User();
        user.setId(1);
        user.setName("杨幂");
         userService.updateById(user);
      }


    @RequestMapping(value ={"/insert"})
    public void insertUser(){
        User user = new User();
        user.setName("赵丽颖");
        userService.insert(user);
    }


    @RequestMapping(value ={"/delete"})
    public void deleteUser(){

     userService.delete(4L);
    }

}
运行配置:
package com.chinasoft.springboot;

import org.mybatis.spring.annotation.MapperScan;
import org.springframework.boot.SpringApplication;
import org.springframework.boot.autoconfigure.SpringBootApplication;
import org.springframework.context.annotation.ComponentScan;

@SpringBootApplication
@ComponentScan(basePackages = "com.chinasoft.*" )
@MapperScan(basePackages = "com.chinasoft.dao") //需注意 此为扫描数据库资源文件
public class SpringbootApplication {

	public static void main(String[] args) {
		SpringApplication.run(SpringbootApplication.class, args);
	}
}
启动:

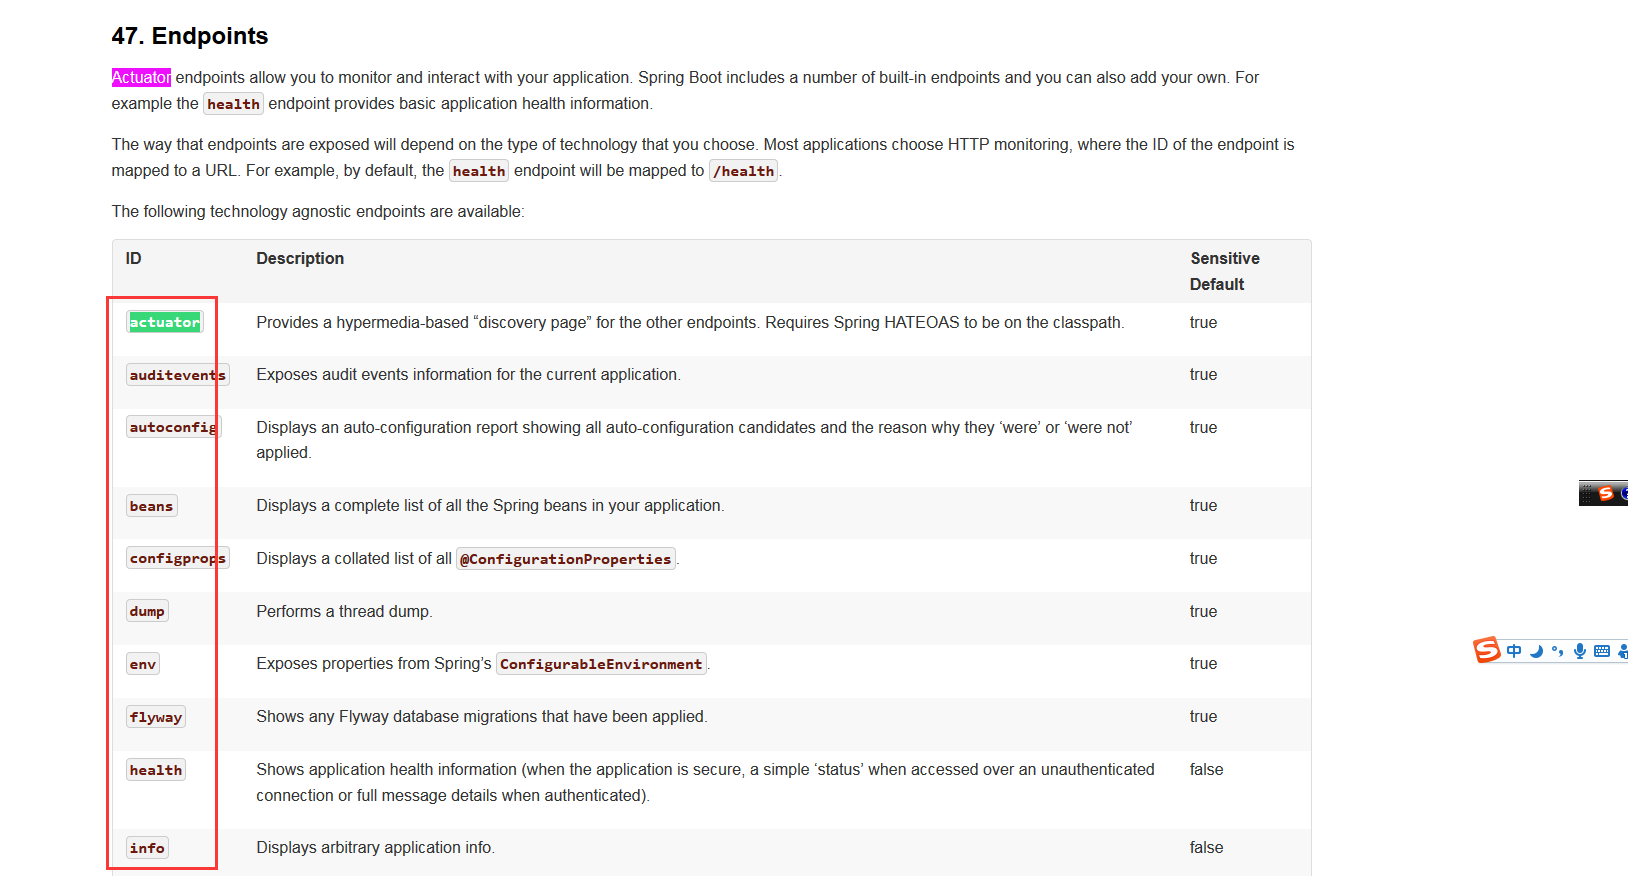
添加监控运维:(查看请求及jvm的运行信息)
<!--监控运维  -->
		<dependency>
			<groupId>org.springframework.boot</groupId>
			<artifactId>spring-boot-starter-actuator</artifactId>
		</dependency>

监控运维作用:
当请求访问时可以访问监控,看到用户的请求,操作信息,及jvm的运行状态。。。信息。
https://docs.spring.io/spring-boot/docs/1.5.9.RELEASE/reference/htmlsingle/
搜索actuator查看相关属性
例如访问:http://localhost:8082/beans 显示的监控信息。。。

细节概要:
1.mybatis怎么和实体类映射的呢?可访问mybatis官网(http://blog.mybatis.org/mybatis-3/java-api.html)
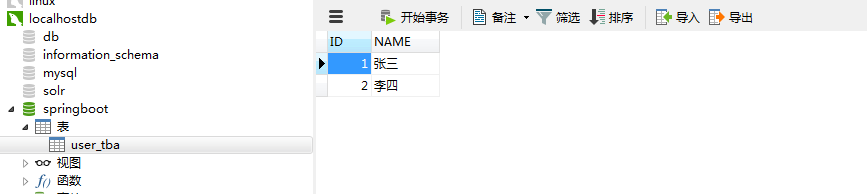
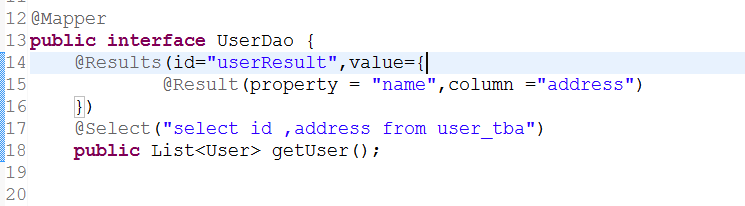
A:@Mapper 自动扫描字段与实体类相对性给予映射。若不同则为空,eg:将数据库中的NAME字段改为address,运行结果如下,

如果手动映射如下:

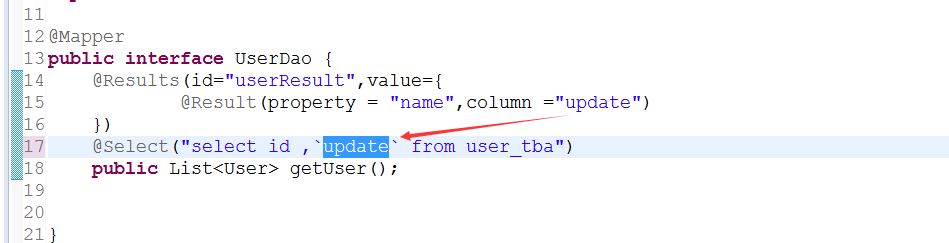
2.关键字
sql中存在关键字 需要在关键字前后加反引号 (键盘英文格式下 ctrl +alt +~ )
总结:
Spring Boot集成mybatis时的一些注意的地方,也可以看出来SpringBoot确实简介方便,以前用mybatis还要封装查询query,而现在直接@select便可以直接查询,还是比较方便的开发的,这也应该是一种趋势,
技术交流群,海量学习资料免费获取:Q群:289683917