一、生成bundle命令
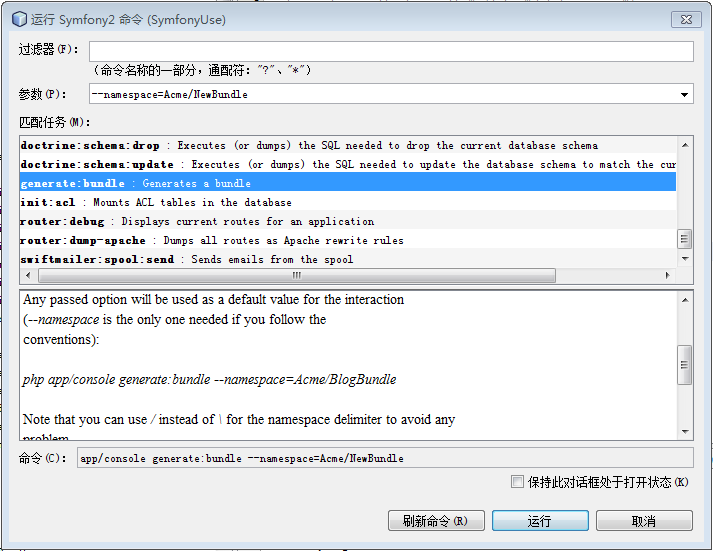
Welcome to the Symfony2 bundle generator
Your application code must be written in bundles. This command helps you generate them easily.
Each bundle is hosted under a namespace (like Acme/Bundle/BlogBundle). The namespace should begin with a "vendor" name like your company name, your project name, or your client name, followed by one or more optional category sub-namespaces, and it should end with the bundle name itself (which must have Bundle as a suffix).
See http://symfony.com/doc/current/cookbook/bundles/best_practices.html#index-1 for more details on bundle naming conventions.
Use / instead of \ for the namespace delimiter to avoid any problem.
Bundle namespace [Acme/NewBundle]:
In your code, a bundle is often referenced by its name. It can be the concatenation of all namespace parts but it's really up to you to come up with a unique name (a good practice is to start with the vendor name). Based on the namespace, we suggest AcmeNewBundle.
Bundle name [AcmeNewBundle]:
The bundle can be generated anywhere. The suggested default directory uses the standard conventions.
Target directory [D:/webserver/htdocs/SymfonyUse/src]:
Determine the format to use for the generated configuration.
Configuration format (yml, xml, php, or annotation) [annotation]: yml
To help you getting started faster, the command can generate some code snippets for you.
Do you want to generate the whole directory structure [no]? yes
Summary before generation
You are going to generate a "Acme\NewBundle\AcmeNewBundle" bundle in "D:/webserver/htdocs/SymfonyUse/src/" using the "yml" format.
Do you confirm generation [yes]? yes
Bundle generation
Generating the bundle code: OK Checking that the bundle is autoloaded: OK Confirm automatic update of your Kernel [yes]? yes Enabling the bundle inside the Kernel: OK Confirm automatic update of the Routing [yes]? yes Importing the bundle routing resource: OK
You can now start using the generated code!
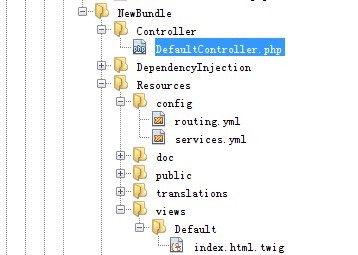
然后可在项目中看到 NewBundle

二、多实体可以公用实体
1、这里NewBundle 可以使用DemoBundle里的实体只要引入便可以了。
打开NewBundle下Controller=>DefaultController.php
写入获取实体的逻辑如下:

可以看到我们在一个bundle里引用了另一个bundle的实体类AcmeDemoBundle:SymfonyUse。这里需要提醒一下,我们获取实体管理使用默认的,$this->getDoctrine()->getEntityManager();便会连接默认的数据库连接,若要连接不同的数据库会有所出入,这在后面要写的多数据库连接中会说到。
2、接着修改views=>Default=>index.html.twig 如下所示
欢迎!
Hello {{ name }}!
</br>
获取所有实体内容如下:
Entitys{{entitys}}!
3、在你的浏览器中输入http://localhost/SymfonyUse/web/app_dev.php/hello/luf
将可以看到

4、若要在非开发环境下使用AcmeDemoBundle 如http://localhost/SymfonyUse/web/app.php/hello/luf
需要在 web=>app.php中
修改$kernel = new AppKernel('prod', false); 为真=》$kernel = new AppKernel('prod', true);
并在app=>AppKernel.php中注册bundles函数中
加入new Acme\DemoBundle\AcmeDemoBundle()即可。
5、Symfony2 的运行流程
由这个简单测试,可以看到。在Control控制层中的Action方法中调用实体,然后通过方法体中的render向需要显示的页面传输数据,即供View显示层显示。
其中实体调用使用Doctrine遵循ORM实现数据层连接。当然数据的调用,也可以使用pdo的方式。