文档编写目的:
记录从0-1搭建DolphinScheduler开发环境的过程(Windows)
DolphinScheduler官网地址:https://dolphinscheduler.apache.org/zh-cn/
安装zookeeper
下载链接:
https://www.apache.org/dyn/closer.lua/zookeeper/zookeeper-3.4.14/zookeeper-3.4.14.tar.gz
[root@node2 soft]# ls
zookeeper-3.4.14  zookeeper-3.4.14.tar.gz
在conf目录下新建zoo_sample.cfg文件的的副本,并将副本改名为zoo.cfg
[root@node2 soft]# cd zookeeper-3.4.14
[root@node2 zookeeper-3.4.14]#
[root@node2 zookeeper-3.4.14]#
[root@node2 zookeeper-3.4.14]# ll
total 1672
drwxr-xr-x  2 2002 2002     223 Jun 29 11:22 bin
-rw-rw-r--  1 2002 2002   97426 Mar  7  2019 build.xml
drwxr-xr-x  2 2002 2002      92 Jun 29 11:22 conf
drwxr-xr-x  2 2002 2002    4096 Mar  7  2019 dist-maven
-rw-rw-r--  1 2002 2002    1709 Mar  7  2019 ivysettings.xml
-rw-rw-r--  1 2002 2002   10742 Mar  7  2019 ivy.xml
drwxr-xr-x  4 2002 2002     308 Mar  7  2019 lib
-rw-rw-r--  1 2002 2002   11970 Mar  7  2019 LICENSE.txt
-rw-rw-r--  1 2002 2002    3132 Mar  7  2019 NOTICE.txt
-rw-rw-r--  1 2002 2002   31622 Mar  7  2019 pom.xml
-rw-rw-r--  1 2002 2002    1765 Mar  7  2019 README.md
-rw-rw-r--  1 2002 2002    1770 Mar  7  2019 README_packaging.txt
drwxr-xr-x  3 2002 2002      22 Mar  7  2019 src
-rw-rw-r--  1 2002 2002 1515359 Mar  7  2019 zookeeper-3.4.14.jar
-rw-rw-r--  1 2002 2002     836 Mar  7  2019 zookeeper-3.4.14.jar.asc
-rw-rw-r--  1 2002 2002      33 Mar  7  2019 zookeeper-3.4.14.jar.md5
-rw-rw-r--  1 2002 2002      41 Mar  7  2019 zookeeper-3.4.14.jar.sha1
drwxr-xr-x  3 2002 2002      47 Mar  7  2019 zookeeper-client
drwxr-xr-x 12 2002 2002    4096 Mar  7  2019 zookeeper-contrib
drwxr-xr-x  7 2002 2002    4096 Mar  7  2019 zookeeper-docs
drwxr-xr-x  3 2002 2002      35 Mar  7  2019 zookeeper-it
drwxr-xr-x  4 2002 2002      46 Mar  7  2019 zookeeper-jute
drwxr-xr-x  5 2002 2002     176 Mar  7  2019 zookeeper-recipes
drwxr-xr-x  3 2002 2002      32 Mar  7  2019 zookeeper-server
[root@node2 zookeeper-3.4.14]#
[root@node2 zookeeper-3.4.14]# cd conf/
[root@node2 conf]#
[root@node2 conf]# ll
total 16
-rw-rw-r-- 1 2002 2002  535 Mar  7  2019 configuration.xsl
-rw-rw-r-- 1 2002 2002 2161 Mar  7  2019 log4j.properties
-rw-r--r-- 1 root root  941 Jun 29 11:22 zoo.cfg
-rw-rw-r-- 1 2002 2002  922 Mar  7  2019 zoo_sample.cfg
本地启zk需要注意下 zk的数据目录
[root@node2 conf]# cat zoo_sample.cfg
# The number of milliseconds of each tick
tickTime=2000
# The number of ticks that the initial
# synchronization phase can take
initLimit=10
# The number of ticks that can pass between
# sending a request and getting an acknowledgement
syncLimit=5
# the directory where the snapshot is stored.
# do not use /tmp for storage, /tmp here is just
# example sakes.
#dataDir=/tmp/zookeeper
dataDir=/opt/soft/zookeeperdata/zookeeper
# the port at which the clients will connect
clientPort=2181
# the maximum number of client connections.
# increase this if you need to handle more clients
#maxClientCnxns=60
#
# Be sure to read the maintenance section of the
# administrator guide before turning on autopurge.
#
# http://zookeeper.apache.org/doc/current/zookeeperAdmin.html#sc_maintenance
#
# The number of snapshots to retain in dataDir
#autopurge.snapRetainCount=3
# Purge task interval in hours
# Set to "0" to disable auto purge feature
#autopurge.purgeInterval=1
启动zookeeper
# 启动zk
./zkServer.sh start
# 停止zk
./zkServer.sh stop
[root@node2 bin]# ll
total 88
-rwxr-xr-x 1 2002 2002   232 Mar  7  2019 README.txt
-rwxr-xr-x 1 2002 2002  1937 Mar  7  2019 zkCleanup.sh
-rwxr-xr-x 1 2002 2002  1056 Mar  7  2019 zkCli.cmd
-rwxr-xr-x 1 2002 2002  1534 Mar  7  2019 zkCli.sh
-rwxr-xr-x 1 2002 2002  1759 Mar  7  2019 zkEnv.cmd
-rwxr-xr-x 1 2002 2002  2919 Mar  7  2019 zkEnv.sh
-rwxr-xr-x 1 2002 2002  1089 Mar  7  2019 zkServer.cmd
-rwxr-xr-x 1 2002 2002  6773 Mar  7  2019 zkServer.sh
-rwxr-xr-x 1 2002 2002   996 Mar  7  2019 zkTxnLogToolkit.cmd
-rwxr-xr-x 1 2002 2002  1385 Mar  7  2019 zkTxnLogToolkit.sh
-rw-r--r-- 1 root root 41931 Jun 30 15:28 zookeeper.out
zk安装完成
[root@node2 bin]# netstat -tunlp | grep 2181
tcp        0      0 :::2181                 :::*                    LISTEN      26788/java
获取代码
git clone https://github.com/apache/incubator-dolphinscheduler.git
后端开发环境搭建
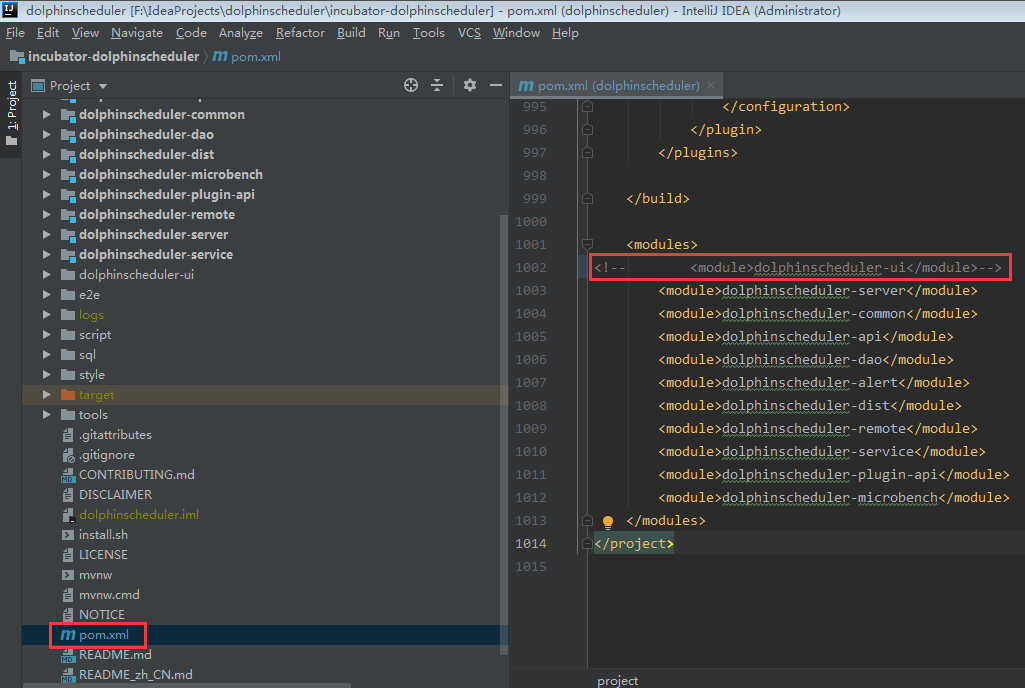
导入idea,刷下maven,执行源码编译命令,在pom中注释掉ui模块
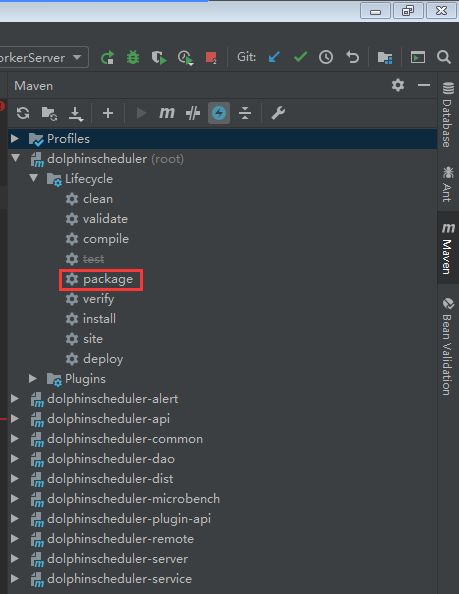
执行编译命令
mvn -U clean package -Prelease -Dmaven.test.skip=true
在apiserver启动类上指定配置文件
@PropertySource(ignoreResourceNotFound = false, value = "classpath:application-api.properties")

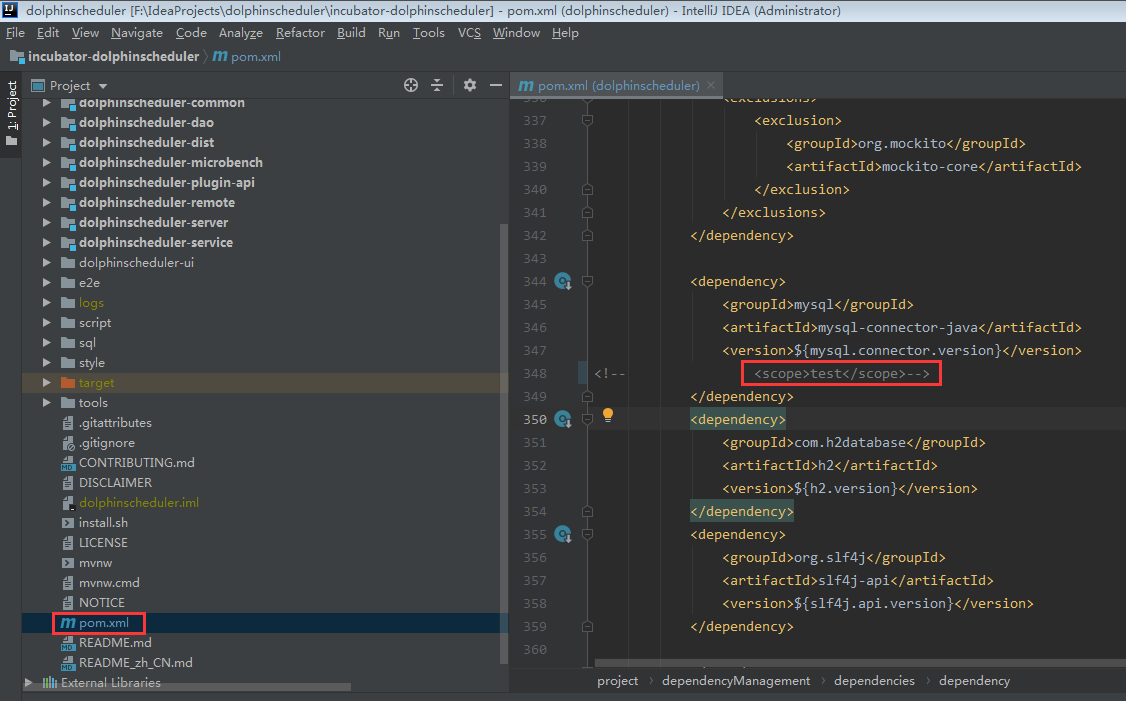
去除pom中的mysql的scope
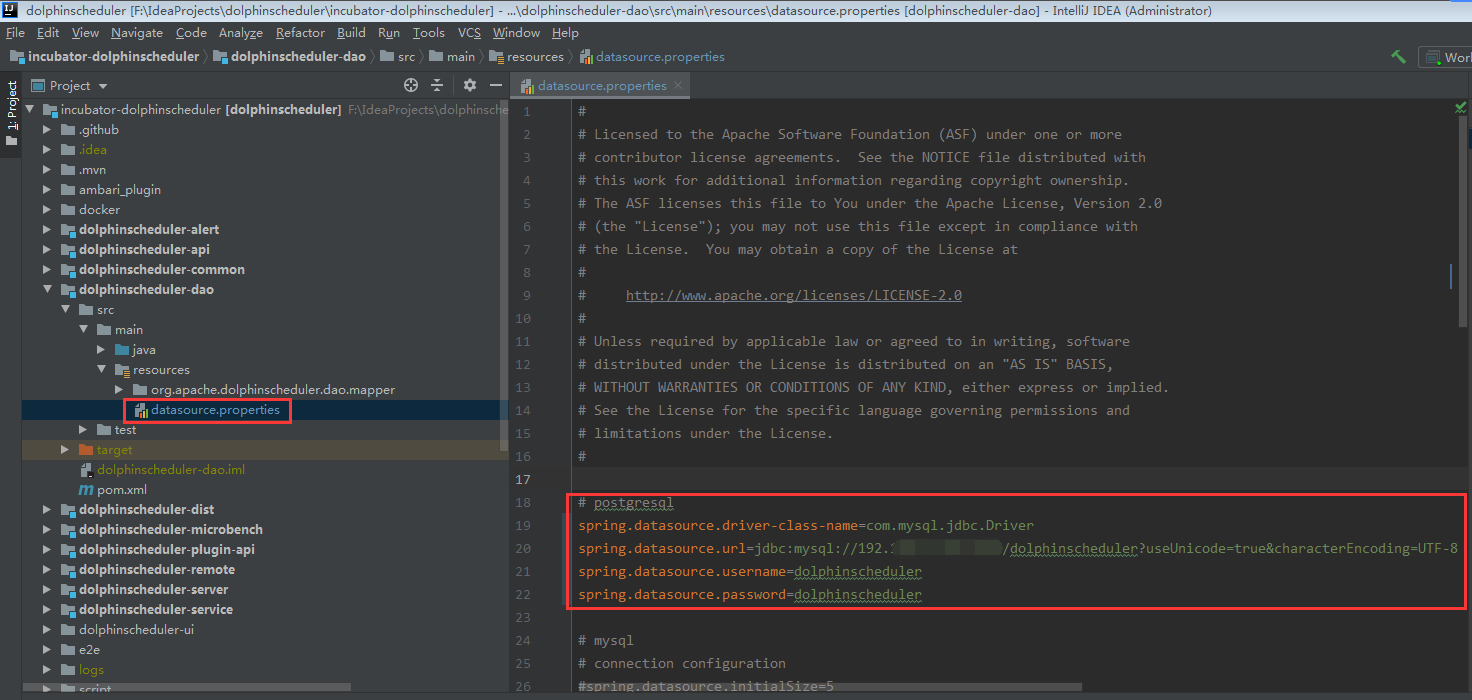
配置dao模块中的数据库连接信息
spring.datasource.driver-class-name=com.mysql.jdbc.Driver
spring.datasource.url=jdbc:mysql://192.168.x.xxx:3306/dolphinscheduler?useUnicode=true&characterEncoding=UTF-8
spring.datasource.username=dolphinscheduler
spring.datasource.password=dolphinscheduler
配置zk连接信息

指定各模块的配置文件
@PropertySource(ignoreResourceNotFound = false, value = "classpath:master.properties")
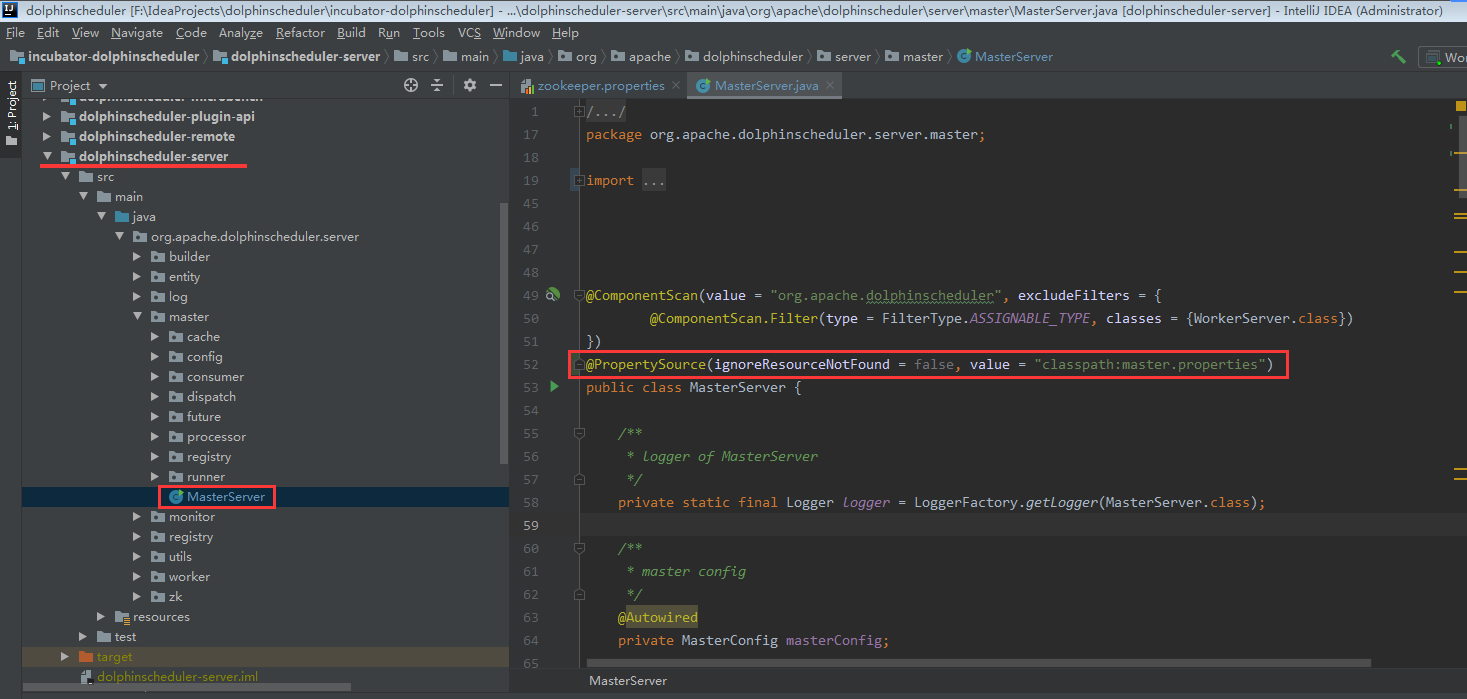
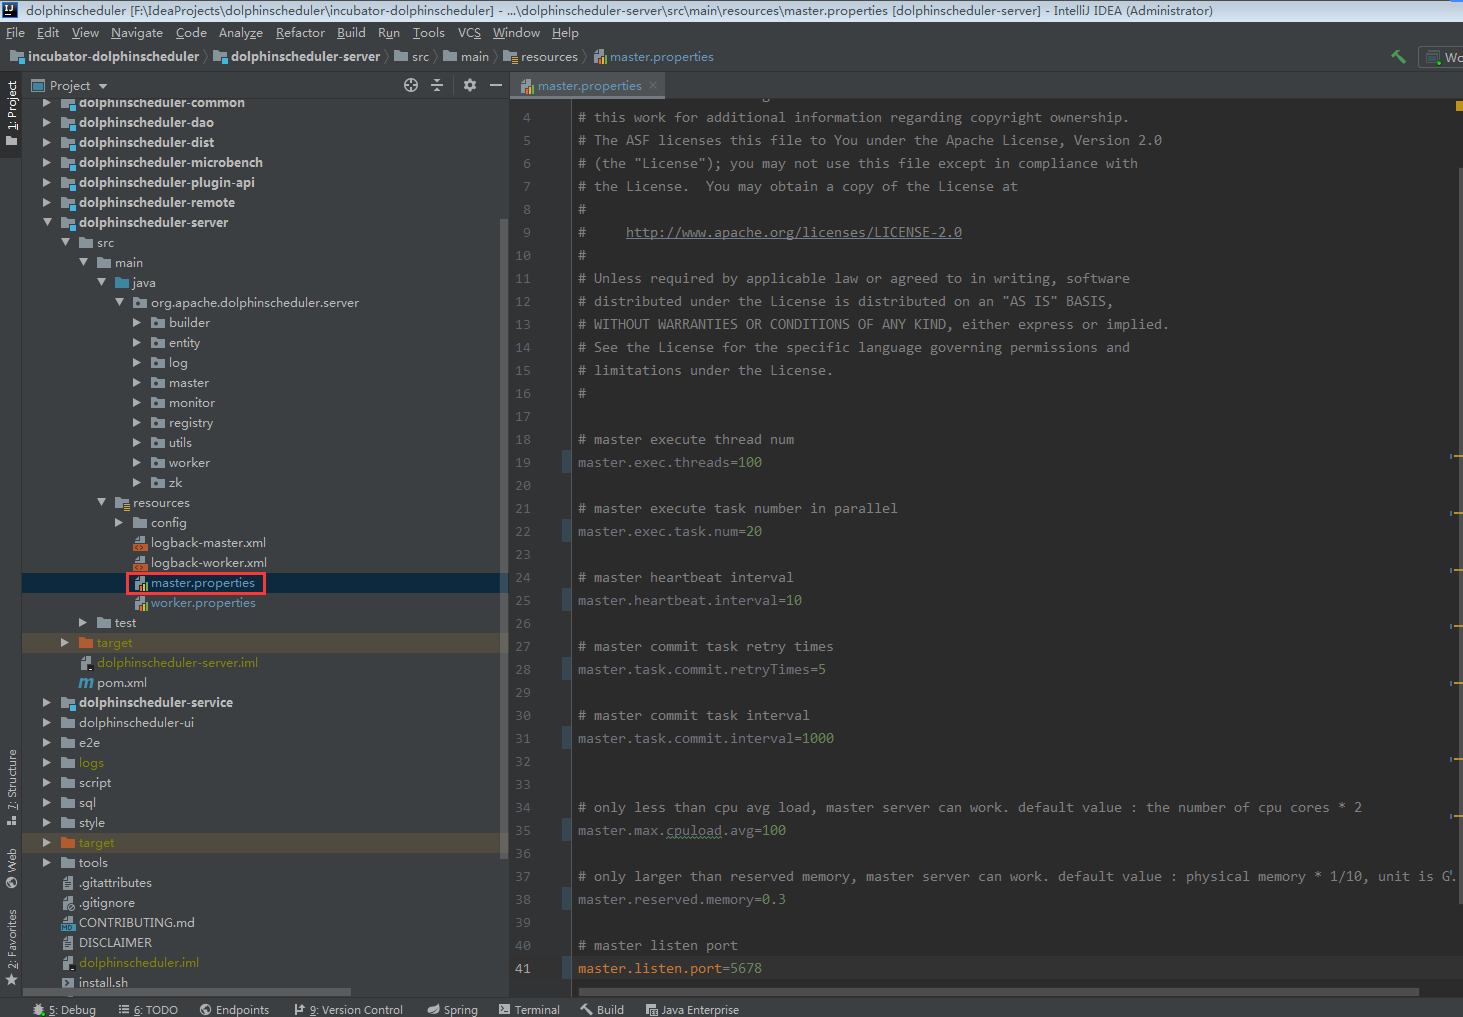
master.properties
@PropertySource(ignoreResourceNotFound = false, value = "classpath:worker.properties")
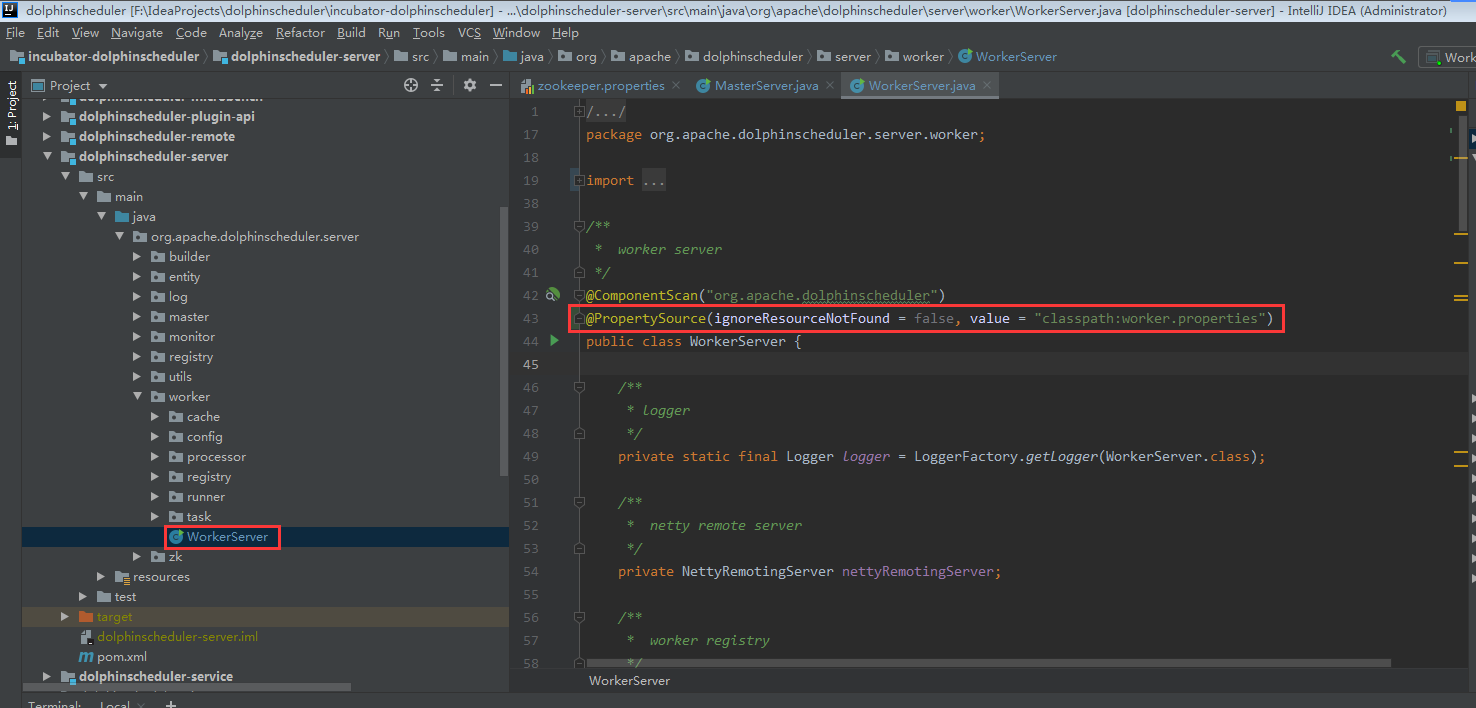
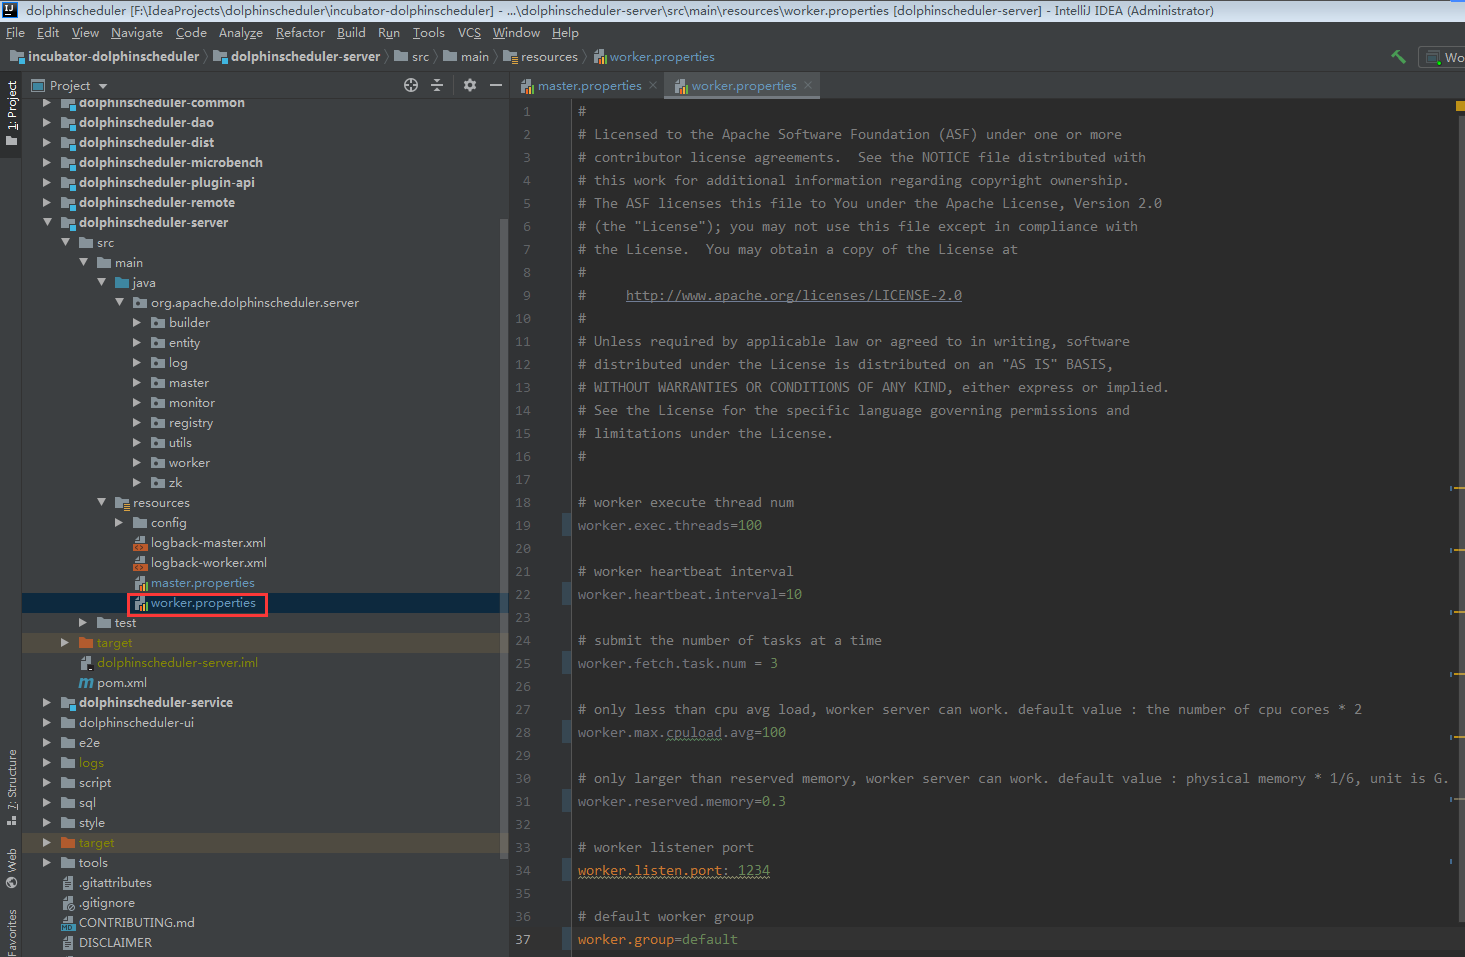
worker.properties
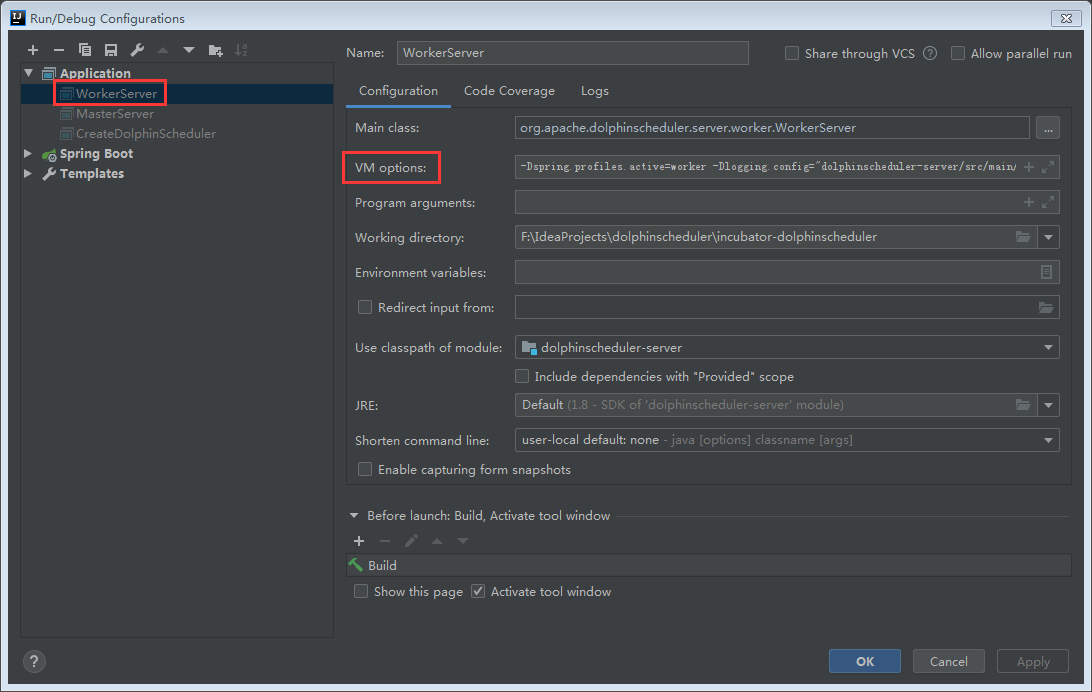
在worker-server启动的vm option中添加日志配置,否则会出现task instance的log path为空,导致本地调试不正常
-Dspring.profiles.active=worker -Dlogging.config="dolphinscheduler-server/src/main/resources/logback-worker.xml"
启动三个服务 api master worker, 正常启动表明后端开发环境搭建完成
前端开发环境搭建
运行npm install

初始化数据库
在mysql中执行数据库创建命令
CREATE DATABASE dolphinscheduler DEFAULT CHARACTER SET utf8 DEFAULT COLLATE utf8_general_ci;
CREATE USER 'dscheduler'@'%' IDENTIFIED BY 'dscheduler';
GRANT ALL PRIVILEGES ON dolphinscheduler.* TO 'dscheduler'@'%' IDENTIFIED BY 'dscheduler';
flush privileges;
执行dao模块下的CreateDolphinScheduler
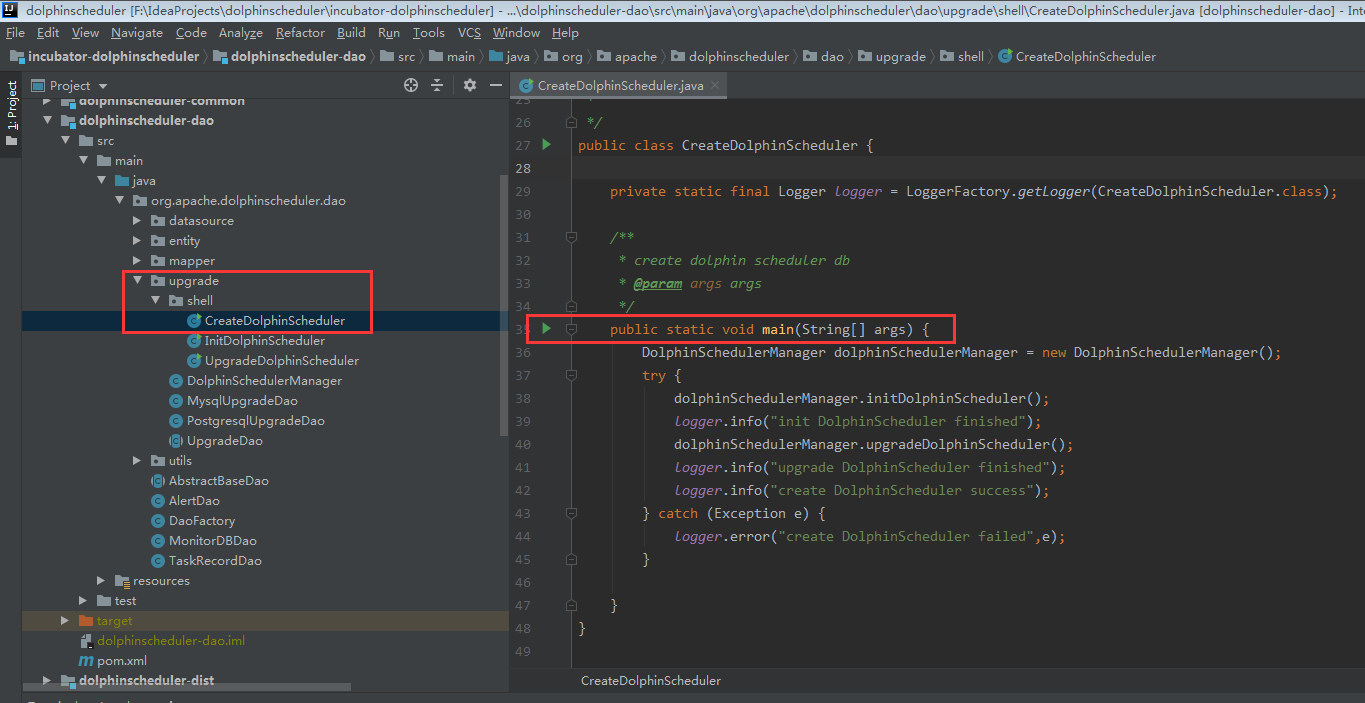
数据库创建成功
启动前后端服务
在idea中启动 api master worker

修改前端项目中的.env文件

运行npm run start启动前端页面
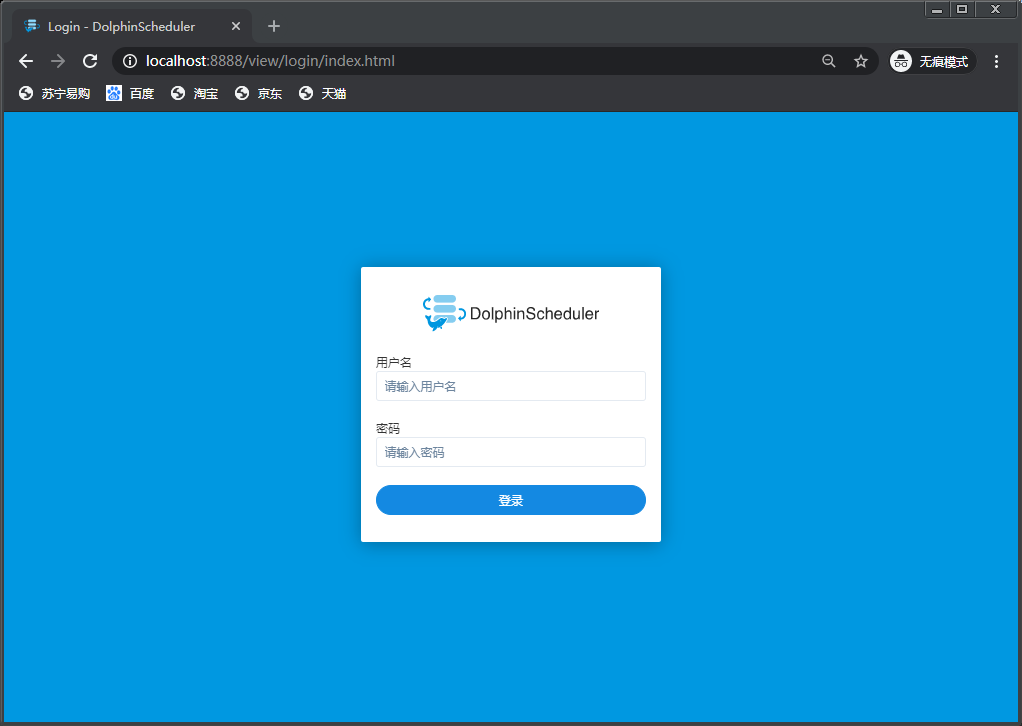
访问http://localhost:8888/
采用管理员账户admin dolphinscheduler123进行登陆,出现页面即整个项目的页面,则开发环境搭建完成
end