注意:
经过多次尝试发现mindspore_gpu的源码编译必须有sudo权限,否则就会报错。
软硬件环境:
操作系统:Ubuntu18.04.6 (全新系统)
CPU:i7 9700k
GPU: RTX 2060SUPER
相关链接:
https://www.cnblogs.com/devilmaycry812839668/p/15059089.html
https://www.mindspore.cn/news/newschildren?id=401
=====================================================
1. GCC的安装:
下载gcc 7.3.0版本安装包,执行以下命令:
wget http://ftp.gnu.org/gnu/gcc/gcc-7.3.0/gcc-7.3.0.tar.gz
执行tar -xzf gcc-7.3.0.tar.gz解压源码包。
执行cd gcc-7.3.0,进入到源码包目录。
继续下面操作前清空系统内的环境变量:
export LIBRARY_PATH=
export LD_LIBRARY_PATH=
export C_INCLUDE_PATH=
export CPLUS_INCLUDE_PATH=
运行以下命令,进行安装前的配置。
安装依赖环境:
./contrib/download_prerequisites
配置环境:
./configure --enable-bootstrap -enable-threads=posix --enable-checking=release --enable-languages=c,c++ --disable-multilib
编译安装:
make -j8 && sudo make install
2. m4下载并安装
wget https://ftp.gnu.org/gnu/m4/m4-1.4.19.tar.gz
解压:
tar -zxvf m4-1.4.19.tar.gz
配置:
./configure
编译安装
make &&sudo make install
3. 安装gmp 6.1.2
下载gmp 6.1.2源码包:
wget https://gmplib.org/download/gmp/gmp-6.1.2.tar.xz
解压到当前文件夹:
tar -xvf gmp-6.1.2.tar.xz
配置:
./configure --enable-cxx
编译安装:
make && sudo make install
4. openssl 下载并安装:
wget https://www.openssl.org/source/openssl-1.1.1l.tar.gz
解压:
tar -zxvf openssl-1.1.1l.tar.gz
配置:
./config
编译并安装:
make -j8&& sudo make install
配置系统环境: 修改 .bashrc 文件,添加内容:
# openssl
export OPENSSL_ROOT_DIR=/usr/local/lib64
重新载入 .bashrc 文件:
source ~/.bashrc
5. CMAKE的下载并安装
wget https://github.com/Kitware/CMake/releases/download/v3.21.4/cmake-3.21.4.tar.gz
解压:
tar -zxvf cmake-3.21.4.tar.gz
配置:
./configure
编译并安装:
make -j8&& sudo make install
配置系统环境: 修改 .bashrc 文件,添加内容:(为cmake指定调用何处的gcc与g++,否则可能会调用系统中以前版本的gcc与g++)
# CC
export CC=/usr/local/bin/gcc
export CXX=/usr/local/bin/g++
重新载入 .bashrc 文件:
source ~/.bashrc
6. patch 的下载并安装:
wget https://ftp.gnu.org/gnu/patch/patch-2.7.6.tar.gz
解压:
tar -zxvf patch-2.7.6.tar.gz
配置:
./configure
编译并安装:
make -j8&&sudo make install
7. Autoconf下载并安装:
wget https://ftp.gnu.org/gnu/autoconf/autoconf-2.71.tar.gz
解压:
tar -zxvf autoconf-2.71.tar.gz
配置:
./configure
编译并安装:
make -j8&&sudo make install
8. libtool 下载并安装:
wget https://ftpmirror.gnu.org/libtool/libtool-2.4.6.tar.gz
解压:
tar -zxvf libtool-2.4.6.tar.gz
配置:
./configure
编译并安装:
make -j8&&sudo make install
9. automake下载并安装
wget https://ftp.gnu.org/gnu/automake/automake-1.16.5.tar.gz
解压:
tar -zxvf automake-1.16.5.tar.gz
配置:
./configure
编译并安装:
make -j8&&sudo make install
10. flex下载并安装
wget https://github.com/westes/flex/files/981163/flex-2.6.4.tar.gz
解压:
tar -zxvf flex-2.6.4.tar.gz
配置:
./configure
编译并安装:
make -j8&&sudo make install
11. NUMA 下载并安装
wget https://github.com/numactl/numactl/releases/download/v2.0.14/numactl-2.0.14.tar.gz
解压:
tar -zxvf numactl-2.0.14.tar.gz
配置:
./configure
编译并安装:
make -j8&&sudo make install
12. cuda 和 cudnn下载并安装
cuda下载地址:
https://developer.nvidia.com/cuda-11.1.1-download-archive
cudnn下载地址:
https://developer.nvidia.com/rdp/cudnn-archive#a-collapse821-113
cuda安装:
sudo sh ./cuda_11.1.1_455.32.00_linux.run --toolkit --silent
cudnn安装:
解压:
tar -zxvf cudnn-11.3-linux-x64-v8.2.1.32.tgz
复制文件:
sudo cp cuda/include/* /usr/local/cuda-11.1/include
sudo cp cuda/lib64/* /usr/local/cuda-11.1/lib64
配置环境变量:
修改 .bashrc 文件
# cuda && cudnn
export PATH=/usr/local/cuda-11.1/bin:$PATH
export LD_LIBRARY_PATH=/usr/local/cuda-11.1/lib64:$LD_LIBRARY_PATH
重新载入 .bashrc 文件:
source ~/.bashrc
13. nccl的下载并安装:
NCCL的下载地址:
https://developer.nvidia.com/nccl/nccl-download
(注意:下载需要进行会员注册,这里推荐使用微信或QQ登录)
配套CUDA 11.1NCCL 2.7.8版本
安装对应版本的nccl之前请注意:
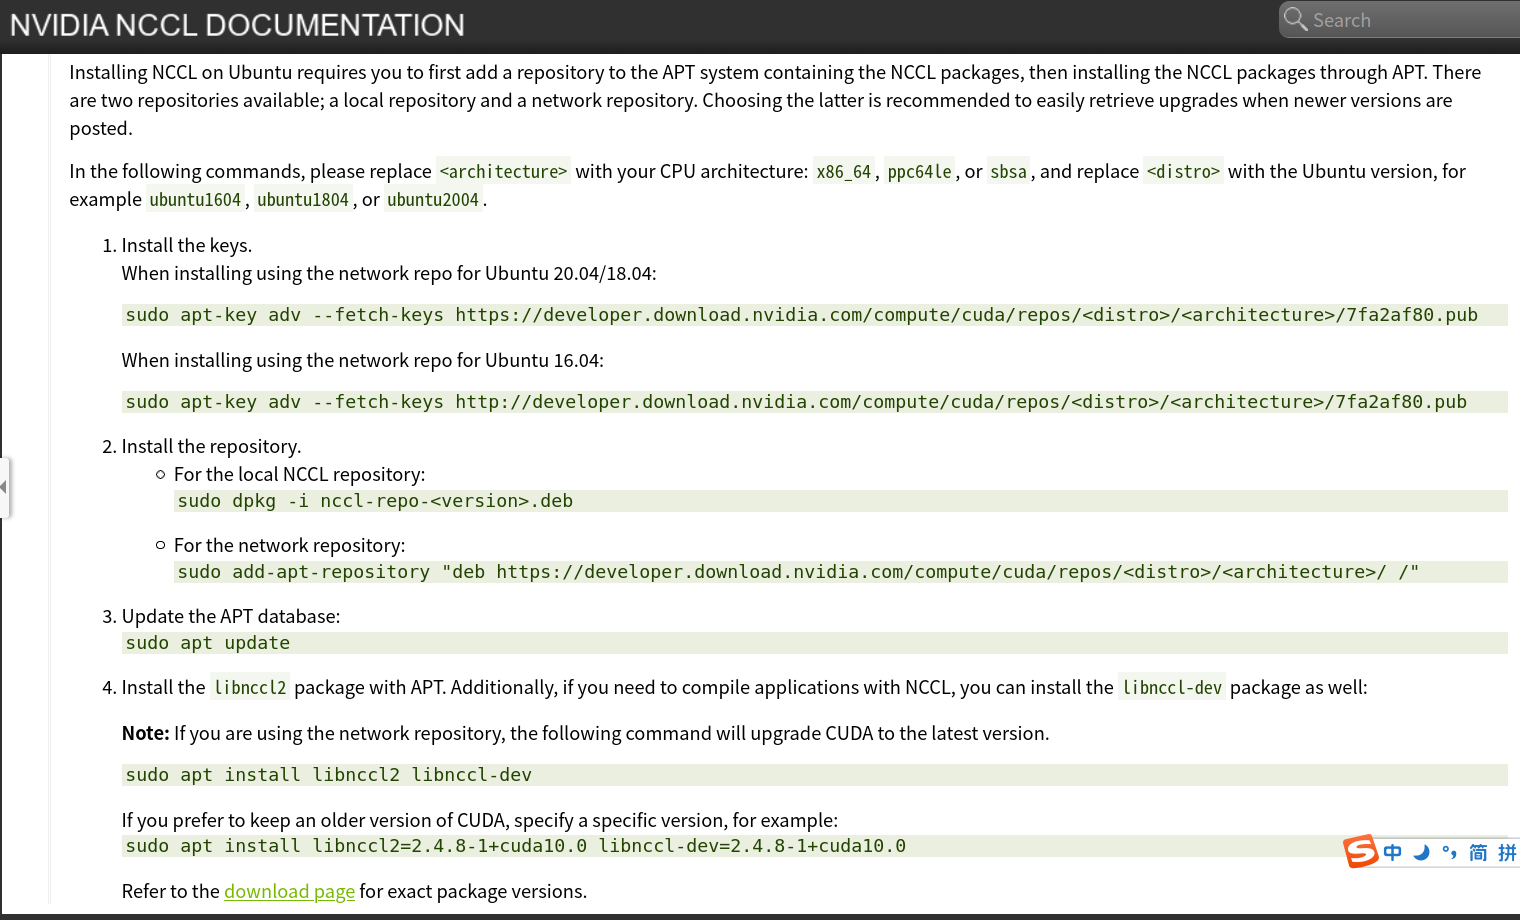
参考nccl 安装官方手册:
https://docs.nvidia.com/deeplearning/nccl/install-guide/index.html#debian

正确的 nccl 安装步骤 ( 本地安装 ):
1. In the following commands, please replace<architecture>with your CPU architecture:x86_64,ppc64le, orsbsa, and replace<distro>with the Ubuntu version, for exampleubuntu1604,ubuntu1804, or ubuntu2004.
根据刚才给出的软硬件平台, <architecture> 为 x86_64 , <distro> 为ubuntu1804 。
于是需执行命令:
sudo apt-key adv --fetch-keys https://developer.download.nvidia.com/compute/cuda/repos/ubuntu1804/x86_64/7fa2af80.pub
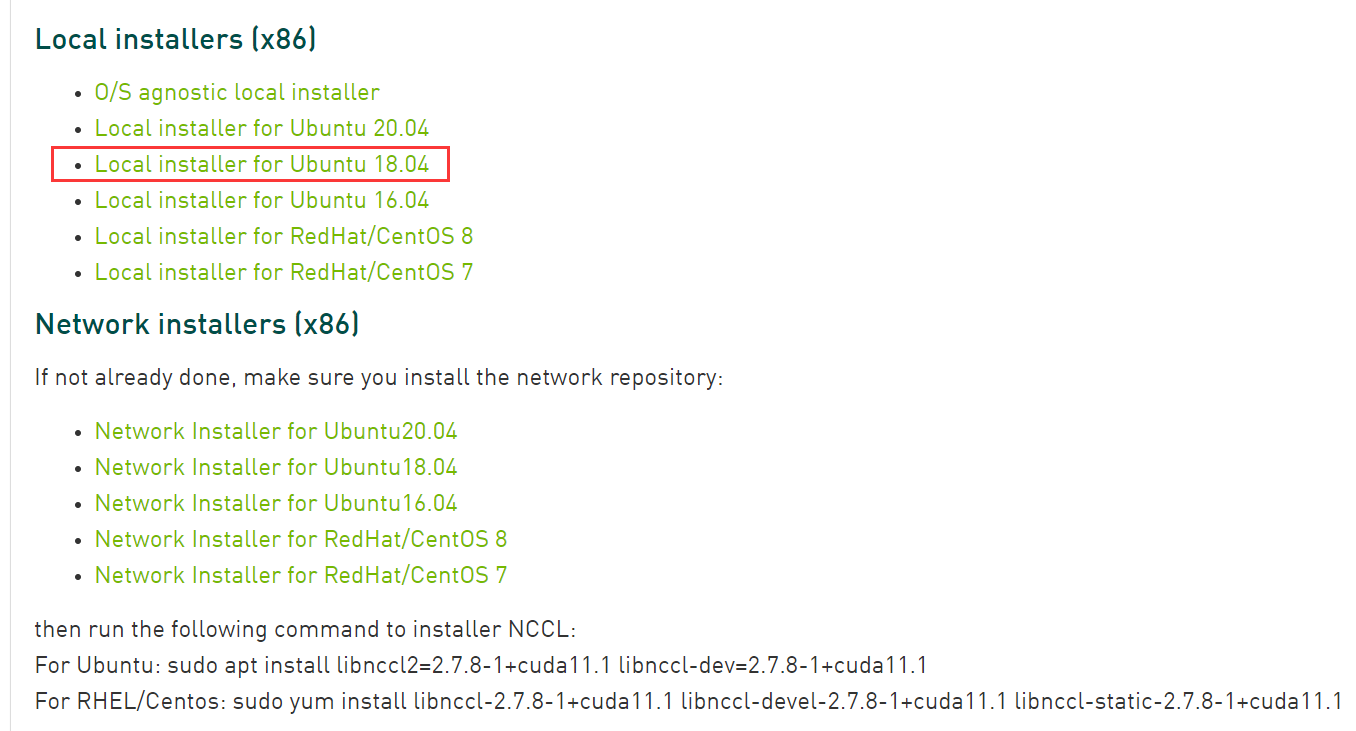
2. 下载安装包:


下载地址:
安装刚才下载的 deb 文件:
sudo dpkg -i nccl-repo-ubuntu1804-2.7.8-ga-cuda11.1_1-1_amd64.deb
更新 apt:
sudo apt update
14. python环境配置:
使用conda环境:
conda create -n mindspore python=3.9.0
conda activate mindspore
pip install wheel
15. 下载源码并编译
git clone https://gitee.com/mindspore/mindspore.git -b r1.5
编译:
bash build.sh -e gpu
报错:


================================================
Open MPI autogen: completed successfully.  w00t!
================================================

checking for perl... perl

============================================================================
== Configuring Open MPI
============================================================================

*** Startup tests
checking build system type... x86_64-pc-linux-gnu
checking host system type... x86_64-pc-linux-gnu
checking target system type... x86_64-pc-linux-gnu
checking for gcc... /usr/local/bin/gcc
checking whether the C compiler works... yes
checking for C compiler default output file name... a.out
checking for suffix of executables...
checking whether we are cross compiling... no
checking for suffix of object files... o
checking whether the compiler supports GNU C... yes
checking whether /usr/local/bin/gcc accepts -g... yes
checking for /usr/local/bin/gcc option to enable C11 features... none needed
checking whether /usr/local/bin/gcc understands -c and -o together... yes
checking for stdio.h... yes
checking for stdlib.h... yes
checking for string.h... yes
checking for inttypes.h... yes
checking for stdint.h... yes
checking for strings.h... yes
checking for sys/stat.h... yes
checking for sys/types.h... yes
checking for unistd.h... yes
checking for wchar.h... yes
checking for minix/config.h... no
checking whether it is safe to define __EXTENSIONS__... yes
checking whether _XOPEN_SOURCE should be defined... no
checking for a BSD-compatible install... /usr/bin/install -c
checking whether build environment is sane... yes
checking for a race-free mkdir -p... /bin/mkdir -p
checking for gawk... no
checking for mawk... mawk
checking whether make sets $(MAKE)... yes
checking whether make supports the include directive... yes (GNU style)
checking whether make supports nested variables... yes
checking whether UID '1000' is supported by ustar format... yes
checking whether GID '1000' is supported by ustar format... yes
checking how to create a ustar tar archive... gnutar
checking dependency style of /usr/local/bin/gcc... gcc3
checking whether make supports nested variables... (cached) yes

*** Checking versions
checking for repo version... date2021-10-29
checking Open MPI version... 4.0.3rc4
checking Open MPI release date... Unreleased developer copy
checking Open MPI repository version... date2021-10-29
checking for repo version... date2021-10-29
checking Open MPI Run-Time Environment version... 4.0.3rc4
checking Open MPI Run-Time Environment release date... Unreleased developer copy
checking Open MPI Run-Time Environment repository version... date2021-10-29
checking for repo version... date2021-10-29
checking Open SHMEM version... 4.0.3rc4
checking Open SHMEM release date... Unreleased developer copy
checking Open SHMEM repository version... date2021-10-29
checking for repo version... date2021-10-29
checking Open Portable Access Layer version... 4.0.3rc4
checking Open Portable Access Layer release date... Unreleased developer copy
checking Open Portable Access Layer repository version... date2021-10-29
checking for bootstrap Autoconf version... 2.71
checking for bootstrap Automake version... 1.16
checking for boostrap Libtool version... 2.4.6

*** Initialization, setup
configure: builddir: /home/devil/mindspore_home/mindspore/build/mindspore/_deps/ompi-src
configure: srcdir: /home/devil/mindspore_home/mindspore/build/mindspore/_deps/ompi-src
installing to directory "/home/devil/mindspore_home/mindspore/build/mindspore/.mslib/ompi_5c3adb5c7f9f2bec8b2c191ebfa149e3"

*** OPAL Configuration options
checking if want to run code coverage... no
checking if want to compile with branch probabilities... no
checking if want to debug memory usage... no
checking if want to profile memory usage... no
checking if want developer-level compiler pickyness... no
checking if want developer-level debugging code... no
checking if want to developer-level timing framework... no
checking if want to install project-internal header files... no
checking if want pretty-print stacktrace... yes
checking if want pty support... yes
checking if want weak symbol support... yes
checking if want dlopen support... yes
checking for default value of mca_base_component_show_load_errors... enabled by default
checking if want heterogeneous support... no
checking if word-sized integers must be word-size aligned... no
checking if want IPv6 support... no
checking if want package/brand string... Open MPI devil@NVME Distribution
checking if want ident string... 4.0.3rc4
checking if want to use an alternative checksum algo for messages... no
checking maximum length of processor name... 256
checking maximum length of error string... 256
checking maximum length of object name... 64
checking maximum length of info key... 36
checking maximum length of info val... 256
checking maximum length of port name... 1024
checking maximum length of datarep string... 128
checking if want getpwuid support... yes
checking for zlib in... (default search paths)
checking for zlib.h... no
checking will zlib support be built... no
checking __NetBSD__... no
checking __FreeBSD__... no
checking __OpenBSD__... no
checking __DragonFly__... no
checking __386BSD__... no
checking __bsdi__... no
checking __APPLE__... no
checking __linux__... yes
checking __sun__... no
checking __sun... no
checking for netdb.h... yes
checking for netinet/in.h... yes
checking for netinet/tcp.h... yes
checking for struct sockaddr_in... yes
checking if --with-cuda is set... not set (--with-cuda=)
./configure: line 13028: syntax error near unexpected token `)'
./configure: line 13028: `    )'
CMake Error at cmake/utils.cmake:179 (message):
  error! when ./configure;CXXFLAGS=-D_FORTIFY_SOURCE=2
  -O2;--prefix=/home/devil/mindspore_home/mindspore/build/mindspore/.mslib/ompi_5c3adb5c7f9f2bec8b2c191ebfa149e3
  in /home/devil/mindspore_home/mindspore/build/mindspore/_deps/ompi-src
Call Stack (most recent call first):
  cmake/utils.cmake:393 (__exec_cmd)
  cmake/external_libs/ompi.cmake:10 (mindspore_add_pkg)
  cmake/mind_expression.cmake:42 (include)
  CMakeLists.txt:54 (include)


-- Configuring incomplete, errors occurred!
See also "/home/devil/mindspore_home/mindspore/build/mindspore/CMakeFiles/CMakeOutput.log".
See also "/home/devil/mindspore_home/mindspore/build/mindspore/CMakeFiles/CMakeError.log".
修改方法:
vim cmake/external_libs/ompi.cmake
if(ENABLE_GITEE)
    set(REQ_URL "https://gitee.com/mirrors/ompi/repository/archive/v4.0.3.tar.gz")
    set(MD5 "77865fe49f85c6294416007c5633a448")
else()
    set(REQ_URL "https://github.com/open-mpi/ompi/archive/v4.0.3.tar.gz")
    set(MD5 "86cb724e8fe71741ad3be4e7927928a2")
endif()

set(ompi_CXXFLAGS "-D_FORTIFY_SOURCE=2 -O2")
mindspore_add_pkg(ompi
        VER 4.0.3
        LIBS mpi
        URL ${REQ_URL}
        MD5 ${MD5}
        PRE_CONFIGURE_COMMAND ./autogen.pl
        CONFIGURE_COMMAND ./configure)
include_directories(${ompi_INC})
add_library(mindspore::ompi ALIAS ompi::mpi)
修改为:
if(ENABLE_GITEE)
    set(REQ_URL "https://download.open-mpi.org/release/open-mpi/v4.0/openmpi-4.0.3.tar.gz")
    set(MD5 "f4be54a4358a536ec2cdc694c7200f0b")
else()
    set(REQ_URL "https://download.open-mpi.org/release/open-mpi/v4.0/openmpi-4.0.3.tar.gz")
    set(MD5 "f4be54a4358a536ec2cdc694c7200f0b")
endif()

set(ompi_CXXFLAGS "-D_FORTIFY_SOURCE=2 -O2")
mindspore_add_pkg(ompi
        VER 4.0.3
        LIBS mpi
        URL ${REQ_URL}
        MD5 ${MD5}
        PRE_CONFIGURE_COMMAND ./configure
        CONFIGURE_COMMAND ./configure)
include_directories(${ompi_INC})
add_library(mindspore::ompi ALIAS ompi::mpi)
再次执行编译命令:
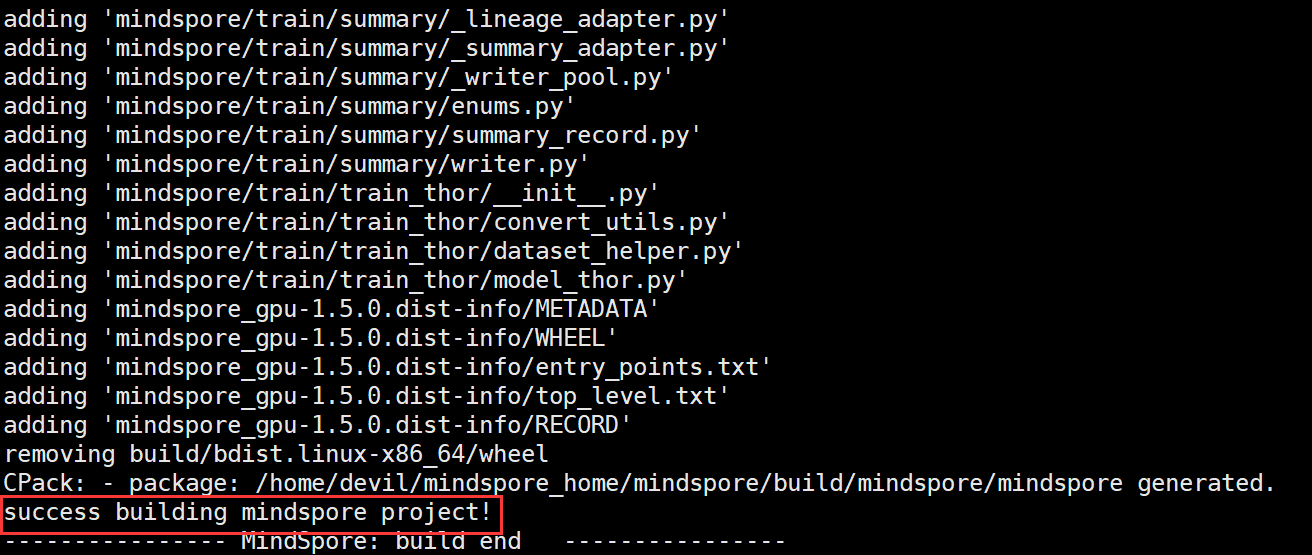
bash build.sh -e gpu
成功编译:

编译完成后生成的MindSpore WHL安装包路径为:
build/package/mindspore_gpu-1.5.0-cp39-cp39-linux_x86_64.whl
将我们编译好的文件拷贝出来,在我们激活的Python环境下进行安装即可:
pip install mindspore_gpu-1.5.0-cp39-cp39-linux_x86_64.whl
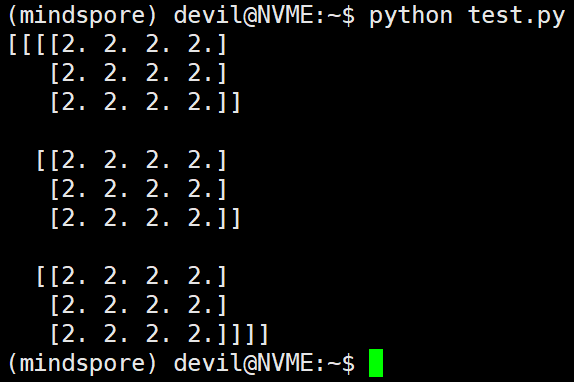
运行官网中的测试代码:
import numpy as np
from mindspore import Tensor
import mindspore.ops as ops
import mindspore.context as context

context.set_context(device_target="GPU")
x = Tensor(np.ones([1,3,3,4]).astype(np.float32))
y = Tensor(np.ones([1,3,3,4]).astype(np.float32))
print(ops.tensor_add(x, y))
成功运行:

=====================================================
特别说明:
本文操作是在使用FQ软件的情况下进行的,因为Github时而连接不通只好翻一下来解决。另外,本文编译是在i7-9700K版本CPU在4.9Ghz频率下进行的,如果CPU不给力可能需要较长时间来进行编译。最重要的一点是由于mindspore源码中编译配置文件存在已久的问题一直没有解决,所以在进行编译之前一定要对默认的编译配置文件进行修改,具体见上面第15步操作。
=====================================================
1. openssl下载并安装:
https://www.openssl.org/source/openssl-1.1.1l.tar.gz
解压:
tar -zxvf openssl-1.1.1l.tar.gz
配置:
./config --prefix=/home/xxxxxx/openssl_1.1.1
编译并安装:
make -j8&& make install
修改系统环境变量:
修改home路径下的.bashrc文件:
# openssl
export OPENSSL_ROOT_DIR=/home/xxxxxx/openssl_1.1.1
重新载入 .bashrc 文件:
source ~/.bashrc
2. cmake下载并安装:
https://github.com/Kitware/CMake/releases/download/v3.22.0-rc1/cmake-3.22.0-rc1.tar.gz
解压:
tar -zxvf cmake-3.22.0-rc1.tar.gz
配置:
./configure --prefix=/home/xxxxxx/cmake_3.22
编译并安装:
make -j8&& make install
重新载入 .bashrc 文件:
source ~/.bashrc
3. patch 的下载并安装:
wget https://ftp.gnu.org/gnu/patch/patch-2.7.6.tar.gz
解压:
tar -zxvf patch-2.7.6.tar.gz
配置:
./configure --prefix=/home/xxxxxx/patch_2.7.6
编译并安装:
make -j8&& make install
配置系统环境:
修改 ~/.bashrc 文件,添加内容:
# patch
export PATH=/home/xxxxxx/patch_2.7.6/bin:$PATH
重新载入 .bashrc 文件:
source ~/.bashrc
4. m4下载并安装:
https://ftp.gnu.org/gnu/m4/m4-1.4.19.tar.gz
解压:
tar -zxvf m4-1.4.19.tar.gz
配置:
./configure --prefix=/home/xxxxxx/m4_1.4.19
编译并安装:
make -j8&& make install
配置系统环境变量:
修改 .bashrc 文件,添加内容:
# m4
export PATH=/home/xxxxxx/m4_1.4.19/bin:$PATH
重新载入 .bashrc 文件:
source ~/.bashrc
5. gmp 6.2.1下载并安装
https://gmplib.org/download/gmp/gmp-6.2.1.tar.xz
解压:
tar -xvf gmp-6.2.1.tar.xz
配置:
./configure --prefix=/home/xxxxxx/gmp_6.2.1/ --enable-cxx
编译并安装:
make -j8&& make install
配置系统环境变量:
修改 .bashrc 文件,添加内容:
# gmp
export LIBRARY_PATH=/home/xxxxxx/gmp_6.2.1/lib:$LIBRARY_PATH
export LD_LIBRARY_PATH=/home/xxxxxx/gmp_6.2.1/lib:$LD_LIBRARY_PATH

export C_INCLUDE_PATH=/home/xxxxxx/gmp_6.2.1/include:$C_INCLUDE_PATH
export CPLUS_INCLUDE_PATH=$C_INCLUDE_PATH:$CPLUS_INCLUDE_PATH
重新载入 .bashrc 文件:
source ~/.bashrc
测试 gmp 是否安装并配置成功:(声明:测试部分内容源于:https://blog.csdn.net/just_h/article/details/82667787)
代码:
# test.cpp 文件
#include <gmpxx.h>
#include <iostream>
#include <stdio.h>
using namespace std;
int main()
{
        mpz_t a,b,c;
        mpz_init(a);
        mpz_init(b);
        mpz_init(c);
        gmp_scanf("%Zd%Zd",a,b);
        mpz_add(c,a,b);
        gmp_printf("c= %Zd
",c);
        return 0;
}
编译:
g++ test.cpp -o test -lgmp
运行:

6. Autoconf下载并安装:
https://ftp.gnu.org/gnu/autoconf/autoconf-2.71.tar.gz
解压:
tar -zxvf autoconf-2.71.tar.gz
配置:
./configure --prefix=/home/xxxxxx/autoconf_2.71
编译并安装:
make -j8&& make install
配置系统环境:
修改 ~/.bashrc 文件,添加内容:
# autoconf
export PATH=/home/xxxxxx/autoconf_2.71/bin:$PATH
重新载入 .bashrc 文件:
source ~/.bashrc
7. libtool 下载并安装:
https://ftpmirror.gnu.org/libtool/libtool-2.4.6.tar.gz
解压:
tar -zxvf libtool-2.4.6.tar.gz
配置:
./configure --prefix=/home/xxxxxx/libtool_2.4.6
编译并安装:
make -j8&& make install
配置系统环境:
修改 ~/.bashrc 文件,添加内容:
# libtool
export PATH=/home/xxxxxx/libtool_2.4.6/bin:$PATH
重新载入 .bashrc 文件:
source ~/.bashrc
8. automake下载并安装
https://ftp.gnu.org/gnu/automake/automake-1.16.5.tar.gz
解压:
tar -zxvf automake-1.16.5.tar.gz
配置:
./configure --prefix=/home/xxxxxx/automake_1.16.5
编译并安装:
make -j8&& make install
配置系统环境:
修改 ~/.bashrc 文件,添加内容:
# automake
export PATH=/home/xxxxxx/automake_1.16.5/bin:$PATH
重新载入 .bashrc 文件:
source ~/.bashrc
9. flex下载并安装
https://github.com/westes/flex/files/981163/flex-2.6.4.tar.gz
解压:
tar -zxvf flex-2.6.4.tar.gz
配置:(参考:https://blog.csdn.net/weixin_39921087/article/details/110659552)
./configure --prefix=/home/xxxxxx/flex_2.6.4 CFLAGS=-D_GNU_SOURCE
编译并安装:
make -j8&& make install
修改系统环境,修改 .bashrc文件,添加内容:
# flex
export PATH=/home/xxxxxx/flex_2.6.4/bin:$PATH

export LIBRARY_PATH=/home/xxxxxx/flex_2.6.4/lib:$LIBRARY_PATH
export LD_LIBRARY_PATH=/home/xxxxxx/flex_2.6.4/lib:$LD_LIBRARY_PATH

export C_INCLUDE_PATH=/home/xxxxxx/flex_2.6.4/include:$C_INCLUDE_PATH
export CPLUS_INCLUDE_PATH=$C_INCLUDE_PATH:$CPLUS_INCLUDE_PATH
重新载入 .bashrc 文件:
source ~/.bashrc
10. NUMA 下载并安装
https://github.com/numactl/numactl/releases/download/v2.0.14/numactl-2.0.14.tar.gz
解压:
tar -zxvf numactl-2.0.14.tar.gz
配置:
./configure --prefix=/home/xxxxxx/numactl_2.0.14
编译并安装:
make -j8&& make install
修改系统环境,修改 .bashrc文件,添加内容:
# numa
export PATH=/home/xxxxxx/numactl_2.0.14/bin:$PATH

export LIBRARY_PATH=/home/xxxxxx/numactl_2.0.14/lib:$LIBRARY_PATH
export LD_LIBRARY_PATH=/home/xxxxxx/numactl_2.0.14/lib:$LD_LIBRARY_PATH

export C_INCLUDE_PATH=/home/xxxxxx/numactl_2.0.14/include:$C_INCLUDE_PATH
export CPLUS_INCLUDE_PATH=$C_INCLUDE_PATH:$CPLUS_INCLUDE_PATH
重新载入 .bashrc 文件:
source ~/.bashrc
