下面这个用法是参照protobuf-csharp-port的官方wiki,参见:
https://code.google.com/p/protobuf-csharp-port/wiki/GettingStarted
官方原文里的用法与代码已经有些不匹配了,需要做一些小的修改。
准备工作
1.首先从https://code.google.com/p/protobuf-csharp-port这个上面把源代码下载下来,我这个版本是protobuf-csharp-port-2.4.1.521-source(r523)
2.下载后是个压缩包,解压目录,如下图:

点开“Build”文件夹:

看见那个BuildAll.bat,点击它会自动执行编译操作,编译完成后将出现build_output和build_temp两个输出文件夹,其中build_output如下图所示例:

生成的Google.ProtocolBuffers.dll将被用作外部链接的DLL使用,这里有个问题,能不能不用做DLL使用呢?因为众所周知的AOT,JIT问题。
- ProtoGen.exe - 源代码生成器
- ProtoMunge.exe - tool to remove sensitive data from binary messages
- ProtoDump.exe - tool to dump a binary message as text
- ProtoBench.exe - tool to run performance benchmarks on binary messages
- protoc.exe - 编译脚本工具
例子: an address book
这块将会用一个程序来演示如何使用这个protocBuffer
The .proto file
看看下面这个proto文件,分析下这个文件都描述了什么信息。此文件在 你下载的源代码文件夹的protos/tutorial。
package tutorial;

import "google/protobuf/csharp_options.proto";

option (google.protobuf.csharp_file_options).namespace = "Google.ProtocolBuffers.Examples.AddressBook";
option (google.protobuf.csharp_file_options).umbrella_classname = "AddressBookProtos";

option optimize_for = SPEED;

message Person {
  required string name = 1;
  required int32 id = 2;        // Unique ID number for this person.
  optional string email = 3;

  enum PhoneType {
    MOBILE = 0;
    HOME = 1;
    WORK = 2;
  }

  message PhoneNumber {
    required string number = 1;
    optional PhoneType type = 2 [default = HOME];
  }

  repeated PhoneNumber phone = 4;
}

// Our address book file is just one of these.
message AddressBook {
  repeated Person person = 1;
}
这个文件和谷歌官方提供的基本一致,但做了一些调整:
- 为了简单期间去掉了输出Java代码的选项。这里如果需要就把Java选项加上即可,和C#没有冲突。
- 导入项代码: google/protobuf/csharp_options.proto ,目的是使用C#扩展。
- 指定了两项C#特有的选项:
- The name of the class containing the descriptor representing the overall .proto file. (This is called the "umbrella" class.) The generated source file is also named after this class. In this case we're using AddressBookProtos.
- 生成类的命名空间。这里用的是: Google.ProtocolBuffers.Examples.AddressBook.
- 指定了一个优化的选项。会多生成一些代码,但能提高运行效率。
- 还有其他的选项,可以看看code.google上的description里的说明。
生成源代码
转到你的源代码目录,执行以下操作
protogen ....protos	utorialaddressbook.proto
         ....protosgoogleprotobufcsharp_options.proto
         ....protosgoogleprotobufdescriptor.proto
         --proto_path=....protos
看看build_temp文件夹,如下图所示:
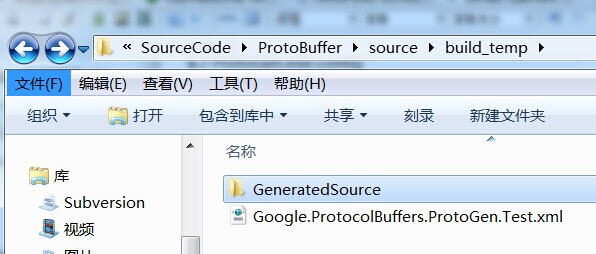
在GeneratedSource文件夹中,就能找到AddressBookProtos.cs文件了:

这个AddressBookProtos.cs文件是我们后边需要用到的,其他文件只是Google用到的,我们不用去管,或者能把这些代码作为源代码引入主工程?不得而知。
注意事项:
- Make sure that you do not use a non-ASCII encoding with your text file. The protoc.exe compiler will complain with the following message:
tutorial/addressbook.proto:1:1: Expected top-level statement (e.g. "message").
The best way to fix this is with Visual Studio. Open the proto file and select "File" -> "Save as...". From the save dialog click the down arrow next to the save button and select "Save with Encoding". Select the "US-ASCII" codepage (near the bottom) and click save.
2. It's often easiest keep all your proto files in a single directory tree. This allows to omit the --proto_path option by running protoc.exe from the top of the this directory tree. Always keep the 'google/protobuf/*.proto' files available so that you can import them to specify options, or use the options through protogen.
3.Unlike a programming language like C# it is usually expected that your proto file will specify numerous messages, not one. Name your proto files based on the namespace, not the message. Create proto files only as often as you would create a new namespace to organize those classes.
使用生成的源代码
为了使用上面生成的cs文件,我们需要执行下面这些操作:
- 创建一个builder,后边将用它来构造Person这个消息体
- 设置builder的属性
- 使用这个builder来创建 Person 消息体
- 将 Person 写入内存流
- 使用上面写好数据的内存流,再创建一个新的Person消息体
- 创建一个AddressBook的builder ,然后把这个刚创建的Person消息体赋值给它
- 使用AddressBook的builder 和上面的数据流创建 AddressBook
将这个AddressBook里的Person和第三步创建的Person进行比较,看数据是否一致。
    static void Sample()
    {
        byte[] bytes;
        //Create a builder to start building a message
        Person.Builder newContact = Person.CreateBuilder();
        //Set the primitive properties
        newContact.SetId(1)
                  .SetName("Foo")
                  .SetEmail("foo@bar");
        //Now add an item to a list (repeating) field
        newContact.AddPhone(
            //Create the child message inline
            Person.Types.PhoneNumber.CreateBuilder().SetNumber("555-1212").Build()
            );
        //Now build the final message:
        Person person = newContact.Build();
        //The builder is no longer valid (at least not now, scheduled for 2.4):
        newContact = null;
        using(MemoryStream stream = new MemoryStream())
        {
            //Save the person to a stream
            person.WriteTo(stream);
            bytes = stream.ToArray();
        }
        //Create another builder, merge the byte[], and build the message:
        Person copy = Person.CreateBuilder().MergeFrom(bytes).Build();

        //A more streamlined approach might look like this:
        bytes = AddressBook.CreateBuilder().AddPerson(copy).Build().ToByteArray();
        //And read the address book back again
        AddressBook restored = AddressBook.CreateBuilder().MergeFrom(bytes).Build();
        //The message performs a deep-comparison on equality:
        if(restored.PersonCount != 1 || !person.Equals(restored.PersonList[0]))
            throw new ApplicationException("There is a bad person in here!");
    }
用VS2013,创建一个WinForm程序,拖一个button上去,双击出事件,调用Sample函数即可,这样就通了。里面还有很多细节没说清楚,不过好歹有整块的东西了。那么后边的工作,需要分成几步来执行:
1.将上述流程分析清楚,有一个初步的架构图和UML图。
2.C#客户端的二进制内存流,显示需要铺设一个二进制的内存流管理器,是否需要参考之前的那个二进制管理器呢。
3.如何集成到Unity里,首先要写一份关于Unity的代码规范和内存处理规范。如果集成到Unity里,那么势必两头都要写代码,加油啊。
4.如何搭建一个Java服务器,支持解析数据,并发送和接收。
5.连接Java服务器通信。客户端和服务器两头看看能否顺利工作。