项目中需要统计数据展现, 采用了饼图形式展现.
第一步: 了解下贝塞尔曲线相关概念
贝塞尔曲线相关概念:
UIBezierPath :画贝塞尔曲线的path类
UIBezierPath定义 : 贝赛尔曲线的每一个顶点都有两个控制点,用于控制在该顶点两侧的曲线的弧度。
曲线的定义有四个点:起始点、终止点(也称锚点)以及两个相互分离的中间点。
滑动两个中间点,贝塞尔曲线的形状会发生变化。
UIBezierPath:对象是CGPathRef数据类型的封装,可以方便的让我们画出矩形 、 椭圆 或者 直线和曲线的组合形状.
使用贝塞尔曲线的基本步骤:
(1)创建一个Bezier path对象。
(2)使用方法moveToPoint:去设置初始线段的起点。
(3)添加line或者curve去定义一个或者多个subpaths。
(4)改变UIBezierPath对象跟绘图相关的属性。
初始化方法:
+ (instancetype)bezierPath;
创建一个矩形:
+ (instancetype)bezierPathWithRect:(CGRect)rect;
创建圆形或者椭圆形:
 + (instancetype)bezierPathWithOvalInRect:(CGRect)rect;
 + (instancetype)bezierPathWithRoundedRect:(CGRect)rect cornerRadius:(CGFloat)cornerRadius; // rounds all corners with the same horizontal and vertical radius
 + (instancetype)bezierPathWithRoundedRect:(CGRect)rect byRoundingCorners:(UIRectCorner)corners cornerRadii:(CGSize)cornerRadii;
 + (instancetype)bezierPathWithArcCenter:(CGPoint)center radius:(CGFloat)radius startAngle:(CGFloat)startAngle endAngle:(CGFloat)endAngle clockwise:(BOOL)clockwise;
 + (instancetype)bezierPathWithCGPath:(CGPathRef)CGPath;
最基本的使用方法是:
 // 设置描绘的起点
 - (void)moveToPoint:(CGPoint)point;

 // 画直线
 - (void)addLineToPoint:(CGPoint)point;

// 画曲线
// a.绘制二次贝塞尔曲线   分别对应终点和一个控制点
 - (void)addQuadCurveToPoint:(CGPoint)endPoint controlPoint:(CGPoint)controlPoint

// b.绘制三次贝塞尔曲线   分别对应终点和两个控制点
 - (void)addCurveToPoint:(CGPoint)endPoint controlPoint1:(CGPoint)controlPoint1 controlPoint2:(CGPoint)controlPoint2;

 //  画圆弧
 - (void)addArcWithCenter:(CGPoint)center radius:(CGFloat)radius startAngle:(CGFloat)startAngle endAngle:(CGFloat)endAngle clockwise:(BOOL)clockwise
第二步: 自定义饼图实现相关代码
自定义饼图:
针对上面的饼图, 实现主要思路:
1.初始化画布
2.bezierPath形成闭合的扇形路径
3.自定义饼图填充颜色
4.饼图的引出点及指引线
5.画引出直线
6.添加饼图相对应提示文字
7.空心展示饼图
8.露出方法,在所需控制器里调用即可
1. 初始化画布
+ (instancetype)initWithFrame:(CGRect)frame {

    ZLBezierPieView *bezierCurveView = [[NSBundle mainBundle] loadNibNamed:@"ZLBezierPieView" owner:self options:nil].lastObject;
    bezierCurveView.frame = frame;

    //背景视图
    UIView *backView = [[UIView alloc] initWithFrame:CGRectMake(0, 0, frame.size.width, frame.size.height)];
    backView.backgroundColor = [UIColor clearColor];
    [bezierCurveView addSubview:backView];

    myFrame = frame;
    return bezierCurveView;
}
2. bezierPath形成闭合的扇形路径
UIBezierPath *bezierPath = [UIBezierPath bezierPathWithArcCenter:point
                                                                  radius:radius
                                                              startAngle:startAngle                                                                 endAngle:endAngle
                                                               clockwise:YES];
[bezierPath addLineToPoint:point];
[bezierPath closePath];
3. 自定义饼图填充颜色
// 可自定义饼图填充颜色(根据自己需求添加)
NSArray *redArray = @[@"46",@"255",@"62",@"254",@"253",@"153",@"110", @"173",@"223",@"196"];
NSArray *greenArray = @[@"191",@"48",@"209",@"199",@"109",@"208",@"123", @"110",@"142",@"193"];
NSArray *blueArray = @[@"238",@"145",@"185",@"17",@"31",@"60",@"254", @"157",@"36",@"48"];

// 填充色
UIColor *customColor = [UIColor colorWithRed:[[redArray objectAtIndex:i] intValue]/255.0  green:[[greenArray objectAtIndex:i] intValue]/255.0 blue:[[blueArray objectAtIndex:i] intValue]/255.0 alpha:1];

// 渲染
CAShapeLayer *shapeLayer = [CAShapeLayer layer];
shapeLayer.lineWidth = 1;
// 填充色
shapeLayer.fillColor = customColor.CGColor;
shapeLayer.path = bezierPath.CGPath;
[self.layer addSublayer:shapeLayer];
4. 饼图的引出点及指引线
// 饼图引出点
CGFloat pieX = point.x + (radius)*cos(startAngle+(endAngle-startAngle)/2);
CGFloat pieY = point.y + (radius)*sin(startAngle+(endAngle-startAngle)/2);

// 指引线引出点
CGFloat X = point.x + (radius+20)*cos(startAngle+(endAngle-startAngle)/2);
CGFloat Y = point.y + (radius+20)*sin(startAngle+(endAngle-startAngle)/2);
CGFloat lineWidth = 80;

// 绘制小圆点
CAShapeLayer *circleLayer = [CAShapeLayer layer];
circleLayer.frame = CGRectMake(0, 0, 1, 1); // 指定frame,只是为了设置宽度和高度
circleLayer.position = CGPointMake(X, Y); // 设置居中显示
circleLayer.fillColor = [UIColor clearColor].CGColor; // 设置填充颜色
circleLayer.lineWidth = 2.0;
circleLayer.strokeColor = customColor.CGColor;
// 使用UIBezierPath创建路径
CGRect frame = CGRectMake(0, 0, 2, 2);
UIBezierPath *circlePath = [UIBezierPath bezierPathWithOvalInRect:frame];
// 设置CAShapeLayer与UIBezierPath关联
circleLayer.path = circlePath.CGPath;
// 将CAShaperLayer放到某个层上显示
[self.layer addSublayer:circleLayer];
5. 画引出直线
// 画第一段直线
CAShapeLayer *lineLayer = [CAShapeLayer layer];
lineLayer.frame = CGRectMake(0, 0, 1, 1); // 指定frame,只是为了设置宽度和高度
lineLayer.fillColor = [UIColor clearColor].CGColor; // 设置填充颜色
lineLayer.lineWidth = 1.0;
lineLayer.strokeColor = customColor.CGColor;
UIBezierPath *indicatrixLine = [UIBezierPath bezierPath];
[indicatrixLine moveToPoint:CGPointMake(pieX, pieY)];
[indicatrixLine addLineToPoint:CGPointMake(X, Y)];
lineLayer.path = indicatrixLine.CGPath;
lineLayer.lineWidth = 1.0;
lineLayer.strokeColor = customColor.CGColor;
[self.layer addSublayer:lineLayer];

if (X < point.x) { // 饼图左侧
    X = X - lineWidth;
}
// 添加指引线(第二段直线)
UIView *line = [[UIView alloc] initWithFrame:CGRectMake(X, Y, lineWidth, 1)];
line.backgroundColor = customColor;
[self.subviews[0] addSubview:line];
6. 添加饼图相对应提示文字
// 添加文字
UILabel *label = [[UILabel alloc]initWithFrame:CGRectMake(X, Y - 15, lineWidth, 30)];
label.font = [UIFont systemFontOfSize:13];
label.textColor = customColor;
label.numberOfLines = 0;
label.text = type_names[i];
label.attributedText = [self setupAttriLabelWithTitleStr:type_names[i] ValueStr:[NSString stringWithFormat:@"%@", targetValues[i]]];
[self.subviews[0] addSubview:label];
if (X < point.x) { // 饼图左侧
    label.textAlignment = NSTextAlignmentLeft;
} else {
    label.textAlignment = NSTextAlignmentRight;
}
/**
 * label 的富文本布局
 *
 * titleStr 标题
 * ValueStr 值
 */
- (NSMutableAttributedString *)setupAttriLabelWithTitleStr:(NSString *)titleStr ValueStr:(NSString *)valueStr {

    NSMutableAttributedString *string = [[NSMutableAttributedString alloc]initWithString:[NSString stringWithFormat:@"%@
%@", titleStr, valueStr]];
    [string addAttribute:NSFontAttributeName value:[UIFont systemFontOfSize:12] range:NSMakeRange(titleStr.length+1, valueStr.length)];
    return string;
}
7. 空心展示饼图
// 画一个圆, 用来空心(如果满圆则可以不要这块)
UIBezierPath *radiusPath = [UIBezierPath bezierPathWithArcCenter:point radius:radius * 0.3 startAngle:0 endAngle:2*M_PI clockwise:YES];
[radiusPath addLineToPoint:point];
[radiusPath closePath];
CAShapeLayer *shapeLayer = [CAShapeLayer layer];
shapeLayer.lineWidth = 1;
shapeLayer.fillColor = [UIColor whiteColor].CGColor;
shapeLayer.path = radiusPath.CGPath;
[self.layer addSublayer:shapeLayer];
8. 露出方法,在所需控制器里调用即可
/**
 *  画饼状图
 *  @param type_names   分类名称值
 *  @param targetValues 所有目标值
 */
- (void)drawPieChartViewWithType_Names:(NSMutableArray *)type_names TargetValues:(NSMutableArray *)targetValues;
初始化:
// 饼图相关
@property (strong, nonatomic) ZLBezierPieView *pieChartView;
@property (strong, nonatomic) NSMutableArray *type_names; // 类型名称
@property (strong, nonatomic) NSMutableArray *type_values; // 数据值
懒加载:
#pragma mark - 懒加载

// 饼图类型名称
- (NSMutableArray *)type_names {
    if (!_type_names) {
        _type_names = [NSMutableArray array];
        _type_names = [NSMutableArray arrayWithArray:@[@"主粮系列",@"零食世界",@"益智玩具",@"衣服狗窝",@"保健医用",@"活体",@"日用系列"]];
    }
    return _type_names;
}

// 饼图类型数据
- (NSMutableArray *)type_values {
    if (!_type_values) {
        _type_values = [NSMutableArray array];
        _type_values = [NSMutableArray arrayWithArray:@[@"100",@"100",@"100",@"200",@"200",@"100",@"200"]];

    }
    return _type_values;
}
饼图画布初始化:
// 饼图画布初始化
_pieChartView = [ZLBezierPieView initWithFrame:CGRectMake(0, 100, [UIScreen mainScreen].bounds.size.width, 250)];
_pieChartView.backgroundColor = [UIColor clearColor];
[self.view addSubview:_pieChartView];
// 饼图
[_pieChartView drawPieChartViewWithType_Names:self.type_names TargetValues:self.type_values];
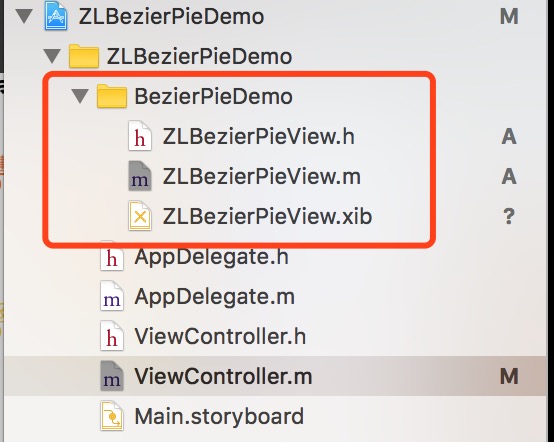
第三步: 项目截图及运行效果截图
项目截图:
运行效果截图:

界面性问题可以根据自己项目需求调整即可, 具体可参考代码, 项目能够直接运行!iOS-贝塞尔曲线之自定义饼图
注:本文著作权归作者,由demo大师代发,拒绝转载,转载需要作者授权