前言
学习过UITableView、AutoLayout以及MVC的相关知识,接下来通过一个微博页面实战来整合一下。
效果图
首先看一下效果图:

程序实现
需求分析
此页面为非等高cell,tableview的组数为1
cell内容根据数据动态展示
cell自适应高度,根据微博有无图片,适配自己高度
项目准备
数据均为本地数据(status.plist 和 images)
上手操作
1、创建工程、导入资源

2、创建MVC对应文件,本案例为:XYStatusesViewController、XYStatus、XYStatusCell控制器逻辑:
3、控制器只需管理逻辑.至于cell的创建和内部细节,全部封装起来
懒加载本地plist数据
- (NSMutableArray *)status {
        if (_status == nil) {

        NSString *path = [[NSBundle mainBundle] pathForResource:@"statuses.plist" ofType:nil];
        NSArray *array = [NSArray arrayWithContentsOfFile:path];

       NSMutableArray *arrayM = [NSMutableArray new];
       for (NSDictionary *dict in array) {

           XYStatus *status = [XYStatus statusWithDict:dict];

            [arrayM addObject:status];

        }

         _status = arrayM;


      }
      return _status;
  }
返回tableView对应的数据源
#pragma mark - Table view data source
  - (NSInteger)tableView:(UITableView *)tableView numberOfRowsInSection:(NSInteger)section {
    return self.status.count;
}
  - (UITableViewCell *)tableView:(UITableView *)tableView cellForRowAtIndexPath:(NSIndexPath *)indexPath {

    XYStatusCell *cell = [XYStatusCell cellWithTableView:tableView];

    cell.status = self.status[indexPath.row];

    NSLog(@"cell.height = %zd",cell.height);

    return cell;
}
/**
 *  不知是Xcode8的特性还是iOS10 特性。所以这种通过model保存高度的方法,可以不用写估算方法也行。
 *  因为最初精算,返回值为0,Model中没有保存。然后返回cell之后,再精算的时候返回真实的保存值。
 */
 - (CGFloat)tableView:(UITableView *)tableView heightForRowAtIndexPath:(NSIndexPath *)indexPath
{
    NSLog(@"-----heightForRowAtIndexPath------");
    XYStatus *status = self.status[indexPath.row];
    return status.cellHeight;

}
/**
 *  这个方法很重要:是估算cell的高度。有这个方法的调用顺序是: 1.估算 2.返回cell 3. 计算准确高度
 *                                            否则:1.计算准确高度 2.返回cell 3.再计算准确高度
 *
 *  不知是Xcode8的特性还是iOS10 特性。所以这种通过model保存高度的方法,可以不用写估算方法也行
 */
 - (CGFloat)tableView:(UITableView *)tableView estimatedHeightForRowAtIndexPath:(NSIndexPath *)indexPath
{

    NSLog(@"-----estimatedHeightForRowAtIndexPath------");

    return 200;
}
模型的封装:模型用来存储内部数据、并通过KVC来保存传入数据
@property (nonatomic, copy) NSString *text;
@property (nonatomic, copy) NSString *name;
@property (nonatomic, copy) NSString *icon;
@property (nonatomic, copy) NSString *picture;
@property (nonatomic, assign,getter=isVip) BOOL vip;
/**
 *  cellHeight
 */
@property (nonatomic, assign) CGFloat cellHeight;
+ (instancetype)statusWithDict:(NSDictionary *)dict;
- (instancetype)initWithDict:(NSDictionary *)dict;
// 内部实现
    + (instancetype)statusWithDict:(NSDictionary *)dict
{
    return [[self alloc] initWithDict:dict];
}
- (instancetype)initWithDict:(NSDictionary *)dict
{
    if (self == [super init]) {

        [self setValuesForKeysWithDictionary:dict];

    }
    return self;
}
View的封装,cell推荐使用xib创建,因为方便
首先cell需要一个status属性、并提供一个类方法创建实例
@property (nonatomic, strong) XYStatus *status;
+ (instancetype)cellWithTableView:(UITableView *)tableView;
在Xib中设置内容控件并拖到.m中(设置好复用标识)

根据Xib创建view的步骤来,设置cell
cell类方法的实现
+ (instancetype)cellWithTableView:(UITableView *)tableView
{

    static NSString *ID = @"cell";
    XYStatusCell *cell = [tableView dequeueReusableCellWithIdentifier:ID];

    if (cell == nil) {
        cell = [[[NSBundle mainBundle] loadNibNamed:NSStringFromClass(self) owner:nil options:nil] lastObject];

    }

    return cell;
}
设置cell的数据 status
- (void)setStatus:(XYStatus *)status
{
    _status = status;

    self.iconView.image = [UIImage imageNamed:status.icon];

    self.nameLabel.text = status.name;

    self.contentLabel.text = status.text;


    if (status.isVip) {

        self.vipView.hidden = NO;
        self.vipView.image = [UIImage imageNamed:@"vip"];
        self.nameLabel.textColor = [UIColor orangeColor];
    }else
    {
        self.vipView.hidden = YES;
        self.nameLabel.textColor = [UIColor blackColor];
    }

    if (status.picture) {
        self.pictureView.hidden = NO;
        self.pictureView.image = [UIImage imageNamed:status.picture];

        _height = CGRectGetMaxY(self.pictureView.frame) + 10;
    }else
    {
        self.pictureView.hidden = YES;

        _height = CGRectGetMaxY(self.contentLabel.frame) + 10;
    }

    // 强制布局
    [self layoutIfNeeded];


    // 计算并标记高度保存到model中去
    if (self.pictureView.hidden) {
        _height = CGRectGetMaxY(self.contentLabel.frame) + 10;
    }else
    {
        _height = CGRectGetMaxY(self.pictureView.frame) + 10;
    }


    // 这里有个注意点:
    // 通过强制布局使得cell子控件设置数据,计算出具体frame。
    // 通过计算的cell的高度,来重新保存到status模型中
    // 这里是C语言中指针的知识,如果有问题,欢迎留言
    status.cellHeight = _height;


}
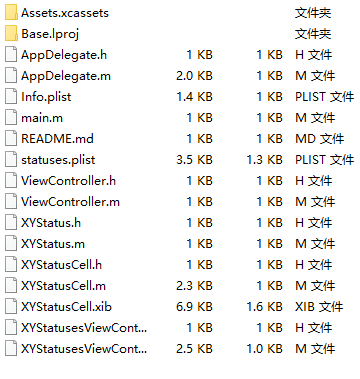
项目代码结构截图
源码截图如下
小结:
麻雀虽小,五脏俱全。非等高cell实战--实现微博页面
注:本文著作权归作者,由demo大师代发,拒绝转载,转载需要作者授权