1、线性布局(linearlayout)是一种让视图水平或垂直线性排列的布局线性布局使用<LinearLayout>标签进行配置对应代码中的类是android.widget.LinearLayout线性布局分为水平和垂直两种方向
线性布局的常用属性如下:
android:orientation 表示布局方向
取值vertical表示垂直布局
取值horizontal表示水平布局
android:gravity 表示视图的对齐方式内容包括:top、bottom、left、right、center_vertical、center_horizontal、center可以使用|分隔填写多个值
布局中的视图可以使用如下属性
android:layout_gravity 表示单个视图的对齐方式
android:layout_weight 表示单个视图所在大小的比重当layout_weight为0时,视图大小由自身确定当layout_weight大于0时,视图在线性布局方向上根据比重拉伸
所编写的一个实例代码如下:
activity_main.xml
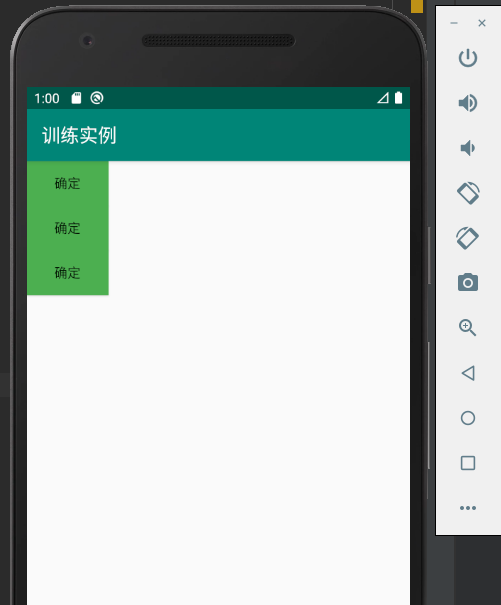
<?xml version="1.0" encoding="utf-8"?>
<LinearLayout xmlns:android="http://schemas.android.com/apk/res/android"
    xmlns:app="http://schemas.android.com/apk/res-auto"
    xmlns:tools="http://schemas.android.com/tools"
    android:layout_width="match_parent"
    android:layout_height="match_parent"
    android:orientation="vertical"
    tools:context=".MainActivity" >


    <Button
        android:id="@+id/btnOk"
        android:layout_width="wrap_content"
        android:layout_height="wrap_content"

        android:background="#4CAF50"
        android:text="@string/btn_ok" />
    <Button
        android:id="@+id/btnOk2"
        android:layout_width="wrap_content"
        android:layout_height="wrap_content"

        android:background="#4CAF50"
        android:text="@string/btn_ok" />
    <Button
        android:id="@+id/btnOk3"
        android:layout_width="wrap_content"
        android:layout_height="wrap_content"

        android:background="#4CAF50"
        android:text="@string/btn_ok" />

</LinearLayout>
具体的实验结果如下:
当修改相应的布局方式时候
activity_main.xml
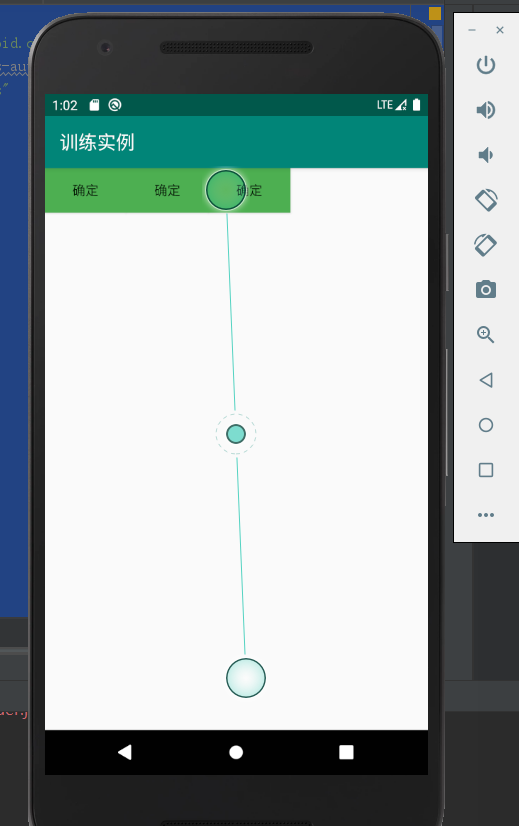
<?xml version="1.0" encoding="utf-8"?>
<LinearLayout xmlns:android="http://schemas.android.com/apk/res/android"
    xmlns:app="http://schemas.android.com/apk/res-auto"
    xmlns:tools="http://schemas.android.com/tools"
    android:layout_width="match_parent"
    android:layout_height="match_parent"
    android:orientation="horizontal"
    tools:context=".MainActivity" >

    <Button
        android:id="@+id/btnOk"
        android:layout_width="wrap_content"
        android:layout_height="wrap_content"
        android:background="#4CAF50"
        android:text="@string/btn_ok" />
    <Button
        android:id="@+id/btnOk2"
        android:layout_width="wrap_content"
        android:layout_height="wrap_content"
        android:background="#4CAF50"
        android:text="@string/btn_ok" />
    <Button
        android:id="@+id/btnOk3"
        android:layout_width="wrap_content"
        android:layout_height="wrap_content"
        android:background="#4CAF50"
        android:text="@string/btn_ok" />

</LinearLayout>
实验的结果如下:
2、对于相对布局:
相对布局是一种通过设置相对位置进行的布局相对布局使用<RelativeLayout>标签进行配置对应代码中的类是android.widget.RelativeLayout布局中的视图通过设置相互间的相对位置进行排列相对的排列位置相对的对齐方式
相对布局内视图可用的常用属性如下:
与位置相关的属性
android:layout_above 表示在目标组件之上
android:layout_below 表示在目标组件之下
android:layout_toLeftOf 表示在目标组件的左边
android:layout_toRightOf 表示在目标组件的右边
与对齐相关的属性
android:alignBaseLine 表示与目标组件的基线对齐
android:alignBottom 表示与目标组件的底边对齐
android:alignTop 表示与目标组件的顶边对齐
android:alignLeft 表示与目标组件的左边对齐
android:alignRight 表示与目标组件的右边对齐
android:layout_centerHorizontal 表示在相对布局容器内水平居中
android:layout_centerVertical 表示在相对布局容器内垂直居中
对应的代码实例如下:
activity_main.xml
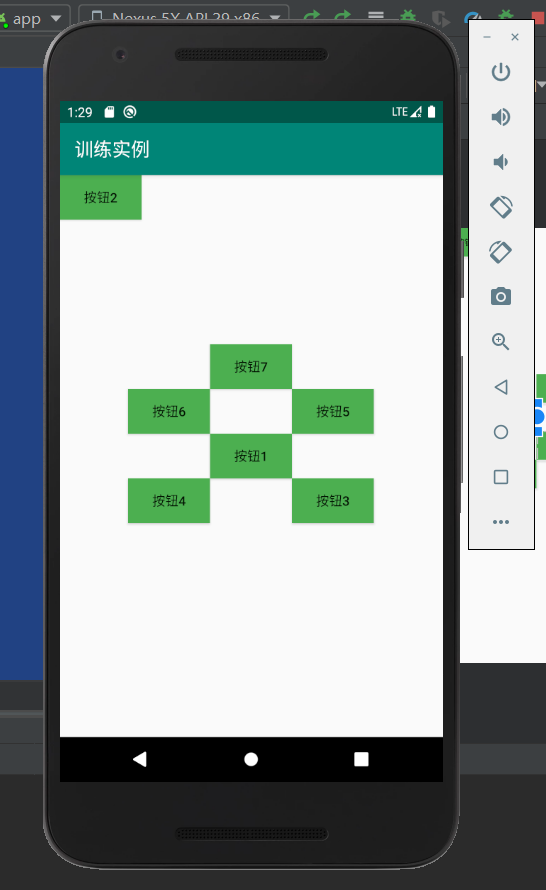
<?xml version="1.0" encoding="utf-8"?>
<RelativeLayout xmlns:android="http://schemas.android.com/apk/res/android"
    xmlns:app="http://schemas.android.com/apk/res-auto"
    xmlns:tools="http://schemas.android.com/tools"
    android:layout_width="match_parent"
    android:layout_height="match_parent"
    android:orientation="horizontal"
    tools:context=".MainActivity" >

    <Button
        android:id="@+id/btnOk"
        android:layout_width="wrap_content"
        android:layout_height="wrap_content"
        android:layout_centerInParent="true"
        android:background="#4CAF50"
        android:text="按钮1" />
    <Button
        android:id="@+id/btnOk2"
        android:layout_width="wrap_content"
        android:layout_height="wrap_content"
        android:layout_alignParentLeft="true"
        android:layout_alignParentTop="true"
        android:background="#4CAF50"
        android:text="按钮2" />
    <Button
        android:id="@+id/btnOk3"
        android:layout_width="wrap_content"
        android:layout_height="wrap_content"
        android:layout_below="@id/btnOk"
        android:layout_toRightOf="@id/btnOk"
        android:background="#4CAF50"
        android:text="按钮3"
         />
    <Button
        android:id="@+id/btnOk4"
        android:layout_width="wrap_content"
        android:layout_height="wrap_content"
        android:layout_below="@id/btnOk"
        android:layout_toLeftOf="@id/btnOk"
        android:background="#4CAF50"
        android:text="按钮4" />
    <Button
        android:id="@+id/btnOk5"
        android:layout_width="wrap_content"
        android:layout_height="wrap_content"
        android:layout_above="@id/btnOk"
        android:layout_toRightOf="@id/btnOk"
        android:background="#4CAF50"
        android:text="按钮5" />
    <Button
        android:id="@+id/btnOk6"
        android:layout_width="wrap_content"
        android:layout_height="wrap_content"
        android:layout_above="@id/btnOk"
        android:layout_toLeftOf="@id/btnOk"
        android:background="#4CAF50"
        android:text="按钮6" />
    <Button
        android:id="@+id/btnOk7"
        android:layout_width="wrap_content"
        android:layout_height="wrap_content"
        android:layout_above="@id/btnOk6"
        android:layout_toRightOf="@id/btnOk6"
        android:background="#4CAF50"
        android:text="按钮7" />

</RelativeLayout>
实验结果如下:
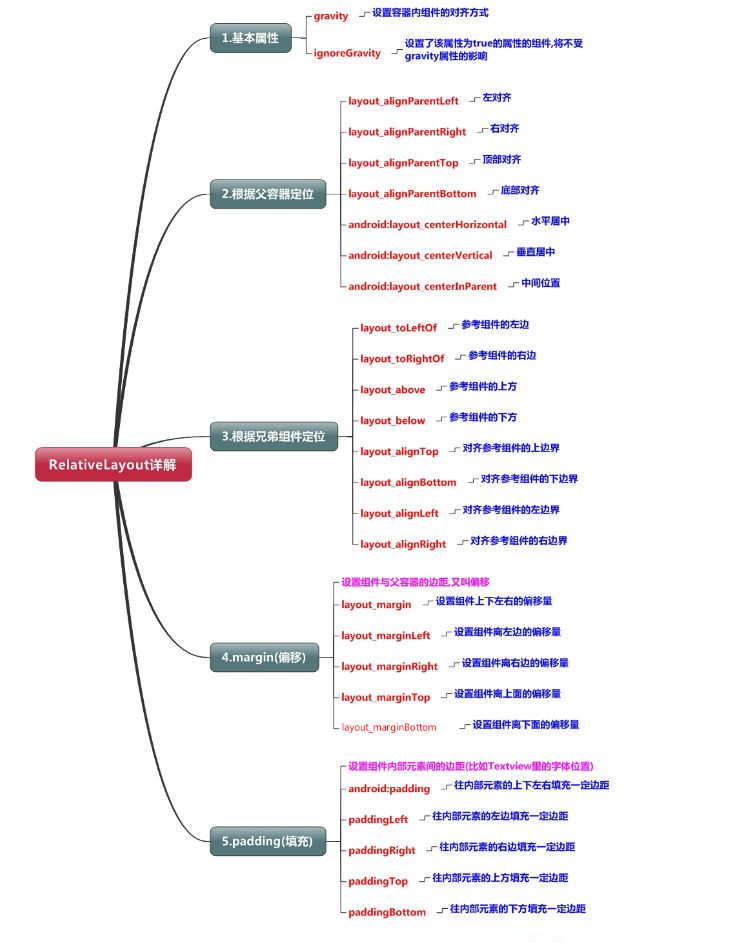
相关的会用到的知识点相关内容如下:
3、表格布局(TableLayout)
表格布局是一种行列方式排列视图的布局使用<TableLayout>和<TableRow>标签进行配置对应的类是android.widget.TableLayout一对<TableRow>标签包含着一行中显示的视图
表格布局的常用属性
android:stretchColumns 用于指定可以被拉伸的列
可以被拉伸的列在屏幕还有空白区域时被拉伸充满
列通过0开始的索引值表示
多个列之间用逗号隔开
android:shrinkColumns 用于指定可以被压缩的列
当屏幕不够用时,列被压缩直到完全显示
android:collapseColumns 用于表示可以被完全折叠的列
表格布局内视图可用的常用属性如下:
android:layout_column 指定列索引号
由于有些行可能列数量不全,这时候需要给列指定索引号
相应的实例代码如下:
activity_main.xml
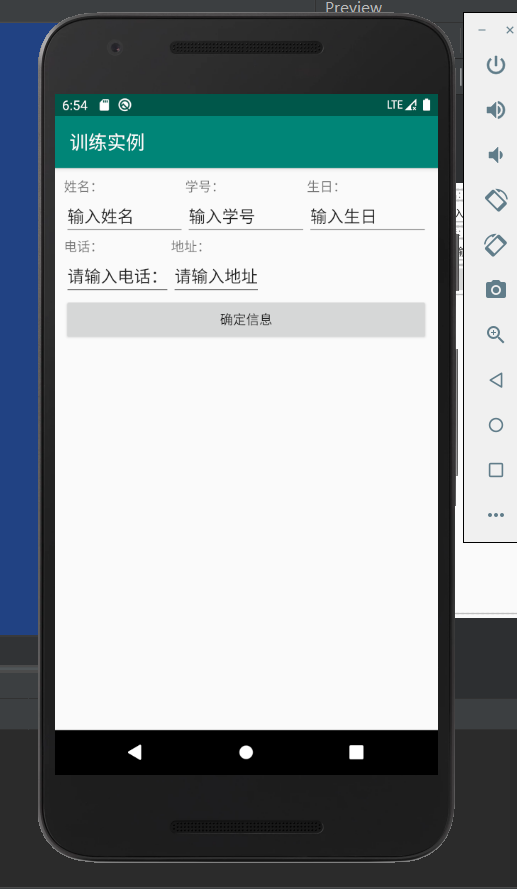
<?xml version="1.0" encoding="utf-8"?>
<TableLayout xmlns:android="http://schemas.android.com/apk/res/android"
    xmlns:app="http://schemas.android.com/apk/res-auto"
    xmlns:tools="http://schemas.android.com/tools"
    android:layout_width="match_parent"
    android:layout_height="match_parent"
    android:layout_gravity="center_horizontal"
    android:layout_margin="10dp"
    tools:context=".MainActivity">
    <TableLayout
        android:layout_width="match_parent"
        android:layout_height="wrap_content">
        <TableRow>
            <TextView
                android:text="姓名:"
                android:layout_weight="1"/>
            <TextView android:text="学号:"
                android:layout_weight="1"/>
            <TextView android:text="生日:"
                android:layout_weight="1"/>
        </TableRow>
        <TableRow>
            <EditText android:text="输入姓名"
                android:layout_weight="1"/>
            <EditText android:text="输入学号"
                android:layout_weight="1"/>
            <EditText android:text="输入生日"
                android:layout_weight="1"/>
        </TableRow>
    </TableLayout>
    <TableRow>
        <TextView android:text="电话:" />
        <TextView android:text="地址:" />
    </TableRow>
    <TableRow>
        <EditText android:text="请输入电话:"/>
        <EditText android:text="请输入地址"/>
    </TableRow>
    <Button android:text="确定信息"
        />
</TableLayout>
对应的实验结果如下:
现在基本掌握的就是这三种布局格式。