注:IntelliJ IDEA版本为2019.3.1。另一篇文章可供参考: [Java] IntelliJ IDEA 2019.3.1创建完整的Spring Boot项目
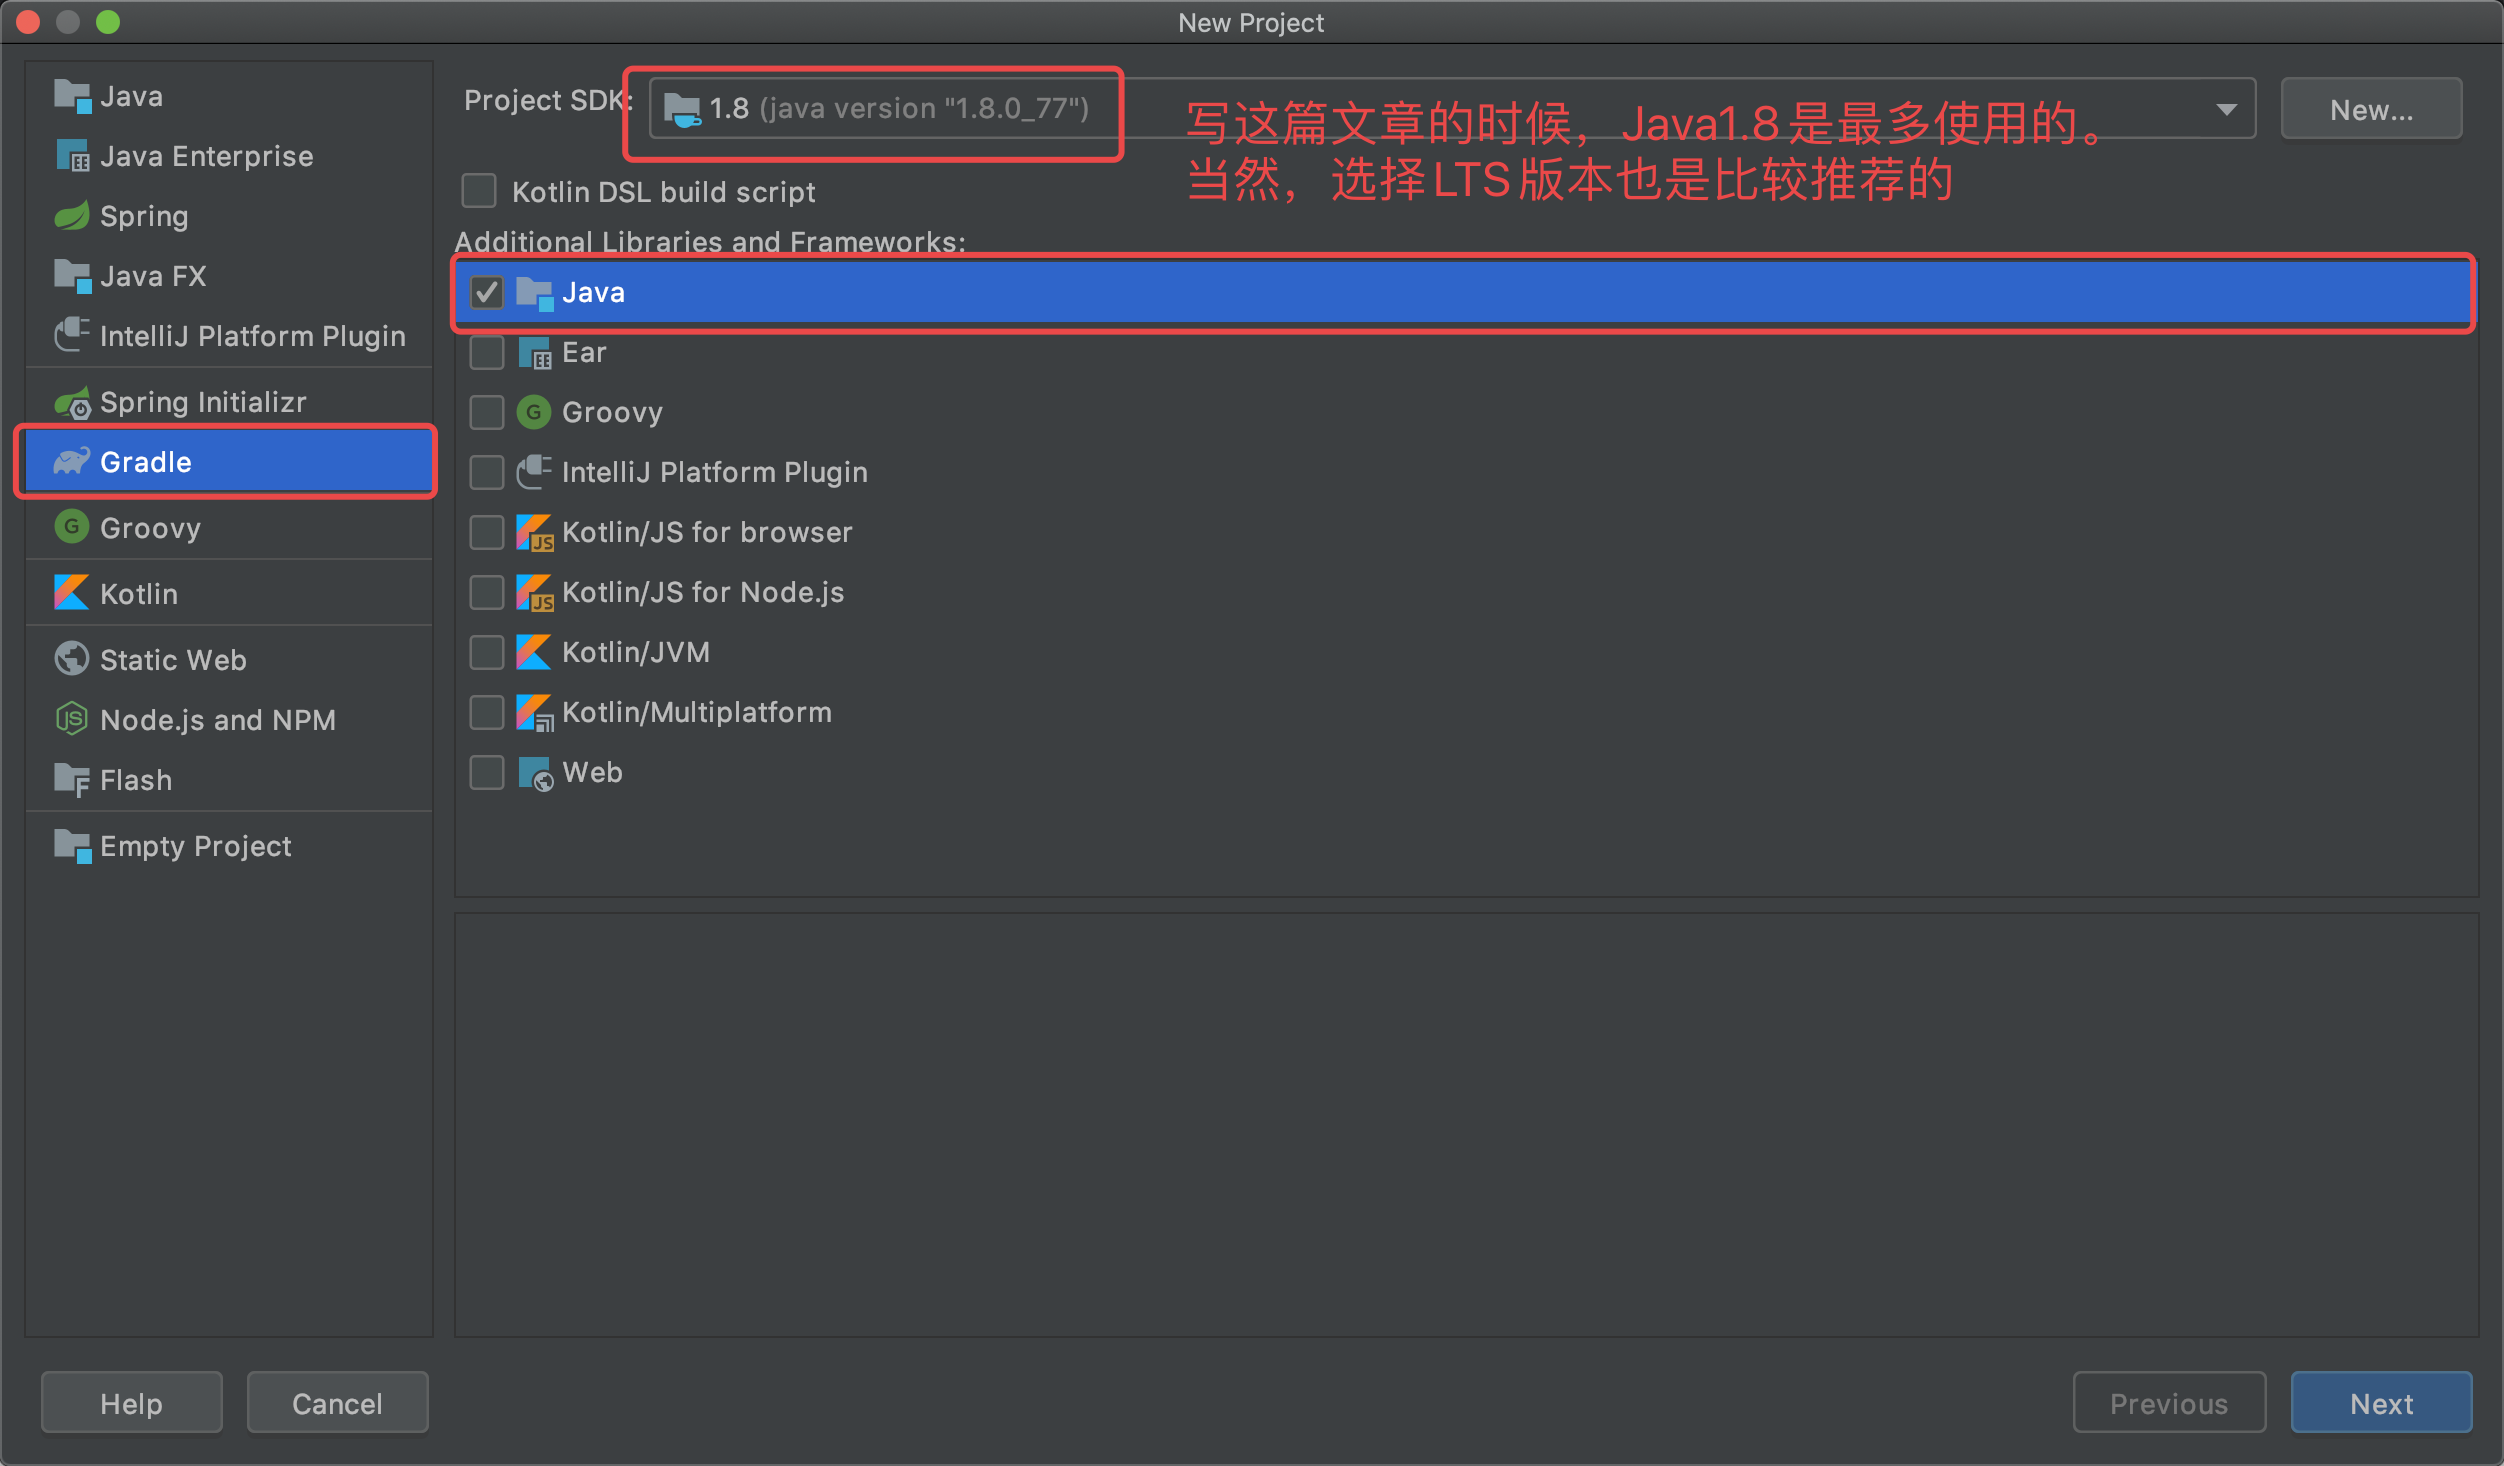
1. 新建项目

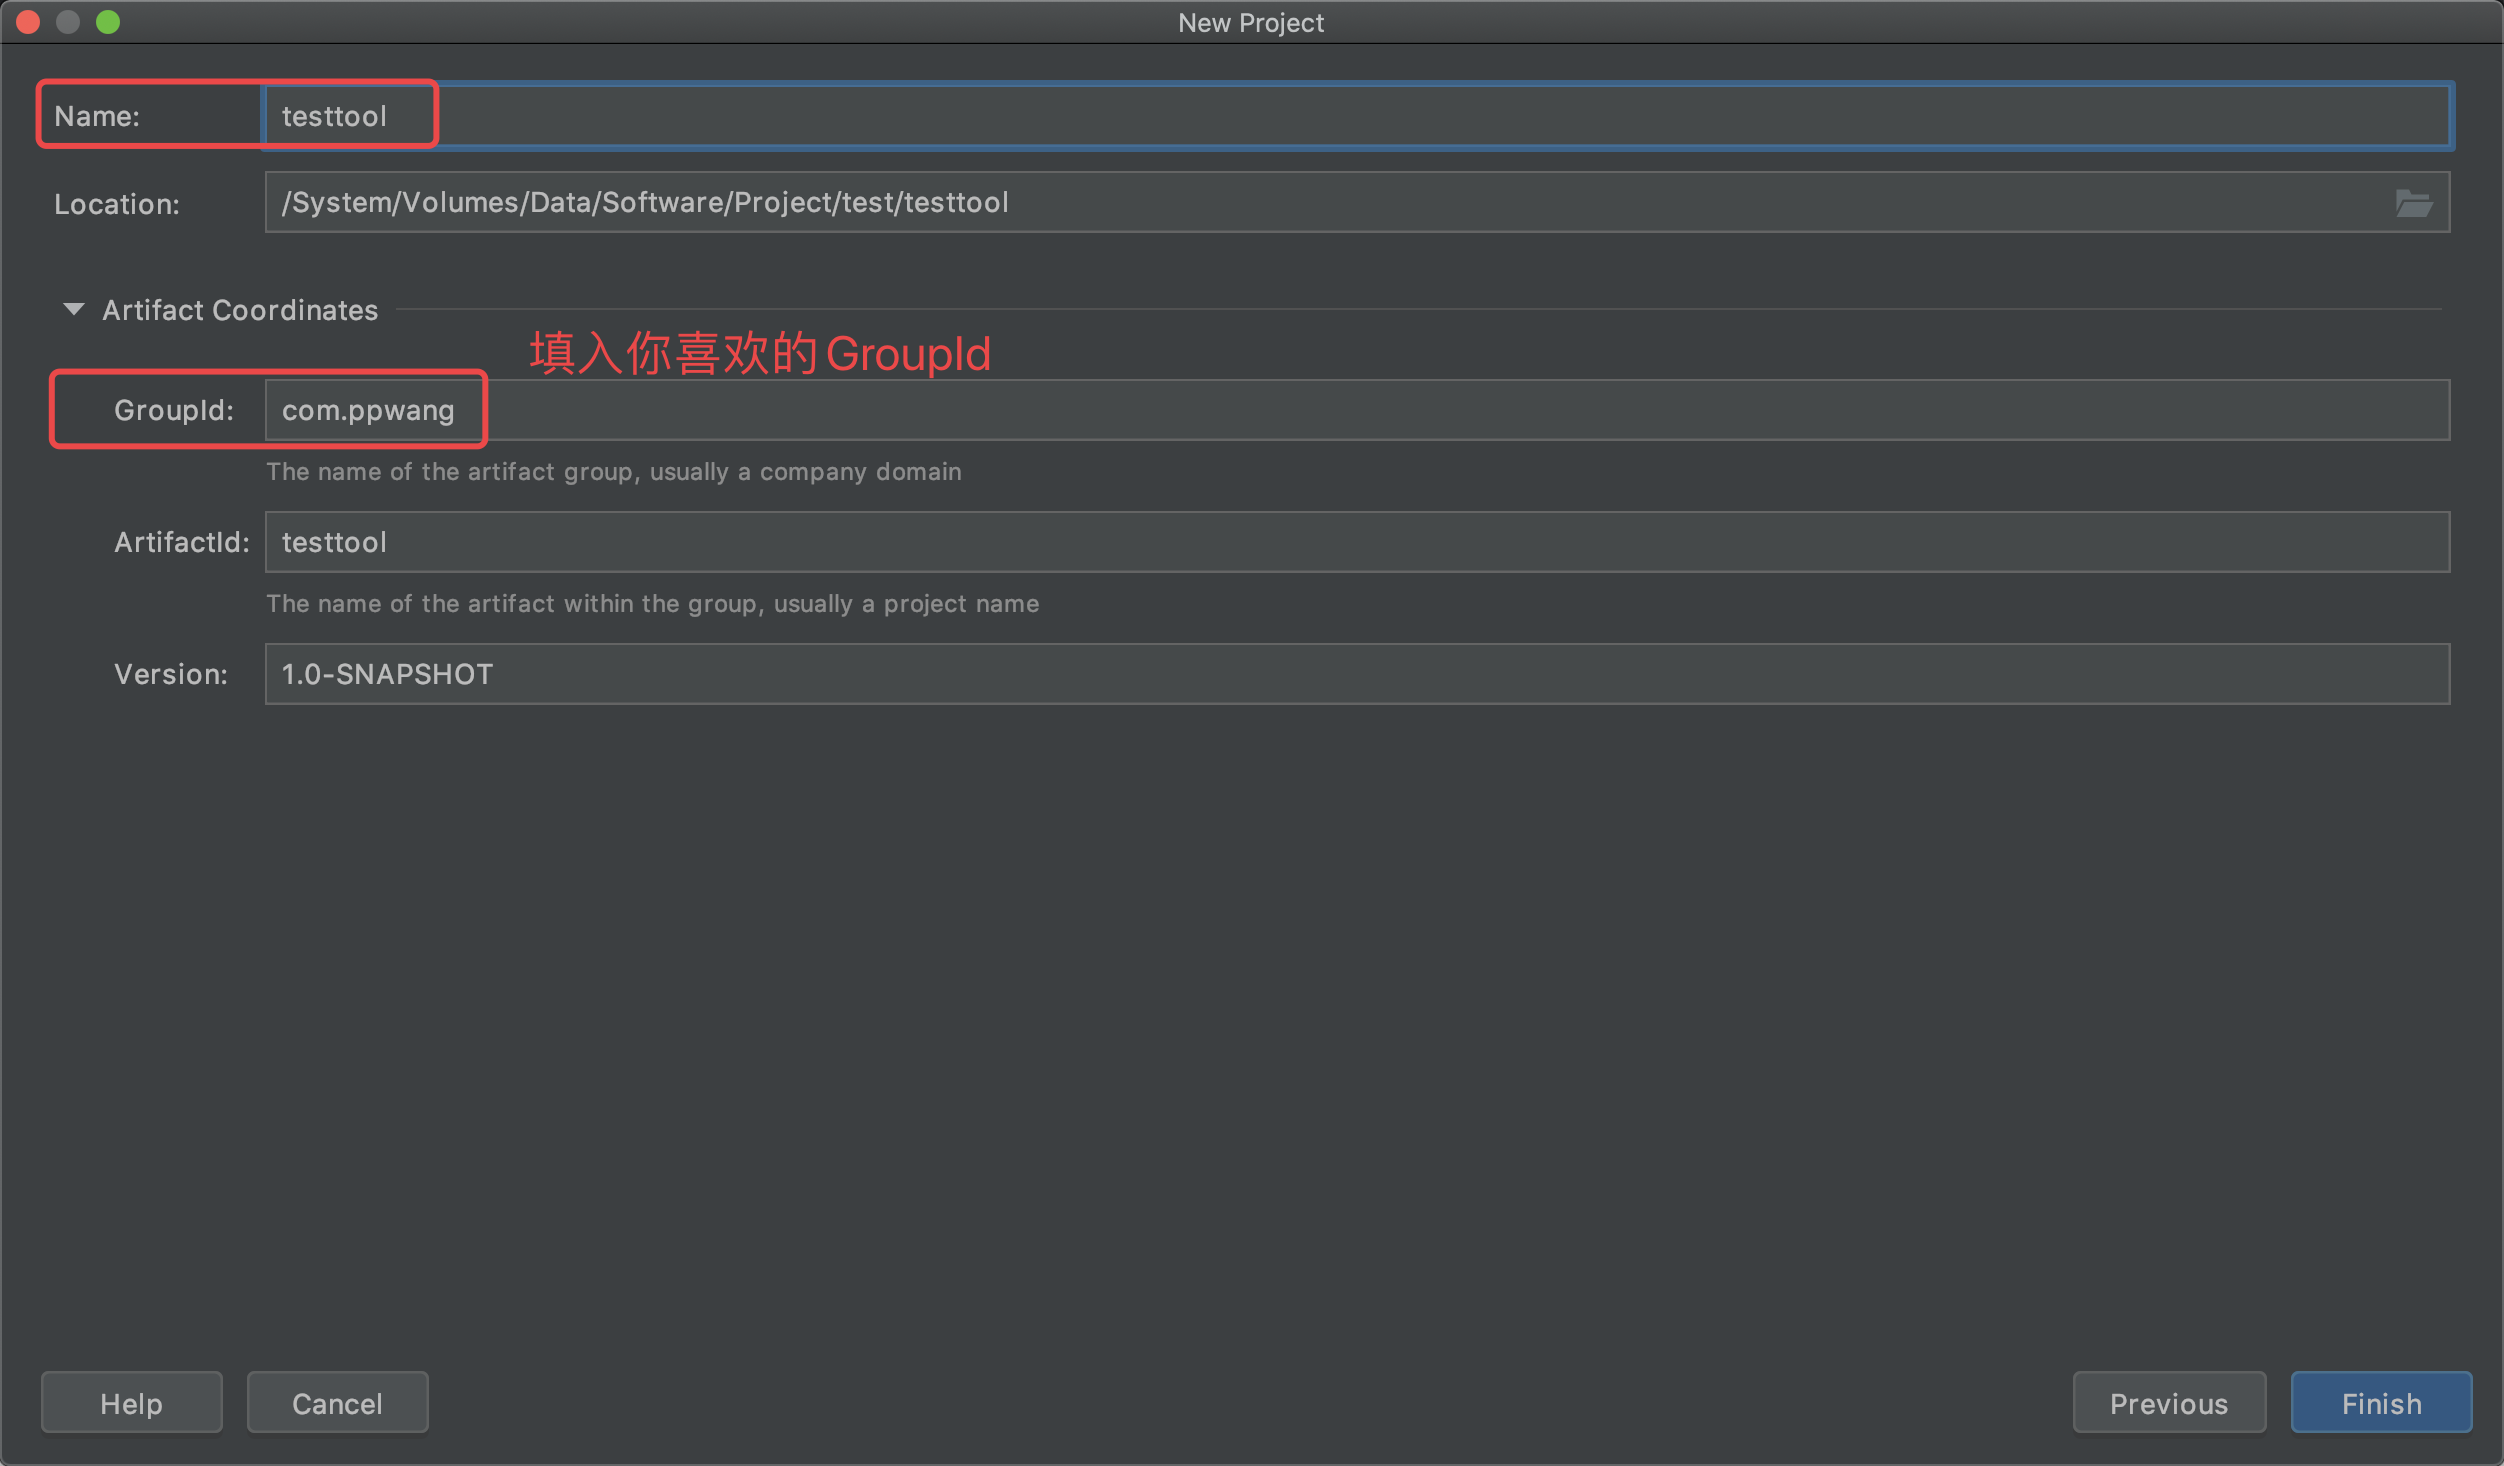
2. 新建项目为Gradle
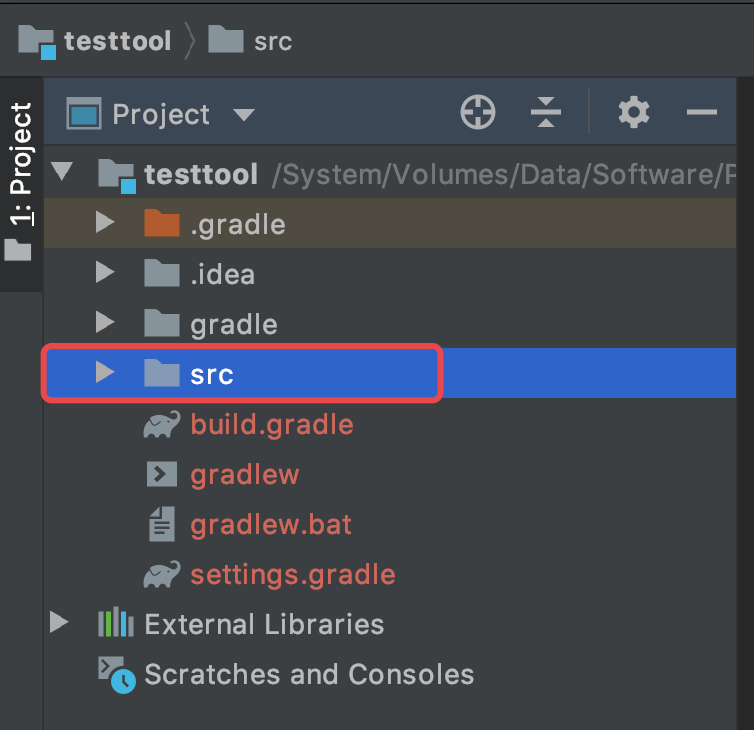
3. 删掉根项目的src目录,开始准备创建模块
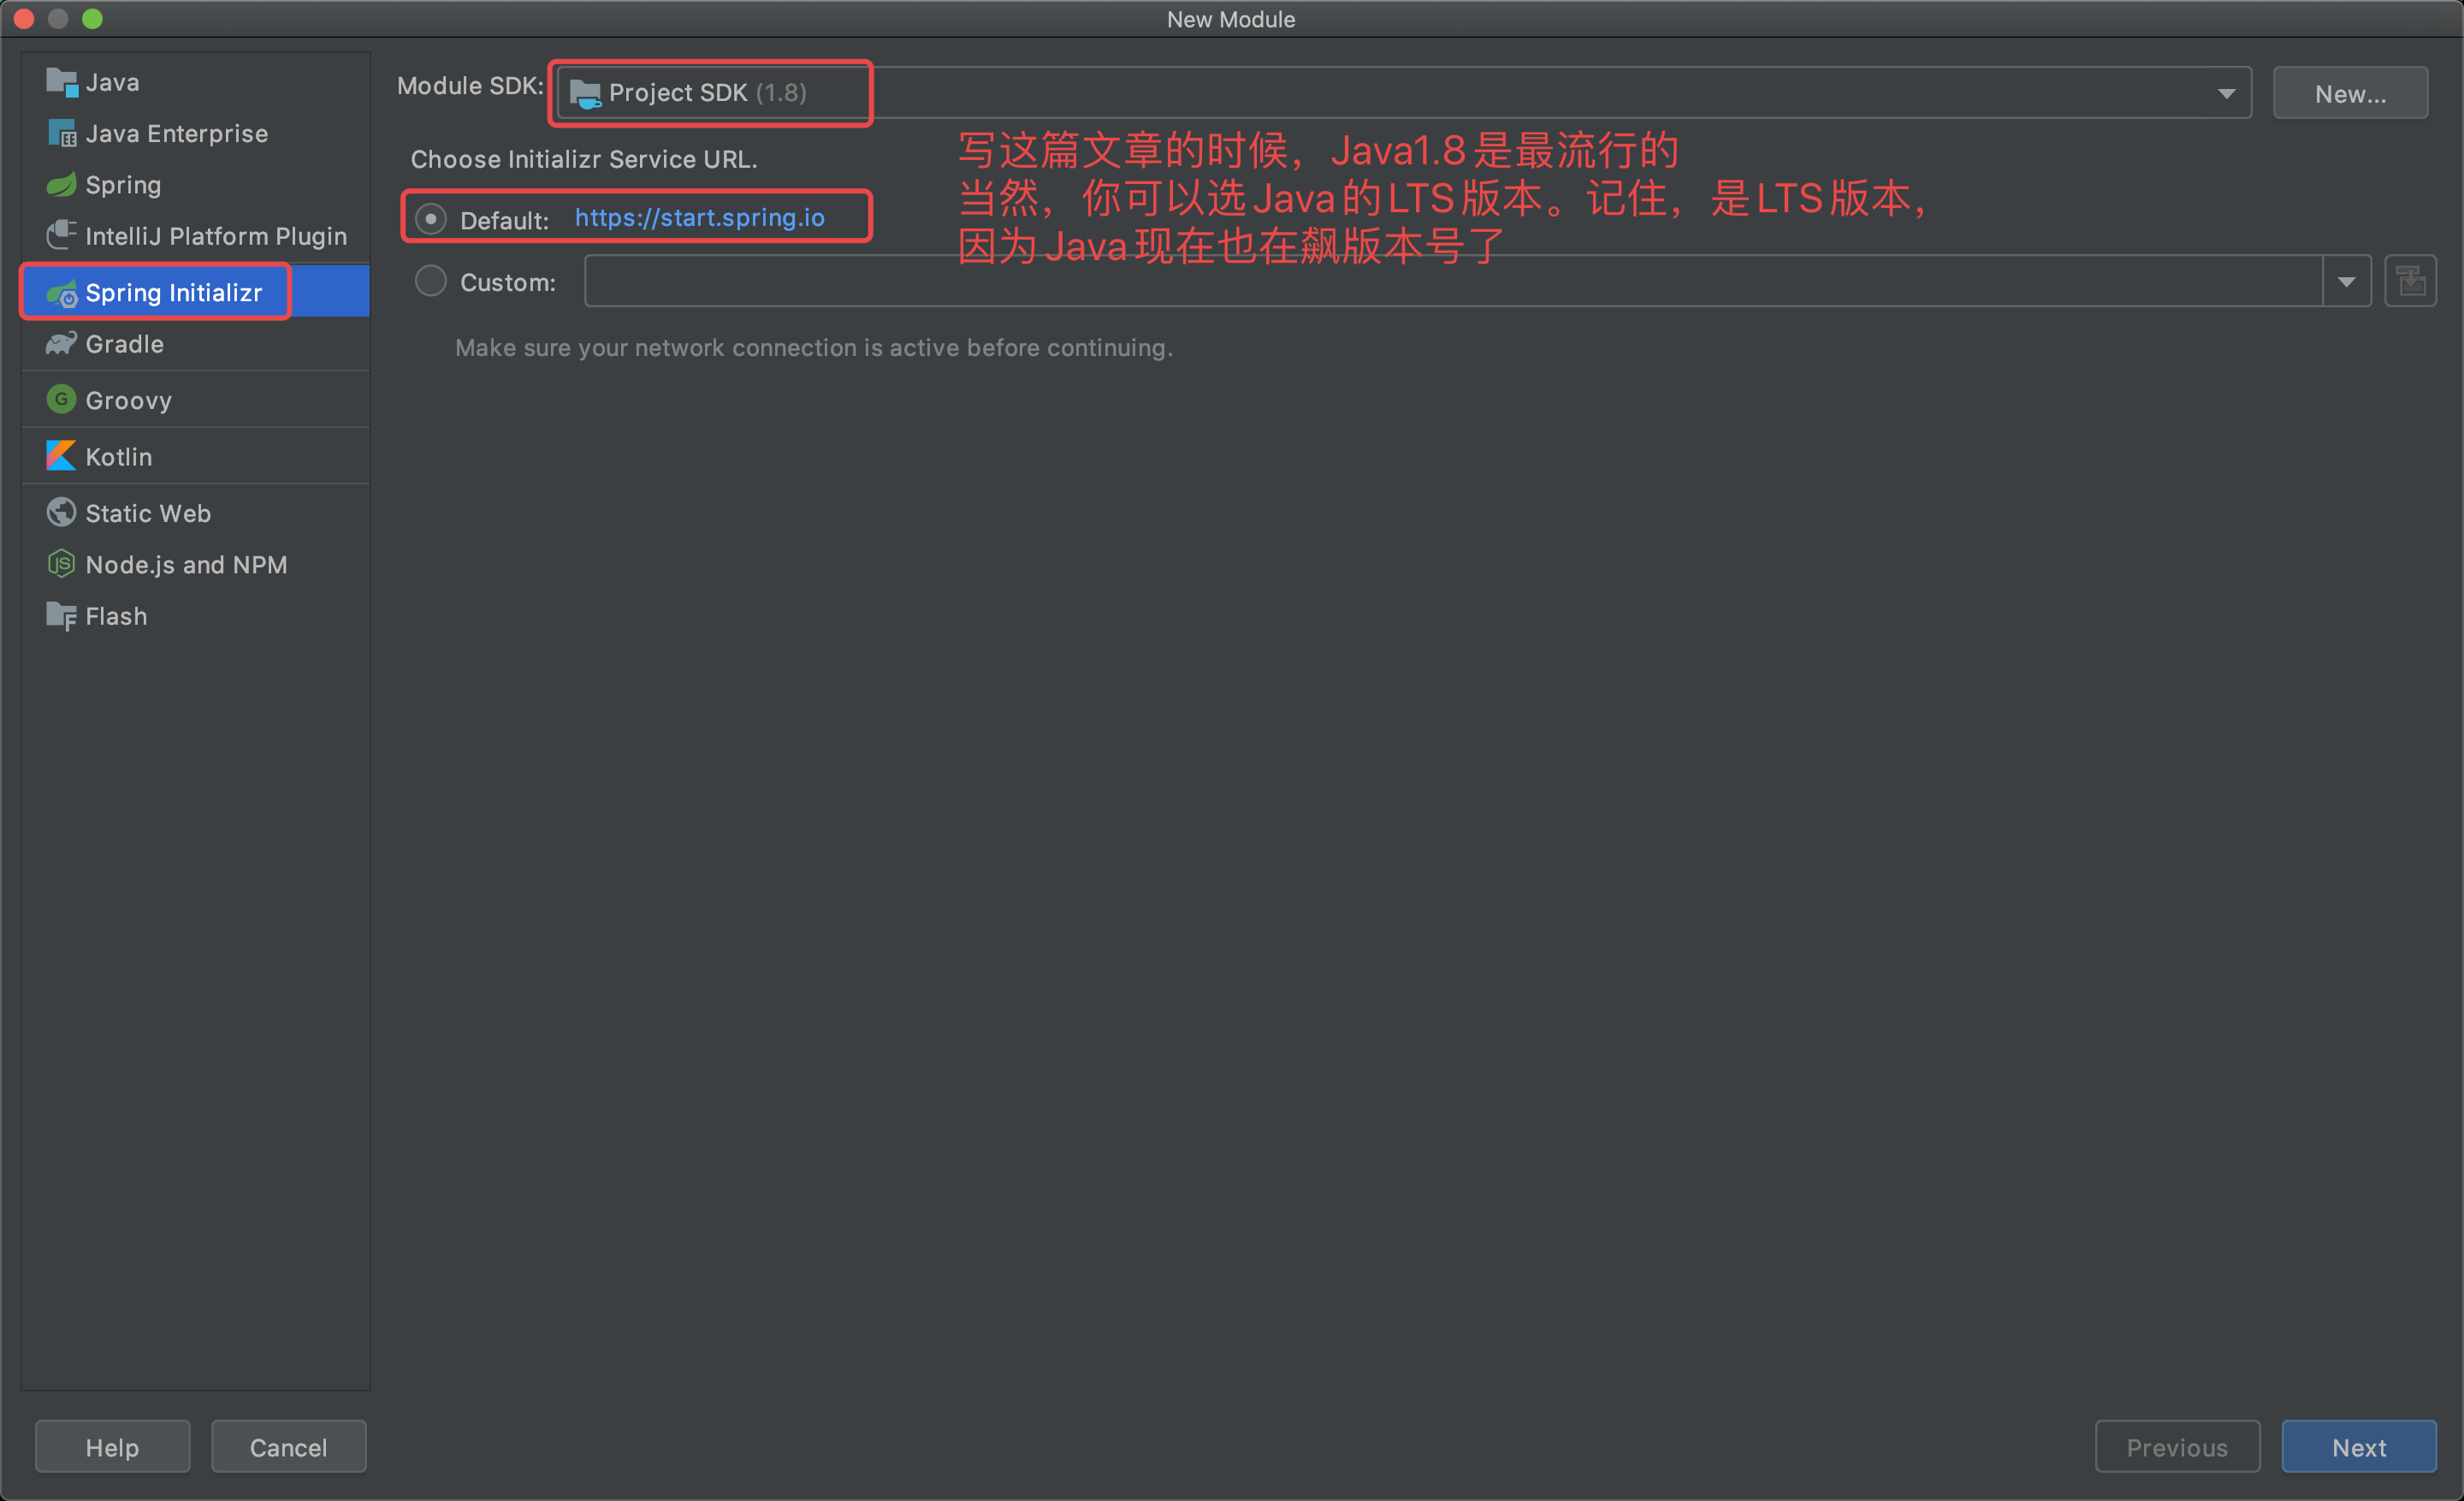
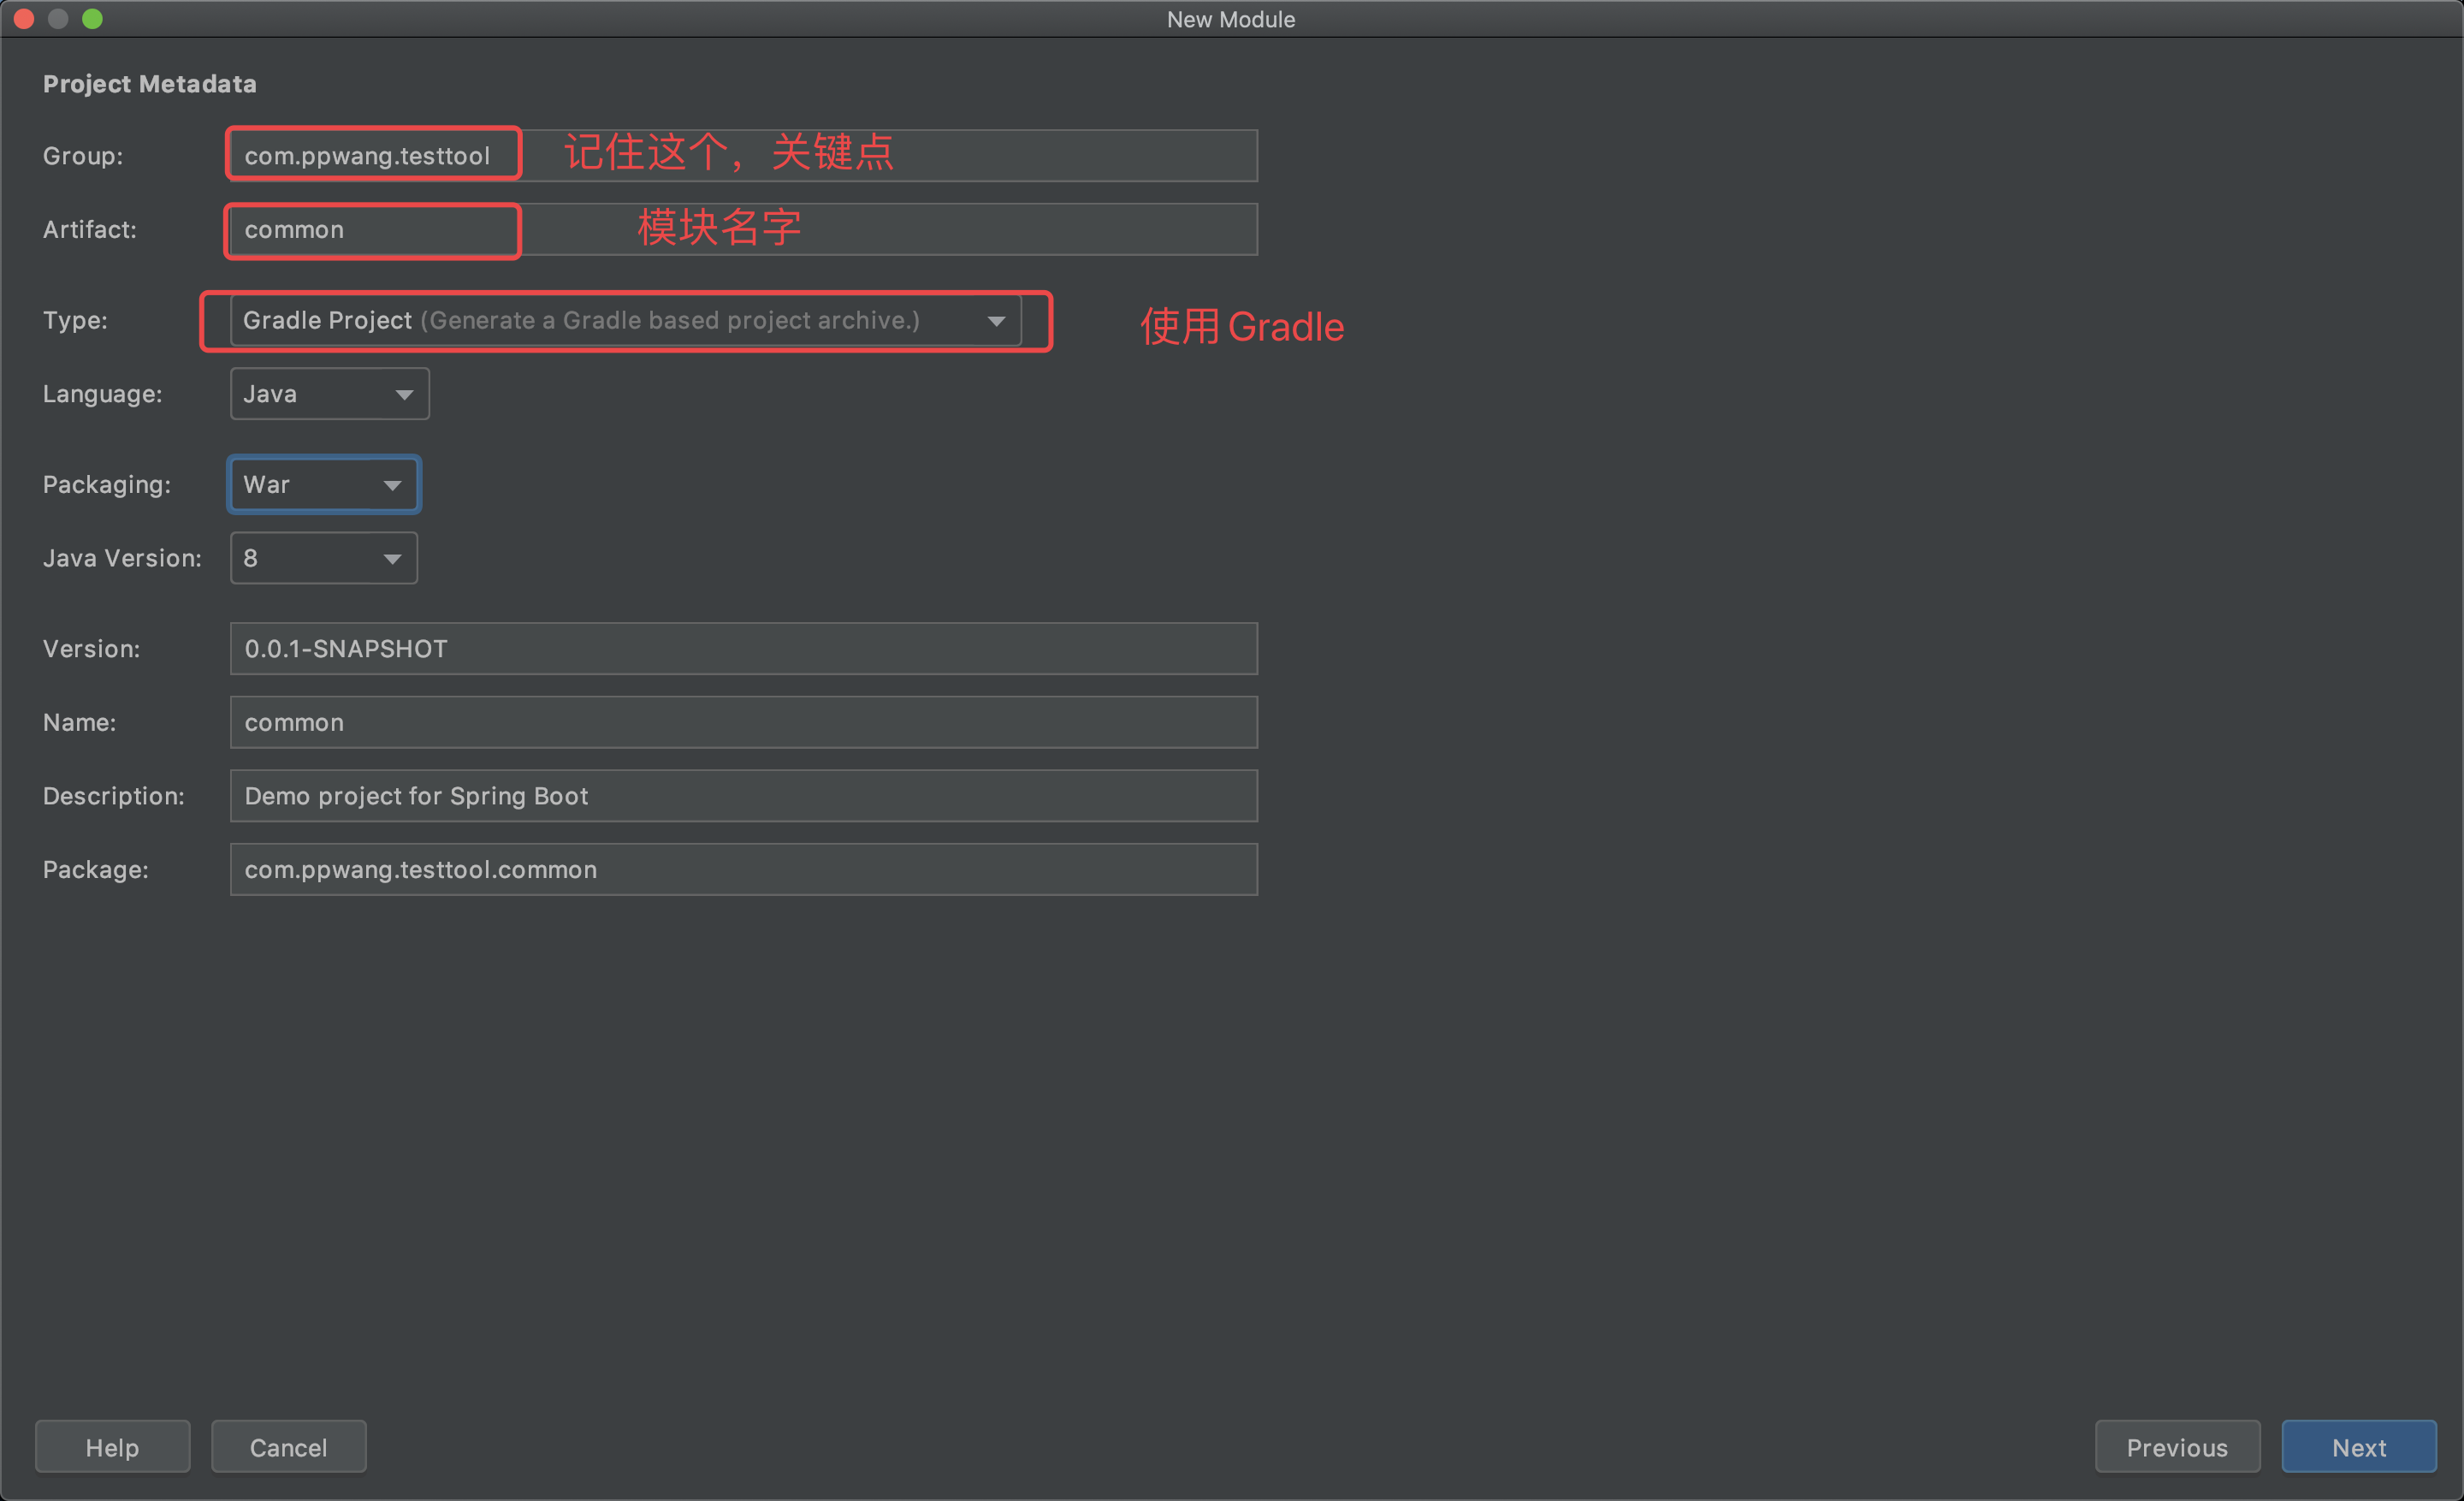
4. 开始创建一个通用模块common模块
选择file->new->module(注意此时鼠标的位置应该在根项目名上)

下一步
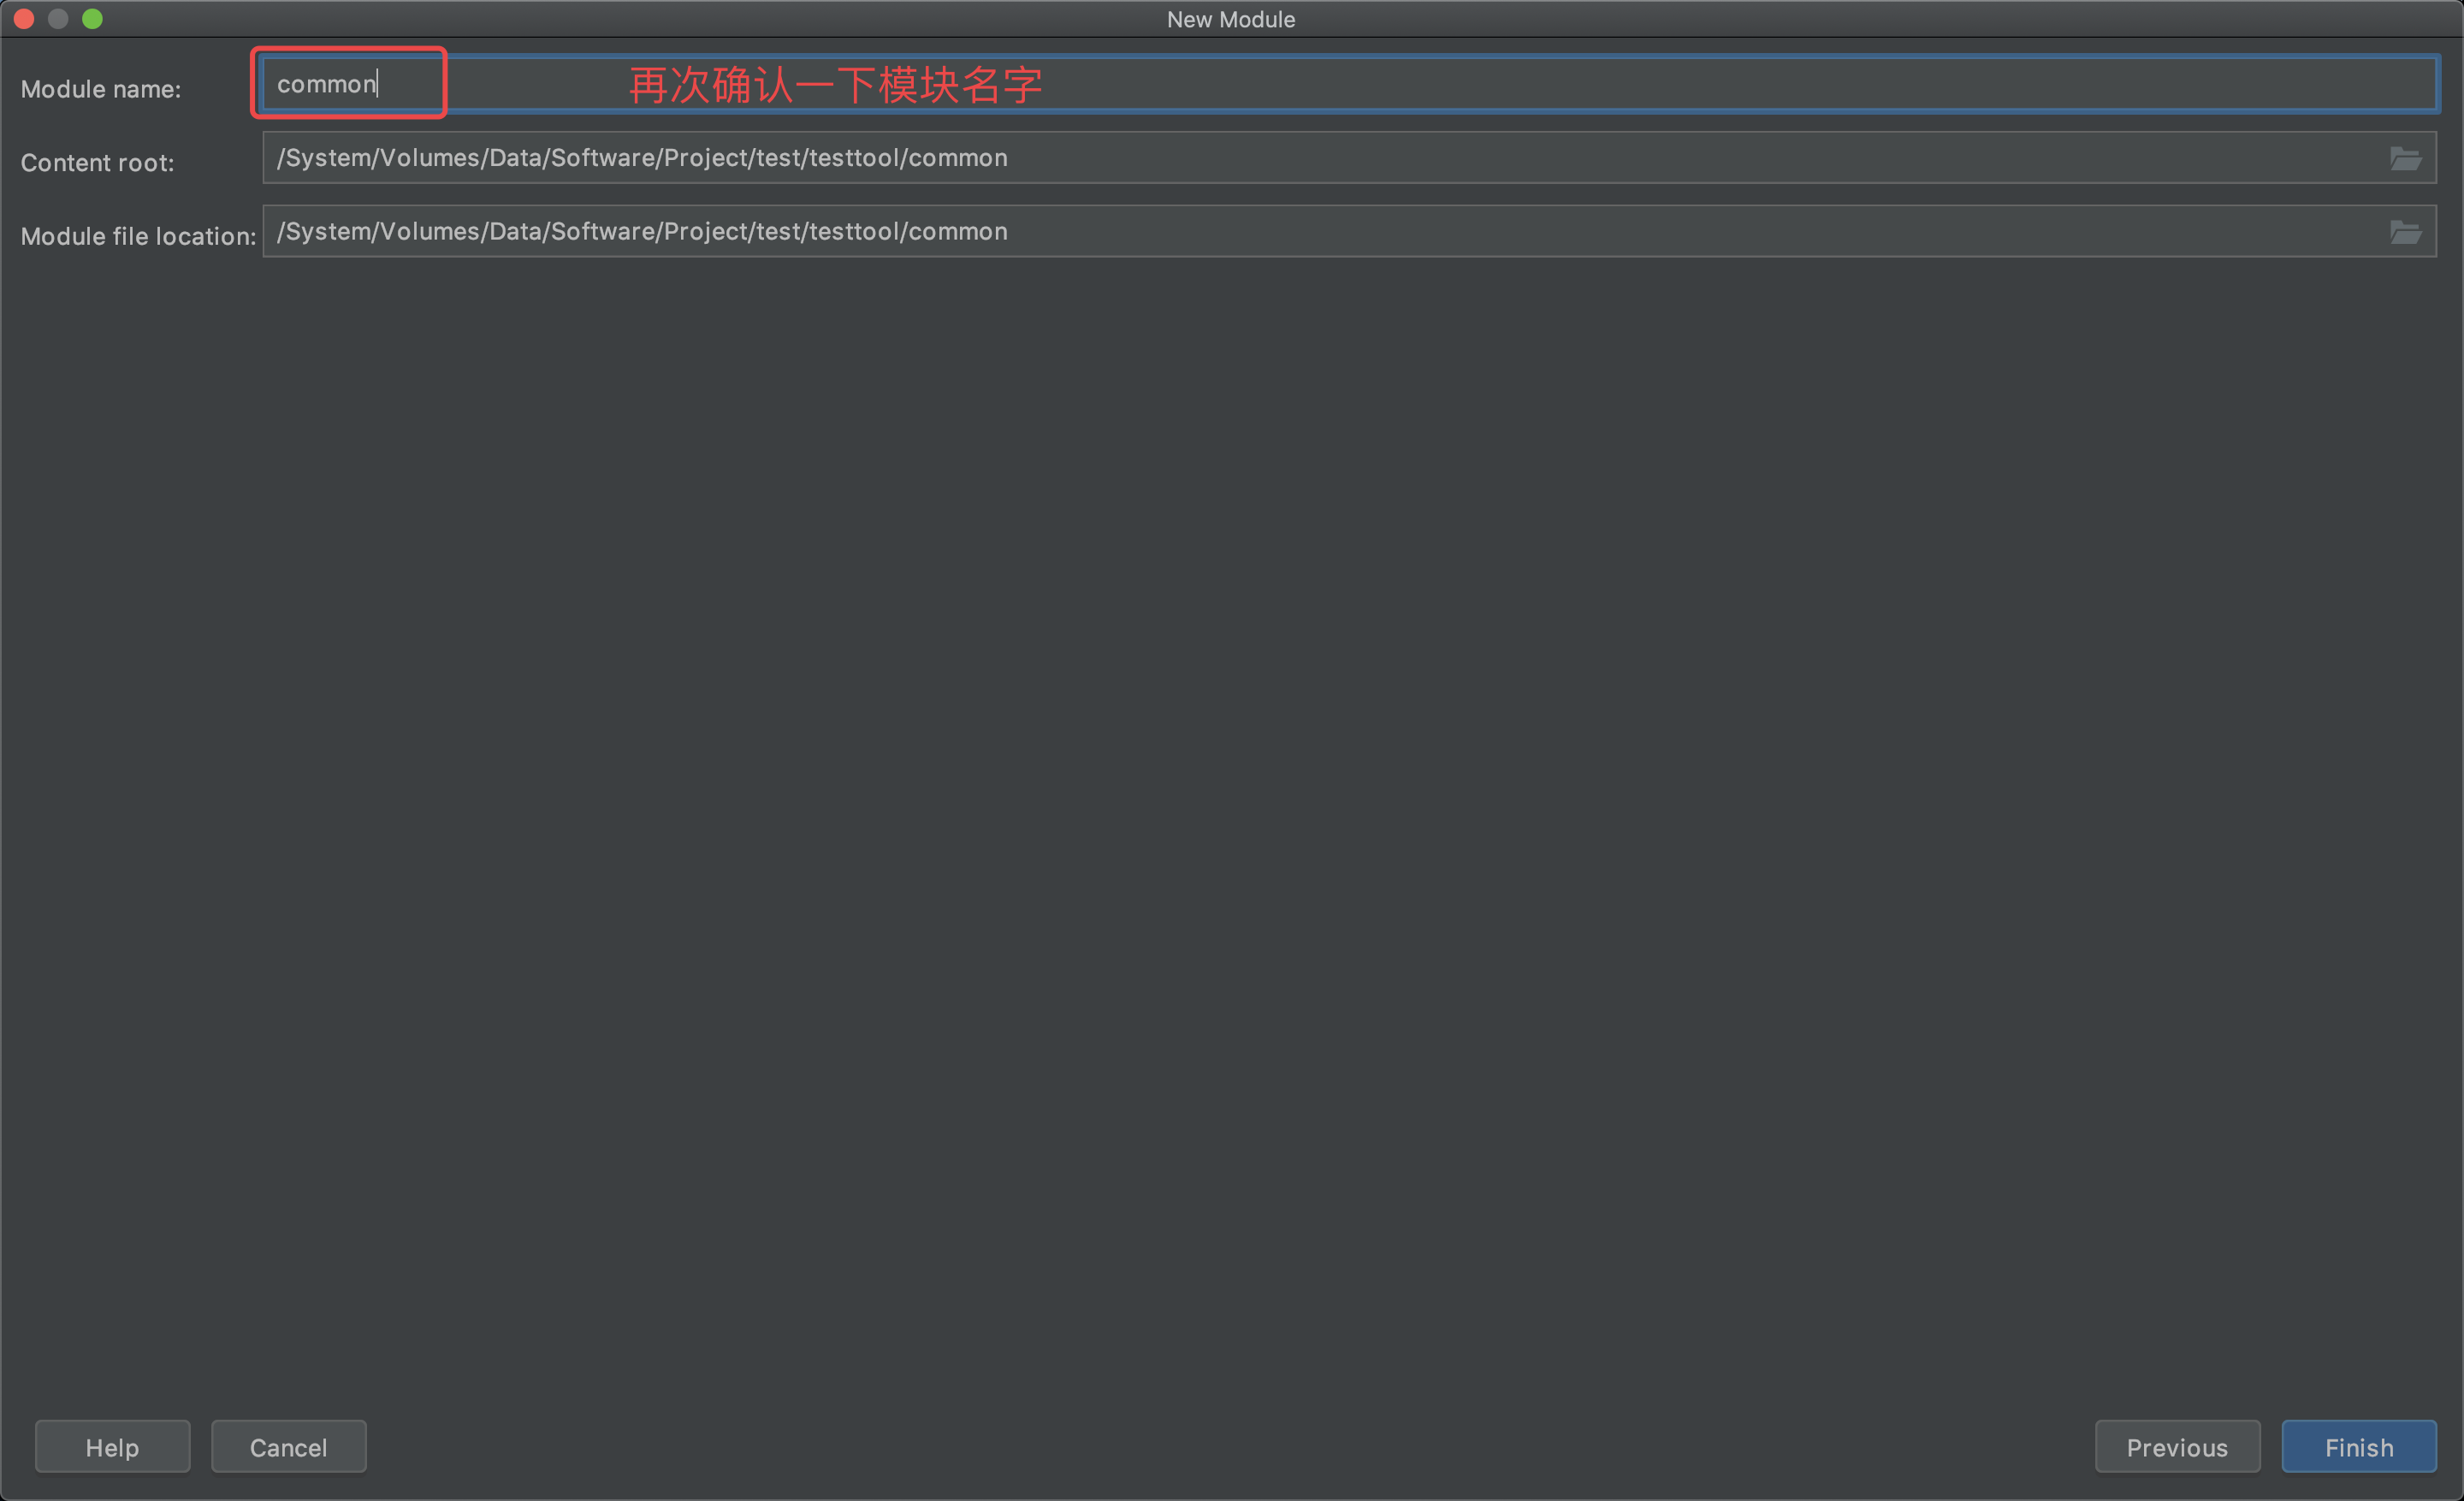
下一步

下一步
5. 至此,common模块已经建好
把common模块下红圈圈起来的三个无用文件删除

6. 继续重复上面新建module的操作来创建一个logrevert模块

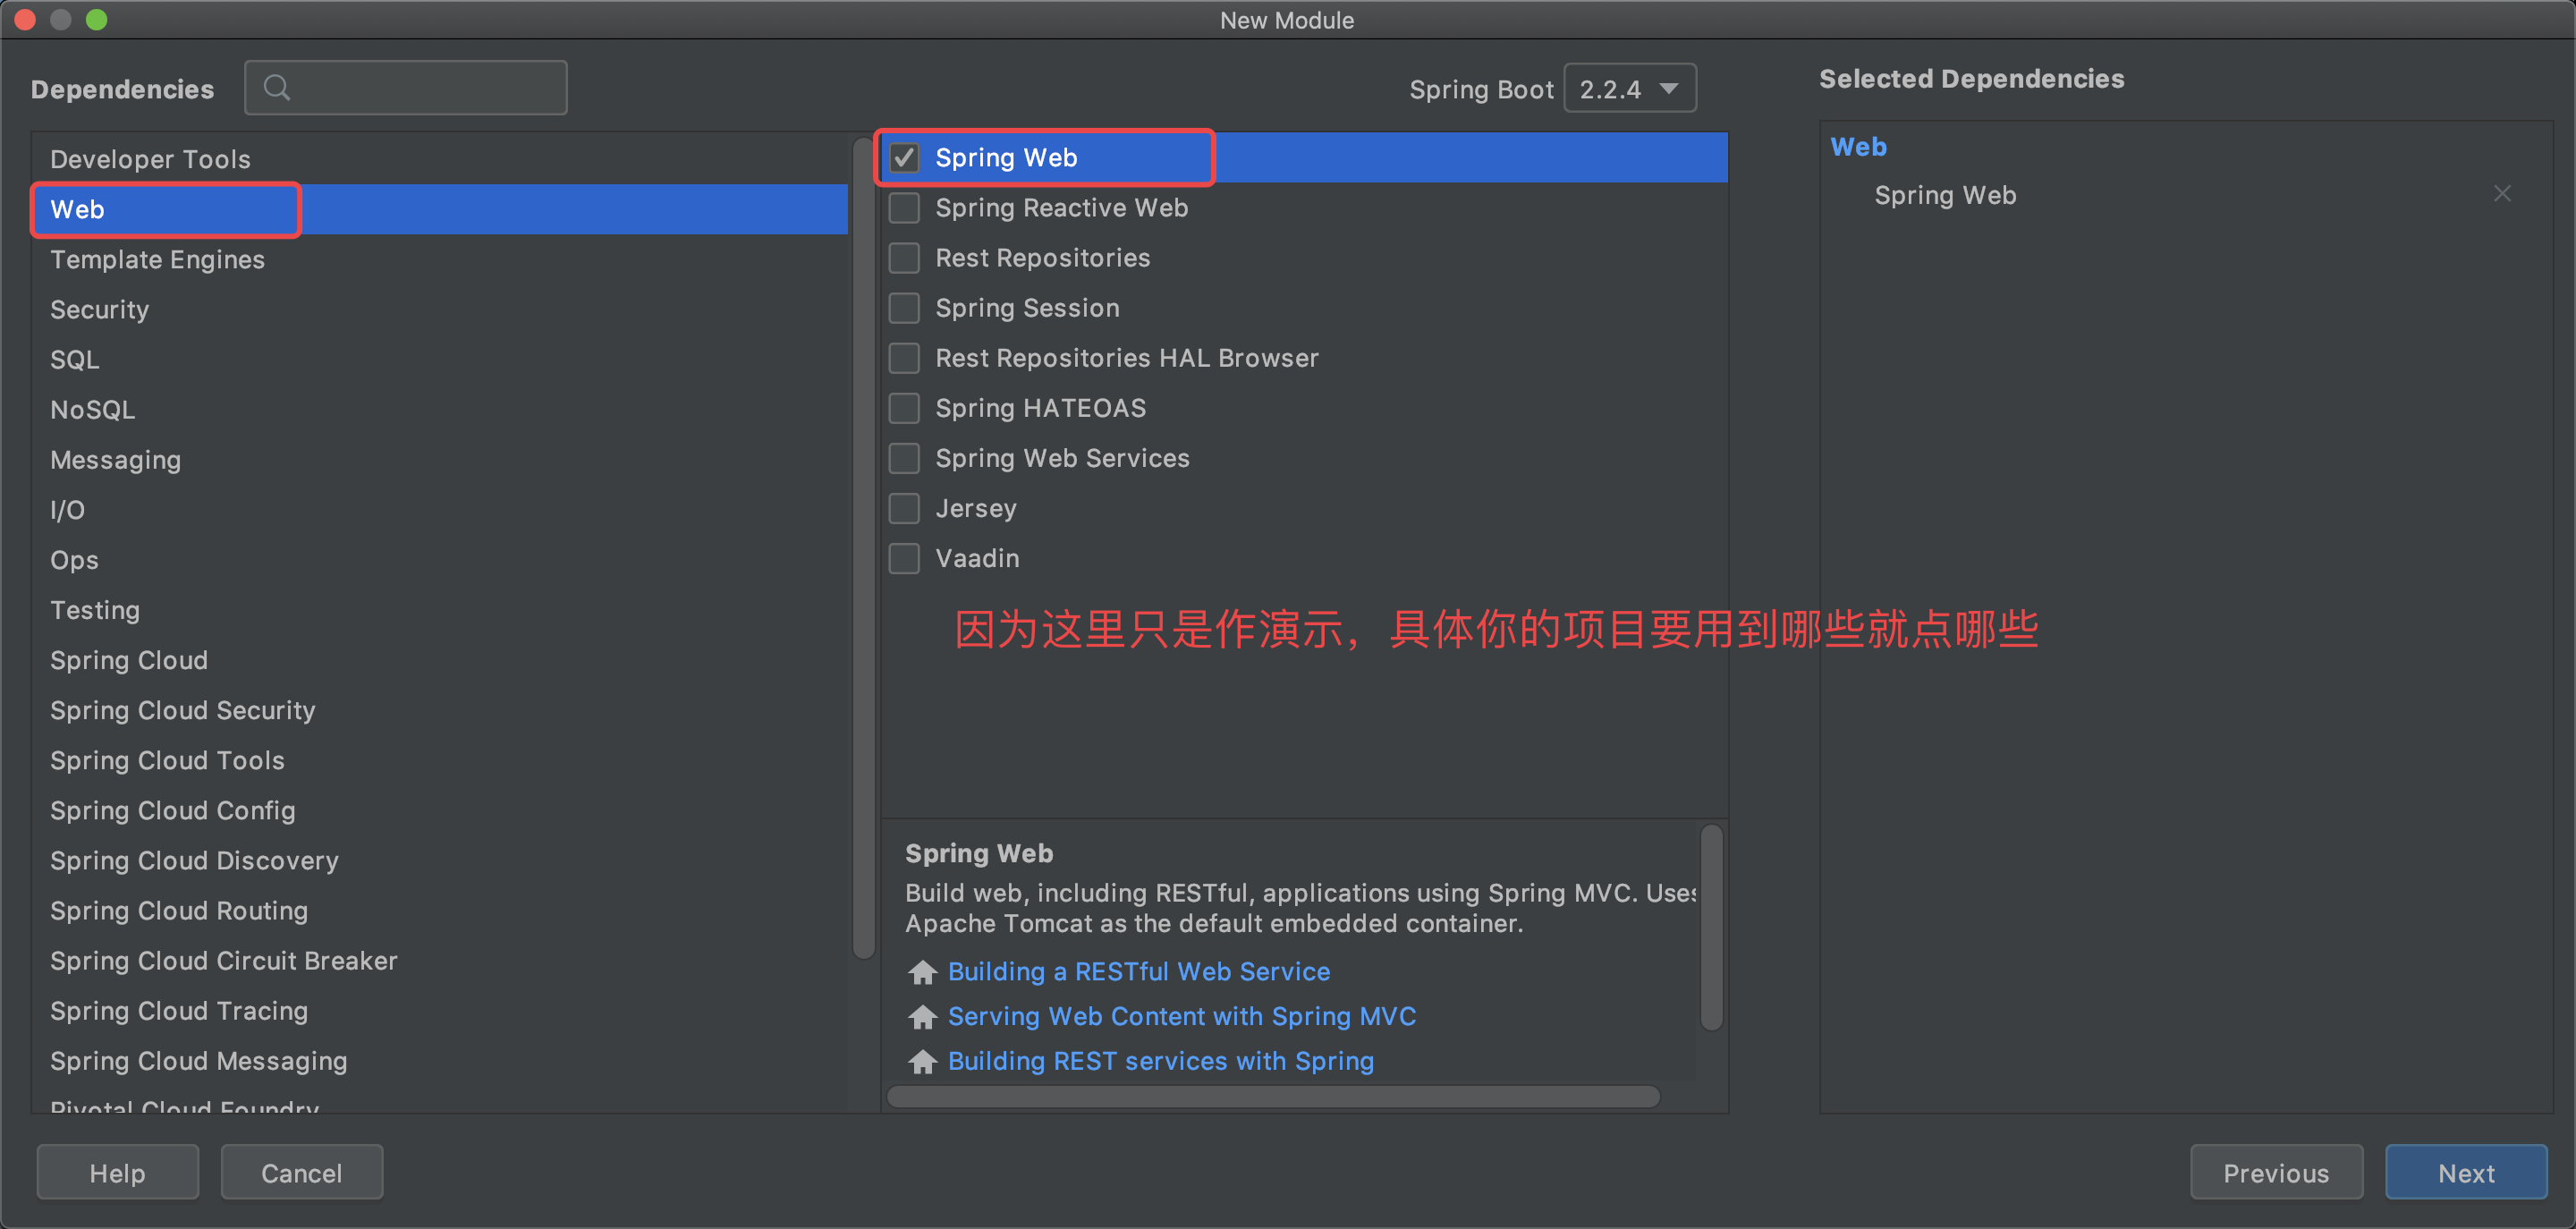
7. 选择依赖
选择web依赖,在这里勾选 spring web。Spring会把web相关的jar在项目初始化时加入依赖导入。下面有很多其他的依赖可自行尝试,然后一路下一步,模块创建完成后把刚才common模块删除的那三个无用文件也删了。
至此,项目结构完成,下面是细节调整
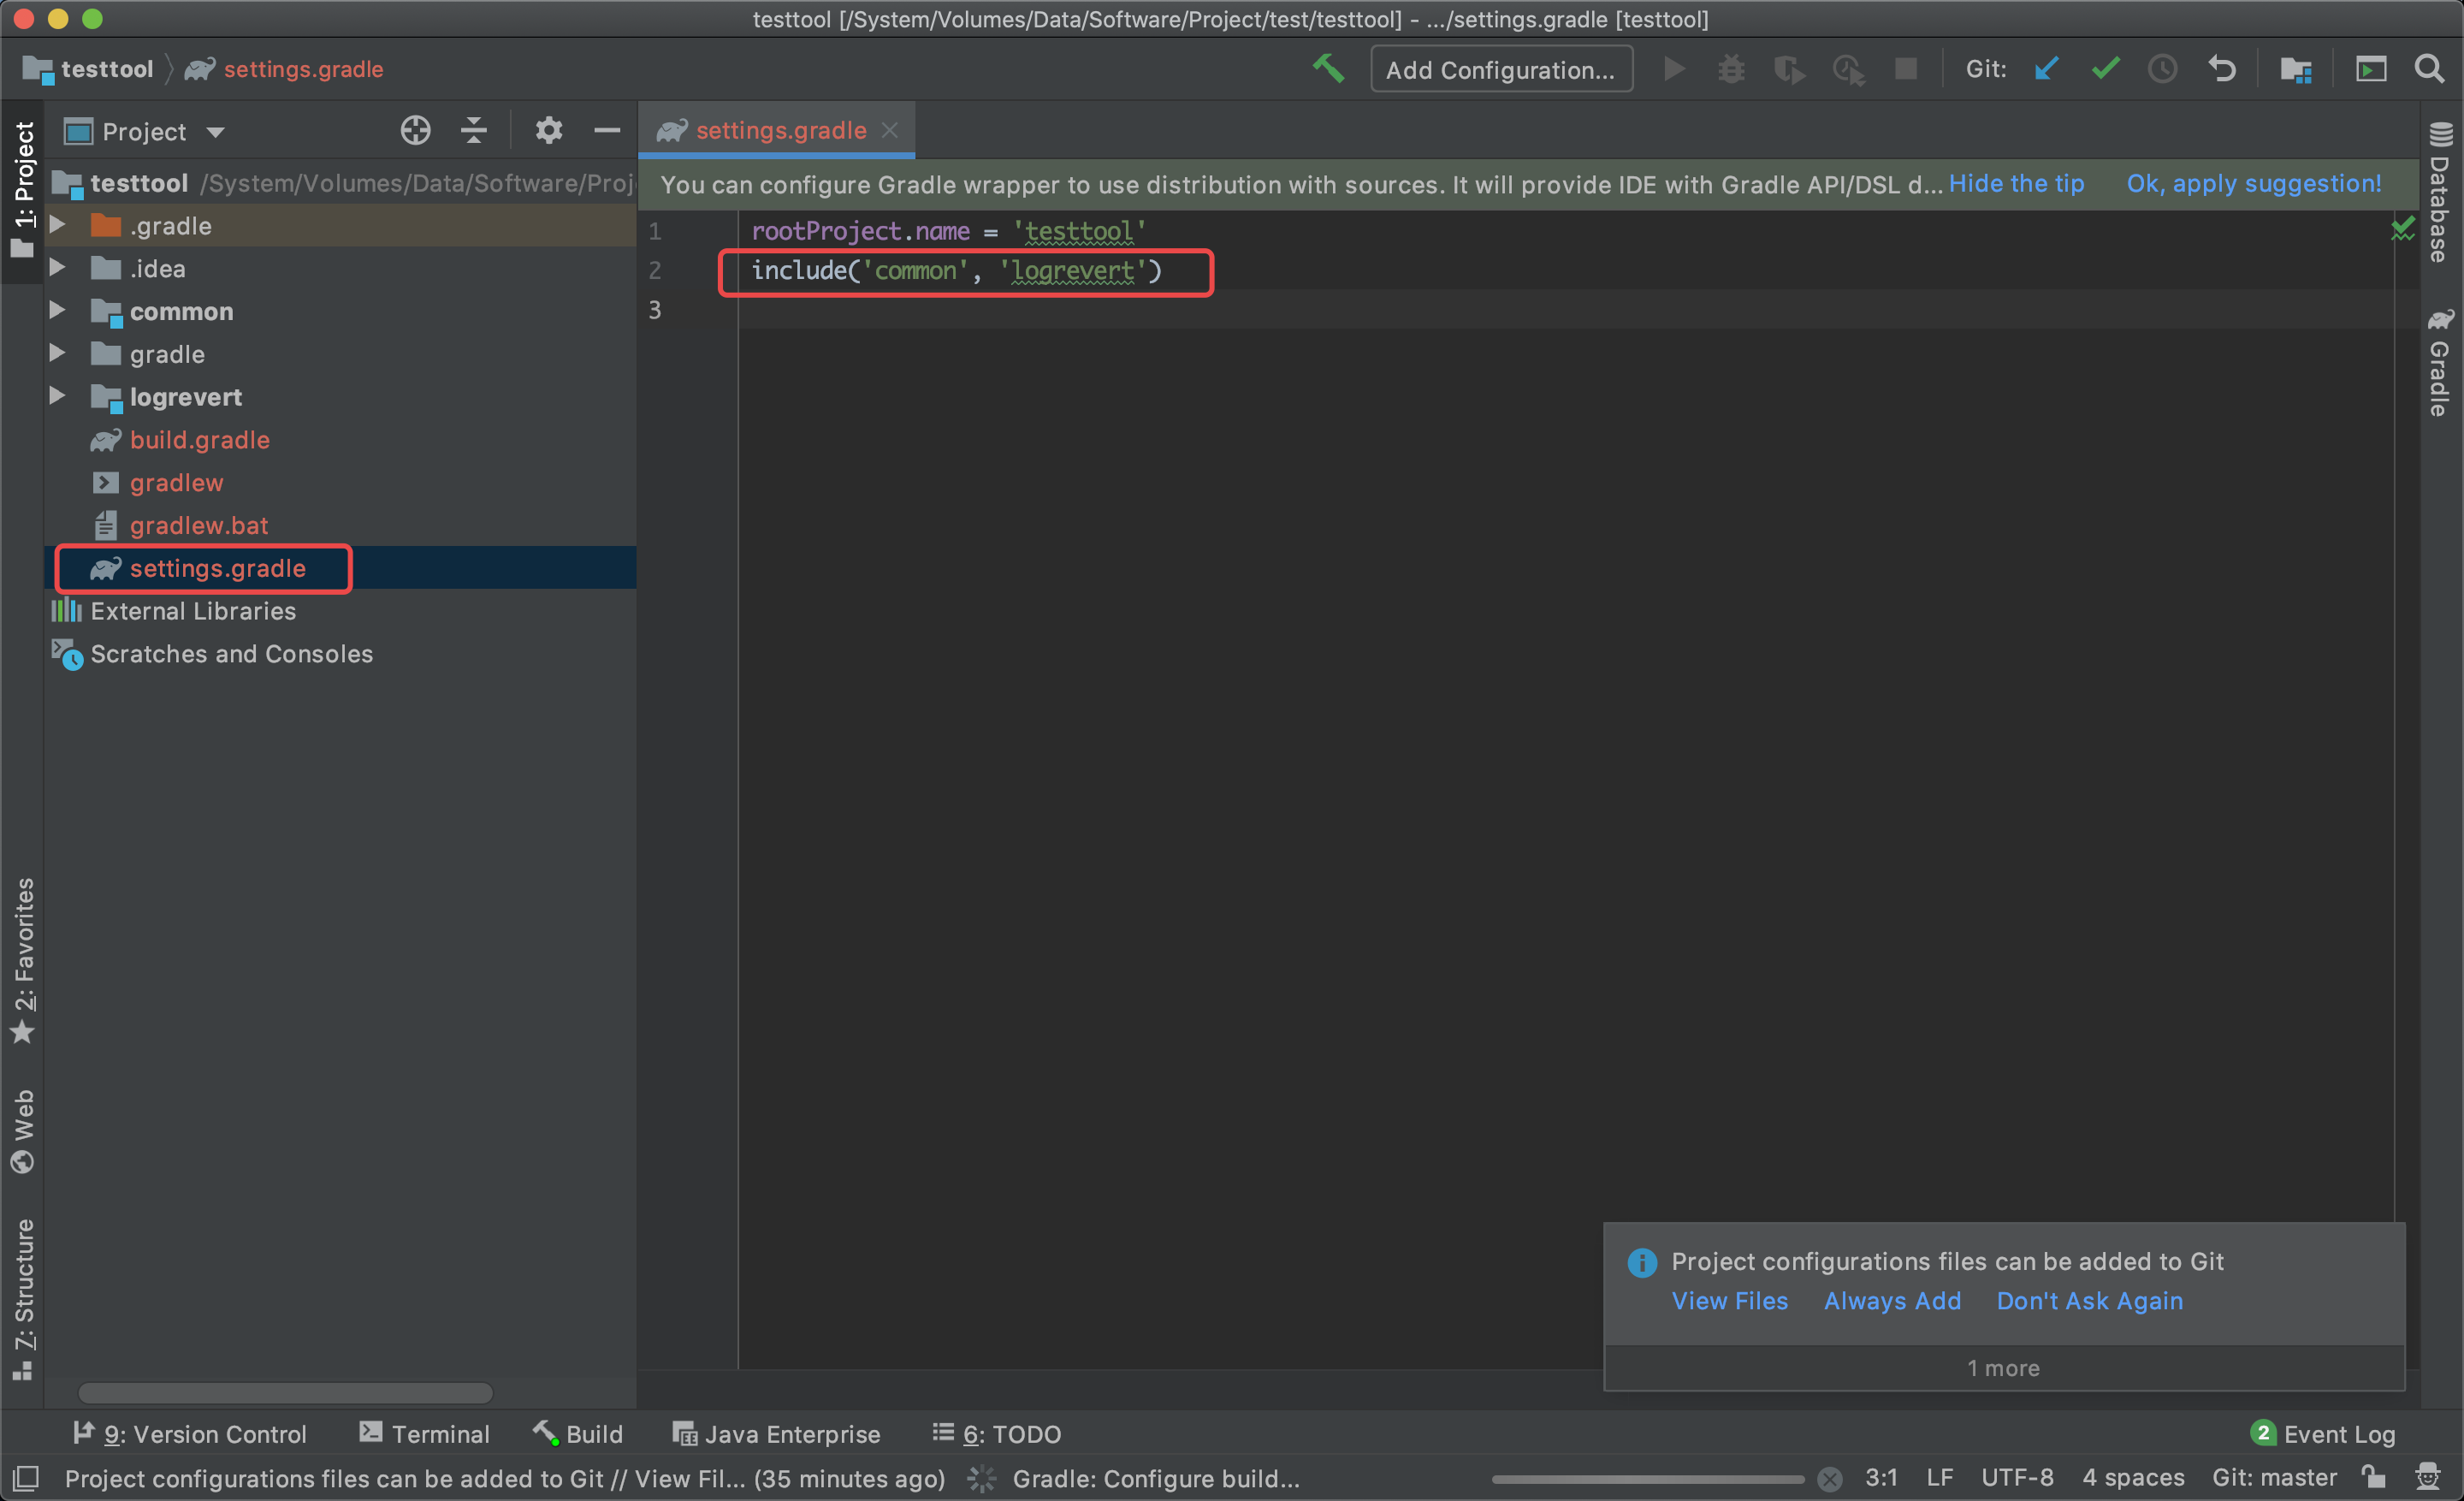
8. 根目录下的settings.gradle
把所有的子模块都include进来,这里include的顺序要注意顺序,被依赖的放在前面,因为gradle打包时是按照顺序依赖的。不然可能会出现有些jar包没打进去
include('common', 'logrevert')
9. 配置子项目通用配置
根目录下的build.gradle
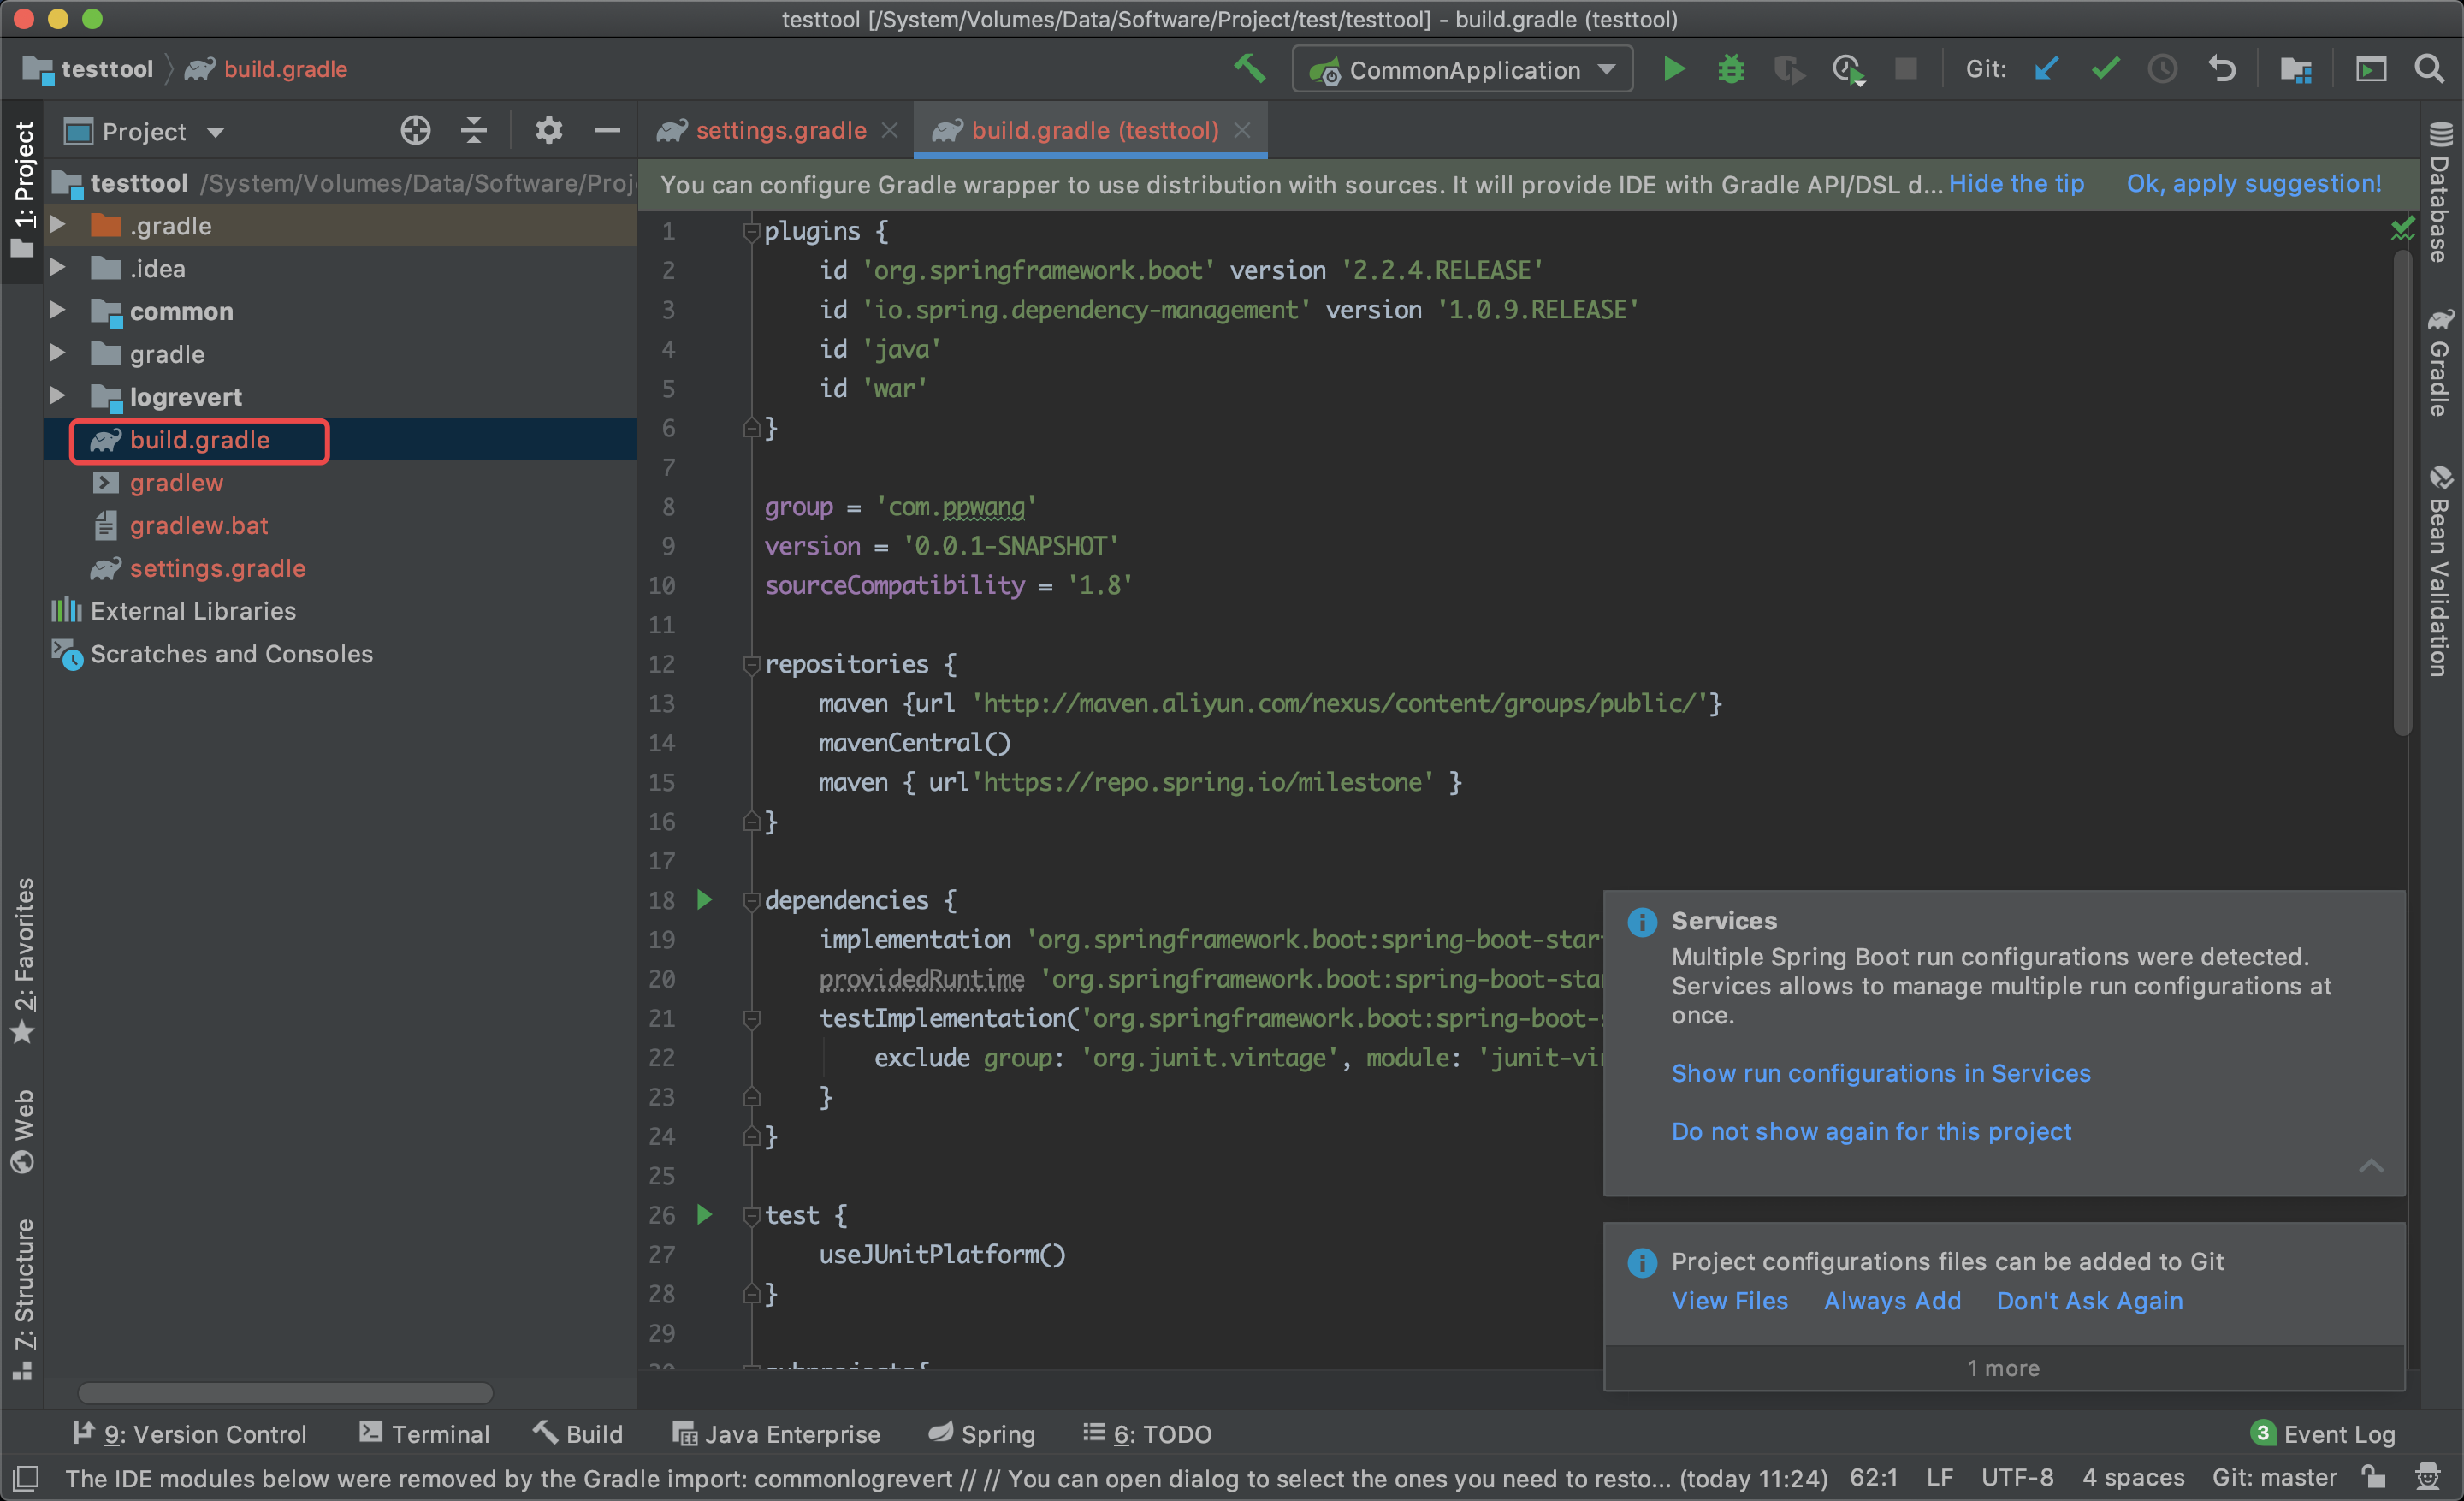
plugins {
    id 'org.springframework.boot' version '2.2.4.RELEASE'
    id 'io.spring.dependency-management' version '1.0.9.RELEASE'
    id 'java'
    id 'war'
}

group = 'com.ppwang'
version = '0.0.1-SNAPSHOT'
sourceCompatibility = '1.8'

repositories {
    maven {url 'http://maven.aliyun.com/nexus/content/groups/public/'}
    mavenCentral()
    maven { url'https://repo.spring.io/milestone' }
}

dependencies {
    implementation 'org.springframework.boot:spring-boot-starter-web'
    providedRuntime 'org.springframework.boot:spring-boot-starter-tomcat'
    testImplementation('org.springframework.boot:spring-boot-starter-test') {
        exclude group: 'org.junit.vintage', module: 'junit-vintage-engine'
    }
}

test {
    useJUnitPlatform()
}

subprojects{
    apply plugin:'java'
    apply plugin:'idea'
    apply plugin:'eclipse'
    apply plugin:'jacoco'
    apply plugin:'org.springframework.boot'
    apply plugin:'io.spring.dependency-management'

    group ='com.ppwang.testtool'

    sourceCompatibility =1.8
    targetCompatibility =1.8

    // java编译的时候缺省状态下会因为中文字符而失败
    [compileJava,compileTestJava,javadoc]*.options*.encoding ='UTF-8'

    bootJar {
        enabled =false  // 默认不需要打可执行jar包
    }

    repositories {
        maven {url 'http://maven.aliyun.com/nexus/content/groups/public/'}
        mavenCentral()
        maven { url'https://repo.spring.io/milestone' }

    }

    dependencies {
        testCompile('org.springframework.boot:spring-boot-starter-test')
    }

}
10. 分别修改common模块和logrevert模块的build.gradle。logrevert依赖于common
common
plugins {
    id 'org.springframework.boot'
    id 'io.spring.dependency-management'
    id 'java'
}

group = 'com.ppwang.testtool'
version = '0.0.1-SNAPSHOT'
sourceCompatibility = '1.8'

repositories {
    maven {url 'http://maven.aliyun.com/nexus/content/groups/public/'}
    mavenCentral()
    maven { url'https://repo.spring.io/milestone' }
}

dependencies {
    implementation 'org.springframework.boot:spring-boot-starter-web'
    testImplementation('org.springframework.boot:spring-boot-starter-test') {
        exclude group: 'org.junit.vintage', module: 'junit-vintage-engine'
    }
}

test {
    useJUnitPlatform()
}
logrevert
plugins {
    id 'org.springframework.boot'
    id 'io.spring.dependency-management'
    id 'java'
}

group = 'com.ppwang.testtool'
version = '0.0.1-SNAPSHOT'
sourceCompatibility = '1.8'

repositories {
    maven {url 'http://maven.aliyun.com/nexus/content/groups/public/'}
    mavenCentral()
    maven { url'https://repo.spring.io/milestone' }
}

dependencies {
    implementation project(':common')
    implementation 'org.springframework.boot:spring-boot-starter-web'
    testImplementation('org.springframework.boot:spring-boot-starter-test') {
        exclude group: 'org.junit.vintage', module: 'junit-vintage-engine'
    }
}

test {
    useJUnitPlatform()
}
11. 至此,所有的配置就已经完成
打开gradle管理,删除多余的模块编译,只保留跟项目(即最全的项目),删除common和logrevert。然后点击刷新按钮刷新gradle。多模块项目就全部完成了
Have fun with Java!