模态视图实现
对于UIViewController跳到另一个视图的时候,有push和present两种方式。但是需要注意的是,pushViewController这个方法,是UINavigationController和其子类才有的方法,普通的控制器是没有的。 所以用得时候一般是某个NavigationController pushViewcontroller或者self.navigationController pushViewController。接下来只看模态视图。
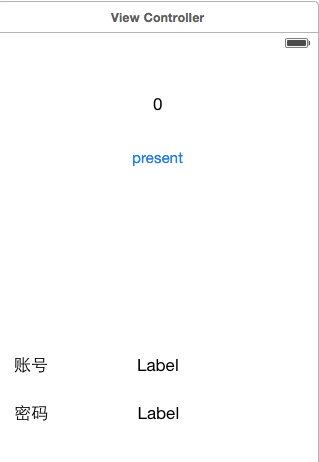
效果是present到另一个界面的时候,输入账号和密码,点击OK之后返回(dismissViewControllerAnimated),纪录present次数。效果图如下
代码如下:使用Main.storyboard
新建一个NewViewController.h/.m文件。
1 @property(nonatomic,strong)UITextField *MyTextField;//账号输入
2 @property(nonatomic,strong)UITextField *MyTextField2;//密码输入
 1 - (void)viewDidLoad {
 2     [super viewDidLoad];
 3
 4     [self createNewController];
 5     [self createTextField];
 6 }
 7
 8 //创建createNewController
 9 - (void)createNewController{
10     self.view.backgroundColor = [UIColor orangeColor];
11     UIButton *backButton = [UIButton buttonWithType:UIButtonTypeCustom];
12     backButton.frame = CGRectMake(100, 200, 40, 40);
13
14     [backButton setTitle:@"OK" forState:UIControlStateNormal];
15     [backButton setTitleColor:[UIColor greenColor] forState:UIControlStateHighlighted];
16
17     //添加button事件
18     [backButton addTarget:self action:
19          @selector(buttonAction:) forControlEvents:UIControlEventTouchUpInside];
20     [self.view addSubview:backButton];
21 }
22
23 - (void)buttonAction:(UIButton *)button{
24     //关闭模态视图
25     [self dismissViewControllerAnimated:YES completion:^{
26         NSLog(@"back over");
27
28
29     }];
30 }
31 //创建new中的textField
32 - (void)createTextField{
33     //--MyTextField
34     _MyTextField = [[UITextField alloc] init];
35     _MyTextField.frame = CGRectMake(100, 100, 100, 30);
36     _MyTextField.backgroundColor = [UIColor whiteColor];
37     //首字母不大写
38     _MyTextField.autocapitalizationType = NO;
39     _MyTextField.borderStyle = UITextBorderStyleRoundedRect;
40     _MyTextField.placeholder = @"请输入账号";
41     _MyTextField.clearButtonMode = UITextFieldViewModeAlways;
42     [self.view addSubview:_MyTextField];
43
44     //---label1
45     UILabel* label1 = [[UILabel alloc] initWithFrame:CGRectMake(20, 100, 40, 30)];
46     label1.text = @"账号";
47     [self.view addSubview:label1];
48
49     //--MyTextField
50     _MyTextField2 = [[UITextField alloc] init];
51     _MyTextField2.frame = CGRectMake(100, 140, 100, 30);
52     _MyTextField2.backgroundColor = [UIColor whiteColor];
53     _MyTextField2.autocapitalizationType = NO;
54     //设置样式
55     _MyTextField2.borderStyle = UITextBorderStyleRoundedRect;
56     _MyTextField2.placeholder = @"请输入密码";
57     //清除方式
58     _MyTextField2.clearButtonMode = UITextFieldViewModeAlways;
59     //隐藏密码
60     _MyTextField2.secureTextEntry = YES;
61     [self.view addSubview:_MyTextField2];
62
63     //---label1
64     UILabel *label2 = [[UILabel alloc] initWithFrame:CGRectMake(20, 140, 40, 30)];
65     label2.text = @"密码";
66     [self.view addSubview:label2];
67 }
在viewController.h中的代码书写如下:是拖动的控件生成的代码
1 @property (weak, nonatomic) IBOutlet UILabel *numLabel;
2 @property (weak, nonatomic) IBOutlet UILabel *MyLabel;
3 @property (weak, nonatomic) IBOutlet UILabel *MyLabel2;
 1 @interface ViewController ()
 2 {
 3     NewViewController *_newVC;
 4 }
 5
 6 @end
 7
 8 @implementation ViewController
 9 //将NewViewController信息传递
10 - (void)setNewVC:(NewViewController *)newVC{
11     _newVC = newVC;
12 }
13
14 - (void)viewDidLoad {
15     [super viewDidLoad];
16
17 }
18
19 //视图将要显示
20 - (void)viewWillAppear:(BOOL)animated{
21 //    必须在第一行写
22     [super viewWillAppear:animated];
23     // 显示 输入的账号 和密码
24     _MyLabel.text = _newVC.MyTextField.text;
25     _MyLabel2.text = _newVC.MyTextField2.text;
26 }
27
28 - (IBAction)presentAction:(UIButton *)sender {
29     //创建视图,视图重用原理
30     _newVC = [[NewViewController alloc] init];
31     if (!_newVC) {
32     _newVC = [[NewViewController alloc] init];
33     }
34     //设置动画样式
35     _newVC.modalTransitionStyle = UIModalTransitionStyleCoverVertical;
36     //弹出模态视图
37     [self presentViewController:_newVC animated:YES completion:^{
38         NSLog(@"弹出完毕");
39         int num = [self.numLabel.text intValue];
40         num ++;
41         NSString *numStr = [NSString stringWithFormat:@"%d",num];
42         self.numLabel.text = numStr;
43     }];
44 }
以上是一个present的简单实现。其中比较重要的部分就是传值的方法,重写了NewVC的set方法。这就跟MVC模式相差无几了。
具体的文字描述如下:
一、最普通的视图控制器UIViewContoller
一个普通的视图控制器一般只有模态跳转的功能,这个方法是所有视图控制器对象都可以用的,而实现这种功能,有两种方法。
1、通过方法 - (void)presentViewController:(UIViewController *)viewControllerToPresent animated: (BOOL)flag completion:(void (^)(void))completion跳转
相信很多人都用过这个方法,他是所有视图控制器对象都有的成员方法。基本绝大部分情况下,这个成员方法都可以正常使用,不过有些时候可能会使用失败,失败一般的原因都是,同一个视图控制器,在同一个时间,只能present一个另外的视图控制器,如果当前的VC已经present了,再次present一个VC时,就会提示失败,如果想继续present,就必须将原来present的控制器dismiss。
控制器还有两个只读属性:presentedViewController和presentingViewController,他们分别是被present的控制器和正在presenting的控制器。比如说, 控制器A和B,[A presentViewController B animated:YES completion:nil]; 那么A相对于B就是presentingViewController,B相对于A是presentedViewController,即这个时候
B.presentingViewController = A;
A.presentedViewController = B;
这两个属性,在有些时候,用起来是很方便的。比如说,现在有个C界面,C界面被显示出来,可能有两种情况,一是modal出来的,另外一种是push出来的,这时候就可以通过当前界面对象的presentingViewController属性来判断到底属于哪种情况,如果是nil,表示是UINavigationController对象push过来的,如果不是则是modal过来的。
2、通过方法 - (void)performSegueWithIdentifier:(NSString *)identifier sender:(id)sender跳转
如果代码要用这种方式,首先要创建一个UIStoryboardSegue对象,并给初始化相应的值。
UIStoryboardSegue对象,提供了 跳转源界面,跳转目的界面,以及一个identifier也就是上面的identifier了,相信这么一说大家就知道这个类是干嘛的了。
这种方法同时也支持UINavigationController的跳转,不过跳转的模式为push了,它只能在当前视图控制器是UINavigationController时才能用。
注:文字解释部分源自http://www.mamicode.com/info-detail-469709.html
欢迎各位读者指正。如若转载请标明出处。