flume执行原理 是什么
三大可新组件
1.源端采集了理数据给他传输了管道中,管道加载的数据传输到下沉端,在传输到
2.
安装flume
压缩包
a1.sinks = k1
a1.channels = c1
# Describe/configure the source
a1.sources.r1.type = netcat
a1.sources.r1.bind = localhost
a1.sources.r1.port = 44444
# Describe the sink
a1.sinks.k1.type = logger
# Use a channel which buffers events in memory
a1.channels.c1.type = memory
a1.channels.c1.capacity = 1000
a1.channels.c1.transactionCapacity = 100
# Bind the source and sink to the channel
a1.sources.r1.channels = c1
a1.sinks.k1.channel = c1
————————————————————————————————————————
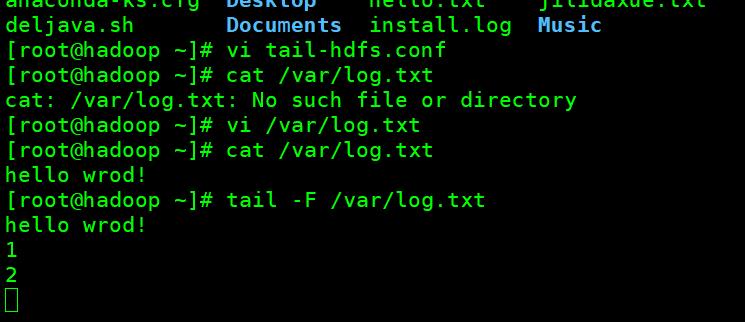
使用在hadoop下创建 vi /var/log.txt
输入hello word
tail -F /var/log.txt
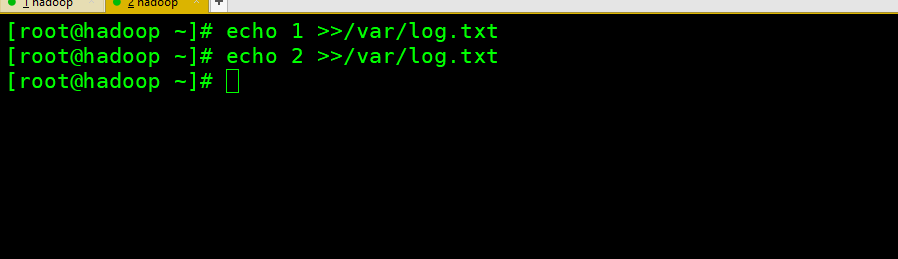
克隆一个页面 echo 1 >>/var/log.txt
——-------------------------------------------------------------------------------------------------
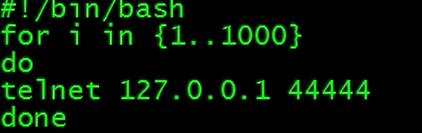
vi tail.sh
#!/bin/bath
for i in {1..1000}
do
echo "hello $i" >> /var/log.txt
sleep 2
done
启动 sh tail.sh


改为下面

继续

改为

配置完成
flume动态使用
a1.sources = r1
a1.sinks = k1
a1.channels = c1
# Describe/configure the source
a1.sources.r1.type = netcat
a1.sources.r1.bind = localhost
a1.sources.r1.port = 44444
# Describe the sink
a1.sinks.k1.type = logger
# Use a channel which buffers events in memory
a1.channels.c1.type = memory
a1.channels.c1.capacity = 1000
a1.channels.c1.transactionCapacity = 100
# Bind the source and sink to the channel
a1.sources.r1.channels = c1
a1.sinks.k1.channel = c1
测试脚本不正确
vi flume.sh
上面输出了10000遍
sh flume.sh