Mysql安装
安装zabbix
rpm -Uvh https://mirrors.aliyun.com/zabbix/zabbix/5.0/rhel/7/x86_64/zabbix-release-5.0-1.el7.noarch.rpm
sed -i 's#http://repo.zabbix.com#https://mirrors.aliyun.com/zabbix#' /etc/yum.repos.d/zabbix.repo
yum makecache
yum install zabbix-server-mysql zabbix-agent -y
安装Zabbix frontend
yum install centos-release-scl -y
编辑配置文件 /etc/yum.repos.d/zabbix.repo
vim /etc/yum.repos.d/zabbix.repo
[zabbix-frontend]
...
enabled=1
...
安装 Zabbix frontend packages
yum -y install zabbix-web-mysql-scl zabbix-apache-conf-scl
zabbix用户及数据库创建
mysql -uroot -p
mysql> create database zabbix character set utf8 collate utf8_bin;
mysql> grant all on zabbix.* to zabbix@localhost identified by 'zabbix';
解决报错(测试好像没用,可略过看下一步方法)
vim /etc/my.cnf
[mysqld]
# solve this problem "index column size too large. the maximum column size is 767 bytes"
default-storage-engine = INNODB
innodb_file_per_table = ON
innodb_large_prefix = ON
innodb_file_format = BARRACUDA
zcat /usr/share/doc/zabbix-server-mysql*/create.sql.gz | mysql -uzabbix -p zabbix
#执行这一步可能会报错"index column size too large. the maximum column size is 767 bytes"
#如下操作可解决
cp -rp /usr/share/doc/zabbix-server-mysql*/create.sql.gz ./
gunzip create.sql.gz
sed -i 's/ENGINE=InnoDB/ENGINE=InnoDB ROW_FORMAT=DYNAMIC/g' ./create.sql
mysql -uroot -p
mysql> use zabbix
mysql> source /tools/create.sql
修改/etc/zabbix/zabbix_server.conf
sed -i "s@# DBPassword=@DBPassword=zabbix@g" /etc/zabbix/zabbix_server.conf
修改/etc/zabbix/zabbix_agentd.conf,这里的IP地址写的是zabbix_server的IP地址,即12.1.1.1
sed -i "s@Server=127.0.0.1@Server=127.0.0.1,12.1.1.1@g" /etc/zabbix/zabbix_agentd.conf
sed -i "s@ServerActive=127.0.0.1@ServerActive=12.1.1.1@g" /etc/zabbix/zabbix_agentd.conf
sed -i "s@^# UnsafeUserParameters=0@UnsafeUserParameters=1
@g" /etc/zabbix/zabbix_agentd.conf
为Zabbix前端配置PHP
编辑配置文件 /etc/opt/rh/rh-php72/php-fpm.d/zabbix.conf
vim /etc/opt/rh/rh-php72/php-fpm.d/zabbix.conf
php_value[date.timezone] = Asia/Shanghai
启动Zabbix server和agent进程,并为它们设置开机自启
systemctl restart zabbix-server zabbix-agent httpd rh-php72-php-fpm
systemctl enable zabbix-server zabbix-agent httpd rh-php72-php-fpm
注意:如果启动后查看没有10051端口,可以查看zabbix_server日志继而解决
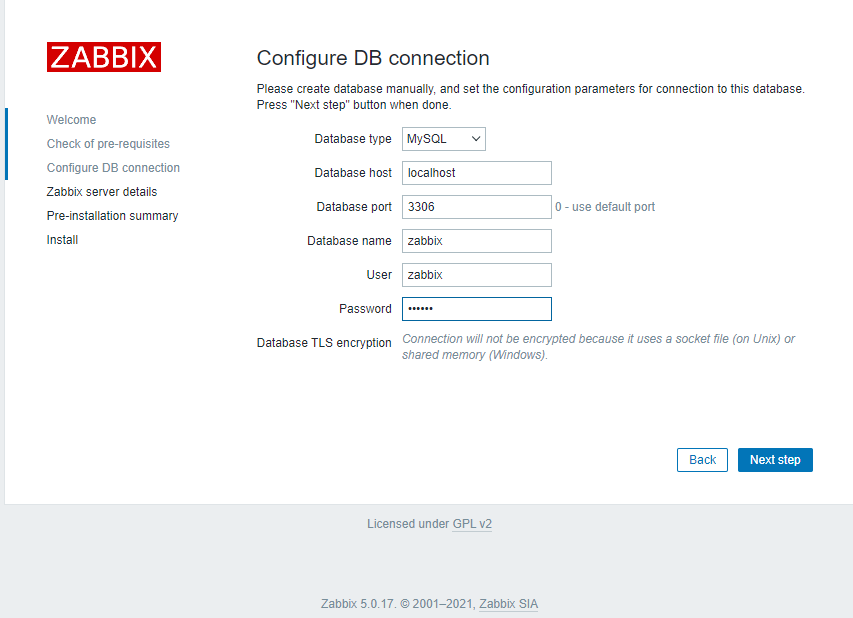
网页安装操作,打开http:IP/zabbix

a.检查php配置,各项通过才可以下一步;
b.配置db连接信息: type:mysql,host:localhost,port:3306,db_name:zabbix,user:zabbix,password:zabbix;
c.zabbix服务器配置:host:localhost,port:10051,name:danny-zabbix(名称随意)
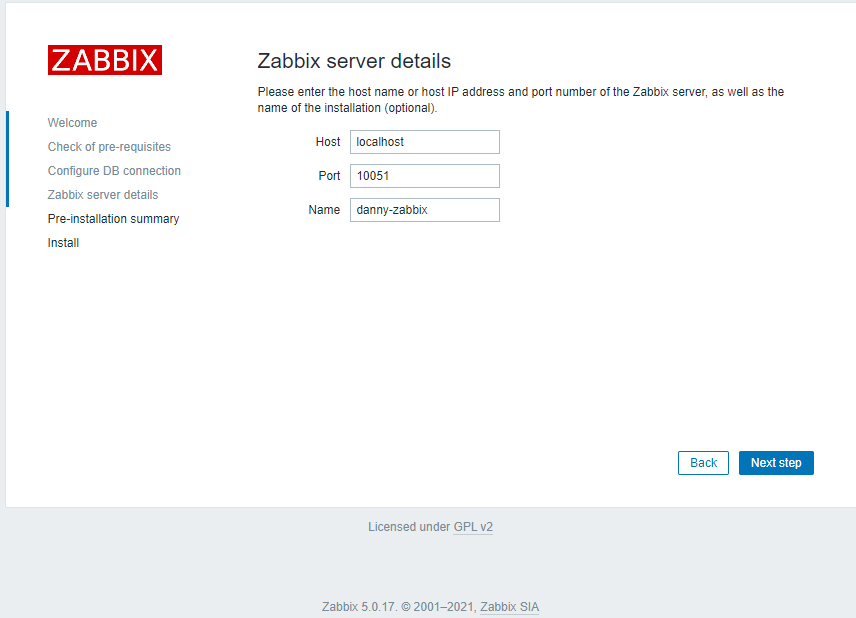
d.一路下一步,完成。
登陆
http://xxx/zabbix/index.php
默认账号:Admin,密码:zabbix
(默认的账号密码存储在mysql的zabbix库的users表中,如需修改更新Mysql中对应数据即可。)

客户端zabbix-agent安装
更新yum源
rpm -Uvh https://mirrors.aliyun.com/zabbix/zabbix/5.0/rhel/7/x86_64/zabbix-release-5.0-1.el7.noarch.rpm

sed -i 's#http://repo.zabbix.com#https://mirrors.aliyun.com/zabbix#' /etc/yum.repos.d/zabbix.repo

yum makecache
安装客户端:
yum install zabbix-agent -y
配置 vim /etc/zabbix/zabbix_agentd.conf 。修改zabbix-server的IP
#####被动模式:允许server的ip来本机取数据
Server=ServerIP

#####主动模式:本机主动给哪台server发送数据
ServerActive=ServerIP

#####主机名
Hostname=Client_12.1.1.2     //很重要,server监控页面判别监控主机的主要指标

Include=/etc/zabbix/zabbix_agentd.conf.d/
UnsafeUserParameters=1           ###启用自定义key

#设置zabbix_agentd开机自动启动,并启动zabbix_agentd服务
systemctl enable zabbix-agent
systemctl restart zabbix-agent


在zabbix_server监控页面中添加主机即可
OK,完成!