Docker-Compose 初探
作者:elfin 资料来源:遇见狂神说


1、Compose 学习前言
Compose是一个用于定义和运行多容器Docker应用程序的工具。使用Compose,可以使用YAML文件来配置应用程序的服务。然后,使用一个命令,从配置创建并启动所有服务。要了解有关撰写的所有功能的详细信息,请参阅后续介绍。
工作中得到所有环境都可以使用它,如:生产环境、测试环境等,具体参考案例
使用Compose基本上需要三个步骤:
- 用
Dockerfile定义应用程序的环境,以便可以在任何地方复制。 - 在
docker-compose.yml中定义组成应用程序的服务,所以它们可以在一个孤立的环境中运行。- services 什么是服务;
docker-compose.yml这个文件怎么写?
- 运行
docker-compose up,启动并运行整个应用程序。- 启动项目
作用:批量容器编排
狂神的理解
Compose是Docker官方的开源项目,需要安装!
Dockerfile让程序可以在任何地方运行。如一个web服务,需要redis、mysql、nginx…多个容器,只使用Dockerfile启动就比较麻烦了!
Compose官方案例:
version: "3.8"
services:
  web:
    build: .
    ports:
      - "5000:5000"
    volumes:
      - .:/code
      - logvolume01:/var/log
    links:
      - redis
  redis:
    image: redis
volumes:
  logvolume01: {}
这里使用一个批准文件将web服务连接到了redis,不管有多少个服务,只要配置正确,则可以实现一键启动。
Compose两个重要的概念:
- 服务services,容器、应用。(web、redis、mysql…);
- 项目project(一组关联的容器,形成一个业务单元).
如果想要集群部署,则需要使用Swarm,可参考Docker —— Swarm 初探
2、Docker Compose安装
2.1 Debug:Docker for windows10
bug的官方反馈链接:Hardware assisted virtualization and data execution protection must be enabled in the BIOS;https://docs.docker.com/docker-for-windows/troubleshoot/#virtualization
因为系统崩了,重装了最新的Windows10专业版(官方镜像)。在安装docker后,启动一直报错,错误信息为让设置BIOS的虚拟开启,弄了很久,开启了虚拟,但是在任务管理器中查看虚拟化仍然是禁用。WSL2、Hyper-V也是有的(专业版自带),结果各种调试一直报错。最后根据官方教程解决了此问题,参考链接,虚拟化开启后,对WSL2进行更新,最后重启搞定。
2.2 Compose 项目安装
此开源项目的安装文档很详细,你可以参考官方文档进行安装,这里我是Windows系统,默认自带了这些应用;Linux系统根据官方文档操作即可,只是要注意,官方的方法可能会很慢。
2.2.1 Linux系统安装Compose
-
运行此命令下载Docker Compose的当前稳定版本
$ sudo curl -L "https://github.com/docker/compose/releases/download/1.27.4/docker-compose-$(uname -s)-$(uname -m)" -o /usr/local/bin/docker-compose这个命令下载一般比较慢,我们可以换成国内的源:
$ sudo curl -L "https://get.daocloud.io/docker/compose/releases/download/1.27.4/docker-compose-$(uname -s)-$(uname -m)" /usr/local/bin/docker-compose注意将版本替换为自己的版本!
-
赋予docker-compose权限
$ sudo chmod +x /usr/local/bin/docker-compose
2.2.2 安装后测试
# 这里是在Windows下的结果,在Linux下也应该出现这些信息…
$ docker-compose --version
docker-compose version 1.27.4, build 30514192
3、Docker-Compose 初体验
你的第一个项目尝试,当然应该是使用官方的gettingstarted。
项目介绍:
在这个页面上,您将构建一个运行在docker-compose上的简单python web应用程序。应用程序使用Flask框架并在Redis中维护一个命中计数器。虽然示例使用Python,但是即使您不熟悉,这里演示的概念也应该是可以理解的。
3.1 创建项目
-
创建项目目录
$ mkdir composetest $ cd composetest -
创建如下的
app.py文件import time import redis from flask import Flask app = Flask(__name__) cache = redis.Redis(host='redis', port=6379) def get_hit_count(): retries = 5 while True: try: return cache.incr('hits') except redis.exceptions.ConnectionError as exc: if retries == 0: raise exc retries -= 1 time.sleep(0.5) @app.route('/') def hello(): count = get_hit_count() return 'Hello World! I have been seen {} times. '.format(count)在本例中,redis是应用程序网络上redis容器的主机名。我们使用Redis的默认端口6379。
注意get_hit_count函数的编写方式。如果redis服务不可用,这个基本的重试循环允许我们多次尝试请求。当应用程序上线时,这在启动时很有用,但是如果在应用程序的生命周期内需要重新启动Redis服务,这也使我们的应用程序更有弹性。在集群中,这也有助于处理节点之间的瞬时连接中断。
-
创建python的依赖文件
flask
redis
3.2 创建项目的Dockerfile文件
在这一步中,您将编写一个Dockerfile来构建Docker映像。图像包含Python应用程序需要的所有依赖项,包括Python本身。
新建Dockerfile文件:
FROM python:3.7-alpine
WORKDIR /code
ENV FLASK_APP=app.py
ENV FLASK_RUN_HOST=0.0.0.0
RUN apk add --no-cache gcc musl-dev linux-headers
COPY requirements.txt requirements.txt
RUN pip install -r requirements.txt
EXPOSE 5000
COPY . .
CMD ["flask", "run"]
- 从 Python 3.7 镜像开始构建镜像
- 设置工作目录:
/code. - 设置
flask命令的环境变量. - 安装gcc等依赖.
- 复制
requirements.txt并安装这些 Python 依赖. - 向映像添加元数据,以说明容器正在侦听端口5000.
- 复制当前文件夹内容到镜像的工作目录下.
- 设置容器的默认命令为:
flask run.
3.3 配置YMAL文件
创建docker-compose.yml文件
version: "3.8"
services:
  web:
    build: .
    ports:
      - "5000:5000"
  redis:
    image: "redis:alpine"
这个文件配置了两个服务:web服务和redis服务。
web服务使用从当前目录中的Dockerfile构建的映像。然后它将容器的5000端口映射到主机的端口5000(第一个5000)。此示例服务使用Flask web服务器的默认端口5000。
redis使用的是官方的redis镜像!
3.4 创建并执行这个项目
-
在项目文件夹下,执行
docker-compose up开始创建并执行此应用$ docker-compose up Building web Step 1/10 : FROM python:3.7-alpine 3.7-alpine: Pulling from library/python 188c0c94c7c5: Pull complete a2f4f20ac898: Pull complete f8a5b284ee96: Pull complete 28e9c106bfa8: Pull complete 6dabd078e3bd: Pull complete Digest: sha256:665fe0313c2c76ee88308e6d186df0cda152000e7c141ba38a6da6c14b78c1fd Status: Downloaded newer image for python:3.7-alpine ---> 8bbdaa3491cd Step 2/10 : WORKDIR /code ---> Running in d9e5fe3b6c33 Removing intermediate container d9e5fe3b6c33 ---> 0439bad41d5a Step 3/10 : ENV FLASK_APP=app.py ---> Running in efcd6edb9114 Removing intermediate container efcd6edb9114 ---> ae81026337ea Step 4/10 : ENV FLASK_RUN_HOST=0.0.0.0 ---> Running in 403ab88414ab Removing intermediate container 403ab88414ab ---> 87cdeb1701fc Step 5/10 : RUN apk add --no-cache gcc musl-dev linux-headers ---> Running in c35c3476057d fetch http://dl-cdn.alpinelinux.org/alpine/v3.12/main/x86_64/APKINDEX.tar.gz fetch http://dl-cdn.alpinelinux.org/alpine/v3.12/community/x86_64/APKINDEX.tar.gz (1/13) Installing libgcc (9.3.0-r2) (2/13) Installing libstdc++ (9.3.0-r2) (3/13) Installing binutils (2.34-r1) (4/13) Installing gmp (6.2.0-r0) (5/13) Installing isl (0.18-r0) (6/13) Installing libgomp (9.3.0-r2) (7/13) Installing libatomic (9.3.0-r2) (8/13) Installing libgphobos (9.3.0-r2) (9/13) Installing mpfr4 (4.0.2-r4) (10/13) Installing mpc1 (1.1.0-r1) (11/13) Installing gcc (9.3.0-r2) (12/13) Installing linux-headers (5.4.5-r1) (13/13) Installing musl-dev (1.1.24-r10) Executing busybox-1.31.1-r19.trigger OK: 153 MiB in 48 packages Removing intermediate container c35c3476057d ---> c4b79ebafb44 Step 6/10 : COPY requirements.txt requirements.txt ---> 8de5ebace374 Step 7/10 : RUN pip install -r requirements.txt ---> Running in 81d0c53eff0f Collecting flask Downloading Flask-1.1.2-py2.py3-none-any.whl (94 kB) Collecting redis Downloading redis-3.5.3-py2.py3-none-any.whl (72 kB) Collecting click>=5.1 Downloading click-7.1.2-py2.py3-none-any.whl (82 kB) Collecting itsdangerous>=0.24 Downloading itsdangerous-1.1.0-py2.py3-none-any.whl (16 kB) Collecting Jinja2>=2.10.1 Downloading Jinja2-2.11.2-py2.py3-none-any.whl (125 kB) Collecting MarkupSafe>=0.23 Downloading MarkupSafe-1.1.1.tar.gz (19 kB) Collecting Werkzeug>=0.15 Downloading Werkzeug-1.0.1-py2.py3-none-any.whl (298 kB) Building wheels for collected packages: MarkupSafe Building wheel for MarkupSafe (setup.py): started Building wheel for MarkupSafe (setup.py): finished with status 'done' Created wheel for MarkupSafe: filename=MarkupSafe-1.1.1-cp37-cp37m-linux_x86_64.whl size=16913 sha256=4a6b9869979395fa310bded8ddf1c7a81489f560c8cbe6fac199b95b46ce0752 Stored in directory: /root/.cache/pip/wheels/b9/d9/ae/63bf9056b0a22b13ade9f6b9e08187c1bb71c47ef21a8c9924 Successfully built MarkupSafe Installing collected packages: MarkupSafe, Werkzeug, Jinja2, itsdangerous, click, redis, flask Successfully installed Jinja2-2.11.2 MarkupSafe-1.1.1 Werkzeug-1.0.1 click-7.1.2 flask-1.1.2 itsdangerous-1.1.0 redis-3.5.3 Removing intermediate container 81d0c53eff0f ---> 43ca7fa6f105 Step 8/10 : EXPOSE 5000 ---> Running in a561e0e7b3f2 Removing intermediate container a561e0e7b3f2 ---> d7de5f10d90e Step 9/10 : COPY . . ---> b94fafdb62cd Step 10/10 : CMD ["flask", "run"] ---> Running in cef6aff2a530 Removing intermediate container cef6aff2a530 ---> c1c130c9c656 Successfully built c1c130c9c656 Successfully tagged composetest_web:latest WARNING: Image for service web was built because it did not already exist. To rebuild this image you must use `docker-compose build` or `docker-compose up --build`. Pulling redis (redis:alpine)... alpine: Pulling from library/redis 188c0c94c7c5: Already exists fb6015f7c791: Pull complete f8890a096979: Pull complete cd6e0c12d5bc: Pull complete 67b3665cee45: Pull complete 0705890dd1f7: Pull complete Digest: sha256:b0e84b6b92149194d99953e44f7d1fa1f470a769529bb05b4164eae60d8aea6c Status: Downloaded newer image for redis:alpine Creating composetest_redis_1 ... done Creating composetest_web_1 ... done Attaching to composetest_redis_1, composetest_web_1 redis_1 | 1:C 06 Dec 2020 13:29:55.459 # oO0OoO0OoO0Oo Redis is starting oO0OoO0OoO0Oo redis_1 | 1:C 06 Dec 2020 13:29:55.459 # Redis version=6.0.9, bits=64, commit=00000000, modified=0, pid=1, just started redis_1 | 1:C 06 Dec 2020 13:29:55.459 # Warning: no config file specified, using the default config. In order to specify a config file use redis-server /path/to/redis.conf redis_1 | 1:M 06 Dec 2020 13:29:55.460 * Running mode=standalone, port=6379. redis_1 | 1:M 06 Dec 2020 13:29:55.460 # WARNING: The TCP backlog setting of 511 cannot be enforced because /proc/sys/net/core/somaxconn is set to the lower value of 128. redis_1 | 1:M 06 Dec 2020 13:29:55.460 # Server initialized redis_1 | 1:M 06 Dec 2020 13:29:55.460 # WARNING overcommit_memory is set to 0! Background save may fail under low memory condition. To fix this issue add 'vm.overcommit_memory = 1' to /etc/sysctl.conf and then reboot or run the command 'sysctl vm.overcommit_memory=1' for this to take effect. redis_1 | 1:M 06 Dec 2020 13:29:55.460 # WARNING you have Transparent Huge Pages (THP) support enabled in your kernel. This will create latency and memory usage issues with Redis. To fix this issue run the command 'echo madvise > /sys/kernel/mm/transparent_hugepage/enabled' as root, and add it to your /etc/rc.local in order to retain the setting after a reboot. Redis must be restarted after THP is disabled (set to 'madvise' or 'never'). redis_1 | 1:M 06 Dec 2020 13:29:55.460 * Ready to accept connections web_1 | * Serving Flask app "app.py" web_1 | * Environment: production web_1 | WARNING: This is a development server. Do not use it in a production deployment. web_1 | Use a production WSGI server instead. web_1 | * Debug mode: off web_1 | * Running on http://0.0.0.0:5000/ (Press CTRL+C to quit) -
在浏览器查看应用
第一次查看与再次刷新的结果如下:


-
查看本地镜像
docker images$ docker images REPOSITORY TAG IMAGE ID CREATED SIZE composetest_web latest c1c130c9c656 12 minutes ago 196MB python 3.7-alpine 8bbdaa3491cd 2 days ago 41.7MB redis alpine c1949ec48c51 5 weeks ago 31.2MB可以看见本地生成了想要的镜像,这里我们从python构建了web镜像,依赖了redis镜像!
可以使用
docker inspect <tag or id>查看镜像的具体信息。 -
停止应用(此项目)
可以在启动的窗口内使用CTRL+C停止;也可以
docker-compose down在终端位于项目目录下执行!$ docker-compose down Stopping composetest_web_1 ... done Stopping composetest_redis_1 ... done Removing composetest_web_1 ... done Removing composetest_redis_1 ... done Removing network composetest_default # 注意这里默认维护了一个composetest_default网络,避免了自定义网络…
3.5 更新Compose配置文件实现应用更新
在docker-compose.yml里添加挂载:
version: "3.8"
services:
  web:
    build: .
    ports:
      - "5000:5000"
    volumes:
      - .:/code
    environment:
      FLASK_ENV: development
  redis:
    image: "redis:alpine"
volumes键将主机上的项目目录(当前目录)装载到容器内的/code中,允许您动态修改代码,而不必重新生成映像。environment键设置FLASK_ENV环境变量,它告诉FLASK run以开发模式运行,并在更改时重新加载代码。这种模式只能在开发中使用。
3.6 重新创建并启动应用
$ docker-compose up
Creating network "composetest_default" with the default driver
Creating composetest_redis_1 ... done
Creating composetest_web_1   ... done
Attaching to composetest_redis_1, composetest_web_1
redis_1  | 1:C 06 Dec 2020 14:12:23.090 # oO0OoO0OoO0Oo Redis is starting oO0OoO0OoO0Oo
redis_1  | 1:C 06 Dec 2020 14:12:23.090 # Redis version=6.0.9, bits=64, commit=00000000, modified=0, pid=1, just started
redis_1  | 1:C 06 Dec 2020 14:12:23.090 # Warning: no config file specified, using the default config. In order to specify a config file use redis-server /path/to/redis.conf
redis_1  | 1:M 06 Dec 2020 14:12:23.093 * Running mode=standalone, port=6379.
redis_1  | 1:M 06 Dec 2020 14:12:23.093 # WARNING: The TCP backlog setting of 511 cannot be enforced because /proc/sys/net/core/somaxconn is set to the lower value of 128.
redis_1  | 1:M 06 Dec 2020 14:12:23.093 # Server initialized
redis_1  | 1:M 06 Dec 2020 14:12:23.093 # WARNING overcommit_memory is set to 0! Background save may fail under low memory condition. To fix this issue add 'vm.overcommit_memory = 1' to /etc/sysctl.conf and then reboot or run the command 'sysctl vm.overcommit_memory=1' for this to take effect.
redis_1  | 1:M 06 Dec 2020 14:12:23.093 # WARNING you have Transparent Huge Pages (THP) support enabled in your kernel. This will create latency and memory usage issues with Redis. To fix this issue run the command 'echo madvise > /sys/kernel/mm/transparent_hugepage/enabled' as root, and add it to your /etc/rc.local in order to retain the setting after a reboot. Redis must be restarted after THP is disabled (set to 'madvise' or 'never').
redis_1  | 1:M 06 Dec 2020 14:12:23.095 * Ready to accept connections
web_1    |  * Serving Flask app "app.py" (lazy loading)
web_1    |  * Environment: development
web_1    |  * Debug mode: on
web_1    |  * Running on http://0.0.0.0:5000/ (Press CTRL+C to quit)
web_1    |  * Restarting with stat
web_1    |  * Debugger is active!
web_1    |  * Debugger PIN: 333-773-512
应用正常启动起来了…
3.7 应用更新
因为应用程序代码现在是使用卷装入容器中的,所以您可以对其代码进行更改并立即看到更改,而无需重新生成映像。
将hello world修改为hello from docker!,终端发生变化:
web_1    | 172.19.0.1 - - [06/Dec/2020 14:13:39] "GET / HTTP/1.1" 200 -
web_1    | 172.19.0.1 - - [06/Dec/2020 14:13:40] "GET / HTTP/1.1" 200 -
web_1    | 172.19.0.1 - - [06/Dec/2020 14:13:41] "GET / HTTP/1.1" 200 -
web_1    | 172.19.0.1 - - [06/Dec/2020 14:13:42] "GET / HTTP/1.1" 200 -
web_1    |  * Detected change in '/code/app.py', reloading
web_1    |  * Restarting with stat
web_1    |  * Debugger is active!
web_1    |  * Debugger PIN: 333-773-512
修改前与修改后的对比:


3.8 Compose的其他命令
3.8.1 docker-compose up -d
$ docker-compose up -d在后台运行,使用CTRL+C停止后,在允许此命令有:
$ docker-compose up -d
Starting composetest_redis_1 ... done
Starting composetest_web_1   ... done
$
3.8.2 docker-compose ps
$ docker-compose ps查看当前正在运行的:
$ docker-compose ps
    Name                      Command               State           Ports
-------------------------------------------------------------------------------------
composetest_redis_1   docker-entrypoint.sh redis ...   Up      6379/tcp
composetest_web_1     flask run                        Up      0.0.0.0:5000->5000/tcp
注意只能在终端位于项目文件夹下执行,位于其他路径会报错!
3.8.3 docker-compose run
docker compose run命令允许您为服务运行一次性命令。例如,查看哪些环境变量可用于web服务。
$ docker-compose run web env查看哪些环境变量可用于web服务:
$ docker-compose run web env
Creating composetest_web_run ... done
PATH=/usr/local/bin:/usr/local/sbin:/usr/local/bin:/usr/sbin:/usr/bin:/sbin:/bin
HOSTNAME=3d54db2b3987
TERM=xterm
FLASK_ENV=development
LANG=C.UTF-8
GPG_KEY=0D96DF4D4110E5C43FBFB17F2D347EA6AA65421D
PYTHON_VERSION=3.7.9
PYTHON_PIP_VERSION=20.3.1
PYTHON_GET_PIP_URL=https://github.com/pypa/get-pip/raw/91630a4867b1f93ba0a12aa81d0ec4ecc1e7eeb9/get-pip.py
PYTHON_GET_PIP_SHA256=d48ae68f297cac54db17e4107b800faae0e5210131f9f386c30c0166bf8d81b7
FLASK_APP=app.py
FLASK_RUN_HOST=0.0.0.0
HOME=/root
运行结果显示了所有可用的环境变量
3.8.4 docker-compose stop
停止docker-compose up -d启动的应用可以使用docker-compose stop。
3.8.5 docker-compose down --volumes
可以使用down命令关闭所有内容,完全移除容器;通过--volumes可以移除数据卷!
环境说明:电脑在未关闭应用的前提下直接关闭终端并关机,下面是开机后启动应用并在浏览器查看的情况:
$ docker-compose up -d
Starting composetest_web_1   ... done
Starting composetest_redis_1 ... done
可以发现应用正常启动。浏览器访问的界面如下:

不难看出这个应用是上一次关机前的应用,或者说容器没有变,数据库没有变!
查看正在运行的容器:
$ docker ps
CONTAINER ID        IMAGE               COMMAND                  CREATED             STATUS              PORTS                    NAMES
4e2a051cc668        composetest_web     "flask run"              12 hours ago        Up 5 minutes        0.0.0.0:5000->5000/tcp   composetest_web_1
32ec414d1270        redis:alpine        "docker-entrypoint.s…"   12 hours ago        Up 5 minutes        6379/tcp                 composetest_redis_1
现在是有两个容器正在运行,分别为:composetest_web_1、composetest_redis_1;
查看数据卷:
$ docker volume ls
DRIVER              VOLUME NAME
local               8c6c1ca9de51d671f0381dd8f0b776c4924b43ca59be38b8d8936557f12e433a
local               fdec109a35409dee7c28e9c41cac947031d64d39ab08eb4143a8c9c26a4dcb3d

$ docker inspect composetest_redis_1
# 下面展示挂载部分:
"Mounts": [
	{
        "Type": "volume",
        "Name": "8c6c1ca9de51d671f0381dd8f0b776c4924b43ca59be38b8d8936557f12e433a",
        "Source": "/var/lib/docker/volumes/8c6c1ca9de51d671f0381dd8f0b776c4924b43ca59be38b8d8936557f12e433a/_data",
        "Destination": "/data",
        "Driver": "local",
        "Mode": "",
        "RW": true,
        "Propagation": ""
	}
],
$ docker inspect composetest_web_1
"Mounts": [
    {
        "Type": "bind",
        "Source": "D:\ELFIN_study_dir\elfin-docker\composetest",
        "Destination": "/code",
        "Mode": "rw",
        "RW": true,
        "Propagation": "rprivate"
    }
],

# 这里只有redis进行了挂载(数据库)、web容器挂载了D:\ELFIN_study_dir\elfin-docker\composetest目录到容器内的"/data"。
查看此应用的默认网络:
$ docker network ls
NETWORK ID          NAME                  DRIVER              SCOPE
1c1cf2eadfa7        bridge                bridge              local
79fecd7c5db2        composetest_default   bridge              local
7507d0881af4        host                  host                local
32d15d21327e        none                  null                local
$ docker inspect composetest_default
[
    {
        "Name": "composetest_default",
        "Id": "79fecd7c5db2b6c51c83b15c4bd9ca3fefe10c508679de863c25c0d639019322",
        "Created": "2020-12-06T14:12:19.3388746Z",
        "Scope": "local",
        "Driver": "bridge",
        "EnableIPv6": false,
        "IPAM": {
            "Driver": "default",
            "Options": null,
            "Config": [
                {
                    "Subnet": "172.19.0.0/16",
                    "Gateway": "172.19.0.1"
                }
            ]
        },
        "Internal": false,
        "Attachable": true,
        "Ingress": false,
        "ConfigFrom": {
            "Network": ""
        },
        "ConfigOnly": false,
        "Containers": {
            "32ec414d127088aa7f9d41fb5de9e0e10952e7d4c543a4a92663f941b5c5dd29": {
                "Name": "composetest_redis_1",
                "EndpointID": "9b7506618508eaeead83b8499fd70726c379af3edbf573b569b7d879b8bf1a54",
                "MacAddress": "xxxxxxxxxxxxx",
                "IPv4Address": "172.19.0.2/16",
                "IPv6Address": ""
            },
            "4e2a051cc66866fe5effc9858b20e384759d84390897c514f43f4048682e0a5f": {
                "Name": "composetest_web_1",
                "EndpointID": "dfd6c2d27ba57f6b0e9a40b6d5bf7b147eee85b0a2a1586c546b8e60c5872441",
                "MacAddress": "xxxxxxxxxxxxx",
                "IPv4Address": "172.19.0.3/16",
                "IPv6Address": ""
            }
        },
        "Options": {},
        "Labels": {
            "com.docker.compose.network": "default",
            "com.docker.compose.project": "composetest",
            "com.docker.compose.version": "1.27.4"
        }
    }
]
我们可以发现当前网络使用的是桥接,网络下的Containers字段显示了两个容器,正好是我们的web、redis。网络的创建时间也是前一天,说明关机断网这些操作不会影响我们的应用,即关机后再次启动,使用的还是之前的应用。
关闭并删除挂载:
$ docker-compose down --volumes
Stopping composetest_web_1   ... done
Stopping composetest_redis_1 ... done
Removing composetest_web_run_ff49b5941a79 ... done
Removing composetest_web_1                ... done
Removing composetest_redis_1              ... done
Removing network composetest_default

$ docker volume ls
DRIVER              VOLUME NAME
local               fdec109a35409dee7c28e9c41cac947031d64d39ab08eb4143a8c9c26a4dcb3d
这里的挂载还在!为什么?难道删除失败了吗?
实际上这里删除并不会删除web的挂载,因为在生成镜像时这个挂载已经使用了……
启动web容器
$ docker ps -a
CONTAINER ID        IMAGE               COMMAND             CREATED             STATUS              PORTS               NAMES

$ docker images
REPOSITORY          TAG                 IMAGE ID            CREATED             SIZE
composetest_web     latest              c1c130c9c656        13 hours ago        196MB
python              3.7-alpine          8bbdaa3491cd        3 days ago          41.7MB
redis               alpine              c1949ec48c51        5 weeks ago         31.2MB

$ docker run -it composetest_web /bin/bash
docker: Error response from daemon: OCI runtime create failed: container_linux.go:349: starting container process caused "exec: "/bin/bash": stat /bin/bash: no such file or directory": unknown.

$ docker run -it composetest_web
 * Serving Flask app "app.py"
 * Environment: production
   WARNING: This is a development server. Do not use it in a production deployment.
   Use a production WSGI server instead.
 * Debug mode: off
 * Running on http://0.0.0.0:5000/ (Press CTRL+C to quit)
进入web容器查看
$ docker ps
CONTAINER ID        IMAGE               COMMAND             CREATED             STATUS              PORTS               NAMES
ef3c4f85677a        composetest_web     "flask run"         3 minutes ago       Up 3 minutes        5000/tcp            determined_nash

$ docker exec -it determined_nash pwd
/code

$ docker exec -it determined_nash ls
Dockerfile          app.py              requirements.txt
__pycache__         docker-compose.yml
对比容器的启动,不难看出,挂载是在镜像生成就完成了,所以上面不会删除web的挂载!
3.8.6 查看其它命令
使用命令 docker-compose --help
D:ELFIN_study_direlfin-dockercomposetest>docker-compose --help
Define and run multi-container applications with Docker.

Usage:
  docker-compose [-f <arg>...] [options] [--] [COMMAND] [ARGS...]
  docker-compose -h|--help

Options:
  -f, --file FILE             Specify an alternate compose file
                              (default: docker-compose.yml)
  -p, --project-name NAME     Specify an alternate project name
                              (default: directory name)
  -c, --context NAME          Specify a context name
  --verbose                   Show more output
  --log-level LEVEL           Set log level (DEBUG, INFO, WARNING, ERROR, CRITICAL)
  --no-ansi                   Do not print ANSI control characters
  -v, --version               Print version and exit
  -H, --host HOST             Daemon socket to connect to

  --tls                       Use TLS; implied by --tlsverify
  --tlscacert CA_PATH         Trust certs signed only by this CA
  --tlscert CLIENT_CERT_PATH  Path to TLS certificate file
  --tlskey TLS_KEY_PATH       Path to TLS key file
  --tlsverify                 Use TLS and verify the remote
  --skip-hostname-check       Don't check the daemon's hostname against the
                              name specified in the client certificate
  --project-directory PATH    Specify an alternate working directory
                              (default: the path of the Compose file)
  --compatibility             If set, Compose will attempt to convert keys
                              in v3 files to their non-Swarm equivalent (DEPRECATED)
  --env-file PATH             Specify an alternate environment file

Commands:
  build              Build or rebuild services
  config             Validate and view the Compose file
  create             Create services
  down               Stop and remove containers, networks, images, and volumes
  events             Receive real time events from containers
  exec               Execute a command in a running container
  help               Get help on a command
  images             List images
  kill               Kill containers
  logs               View output from containers
  pause              Pause services
  port               Print the public port for a port binding
  ps                 List containers
  pull               Pull service images
  push               Push service images
  restart            Restart services
  rm                 Remove stopped containers
  run                Run a one-off command
  scale              Set number of containers for a service
  start              Start services
  stop               Stop services
  top                Display the running processes
  unpause            Unpause services
  up                 Create and start containers
  version            Show version information and quit
4、编写docker-compose.yml文件
如何书写你的yml文件,这里我们需要注意三类关键字,以及三个层级。
三类关键字是文件的第一层,分别为:version、services、其他。在书写docker-compose.yml文件时,version、services是最重要的,其他关键字可以根据你的项目而定。
version: "3.8"
services:

  redis:
    image: redis:alpine
    ports:
      - "6379"
    networks:
      - frontend
    deploy:
      replicas: 2
      update_config:
        parallelism: 2
        delay: 10s
      restart_policy:
        condition: on-failure

  db:
    image: postgres:9.4
    volumes:
      - db-data:/var/lib/postgresql/data
    networks:
      - backend
    deploy:
      placement:
        max_replicas_per_node: 1
        constraints:
          - "node.role==manager"

  vote:
    image: dockersamples/examplevotingapp_vote:before
    ports:
      - "5000:80"
    networks:
      - frontend
    depends_on:
      - redis
    deploy:
      replicas: 2
      update_config:
        parallelism: 2
      restart_policy:
        condition: on-failure

  result:
    image: dockersamples/examplevotingapp_result:before
    ports:
      - "5001:80"
    networks:
      - backend
    depends_on:
      - db
    deploy:
      replicas: 1
      update_config:
        parallelism: 2
        delay: 10s
      restart_policy:
        condition: on-failure

  worker:
    image: dockersamples/examplevotingapp_worker
    networks:
      - frontend
      - backend
    deploy:
      mode: replicated
      replicas: 1
      labels: [APP=VOTING]
      restart_policy:
        condition: on-failure
        delay: 10s
        max_attempts: 3
        window: 120s
      placement:
        constraints:
          - "node.role==manager"

  visualizer:
    image: dockersamples/visualizer:stable
    ports:
      - "8080:8080"
    stop_grace_period: 1m30s
    volumes:
      - "/var/run/docker.sock:/var/run/docker.sock"
    deploy:
      placement:
        constraints:
          - "node.role==manager"

networks:
  frontend:
  backend:

volumes:
  db-data:
services中主要有三个层级:services—>容器服务—>具体的一些配置。
4.1 version
关于version的版本是向下兼容的,具体兼容信息可以查看官方文档。
4.2 services 配置的关键字
services能配置哪些关键字,可以参考官方文档。
这里面主要有build、command、configs、deploy等!我们要重点注意一下depends_on!
4.3 其他关键字
在4.2中的关键字也可以在第一层的其他关键字里面配置,这种关键字会是全局(对所有服务生效)关键字
5、使用docker-compose一键部署WP博客
WP博客是很多人搭建博客的基础,而docker支持其一键部署,这里我们以此为例进行学习…
5.1 WordPress博客项目准备
Quickstart: Compose and WordPress这是官方的教程
-
创建你的项目目录
你可以给这个目录起个容易记住的名字。此目录是应用程序镜像的环境。目录应该只包含生成该映像的资源。
$ mkdir elfin-wordpress $ cd elfin-wordpress $ # 此时已经创建成功,且进入elfin-wordpress,这里的$是处理过的,测试环境实际上是Windows -
创建
docker-compose.ymlversion: '3.8' services: db: image: mysql:5.7 volumes: - db_data:/var/lib/mysql restart: always environment: MYSQL_ROOT_PASSWORD: somewordpress MYSQL_DATABASE: wordpress MYSQL_USER: wordpress MYSQL_PASSWORD: wordpress wordpress: depends_on: - db image: wordpress:latest ports: - "8000:80" restart: always environment: WORDPRESS_DB_HOST: db:3306 WORDPRESS_DB_USER: wordpress WORDPRESS_DB_PASSWORD: wordpress WORDPRESS_DB_NAME: wordpress volumes: db_data: {}这里db_data将保存WoedPress对数据库所做的任何更新!WordPress Multisite只在端口80和443上工作。
5.2 创建项目并运行
$ docker-compose up -d
Creating network "elfin-wordpress_default" with the default driver
Creating volume "elfin-wordpress_db_data" with default driver
Pulling db (mysql:5.7)...
5.7: Pulling from library/mysql
852e50cd189d: Pull complete
29969ddb0ffb: Pull complete
a43f41a44c48: Pull complete
5cdd802543a3: Pull complete
b79b040de953: Pull complete
938c64119969: Pull complete
7689ec51a0d9: Pull complete
36bd6224d58f: Pull complete
cab9d3fa4c8c: Pull complete
1b741e1c47de: Pull complete
aac9d11987ac: Pull complete
Digest: sha256:8e2004f9fe43df06c3030090f593021a5f283d028b5ed5765cc24236c2c4d88e
Status: Downloaded newer image for mysql:5.7
Pulling wordpress (wordpress:latest)...
latest: Pulling from library/wordpress
852e50cd189d: Already exists
0266fc315b01: Pull complete
4c8a5fa787a1: Pull complete
46fc127c1884: Pull complete
f768b7fadf16: Pull complete
345b578c1a78: Pull complete
90aafe41e78d: Pull complete
0b5d7691301b: Pull complete
e06cc2d9e2f8: Pull complete
6e9815fb33e7: Pull complete
9c620d71744c: Pull complete
66ef24dcaca4: Pull complete
83f52dab9487: Pull complete
83626a606b22: Pull complete
81fb279f13d3: Pull complete
1417d770ba43: Pull complete
3831bd0339c0: Pull complete
bf496d74576e: Pull complete
cc074193f10d: Pull complete
21692721b48c: Pull complete
Digest: sha256:cf7c7a9c9cc8614a7357dac77d401612c67af5e0ab1ab19e0777f643af3d3a3c
Status: Downloaded newer image for wordpress:latest
Creating elfin-wordpress_db_1 ... done
Creating elfin-wordpress_wordpress_1 ... done
5.3 浏览器查看微博项目
访问浏览器http://localhost:8000 (Docker Desktop for Mac or Docker Desktop for Windows)
访问浏览器http://MACHINE_VM_IP:8000 ,你可以使用docker-machine ip MACHINE_VM查看machine的地址。
访问http://localhost:8000后,会让你配置一些微博的基本信息,然后就进入博客的后端了:
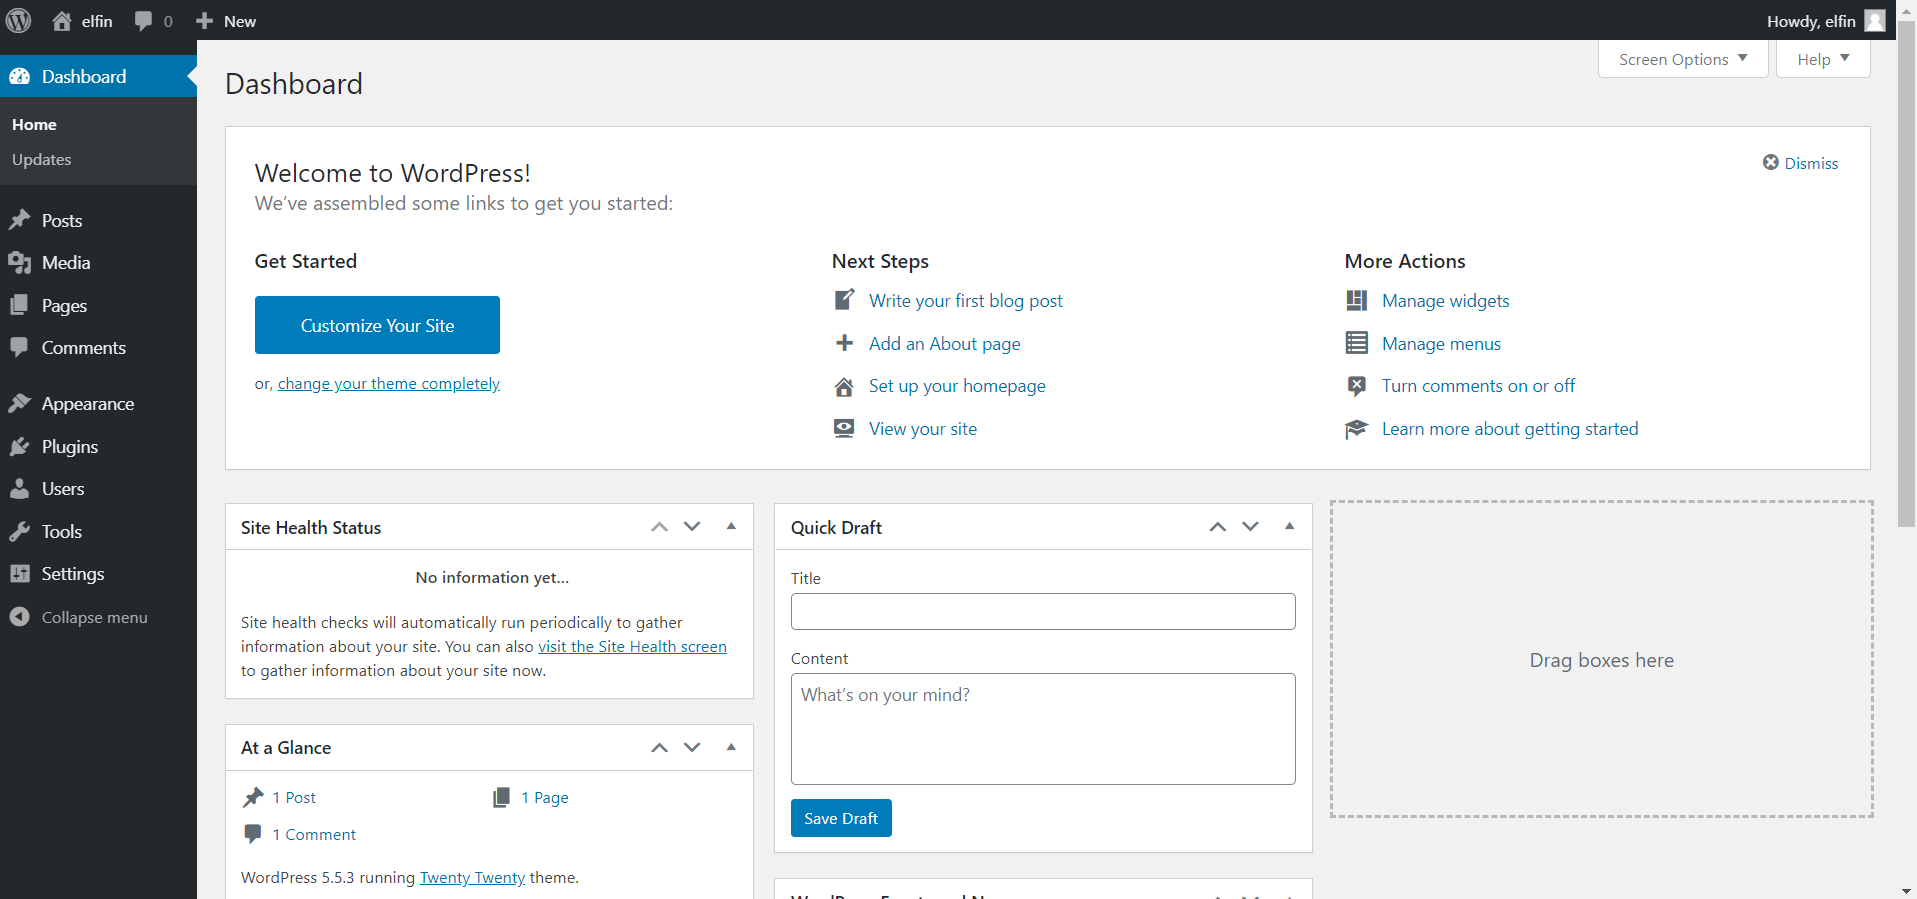
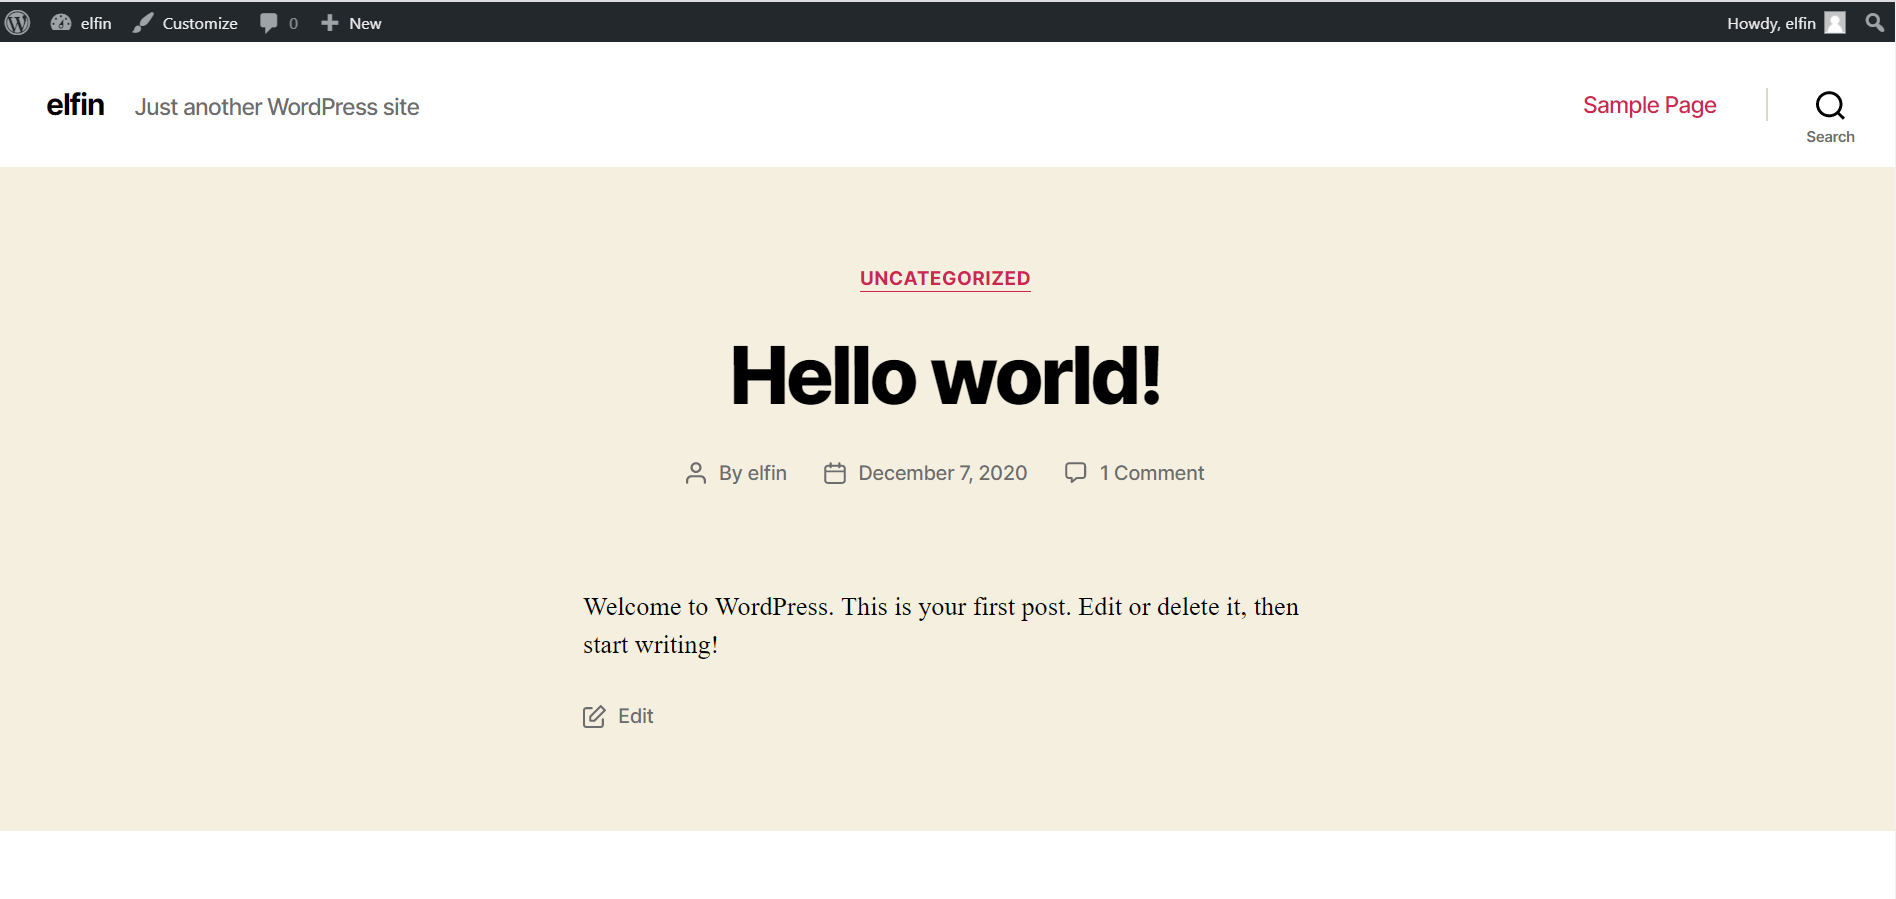
点击View your site就可以到前端界面了:
完!