
新事件分发机制:在2.x 版本事件处理时,将要触发的事件交给代理(delegate)处理,再通过实现代理里面的onTouchBegan等方法接收事件,最后完成事件的响应。而在新的事件分发机制中,只需通过创建一个事件监听器-用来实现各种触发后的逻辑,然后添加到事件分发器_eventDispatcher,所有事件监听器有这个分发器统一管理,即可完成事件响应。
事件监听器有以下几种:
- 触摸事件 (EventListenerTouch)
- 键盘响应事件 (EventListenerKeyboard)
- 鼠标响应事件 (EventListenerMouse)
- 自定义事件 (EventListenerCustom)
- 加速记录事件 (EventListenerAcceleration)
_eventDispatcher的工作由三部分组成:
- 事件分发器 EventDispatcher
- 事件类型 EventTouch, EventKeyboard 等
- 事件监听器 EventListenerTouch, EventListenerKeyboard 等
监听器实现了各种触发后的逻辑,在适当时候由事件分发器分发事件类型,然后调用相应类型的监听器。
用户输入事件
触摸事件
在处理触摸事件时,既可以重写三个方法onTouchBegan,onTouchMoved和onTouchEnded,也可以直接通过Lambda表达式完成响应逻辑。
在2.x版本中,开启多点触摸需要在AppController.mm中的application didFinishLaunchingWithOptions:launchOptions中添加[__glView setMultipleTouchEnabled: YES],另外还需重载5个相应函数:
- virtual void registerWithTouchDispatcher(void);
- virtual void ccTouchesBegan(cocos2d::CCSet pTouches, cocos2d::CCEvent pEvent);
- virtual void ccTouchesMoved(cocos2d::CCSet pTouches, cocos2d::CCEvent pEvent);
- virtual void ccTouchesEnded(cocos2d::CCSet pTouches, cocos2d::CCEvent pEvent);
- virtual void ccTouchesCancelled(cocos2d::CCSet pTouches, cocos2d::CCEvent pEvent);
而在3.0中,只需创建多点触摸事件监听器,并将其添加到事件分发器中即可。
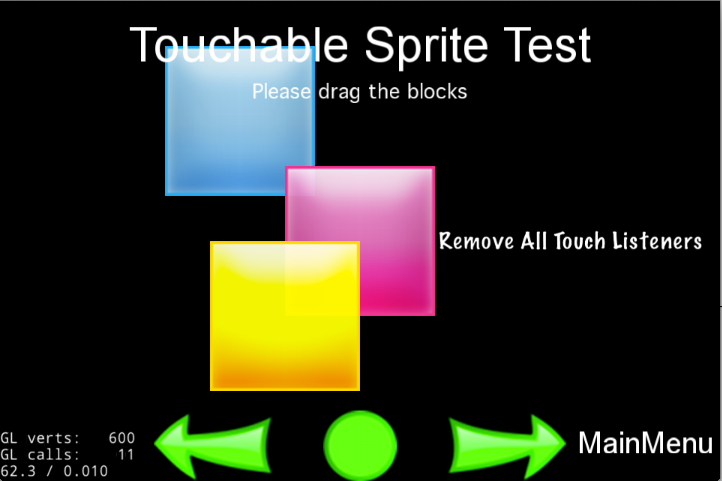
以下代码在一个界面中添加三个按钮,三个按钮相互遮挡,并且都能触发触摸事件:
    // 创建按钮精灵
    auto sprite1 = Sprite::create("Images/CyanSquare.png");
    sprite1->setPosition(origin+Point(size.width/2, size.height/2) + Point(-80, 80));
    addChild(sprite1, 10);
    // sprite2
    ...
    // sprite3
    ...
创建好按钮精灵后,创建单点触摸事件监听器,并完成相应逻辑处理
    // 创建一个事件监听器类型为 OneByOne 的单点触摸
    auto listener1 = EventListenerTouchOneByOne::create();
    // 设置是否吞没事件,在 onTouchBegan 方法返回 true 时吞没
    listener1->setSwallowTouches(true);

    // 使用 lambda 实现 onTouchBegan 事件回调函数
    listener1->onTouchBegan = [](http://www.cocos.com/doc/doc/cocos-docs-master/manual/framework/native/v3/event-dispatcher/Touch* touch, Event* event){
        // 获取事件所绑定的 target
        auto target = static_cast<Sprite*>(event->getCurrentTarget());

        // 获取当前点击点所在相对按钮的位置坐标
        Point locationInNode = target->convertToNodeSpace(touch->getLocation());
        Size s = target->getContentSize();
        Rect rect = Rect(0, 0, s.width, s.height);

        // 点击范围判断检测
        if (rect.containsPoint(locationInNode))
        {
            log("sprite began... x = %f, y = %f", locationInNode.x, locationInNode.y);
            target->setOpacity(180);
            return true;
        }
        return false;
        };

    // 触摸移动时触发
    listener1->onTouchMoved = [](http://www.cocos.com/doc/doc/cocos-docs-master/manual/framework/native/v3/event-dispatcher/Touch* touch, Event* event){...};

    // 点击事件结束处理
    listener1->onTouchEnded = [=](http://www.cocos.com/doc/doc/cocos-docs-master/manual/framework/native/v3/event-dispatcher/Touch* touch, Event* event){...};
最后需要将事件监听器添加到事件分发器
    // 添加监听器
    _eventDispatcher->addEventListenerWithSceneGraphPriority(listener1, sprite1);
    _eventDispatcher->addEventListenerWithSceneGraphPriority(listener1->clone(), sprite2);
_eventDispatcher->addEventListenerWithSceneGraphPriority(listener1->clone(), sprite3);以上代码中_eventDispatcher是Node的属性,通过它管理当前节点(场景、层、精灵等)的所有事件的分发。但它本身是一个单例模式值的引用,在Node的构造函数中,通过Director::getInstance()->getEventDispatcher(); 获取,有了这个属性,就能方便的处理事件。
注意:当再次使用 listener1 的时候,需要使用clone()方法创建一个新的克隆,因为在使用addEventListenerWithSceneGraphPriority或者addEventListenerWithFixedPriority方法时,会对当前使用的事件监听器添加一个已注册的标记,这使得它不能够被添加多次。另外,有一点非常重要,FixedPriority listener添加完之后需要手动remove,而SceneGraphPriority listener是跟Node绑定的,在Node的析构函数中会被移除。具体的示例用法可以参考引擎自带的tests。
我们可以通过以下方法移除一个已经被添加了的监听器。
_eventDispatcher->removeEventListener(listener);
也可以使用如下方法,移除当前事件分发器中所有监听器。
_eventDispatcher->removeAllEventListeners();
当使用removeAll的时候,此节点的所有的监听将被移除,推荐使用 指定删除的方式。removeAll之后菜单也不能响应。因为它也需要接受触摸事件。
键盘响应事件
键盘响应事件和处理触摸事件使用了相同的处理方式,一下代码演示如何处理键盘响应事件:
    // 初始化并绑定
    auto listener = EventListenerKeyboard::create();
    listener->onKeyPressed = CC_CALLBACK_2(KeyboardTest::onKeyPressed, this);
    listener->onKeyReleased = CC_CALLBACK_2(KeyboardTest::onKeyReleased, this);

    _eventDispatcher->addEventListenerWithSceneGraphPriority(listener, this);

    // 键位响应函数原型
    void KeyboardTest::onKeyPressed(EventKeyboard::KeyCode keyCode, Event* event)
    {
        log("Key with keycode %d pressed", keyCode);
    }

    void KeyboardTest::onKeyReleased(EventKeyboard::KeyCode keyCode, Event* event)
    {
        log("Key with keycode %d released", keyCode);
    }
鼠标响应事件
在 3.0 中多了鼠标捕获事件派发,这可以在不同的平台上,丰富我们游戏的用户体验。
下面代码实现鼠标响应事件的实现步骤:
    // 创建监听器
    _mouseListener = EventListenerMouse::create();

    // 时间响应逻辑
    _mouseListener->onMouseMove = [=](http://www.cocos.com/doc/doc/cocos-docs-master/manual/framework/native/v3/event-dispatcher/Event *event){
    EventMouse* e = (EventMouse*)event;
    string str = "Mouse Down detected, Key: ";
    str += tostr(e->getMouseButton());
    // ...
};
    _mouseListener->onMouseUp = [=](http://www.cocos.com/doc/doc/cocos-docs-master/manual/framework/native/v3/event-dispatcher/Event *event){...};
    _mouseListener->onMouseDown = [=](http://www.cocos.com/doc/doc/cocos-docs-master/manual/framework/native/v3/event-dispatcher/Event *event){...};
    _mouseListener->onMouseScroll = [=](http://www.cocos.com/doc/doc/cocos-docs-master/manual/framework/native/v3/event-dispatcher/Event *event){...};
    // 添加到事件分发器
    _eventDispatcher->addEventListenerWithSceneGraphPriority(_mouseListener, this);
自定义事件
以上是系统自带的事件类型,事件由系统内部自动触发,如 触摸屏幕,键盘响应等,除此之外,还提供了一种 自定义事件,简而言之,它不是由系统自动触发,而是人为的干涉,如下:
    _listener = EventListenerCustom::create("game_custom_event1", [=](http://www.cocos.com/doc/doc/cocos-docs-master/manual/framework/native/v3/event-dispatcher/EventCustom* event){
        std::string str("Custom event 1 received, ");
        char* buf = static_cast<char*>(event->getUserData());
        str += buf;
        str += " times";
        statusLabel->setString(str.c_str());
    });

    _eventDispatcher->addEventListenerWithFixedPriority(_listener, 1);
以上定义了一个 “自定义事件监听器”,实现了相关逻辑,并且添加到事件分发器。上面的自定义事件将由以下代码触发:
    static int count = 0;
    ++count;
    char* buf = new char[10];
    sprintf(buf, "%d", count);
    EventCustom event("game_custom_event1");
    event.setUserData(buf);
    if(...)
    {
        _eventDispatcher->dispatchEvent(&event);
    }
    CC_SAFE_DELETE_ARRAY(buf);
定义一个 EventCustom,并且设置了其 UserData 数据,手动的通过 _eventDispatcher->dispatchEvent(&event); 将此事件分发出去,从而触发之前所实现的逻辑。
加速计事件
除了触摸,移动设备上一个很重要的输入源是设备的方向,因此大多数设备都配备了加速计,用于测量设备静止或匀速运动时所受到的重力方向。
重力感应来自移动设备的加速计,通常支持X,Y和Z三个方向的加速度感应,所以又称为三向加速计。在实际应用中,可以根据3个方向的力度大小来计算手机倾斜的角度或方向。
3.0中,新的事件机制下,我们需要通过创建一个加速计监听器EventListenerAcceleration,其静态create方法中有个Acceleration的参数需要注意。Acceleration是一个类,包含了加速计获得的3个方向的加速度,相关代码如下:
class Acceleration
{
public:
    double x;
    double y;
    double z;

    double timestamp;

    Acceleration(): x(0), y(0), z(0), timestamp(0) {}
};
该类中每个方向的加速度大小都为一个重力加速度大小。
在使用加速计事件监听器之前,需要先启用此硬件设备:
Device::setAccelerometerEnabled(true);
然后创建对应的监听器,在创建回调函数时,可以使用 lambda 表达式创建匿名函数,也可以绑定已有的函数逻辑实现,如下:
    auto listener = EventListenerAcceleration::create([=](http://www.cocos.com/doc/doc/cocos-docs-master/manual/framework/native/v3/event-dispatcher/Acceleration* acc, Event* event){
        //逻辑代码段
    });
    _eventDispatcher->addEventListenerWithSceneGraphPriority(listener, this);