一 异步任务
启动类
@MapperScan("com.topcheer.*.*.dao")
@SpringBootApplication
@EnableCaching
@EnableRabbit
@EnableAsync
public class Oss6Application {
public static void main(String[] args) {
SpringApplication.run(Oss6Application.class, args);
}
}
Controller层
1 /** 2 * @author WGR 3 * @create 2019/10/12 -- 21:53 4 */ 5 @RestController 6 public class AsynController { 7 8 @Autowired 9 AsynService asyncService; 10 11 @GetMapping("/hello") 12 public String hello(){ 13 asyncService.hello(); 14 return "success"; 15 } 16 }
Service层
1 /** 2 * @author WGR 3 * @create 2019/10/12 -- 21:52 4 */ 5 @Service 6 public class AsynService { 7 8 //告诉Spring这是一个异步方法 9 @Async 10 public void hello() { 11 try { 12 Thread.sleep(3000); 13 } catch (InterruptedException e) { 14 e.printStackTrace(); 15 } 16 System.out.println("处理数据中..."); 17 } 18 19 }
测试结果:
页面直接显示success,控制台过3秒显示处理数据中...
二 定时任务
此处的定时,标注在方法上+注解,假如想修改生成环境的时间,不是很灵活,后面补充Quartz+boot,采用数据库配置和反射的原理。
注:java的cron表达式和Linux的不太一样,请注意,java为6位,linux为5位。

启动类
1 @SpringBootApplication 2 @EnableScheduling 3 public class Oss6Application { 4 5 public static void main(String[] args) { 6 SpringApplication.run(Oss6Application.class, args); 7 } 8 9 } 10
服务类
1 @Service 2 public class ScheduledService { 3 4 /** 5 * second(秒), minute(分), hour(时), day of month(日), month(月), day of week(周几). 6 * 0 * * * * MON-FRI 7 * 【0 0/5 14,18 * * ?】 每天14点整,和18点整,每隔5分钟执行一次 8 * 【0 15 10 ? * 1-6】 每个月的周一至周六10:15分执行一次 9 * 【0 0 2 ? * 6L】每个月的最后一个周六凌晨2点执行一次 10 * 【0 0 2 LW * ?】每个月的最后一个工作日凌晨2点执行一次 11 * 【0 0 2-4 ? * 1#1】每个月的第一个周一凌晨2点到4点期间,每个整点都执行一次; 12 */ 13 // @Scheduled(cron = "0 * * * * MON-SAT") 14 //@Scheduled(cron = "0,1,2,3,4 * * * * MON-SAT") 15 // @Scheduled(cron = "0-4 * * * * MON-SAT") 16 @Scheduled(cron = "0/4 * * * * MON-SAT") //每4秒执行一次 17 public void hello(){ 18 System.out.println("hello ... "); 19 } 20 }
三 邮件任务
pom.xml
1         <dependency>
2             <groupId>org.springframework.boot</groupId>
3             <artifactId>spring-boot-starter-mail</artifactId>
4             <scope>test</scope>
5         </dependency>
配置文件
1 spring:
2  mail:
3     username: ***********
4     password: *********   (这是qq邮箱的授权码)
5     host: smtp.qq.com
6 spring.mail.properties.mail.smtp.ssl.enable=true
测试类
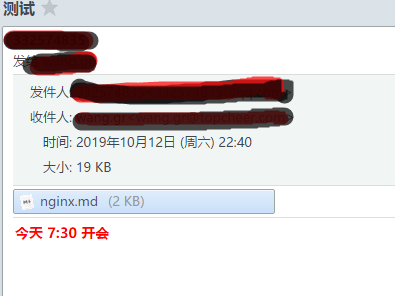
1 @Autowired(required = false) 2 JavaMailSenderImpl mailSender; 3 4 @Test 5 public void contextLoads() { 6 SimpleMailMessage message = new SimpleMailMessage(); 7 //邮件设置 8 message.setSubject("通知-今晚开会"); 9 message.setText("今晚7:30开会"); 10 11 message.setTo("**************"); 12 message.setFrom("**************"); 13 14 mailSender.send(message); 15 } 16 17 @Test 18 public void test02() throws Exception{ 19 //1、创建一个复杂的消息邮件 20 MimeMessage mimeMessage = mailSender.createMimeMessage(); 21 MimeMessageHelper helper = new MimeMessageHelper(mimeMessage, true); 22 23 //邮件设置 24 helper.setSubject("测试"); 25 helper.setText("<b style='color:red'>今天 7:30 开会</b>",true); 26 27 helper.setTo("***************"); 28 helper.setFrom("**************"); 29 30 //上传文件 31 helper.addAttachment("nginx.md",new File("C:\Users\asus\Desktop\nginx.md")); 32 33 mailSender.send(mimeMessage); 34 35 }
结果:
总结
简单的介绍了几个任务,后面有时间会详细说明在项目实战的开发应用。