一、环境配置
192.168.42.8部署gitlab,节点一
192.168.42.9部署git,Jenkins,ansible服务器
192.168.42.10节点二
二、操作演示
①gitlab创建新的nginx项目
创建目录及克隆
[root@localhost ~]# mkdir nn
[root@localhost ~]# cd nn
[root@localhost nn]# git clone http://192.168.42.8/root/nginx.git
Cloning into 'nginx'...
warning: You appear to have cloned an empty repository.
[root@localhost nn]# ls
nginx
[root@localhost nn]# cd nginx/
[root@localhost nginx]# ls -a
.  ..  .git
②发送密钥
[root@localhost nginx]# ssh-keygen
[root@localhost nginx]# ssh-copy-id 192.168.42.8
[root@localhost nginx]# ssh-copy-id 192.168.42.10
③创建roles相关目录,并编写相关文件
1.创建roles目录
[root@localhost nginx]# mkdir roles/nginx/{files,template,vars,tasks} -p
2.编写vars文件
[root@localhost nginx]# vim roles/nginx/vars/main.yaml
[root@localhost nginx]# cat roles/nginx/vars/main.yaml
conn: 2048
host_user: root
por: 83
docu_root: /var/www/html
3.复制nginx至template下
[root@localhost nginx]# cp /etc/nginx/nginx.conf roles/nginx/template/nginx.conf.j2
4.编辑nginx.conf,修改变量
[root@localhost nginx]# vim roles/nginx/template/nginx.conf.j2
      user {{ host_user }};
      worker_connections {{ conn }};
      listen       {{ por }};
      root         {{ docu_root }};
5.编辑tasks文件
[root@localhost nginx]# cat roles/nginx/tasks/main.yaml
- template: src=roles/nginx/template/nginx.conf.j2 dest=/etc/nginx/nginx.conf
- yum: name=nginx state=present
- service: name=nginx state=restarted
- copy: src=roles/nginx/files/index.html dest=/var/www/html
6.编写测试文件
[root@localhost nginx]# echo 'I will success' >> roles/nginx/files/index.html
[root@localhost nginx]# ls roles/nginx/files/
index.html
7.编写清单文件
[root@localhost nginx]# cat inventory/jams
[jams]
192.168.42.8
192.168.42.10
8.编写剧本
[root@localhost nginx]# cat jams.yaml
- hosts: all
  roles:
  - nginx
9.模拟执行剧本
[root@localhost nginx]# ansible-playbook -C -i inventory/jams jams.yaml
[root@localhost nginx]# ansible-playbook -i inventory/jams jams.yaml
10.提交
[root@localhost nginx]# git add .
[root@localhost nginx]# git commit -m v1
[root@localhost nginx]# git push -u origin master
jenkins 实现持续集成
经过上面的一些操作之后,我们已经完成了静态网站的部署,以及代码的上传
但是发现还是每次执行需要输入命令等
现在我们就使用jenkins来实现持续化部署
第一步:jenkins中创建任务
创建了一个自由风格的软件项目
项目名称为item7
第二步:添加源码管理信息
这里的url就是你的项目的地址(即gitlab的仓库链接地址)
下面的凭证输入之前添加的全局凭据的账号和密码。

用脚本构建,cd到workspace下。
创建的bubu文件以及此次的任务名目录(任务名是一个worksapce下的目录)都会在workspace目录下。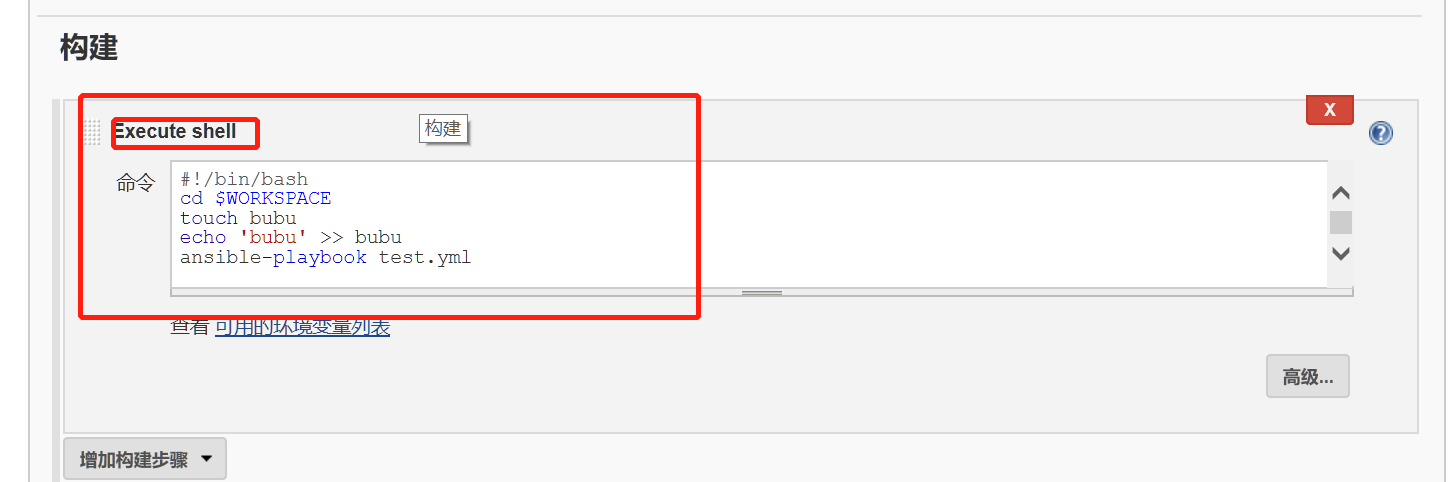
可以看到我的任务脚本内执行ansible时并没有指定清单inventory/test 这是因为我选择了在/etc/ansible/hosts里面配置主机信息,这也是一种方法。
三:选择立即构建执行任务。
可能会碰到以下报错:

1)这里的失败原因是因为运行jenkins程序的是jenkins用户,我们连接节点的秘钥是root的,所以现在连接不上
打开配置文件/var/lib/jenkins 将jenkins用户改为root用户即可。
2)有时候报错时因为各主机之间的时间不同步,使用ntpdate同步时间后再次尝试。
3)有时候部署gitlab的节点无法启动nginx服务这是因为gitlab会自动启动nginx,使用gitlab-ctl stop nginx,然后再启动即可。
4)更有时候部署gitlab的ip换了,但是仓库的链接地址还是没变,这在gitlab网页上不好修改,我们在做git clone克隆的时候以及用gitlab做持续集成的时候就需要自己手动修改。
5)如果做jenkin持续集成构建时报错 playbook xxx not found (找不到剧本)
或者其中一台节点无法重启nginx服务
在部署jenkins服务的主机上提交推送文件给gitlab仓库
然后试试关闭防火墙和重启jenkins服务。
6)如果报错找不到repository或者master分支,这是因为gitlab创建新项目的时候没有创建搭建本地仓库。
四:如果构建成功的话,可以去linux下的/var/lib/jenkins/workspace/下去查看是否含有bubu文件。
来证明gitlab+ansible+jenkins的持续集成实验成功。