前言:
示例是很有用的,这里列举的是非常简单的小java项目。应用了spring mvc,学习本项目可以了解前怎么调用的后端?后端怎么提供的接口?怎么增加的依赖等。
本教程是在一个maven web项目基础上做的,教程如下:
https://blog.csdn.net/czc9309/article/details/80304074
本教程源码:
1、CSDN下载位置:https://download.csdn.net/download/Garen7/12248709(有积分的给点吧!)
2、github:https://github.com/galen17/springSecurity的release_springMVC分支;(多谢点star!)
创建环境
idea+maven
虽然是idea开发的,eclipse也可以应用下面的代码!
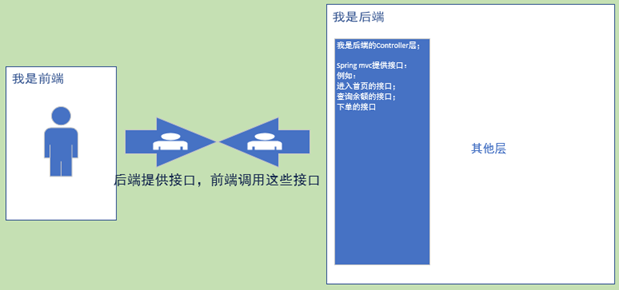
- spring MVC是个Controller层的框架,前端调用后端服务器的接口处理器。
- springMVC在后端服务器提供接口,前端就访问这些接口。
pom.xml添加spring MVC依赖
这里只增加了springMVC的依赖。
<!-- Spring dependencies -->
<dependency>
<groupId>org.springframework</groupId>
<artifactId>spring-webmvc</artifactId>
<version>5.1.5.RELEASE</version>
</dependency>
配置web.xml
增加spring MVC配置,众所周知spring MVC是以servlet为基础,这里配置了DispatcherServlet及配置文件。学习过servlet都知道这里就是增加了一个servlet。
<!--启动SpringMVC-->
<servlet>
<servlet-name>DispatcherServlet</servlet-name>
<servlet-class>org.springframework.web.servlet.DispatcherServlet</servlet-class>
<init-param>
<param-name>contextConfigLocation</param-name>
<param-value>classpath:springmvc.xml</param-value>
</init-param>
<!-- 服务器启动加载Servlet-->
<load-on-startup>1</load-on-startup>
</servlet>
<servlet-mapping>
<servlet-name>DispatcherServlet</servlet-name>
<url-pattern>/</url-pattern>
</servlet-mapping>
添加spring MVC 的配置文件:springmvc.xml
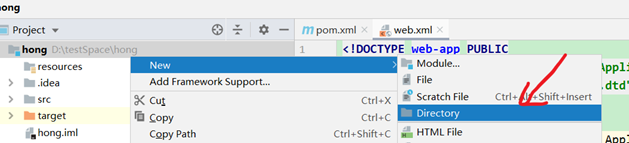
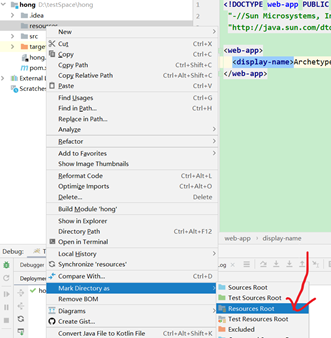
先增加个放配置文件的资源文件夹

把新建的文件夹改成资源文件夹,在idea中每个文件夹的属性不同,有放配置文件的,有放java的。详情自己去查吧。
新增springmvc.xml,内容
<?xml version="1.0" encoding="UTF-8"?>
<beans xmlns="http://www.springframework.org/schema/beans"
xmlns:mvc="http://www.springframework.org/schema/mvc"
xmlns:contenxt="http://www.springframework.org/schema/context"
xmlns:xsi="http://www.w3.org/2001/XMLSchema-instance"
xsi:schemaLocation="
http://www.springframework.org/schema/beans
http://www.springframework.org/schema/beans/spring-beans.xsd
http://www.springframework.org/schema/mvc
http://www.springframework.org/schema/mvc/spring-mvc.xsd
http://www.springframework.org/schema/context
http://www.springframework.org/schema/context/spring-context.xsd">
<!-- 扫描Controller类-->
<contenxt:component-scan base-package="cn.sm1234"/>
<!--注解方式处理器映射器和处理器适配器 -->
<mvc:annotation-driven></mvc:annotation-driven>
<!--视图解析器-->
<bean class="org.springframework.web.servlet.view.InternalResourceViewResolver">
<!--前缀 -->
<property name="prefix" value="/WEB-INF/"/>
<!-- 后缀-->
<property name="suffix" value=".jsp"/>
</bean>
</beans>
在main-java下增加包cn.sm1234.controller,并增加java文件"ProductController.java",内容为:
package cn.sm1234.controller;
import org.springframework.stereotype.Controller;
import org.springframework.web.bind.annotation.RequestMapping;
@Controller
@RequestMapping("/product")
public class ProductController {
/**
* 商品添加
*/
@RequestMapping("/index")
public String index(){
return "index";
}
/**
* 商品添加
*/
@RequestMapping("/add")
public String add(){
return "product/productAdd";
}
/**
* 商品修改
*/
@RequestMapping("/update")
public String update(){
return "product/productUpdate";
}
/**
* 商品修改
*/
@RequestMapping("/list")
public String list(){
return "product/productList";
}
/**
* 商品删除
*/
@RequestMapping("/delete")
public String delete(){
return "product/productDelete";
}
}
新增jsp页面:index.jsp,productAdd.jsp,productDelete.jsp等
在WEB-INF下新增index.jsp
<%@ page contentType="text/html;charset=UTF-8" language="java" %>
<html>
<head>
<title>首页</title>
</head>
<body>
以下是网站的功能:<br/>
<a href="${pageContext.request.contextPath}/product/add">商品添加</a><br/>
<a href="${pageContext.request.contextPath}/product/update">商品修改</a><br/>
<a href="${pageContext.request.contextPath}/product/list">商品查询</a><br/>
<a href="${pageContext.request.contextPath}/product/delete">商品删除</a><br/>
</body>
</html>
在WEB-INF下新增文件夹product,
在product下增加productAdd.jsp
<%@ page contentType="text/html;charset=UTF-8" language="java" %>
<html>
<head>
<title>商品添加页面</title>
</head>
<body>
这是商品添加页面
</body>
</html>
在WEB-INF的product下增加productDelete.jsp
<%@ page contentType="text/html;charset=UTF-8" language="java" %>
<html>
<head>
<title>商品删除页面</title>
</head>
<body>
这是商品删除页面
</body>
</html>
在WEB-INF的product下增加productList.jsp
<%@ page contentType="text/html;charset=UTF-8" language="java" %>
<html>
<head>
<title>商品查询页面</title>
</head>
<body>
这是商品查询页面
</body>
</html>
在WEB-INF的product下增加productUpdate.jsp
<%@ page contentType="text/html;charset=UTF-8" language="java" %>
<html>
<head>
<title>商品修改页面</title>
</head>
<body>
这是商品修改页面
</body>
</html>
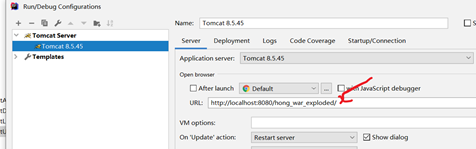
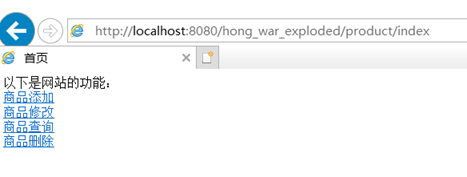
搭建完成了,运行后访问地址:
http://localhost:8080/hong_war_exploded/product/index即可:hong_war_exploded是我项目名称,自己按照自己的更改,在这里
访问后显示:
总结:
- 用户请求地址
- springmvc分析地址找到对应的后端java代码
- springmvc再根据后端返回的数据和配置信息,找到jsp页面,返回给用户
