1、卸载系统自带的 MariaDB
[root@CentOS ~]# rpm -qa | grep mariadb
mariadb-libs-5.5.52-1.el7.x86_64
[root@CentOS ~]# rpm -e --nodeps mariadb-libs-5.5.52-1.el7.x86_64
2、下载 mysql5.7.21 安装包
[root@CentOS local]# wget https://dev.mysql.com/get/Downloads/MySQL-5.7/mysql-5.7.21-linux-glibc2.12-x86_64.tar.gz
3、创建 mysql 用户组和 mysql 用户
[root@CentOS local]# useradd mysql
4、解压安装包,并将解压好的文件夹重命名为mysql
[root@CentOS local]# tar -zxvf mysql-5.7.21-linux-glibc2.12-x86_64.tar.gz mysql-5.7.21-linux-glibc2.12-x86_64/bin/myisam_ftdump mysql-5.7.21-linux-glibc2.12-x86_64/bin/myisamchk mysql-5.7.21-linux-glibc2.12-x86_64/bin/myisamlog mysql-5.7.21-linux-glibc2.12-x86_64/bin/myisampack mysql-5.7.21-linux-glibc2.12-x86_64/bin/mysql mysql-5.7.21-linux-glibc2.12-x86_64/bin/mysql_client_test_embedded mysql-5.7.21-linux-glibc2.12-x86_64/bin/mysql_config_editor mysql-5.7.21-linux-glibc2.12-x86_64/bin/mysql_embedded mysql-5.7.21-linux-glibc2.12-x86_64/bin/mysql_install_db mysql-5.7.21-linux-glibc2.12-x86_64/bin/mysql_plugin ......(略去内容)..... [root@CentOS local]# mv mysql-5.7.21-linux-glibc2.12-x86_64 mysql
5、将 mysql 添加为系统服务
[root@CentOS local]# cp mysql/support-files/mysql.server /etc/init.d/mysql [root@CentOS local]# chkconfig --add mysql
6、初始化数据库
[root@CentOS mysql]# mkdir data [root@CentOS mysql]# ./bin/mysqld --initialize --user=mysql --basedir=/usr/local/mysql --datadir=/usr/local/mysql/data 2018-02-24T11:03:47.265873Z 0 [Warning] TIMESTAMP with implicit DEFAULT value is deprecated. Please use --explicit_defaults_for_timestamp server option (see documentation for more details). 2018-02-24T11:03:48.343129Z 0 [Warning] InnoDB: New log files created, LSN=45790 2018-02-24T11:03:48.473269Z 0 [Warning] InnoDB: Creating foreign key constraint system tables. 2018-02-24T11:03:48.541782Z 0 [Warning] No existing UUID has been found, so we assume that this is the first time that this server has been started. Generating a new UUID: 63b1ed0c-1952-11e8-aa97-000c29847b2d. 2018-02-24T11:03:48.542867Z 0 [Warning] Gtid table is not ready to be used. Table 'mysql.gtid_executed' cannot be opened. 2018-02-24T11:03:48.543383Z 1 [Note] A temporary password is generated for root@localhost: =u>yyVorV7g% [root@CentOS mysql]#
例如在 /usr/local/mysql 目录下创建用于保存数据的data 目录,初始化数据库后获得的临时密码为:=u>yyVorV7g%
7、启动mysql服务,使用临时密码登录mysql
[root@CentOS mysql]# systemctl start mysql # 使用 service mysql start 也可以 [root@CentOS mysql]# ps -ef | grep mysql root 4654 1 0 19:07 ? 00:00:00 /bin/sh /usr/local/mysql/bin/mysqld_safe --datadir=/usr/local/mysql/data --pid-file=/usr/local/mysql/data/CentOS.pid mysql 4739 4654 4 19:07 ? 00:00:00 /usr/local/mysql/bin/mysqld --basedir=/usr/local/mysql --datadir=/usr/local/mysql/data --plugin-dir=/usr/local/mysql/lib/plugin --user=mysql --log-error=CentOS.err --pid-file=/usr/local/mysql/data/CentOS.pid root 4772 3618 0 19:07 pts/0 00:00:00 grep --color=auto mysql [root@CentOS mysql]# ./bin/mysql -u root -p Enter password: # 这里输入刚获取的临时密码 Welcome to the MySQL monitor. Commands end with ; or g. Your MySQL connection id is 2 Server version: 5.7.21 Copyright (c) 2000, 2018, Oracle and/or its affiliates. All rights reserved. Oracle is a registered trademark of Oracle Corporation and/or its affiliates. Other names may be trademarks of their respective owners. Type 'help;' or 'h' for help. Type 'c' to clear the current input statement. mysql>
8、修改登录密码
mysql> SET PASSWORD FOR 'root'@'localhost' = PASSWORD('123456'); # 将 root 登录密码修改为123456 Query OK, 0 rows affected, 1 warning (0.00 sec) mysql>
9、将 mysql 服务设置为开机启动
[root@CentOS mysql]# chkconfig mysql on
10、设置任何远程主机都可以访问数据库
[root@CentOS bin]# ./mysql -u root -p Enter password: Welcome to the MySQL monitor. Commands end with ; or g. Your MySQL connection id is 6 Server version: 5.7.21 MySQL Community Server (GPL) Copyright (c) 2000, 2018, Oracle and/or its affiliates. All rights reserved. Oracle is a registered trademark of Oracle Corporation and/or its affiliates. Other names may be trademarks of their respective owners. Type 'help;' or 'h' for help. Type 'c' to clear the current input statement. mysql> grant all privileges on *.* to 'root' @'%' identified by '123456'; # 设置任何远程主机都可以访问 Query OK, 0 rows affected, 1 warning (0.00 sec) mysql> flush privileges; # 刷新权限 Query OK, 0 rows affected (0.00 sec) mysql>
11、开放 3306 端口(mysql 默认端口)
[root@CentOS bin]# firewall-cmd --zone=public --add-port=3306/tcp --permanent # 添加 3306 端口 success [root@CentOS bin]# firewall-cmd --reload # 重新载入 success [root@CentOS bin]#
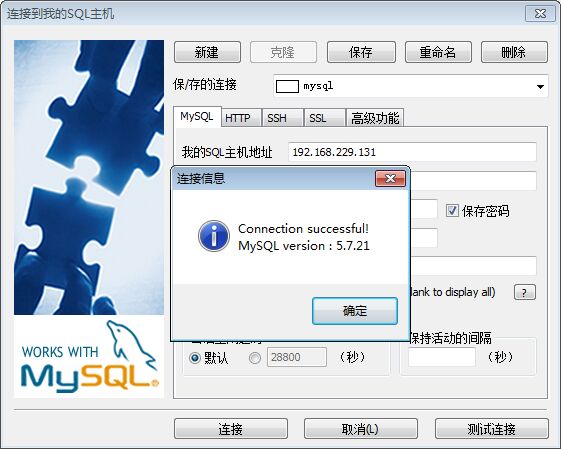
12、使用 Sqlyog 客户端进行测试
![]()