发布环境:
- cenots7
- Docker
开发环境:
- vs2019
- Net Core 3.1
版本号:
- consul:1.6.1.1
ocelot:16.0.1
docker:19.03.12
Jenkins :2.235.3
Consul
做服务发现的框架常用的有zookeeper,eureka,etcd,consul。
consul就是提供服务发现的工具,具有分布式、高可用、横向扩展等特性。
Consul服务端安装
官方文档
在Linux的docker 下安装的和部署consul
#拉取
docker pull consul
#启动
docker run -d --name consul -p 8500:8500 consul
Window的consul可以直接去官网下载,下载后是一个consul.exe文件,用cmd定位到下载目录后直接运行指令consul.exe agent --dev启动
启动后浏览器访问http://120.79.256.192:8500/可以直接看到界面。
Consul客户端注册
新建NetCore 3.1的Web应用程序。
添加一个控制器做心跳和测试用的。
[Route("api/[controller]/[action]")]
[ApiController]
public class MicroservicesController : ControllerBase
{
    /// <summary>
    /// 心跳检查
    /// </summary>
    /// <returns></returns>
    [HttpGet]
    public IActionResult Index()
    {
        return Ok();//只是个200状态码
    }

    /// <summary>
    /// 测试接口
    /// </summary>
    /// <returns></returns>
    [HttpGet]
    public string Get()
    {
        Console.WriteLine(Request.Host.Value);
        return Request.Host.Value;
    }
}
NuGet添加引用Consul最新版本。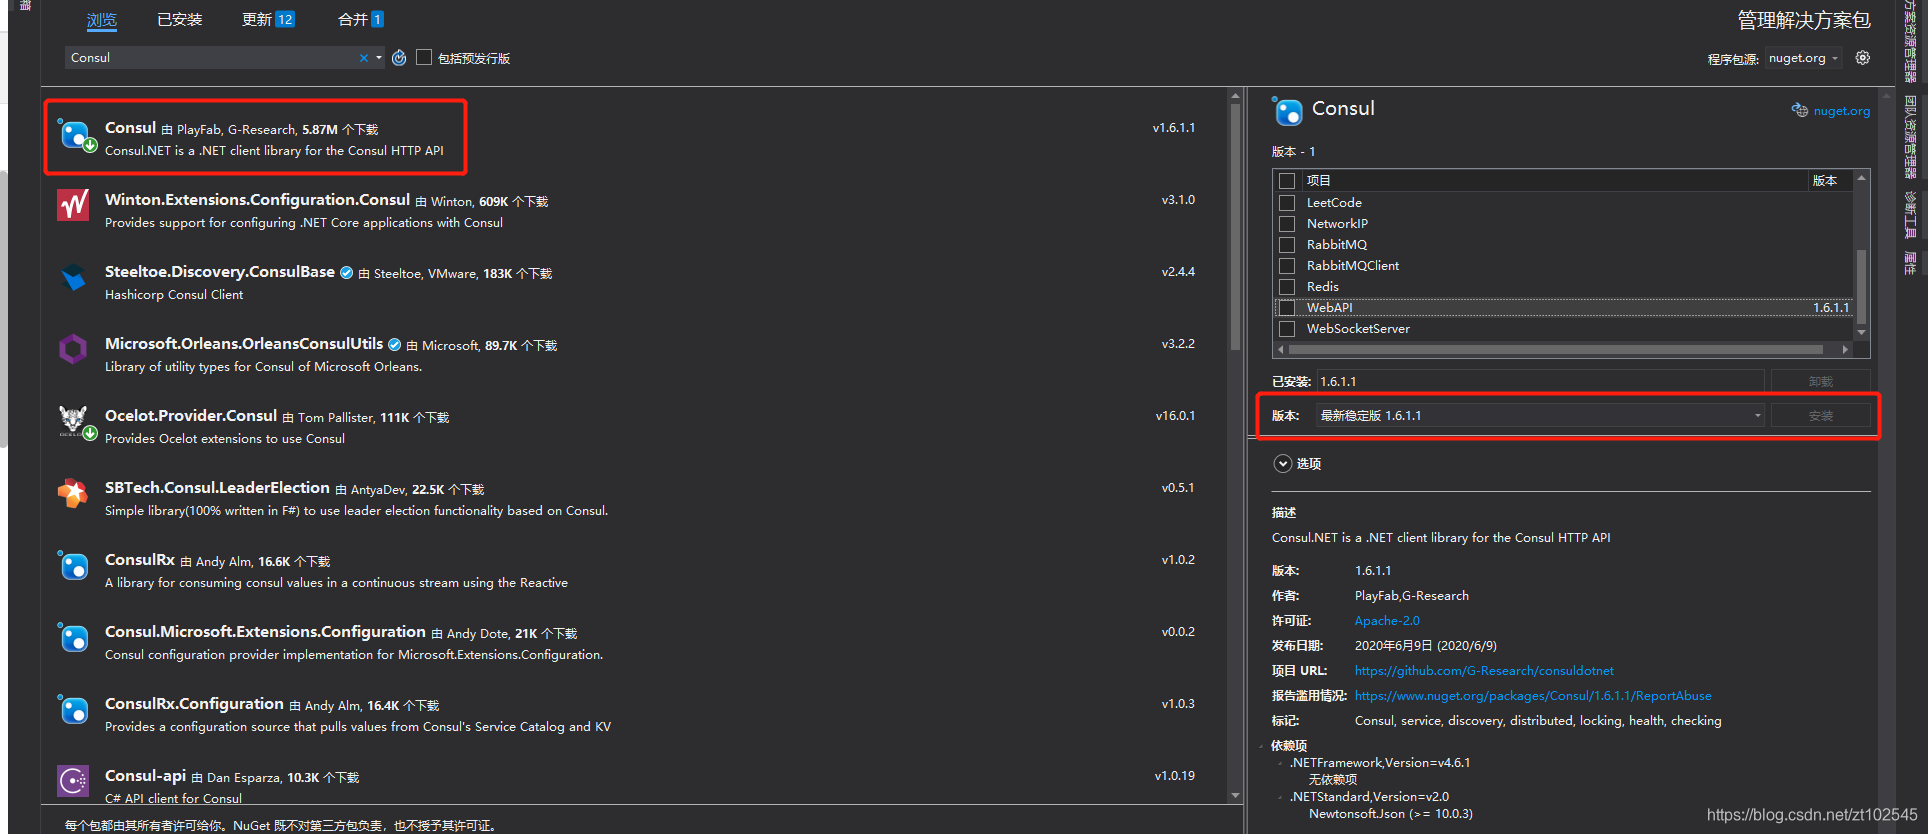
添加IConfiguration的扩展方法,然后在Startup的Configure里调用。
/// <summary>
/// 扩展方法
/// </summary>
/// <param name="configuration"></param>
public static void ConsulRegist(this IConfiguration configuration)
{
    ConsulClient client = new ConsulClient(c =>
    {
        c.Address = new Uri("http://120.79.256.192:8500/");//Consul服务端的地址
        c.Datacenter = "dc1";
    });

    //直接在VS里运行会报错,因为拿不到ip跟port,这些参数是启动的时候传入的,需要用指令启动
    //dotnet WebAPI.dll --urls="http://*:5005" --ip="127.0.0.1" --port=5005
    string ip = configuration["ip"];
    int port = int.Parse(configuration["port"]);
    int weight = string.IsNullOrWhiteSpace(configuration["weight"]) ? 1 : int.Parse(configuration["weight"]);
    //客户端向服务端注册的方法
    client.Agent.ServiceRegister(new AgentServiceRegistration()
    {
        ID = "service " + ip + ":" + port,//ID唯一
        Name = "ZztService",//注册名称
        Address = ip,//注册客户端的IP
        Port = port,//注册客户端的端口号
        Tags = new string[] { weight.ToString() },//传入参数
        Check = new AgentServiceCheck()//心跳检测
        {
            Interval = TimeSpan.FromSeconds(12),//每12s检查一次
            HTTP = $"http://{ip}:{port}/api/Microservices/Index",//调用检测接口,该方法没有内容,直接返回200
            Timeout = TimeSpan.FromSeconds(5),//超时时间
            DeregisterCriticalServiceAfter = TimeSpan.FromSeconds(20)//超时后20s后服务端认为该客户端挂了,直接断开。
        }
    });
    //命令行参数获取
    Console.WriteLine($"{ip}:{port}--weight:{weight}");
}

//Startup.Configure方法里执行Consul注册
#region Consul注册
//站点启动完成--执行且只执行一次
this.Configuration.ConsulRegist();
#endregion
Ocelot
Ocelot是一个用.NET Core实现并且开源的API网关,它功能强大,包括了:路由、请求聚合、服务发现、认证、鉴权、限流熔断、并内置了负载均衡器与Service Fabric、Butterfly Tracing集成。这些功能只都只需要简单的配置即可完成。
配置的官方文档
新建NetCore 3.1的Web应用程序。
添加Json配置文件,这里命名为:“OcelotConfig.json”添加以下内容
注意:16版本之前根节点是 ReRoutes,现在是 Routes 。
通用配置的模板如下:
{
  "Routes": [
    {
      "UpstreamPathTemplate": "/{url}", //服务地址
      "DownstreamPathTemplate": "/{url}", //网关地址
      "DownstreamScheme": "http", //请求协议
      "UpstreamHttpMethod": [ "Get", "Post" ] //请求方式
    }
  ]
}
常用的配置节点的简单说明如下:
- Downstream是下游服务配置
UpStream是上游服务配置
Aggregates 服务聚合配置
ServiceName, LoadBalancer, UseServiceDiscovery 配置服务发现
AuthenticationOptions 配置服务认证
RouteClaimsRequirement 配置Claims鉴权
RateLimitOptions为限流配置
FileCacheOptions 缓存配置
QosOptions 服务质量与熔断
DownstreamHeaderTransform头信息转发
将Json文件添加到程序里。
public class Program
{
    public static void Main(string[] args)
    {
        CreateHostBuilder(args).Build().Run();
    }

    public static IHostBuilder CreateHostBuilder(string[] args) =>
        Host.CreateDefaultBuilder(args)
            .ConfigureAppConfiguration(config=> {
                config.AddJsonFile("OcelotConfig.json", optional: false, reloadOnChange: true);
            })
            .ConfigureWebHostDefaults(webBuilder =>
            {
                webBuilder.UseStartup<Startup>();
            });
}
将程序的整个进程的管道换成Ocelot
public class Startup
{
    // This method gets called by the runtime. Use this method to add services to the container.
    // For more information on how to configure your application, visit https://go.microsoft.com/fwlink/?LinkID=398940
    public void ConfigureServices(IServiceCollection services)
    {
        services
            .AddOcelot()//使用Ocelot
    }

    // This method gets called by the runtime. Use this method to configure the HTTP request pipeline.
    public void Configure(IApplicationBuilder app, IWebHostEnvironment env)
    {
        app.UseOcelot();//将整个进程的管道换成Ocelot
    }
}
服务发现
可以配合Consul来实现。
NuGet添加引用Ocelot最新版本。Ocelot使用Consul还需要添加Ocelot.Provider.Consul引用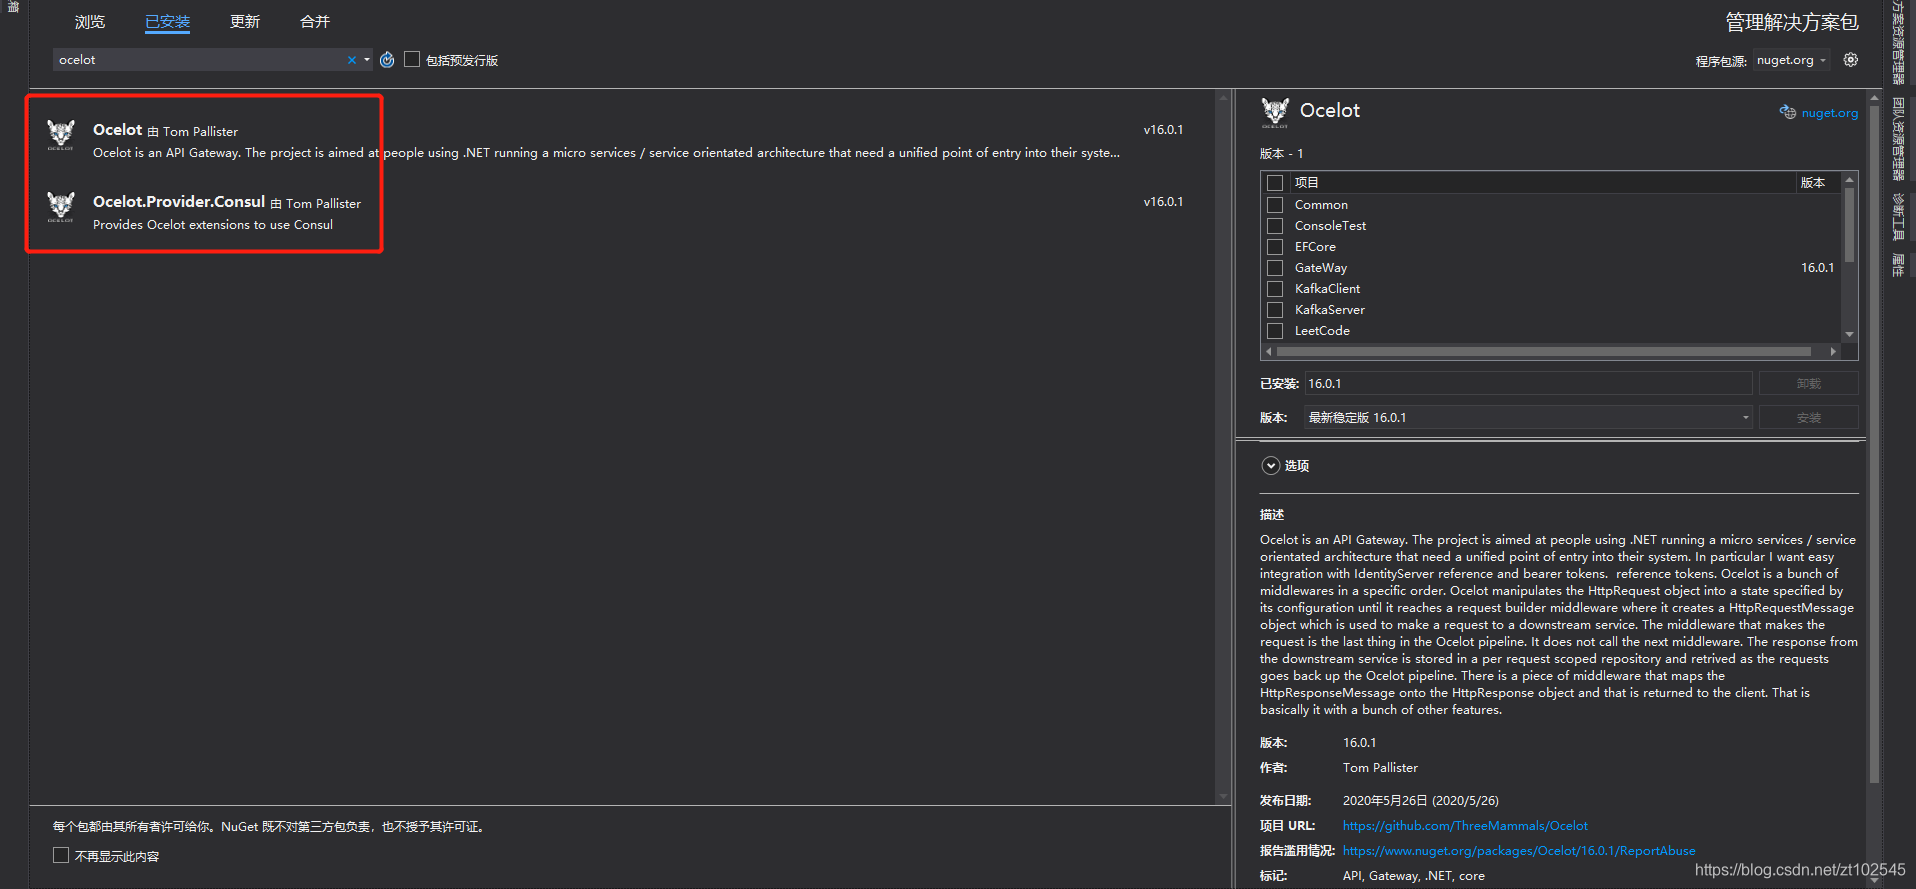
在Startup里面注册
 public void ConfigureServices(IServiceCollection services)
 {
     services
         .AddOcelot()//使用Ocelot
         .AddConsul();//使用Consul
 }
在Ocelot配置文件的Routes根节点中加入节点RateLimitOptions,添加GlobalConfiguration根节点,加入节点GlobalConfiguration
{
  "Routes": [
    {
      "UpstreamPathTemplate": "/{url}", //服务地址
      "DownstreamPathTemplate": "/{url}", //网关地址
      "DownstreamScheme": "http", //请求协议
      "UpstreamHttpMethod": [ "Get", "Post" ], //请求方式
      "UseServiceDiscovery": true, //是否使用服务发现
      "ServiceName": "ZztService", //Consul服务名称
      "LoadBalancerOptions": { //负载均衡策略方式
        "Type": "RoundRobin" //轮询
      }
    }
  ],
  "GlobalConfiguration": { //网关全局配置
    //"BaseUrl": "http://127.0.0.1:6299", //网关对外地址
    "ServiceDiscoveryProvider": {//服务发现的全局配置
      "Host": "120.79.256.192", //Consul服务端地址
      "Port": 8500, //Consul服务端端口号
      "Type": "Consul" //指明由Consul提供的服务发现,也可以换zookeeper,etcd等组件
    }
  }
}
服务治理
Cache
Ocelot网关一层加一个缓存,可以对上层请求服务进行缓存。
Ocelot要使用Cache需要引用Ocelot.Cache.CacheManager
创建一个自定义的缓存类,实现IOcelotCache接口
这里缓存的处理使用的是MemoryCache,也可以根据项目需求换成Redis
/// <summary>
/// 自定义Ocelot的缓存类,实现IOcelotCache接口
/// </summary>
public class OcelotCache : IOcelotCache<CachedResponse>
{
    /// <summary>
    /// 添加缓存
    /// </summary>
    /// <param name="key"></param>
    /// <param name="value"></param>
    /// <param name="ttl"></param>
    /// <param name="region"></param>
    public void Add(string key, CachedResponse value, TimeSpan ttl, string region)
    {
        Console.WriteLine($"This is OcelotCache.Add");
        MemoryCache.Set(key, value, ttl.TotalSeconds);
    }

    /// <summary>
    /// 覆盖缓存
    /// </summary>
    /// <param name="key"></param>
    /// <param name="value"></param>
    /// <param name="ttl"></param>
    /// <param name="region"></param>
    public void AddAndDelete(string key, CachedResponse value, TimeSpan ttl, string region)
    {
        Console.WriteLine($"This is OcelotCache.AddAndDelete");
        MemoryCache.Remove(key);
        MemoryCache.Set(key, value, ttl.TotalSeconds);
    }

    /// <summary>
    /// 清除缓存
    /// </summary>
    /// <param name="region">key</param>
    public void ClearRegion(string region)
    {
        Console.WriteLine($"This is OcelotCache.ClearRegion");
        //简单处理,清除所有缓存,根据需要自己优化
        MemoryCache.Remove(region);
    }

    /// <summary>
    /// 获取缓存
    /// </summary>
    /// <param name="key"></param>
    /// <param name="region"></param>
    /// <returns></returns>
    public CachedResponse Get(string key, string region)
    {
        try
        {
            Console.WriteLine($"This is OcelotCache.Get");
            return (CachedResponse)MemoryCache.Get(key);
        }
        catch (Exception ex)
        {
            Console.WriteLine(ex.Message);
            return null;
        }
    }
}
在Startup里面注册
public void ConfigureServices(IServiceCollection services)
{
    services
        .AddOcelot()//使用Ocelot
        .AddConsul()//使用Consul
        .AddCacheManager(o => o.WithDictionaryHandle());//使用Cache,默认字典存储

    //这里的IOcelotCache<CachedResponse>是默认的缓存的约束,替换成自定义的OcelotCache
    services.AddSingleton<IOcelotCache<CachedResponse>, OcelotCache>();
}
在Ocelot配置文件的Routes根节点中加入节点FileCacheOptions
"FileCacheOptions": {//缓存配置
    "TtlSeconds": 15,//缓存时间
    "Region": "UserCache" //可以调用Api清理
  }
}
Polly
Polly是一个被.NET基金会认可的弹性和瞬态故障处理库,允许我们以非常顺畅和线程安全的方式来执诸如行重试,断路,超时,故障恢复等策略,其主要功能如下:
重试(Retry)
断路器(Circuit-Breaker)
超时检测(Timeout)
缓存(Cache)
降级(Fallback)
Ocelot要使用Polly需要引用Ocelot.Provider.Polly
在Startup里面注册
public void ConfigureServices(IServiceCollection services)
{
    services
        .AddOcelot()//使用Ocelot
        .AddConsul()//使用Consul
        .AddCacheManager(o => o.WithDictionaryHandle())//使用Cache,默认字典存储
        .AddPolly();//使用Polly
    //这里的IOcelotCache<CachedResponse>是默认的缓存的约束,替换成自定义的OcelotCache
    services.AddSingleton<IOcelotCache<CachedResponse>, OcelotCache>();
}
熔断
熔断机制:
熔断的意思是停止将请求转发到下游服务。当下游服务已经出现故障的时候再请求也是无功而返,并且增加下游服务器和API网关的负担。而后使用断路器来检测故障是否得到解决,防止请求反复尝试执行一个异常操作,从而减少等待纠正故障的时间。
这个功能是用的Pollly来实现的,我们只需要为路由做一些简单配置即可。
熔断配置
在Ocelot配置文件的Routes根节点中加入节点QoSOptions
"QoSOptions": {//熔断的配置
  "ExceptionsAllowedBeforeBreaking": 3, //允许多少个异常请求
  "DurationOfBreak": 10000, // 熔断的时间,单位为ms,10S后尝试再次请求
  "TimeoutValue": 5000 //下游处理时间超过2s则视为超时, 默认90秒
}
限流
限流机制:
对请求进行限流可以防止下游服务器因为访问过载而崩溃。
限制单位时间内请求次数,超过则返回指定信息。
限流优先于缓存,不管上游请求的是服务还是网关的缓存都算请求次数的
在Ocelot配置文件的Routes根节点中加入节点RateLimitOptions
"RateLimitOptions": { //限流的配置
  "ClientWhitelist": [ "zzt", "zzt2" ], //白名单,请求头的添加参数ClientId来识别白名单
  "EnableRateLimiting": true, //启动限流
  "Period": "10s", //1s, 5m, 1h, 1d,这里表示10秒为单位统计请求次数。10秒内能请求多少次
  "PeriodTimespan": 5, //多少秒之后客户端可以重试,单位秒
  "Limit": 5 //统计时间段内允许的最大请求数量
}
在Ocelot配置文件的GlobalConfiguration根节点中加入节点RateLimitOptions
"RateLimitOptions": {//限流的全局配置
  "QuotaExceededMessage": "Too many requests", // 当请求过载被截断时返回的消息
  "HttpStatusCode": 666 // 当请求过载被截断时返回的http status
}
降级
降级机制:
满足一定条件时,直接关闭服务,减低服务器压力。
降级不是由配置的,而是一种目的,可以用以下策略达成降级的目的。
- 网关降级——超时/熔断/限流
- 上游降级——关闭服务
- 下游降级——不调用
Jenkin
不细说了,参考之前写的博客:Jenkins+Docker+Git实现自动化部署
项目结构: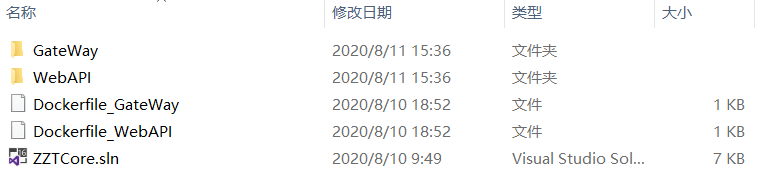
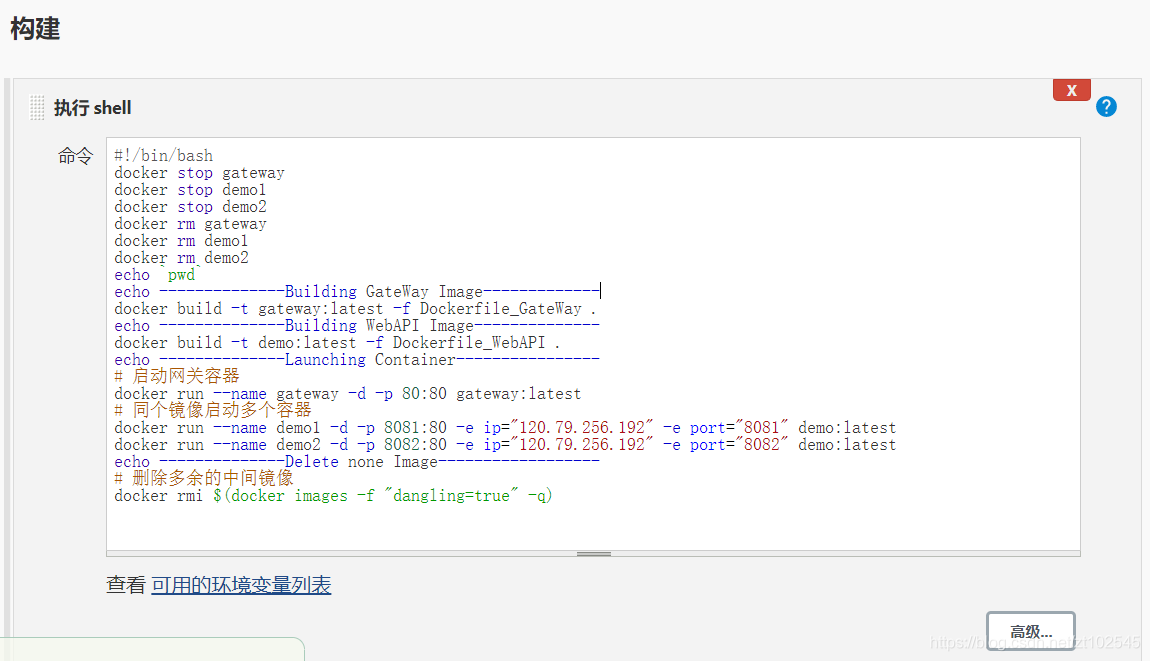
#!/bin/bash
docker stop gateway
docker stop demo1
docker stop demo2
docker rm gateway
docker rm demo1
docker rm demo2
echo `pwd`
echo --------------Building GateWay Image-------------
#-f 定位Dockerfile文件的位置,因为同一目录下可能有多个Dockerfile
docker build -t gateway:latest -f Dockerfile_GateWay .
echo --------------Building WebAPI Image--------------
docker build -t demo:latest -f Dockerfile_WebAPI .
echo --------------Launching Container----------------
# 启动网关容器
docker run --name gateway -d -p 80:80 gateway:latest
# 同个镜像启动多个容器,-e表示传递参数,ip和port必须传递,程序需要注册到consul
docker run --name demo1 -d -p 8081:80 -e ip="120.79.256.192" -e port="8081" demo:latest
docker run --name demo2 -d -p 8082:80 -e ip="120.79.256.192" -e port="8082" demo:latest
echo --------------Delete none Image------------------
# 删除多余的中间镜像
docker rmi $(docker images -f "dangling=true" -q)
构建成功后docker镜像和容器如下:
[root@iZwz925p95hhdeZ ~]# docker images
REPOSITORY                             TAG                 IMAGE ID            CREATED             SIZE
demo                                   latest              d1b1dab1eac3        4 hours ago         233MB
gateway                                latest              01a506051910        16 hours ago        210MB
consul                                 latest              45f9911e51f6        3 days ago          122MB
jenkins/jenkins                        lts                 135a0d19f757        2 weeks ago         667MB
microsoft/dotnet                       latest              156e5cc5d7a3        7 weeks ago         1.74GB
mcr.microsoft.com/dotnet/core/sdk      3.1-buster          5f369f0d8192        2 months ago        705MB
mcr.microsoft.com/dotnet/core/aspnet   3.1-buster-slim     e2cd20adb129        5 months ago        207MB
[root@iZwz925p95hhdeZ ~]# docker ps
CONTAINER ID        IMAGE                 COMMAND                  CREATED             STATUS              PORTS                                                                      NAMES
6c3373c16ac6        demo:latest           "dotnet WebAPI.dll"      4 hours ago         Up 4 hours          0.0.0.0:8082->80/tcp                                                       demo2
407a2e0be4d5        demo:latest           "dotnet WebAPI.dll"      4 hours ago         Up 4 hours          0.0.0.0:8081->80/tcp                                                       demo1
c20ef71c2f1e        gateway:latest        "dotnet GateWay.dll"     4 hours ago         Up 4 hours          0.0.0.0:80->80/tcp, 443/tcp                                                gateway
009d29c38b7a        consul                "docker-entrypoint.s…"   16 hours ago        Up 16 hours         8300-8302/tcp, 8301-8302/udp, 8600/tcp, 8600/udp, 0.0.0.0:8500->8500/tcp   consul
0c89cd504e17        jenkins/jenkins:lts   "/sbin/tini -- /usr/…"   8 days ago          Up 7 days           0.0.0.0:8080->8080/tcp, 0.0.0.0:50000->50000/tcp                           jenkins
最后访问我们部署好的网关地址:http://120.79.256.192/api/Microservices/Get
Skywalking
安装启动
Docker下安装最新版,注意安装V7.0版本,目前SkyAPM.Agent.AspNetCore暂不支持最新8.0版本。这是个坑,所以自行安装7.0版本
#下载oap
[root@iZwz925p95hhdeZ ~]# docker pull apache/skywalking-oap-server
Using default tag: latest
latest: Pulling from apache/skywalking-oap-server
e7c96db7181b: Pull complete
f910a506b6cb: Pull complete
b6abafe80f63: Pull complete
ba0cd243507a: Pull complete
f28c577725a3: Pull complete
Digest: sha256:21aab32a3d6e95d031ce291477d1e9cfa84e5a0b9e938d49b1252261631b2883
Status: Downloaded newer image for apache/skywalking-oap-server:latest
docker.io/apache/skywalking-oap-server:latest
#下载ui界面
[root@iZwz925p95hhdeZ ~]# docker pull apache/skywalking-ui
Using default tag: latest
latest: Pulling from apache/skywalking-ui
e7c96db7181b: Already exists
f910a506b6cb: Already exists
b6abafe80f63: Already exists
047642b58c35: Pull complete
159530a74c1a: Pull complete
Digest: sha256:67d50e4deff42df439831822665b5e3827d2c33658b6d6b4e3dc3258e7f98daf
Status: Downloaded newer image for apache/skywalking-ui:latest
docker.io/apache/skywalking-ui:latest
#默认使用h2内存数据库,可直接启动oap
[root@iZwz925p95hhdeZ ~]# docker run --name skywalking -d -p 1234:1234 -p 11800:11800 -p 12800:12800 --restart always apache/skywalking-oap-server
84ad1385d4b34e5b5e5e34a58278b97f834f0e5f7763b4981694af5a66dca634
#启动ui页面
[root@iZwz925p95hhdeZ ~]# docker run --name skywalking-ui -d -p 8090:8080 --link skywalking:skywalking -e SW_OAP_ADDRESS=skywalking:12800 --restart always apache/skywalking-ui
e6ee24a4dafec135d7dfd2836be9dbf82e3824502f86ceb4ef62dda88af008eb
映射的端口是8090,浏览器直接访问
项目应用
项目中添加引用SkyAPM.Agent.AspNetCore
创建一个skyapm.json文件,添加以下内容,并将文件属性修改为始终复制
{
  "SkyWalking": {
    "ServiceName": "GateWay", //服务名称
    "Namespace": "",
    "HeaderVersions": [
      "sw6"
    ],
    "Sampling": {
      "SamplePer3Secs": -1,
      "Percentage": -1.0
    },
    "Logging": {
      "Level": "Information",
      "FilePath": "logs/skyapm-{Date}.log"
    },
    "Transport": {
      "Interval": 3000,
      "ProtocolVersion": "v6",
      "QueueSize": 30000,
      "BatchSize": 3000,
      "gRPC": {
        "Servers": "127.0.0.1:11800", //Skywalking服务地址,生产环境替需替换成生产skyapm发布后的地址
        "Timeout": 10000,
        "ConnectTimeout": 10000,
        "ReportTimeout": 600000
      }
    }
  }
}
在Startup.ConfigureServices方法内添加注入
services.AddSkyApmExtensions();
本地运行需在launchSettings.json文件中的environmentVariables节点下添加系统变量,内容如下:
"ASPNETCORE_HOSTINGSTARTUPASSEMBLIES": "SkyAPM.Agent.AspNetCore",
"SKYWALKING__SERVICENAME": "GateWay"
生产环境需要修改Dockerfile文件,添加以下内容:两个ENV变量及内容,一个是skyapm包名,一个是服务名称,跟配置文件一致。
ENV ASPNETCORE_HOSTINGSTARTUPASSEMBLIES=SkyAPM.Agent.AspNetCore
ENV SKYWALKING__SERVICENAME=GateWay
参考的博客:
https://ocelot.readthedocs.io/en/latest/index.html
https://www.cnblogs.com/jesse2013/p/net-core-apigateway-ocelot-docs.html
https://www.cnblogs.com/lcyhjx/tag/%E5%BE%AE%E6%9C%8D%E5%8A%A1/