python接口,我的理解主要是两个,一个是原来caffe官方给的,这里是接口介绍。另一个是SSD框架加的model_libs.py,主要是添加了一些base_network和一些相关的函数。这两个如果能够用得很好的话,兄弟,恭喜你!你已经精通caffe的python接口了。其实不用说的,这个接口很方便,从此你不再需要手动去写什么网络,单独去执行什么bat又或者是sh的命令训练测试了,接口的可移植性非常好,我们将这些必要的设置写在python文件里,完成上面的一套工作。因此,在我看来,SSD的python接口就是上面两个的完美结合。
第一个就是官方给的,官方是这么介绍的:
Python
The Python interface – pycaffe – is the caffe module and its scripts in caffe/python. import caffe to load models, do forward and backward, handle IO, visualize networks, and even instrument model solving. All model data, derivatives, and parameters are exposed for reading and writing.
caffe.Netis the central interface for loading, configuring, and running models.caffe.Classifierandcaffe.Detectorprovide convenience interfaces for common tasks.caffe.SGDSolverexposes the solving interface.caffe.iohandles input / output with preprocessing and protocol buffers.caffe.drawvisualizes network architectures.- Caffe blobs are exposed as numpy ndarrays for ease-of-use and efficiency.
Tutorial IPython notebooks are found in caffe/examples: do ipython notebook caffe/examples to try them. For developer reference docstrings can be found throughout the code.
Compile pycaffe by make pycaffe. Add the module directory to your $PYTHONPATH by export PYTHONPATH=/path/to/caffe/python:$PYTHONPATH or the like for import caffe.
上面也说了,使用python接口应该要编译pycaffe,同时应该export PYTHONPATH=/path/to/caffe/python:$PYTHONPATH ,避免no moudle named caffe这样类似的错误。这里给出了一个例子,地址在这:例子,这个例子最主要是说明了怎么查看一个CNN网络中间层的输出和特征可视化。对此有不少博客给出了代码注释,给一个参考:链接。
其实对于中间层的可视化应该是我们在第一个问题中比较关注的,另外py文件如何训练、测试应该参考SSD模型相应的代码,在此不再赘述。
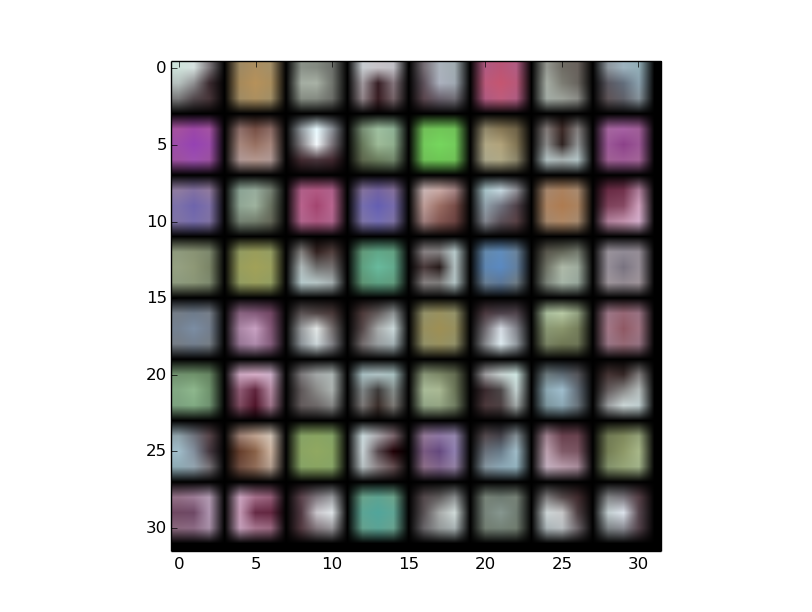
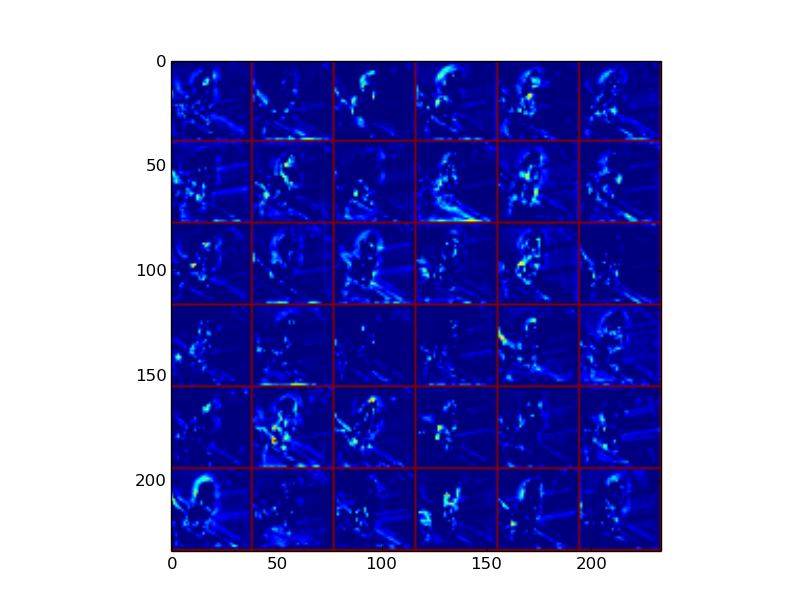
下面主要来看看中间层的可视化,代码如下(需要修改必要的路径):
import numpy as np
import matplotlib.pyplot as plt
import pylab
import os
import caffe
import sys
import pickle
import cv2

caffe_root = os.getcwd()
deploy =  'models/VGGNet/VOC0712/SSD_300x300/deploy.prototxt'
weight = 'models/VGGNet/VOC0712/SSD_300x300/VGG_VOC0712_SSD_300x300_iter_120000.caffemodel'

def initilize():
    print 'initilize ... '
    sys.path.insert(0, caffe_root + 'python')
    caffe.set_mode_gpu()
    caffe.set_device(0)
    net = caffe.Net(deploy, weight,caffe.TEST)
    return net

def getNetDetails(image, net):
    transformer = caffe.io.Transformer({'data': net.blobs['data'].data.shape})
    #changing blob from H*W*C to C*H*W
    transformer.set_transpose('data', (2,0,1))
    #ensure the pixel scale is range from (0,255)
    transformer.set_raw_scale('data', 255)
    #change channel order from RGB to BGR
    transformer.set_channel_swap('data', (2,1,0))
    #reshape data
    net.blobs['data'].reshape(1,3,300,300)
    #input data and preprocess
    net.blobs['data'].data[...] = transformer.preprocess('data', caffe.io.load_image(image))
    #testing model is just a forward process
    out = net.forward()

    filters = net.params['conv1_1'][0].data
    with open('FirstLayerFilter.pickle','wb') as f:
       pickle.dump(filters,f)
    vis_square(filters.transpose(0, 2, 3, 1))

    feat = net.blobs['conv4_4'].data[0, :36]
    with open('FirstLayerOutput.pickle','wb') as f:
       pickle.dump(feat,f)
    vis_square(feat,padval=1)
    pool = net.blobs['conv8_2'].data[0, :81]
    with open('pool1.pickle','wb') as f:
       pickle.dump(pool,f)
    vis_square(pool,padval=1)

def vis_square(data, padsize=1, padval=0 ):
    data -= data.min()
    data /= data.max()
    n = int(np.ceil(np.sqrt(data.shape[0])))
    padding = ((0, n ** 2 - data.shape[0]), (0, padsize), (0, padsize)) + ((0, 0),) * (data.ndim - 3)
    data = np.pad(data, padding, mode='constant', constant_values=(padval, padval))
    data = data.reshape((n, n) + data.shape[1:]).transpose((0, 2, 1, 3) + tuple(range(4, data.ndim + 1)))
    data = data.reshape((n * data.shape[1], n * data.shape[3]) + data.shape[4:])
    plt.imshow(data)
    pylab.show()
    print data.shape

if __name__ == "__main__":
    net = initilize()
    testimage = 'examples/images/person.jpg'
    getNetDetails(testimage, net)


另一个就是model_libs.py,之所以出现它是因为我们不想自己写好了prototxt,然后导入,更希望是在一个base_network的基础下去修改,更具有普适性,同时效率高移植性好,出于这样的目的,写了model_libs.py这个脚本,当然这些脚本都是可以根据自己需要修改的,另外可以自己写个脚本实现项目的其它需求。
两者一结合,那就实现的太完美了,屡试不爽,从此就多了这么一套有趣的工具。