1.
2.
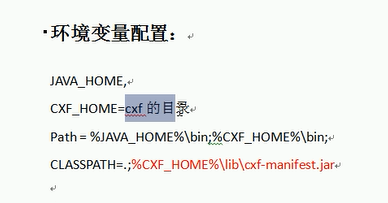
3.环境变量的配置
4.创建动态web工程-->版本2.5-->tomcat7.0

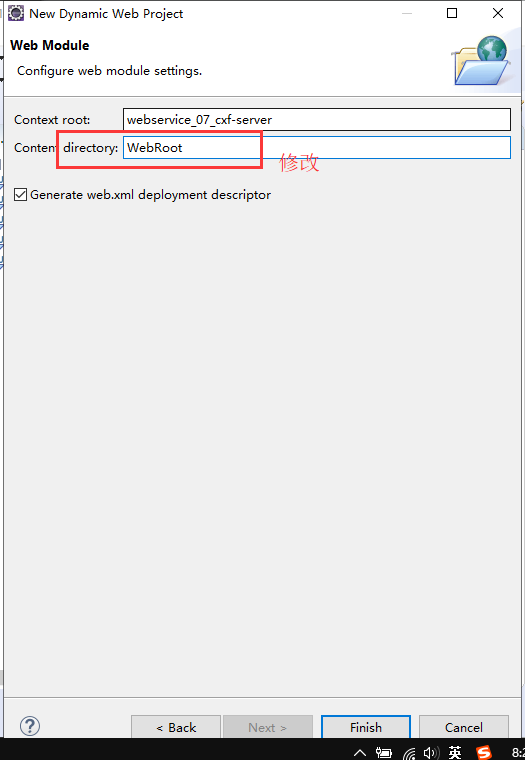
第一步:创建cxf项目
第二步:添加cxf的jar包
全部将jar包拷入lib目录下
第三步:编写webservice接口和服务
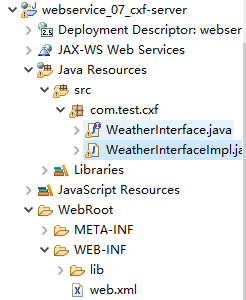
4.1 WeatherInterface.java
package com.test.cxf;
import javax.jws.WebMethod;
import javax.jws.WebService;
/**
* 天气查询服务接口
* @author xjj13
*
*/
@WebService
public interface WeatherInterface {
//天气查询
public String queryWeather(String cityname);
}
4.2 WeatherInterfaceImpl.java
package com.test.cxf;
import javax.jws.WebMethod;
import javax.jws.WebService;
/**
* 天气查询服务
* @author xjj13
*
*/
@WebService(endpointInterface="com.server.WeatherInterface")
public class WeatherInterfaceImpl implements WeatherInterface{
@Override
public String queryWeather(String cityname) {
//接受客户端发送过来的数据
System.out.println("from client..."+cityname);
String result="晴";
//向客户端返回天气查询结果
return result;
}
}
第四步:在WEB-INF下创建applicationContext.xml
<?xml version="1.0" encoding="UTF-8"?>
<beans xmlns="http://www.springframework.org/schema/beans"
xmlns:xsi="http://www.w3.org/2001/XMLSchema-instance"
xmlns:jaxws="http://cxf.apache.org/jaxws"
xmlns:jaxrs="http://cxf.apache.org/jaxrs"
xmlns:cxf="http://cxf.apache.org/core"
xsi:schemaLocation="http://www.springframework.org/schema/beans
http://www.springframework.org/schema/beans/spring-beans.xsd
http://cxf.apache.org/jaxrs http://cxf.apache.org/schemas/jaxrs.xsd
http://cxf.apache.org/jaxws http://cxf.apache.org/schemas/jaxws.xsd
http://cxf.apache.org/core http://cxf.apache.org/schemas/core.xsd">
<!-- 定义webservice服务,相当于发布服务 -->
<!--id为spring里bean的id;address为webservice的地址,原来写死了http://127.0.0.1:12345/weather -->
<jaxws:server id="weather" address="/weather" serviceClass="com.test.cxf.WeatherInterface">
<jaxws:serviceBean>
<bean class="com.test.cxf.WeatherInterfaceImpl"></bean>
</jaxws:serviceBean>
</jaxws:server>
</beans>
第五步:在web.xml配置spring环境
<?xml version="1.0" encoding="UTF-8"?>
<web-app xmlns:xsi="http://www.w3.org/2001/XMLSchema-instance"
xmlns="http://java.sun.com/xml/ns/javaee"
xsi:schemaLocation="http://java.sun.com/xml/ns/javaee http://java.sun.com/xml/ns/javaee/web-app_2_5.xsd"
id="WebApp_ID" version="2.5">
<display-name>webservice_07_cxf-server</display-name>
<!-- spring的环境配置文件 -->
<context-param>
<param-name>contextConfigLocation</param-name>
<param-value>/WEB-INF/applicationContext.xml</param-value>
</context-param>
<!-- ContextLoaderListener为spring的监听类,spring的配置文件由监听类加载 -->
<listener>
<listener-class>org.springframework.web.context.ContextLoaderListener</listener-class>
</listener>
<welcome-file-list>
<welcome-file>index.html</welcome-file>
<welcome-file>index.htm</welcome-file>
<welcome-file>index.jsp</welcome-file>
<welcome-file>default.html</welcome-file>
<welcome-file>default.htm</welcome-file>
<welcome-file>default.jsp</welcome-file>
</welcome-file-list>
</web-app>
第六步:在web.xml配置CXF的servlet
<?xml version="1.0" encoding="UTF-8"?>
<web-app xmlns:xsi="http://www.w3.org/2001/XMLSchema-instance"
xmlns="http://java.sun.com/xml/ns/javaee"
xsi:schemaLocation="http://java.sun.com/xml/ns/javaee http://java.sun.com/xml/ns/javaee/web-app_2_5.xsd"
id="WebApp_ID" version="2.5">
<display-name>webservice_07_cxf-server</display-name>
<!-- spring的环境配置文件 -->
<context-param>
<param-name>contextConfigLocation</param-name>
<param-value>/WEB-INF/applicationContext.xml</param-value>
</context-param>
<!-- ContextLoaderListener为spring的监听类,spring的配置文件由监听类加载 -->
<listener>
<listener-class>org.springframework.web.context.ContextLoaderListener</listener-class>
</listener>
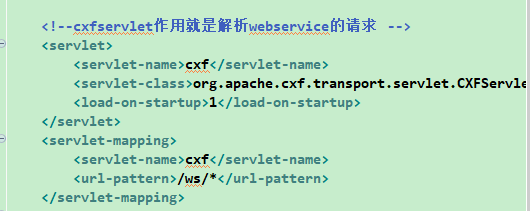
<!--cxfservlet作用就是解析webservice的请求 -->
<servlet>
<servlet-name>cxf</servlet-name>
<servlet-class>org.apache.cxf.transport.servlet.CXFServlet</servlet-class>
<load-on-startup>1</load-on-startup>
</servlet>
<servlet-mapping>
<servlet-name>cxf</servlet-name>
<url-pattern>/ws/*</url-pattern>
</servlet-mapping>
<welcome-file-list>
<welcome-file>index.html</welcome-file>
<welcome-file>index.htm</welcome-file>
<welcome-file>index.jsp</welcome-file>
<welcome-file>default.html</welcome-file>
<welcome-file>default.htm</welcome-file>
<welcome-file>default.jsp</welcome-file>
</welcome-file-list>
</web-app>
第七步:启动web容器
访问:http://127.0.0.1:8080/项目名/ws/weather?wsdl

