Ant是一种基于Java的build 工具,适用于大项目中,你的代码不必使用编译器,其他开发成员直接使用脚本就可以编译一个版本。使用Ant 不必纠结与shell命令,配置文件是xml文件。
1,安装
Ant 是开源项目,所以又两种方式安装,一种是编译好的exe,另外一种是源码。下载地址是:http://ant.apache.org/bindownload.cgi。下载完编译好的版本之后,发现有如下图所示:

图1
安装jdk 下载地址 http://www.java.com
设定环境变量:我的系统 ,ANT_HOME :E:\studyfiles\flex\blazeds\compile tool\apache-ant-1.8.2;JAVA_HOME:C:\Program Files\Java\jdk1.6.0_03;JRE_HOME:C:\Program Files\Java\jre6。Ant 目录添加到path中,如图:
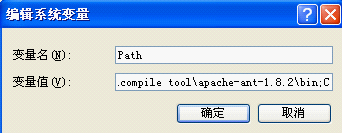
图2
安装配置完成之后,查看是否安装成功。Cmd 中键入 ant -help ,得到如下结果:

图3
2,build.xml 文件
这里给出用于编译swf 的mxmlc build 文件 ,和compc 编译为类库即swc 文件的build文件。
Mxmlc 文件
<project name="Flex Ant Tasks Build Script" default="compile flex project">
<!-- load previously defined configuration properties file -->
<property file="build.properties" />
<!-- points to our flexTasks.jar we copied to the libs folder to distribute with the project -->
<taskdef resource="flexTasks.tasks" classpath="${basedir}/libs/flexTasks.jar"/>
<!-- delete and recreate the DEPLOY dir -->
<target name="init">
<delete dir="${DEPLOY_DIR}" />
<mkdir dir="${DEPLOY_DIR}" />
</target>
<!-- Build and output the Main.swf-->
<target name="compile flex project" depends="init">
<mxmlc file="${SRC_DIR}/Main.mxml" output="${DEPLOY_DIR}/Main.swf">
<load-config filename="${FLEX_HOME}/frameworks/flex-config.xml"/>
<source-path path-element="${FLEX_HOME}/frameworks"/>
<compiler.debug>false</compiler.debug>
</mxmlc>
</target>
</project>
Compc 文件
<?xml version="1.0"?>
<project name="FlexSpy" default="main" basedir=".">
<property name="FLEX_HOME" value="D:/Program Files/Adobe/Flex Builder 3/sdks/3.2.0" />
<taskdef resource="flexTasks.tasks" classpath="${FLEX_HOME}/ant/lib/flexTasks.jar" />
<property name="APP_SRC" value="${basedir}/src"/>
<property name="OUTPUT" value="${basedir}/bin/FlexSpy.swc"/>
<target name="main" depends="clean,compile"/>
<target name="clean">
<delete dir="${OUTPUT}"/>
</target>
<target name="compile">
<fileset dir="${APP_SRC}" id="src.files">
<include name="**/**"/>
</fileset>
<pathconvert property="src_classes" pathsep=" " dirsep="." refid="src.files">
<map from="\" to="/"/>
<map from="${APP_SRC}/" to=""/>
<mapper>
<chainedmapper>
<globmapper from="*.as" to="*"/>
</chainedmapper>
</mapper>
</pathconvert>
<compc output="${OUTPUT}" include-classes="${src_classes}"
actionscript-file-encoding="UTF-8" keep-generated-actionscript="true"
static-link-runtime-shared-libraries="true" debug="true">
<source-path path-element="${FLEX_HOME}/frameworks" />
<source-path path-element="${APP_SRC}" />
<compiler.library-path dir="${basedir}" append="true">
<include name="libs" />
</compiler.library-path>
</compc>
</target>
</project>
3,着重注意事项:
(1)Flex Embed资源错误Unable to transcode asset处理
<mx:Image id="img_border" source="@Embed('../assets/border.png')" visible="false" width="100%" height="100%"/>一段简单的代码flex编译居然报错:Unable to transcode ../assets/border.png.解决方法很简单,将 '../assets/border.png' 改为 '/../assets/border.png'就是在前面加个斜杠。
(2)Flex国际化
首先先介绍下国际化:Flex国际化一般采用的是类似struts的bundle类似的方法,至于好处嘛会使用STRUTS的人都应该知道。直接在项目中写.properties文件,具体做法如下: 在项目上点击右键,选择Properties。然后选择Flex Compiler,在Additional Compiler arguments下面已经配置好了语言包,默认为-locale en_US。 这时我们可以用一个locale目录来简单定制我们额外设置(当然不包括Flex内部控件的语言)的语言设置。
比如改为:-locale=en_US -source-path+=g:\flexproj\locale\{locale}。这样在g盘的flexproj目录下建立一个locale目录。
然后目录下放置包含我们要扩展的语言文件的文件夹就可以了。比如:g:\flexproj\locale\en_US。
注意:locale下面的目录名应该和-locale=设置的名称一致。那么这样,我们就可以使用额外的语言设置了。举个例子吧:查看项目属性里Additional Compiler arguments配置为 -locale+=en_US -source-path+=g:\flexproj\testgoufang\locale\{locale} 然后在对应的locale目录下添加国际化资源文件,g:\flexproj\testgoufang\locale\en_US\strings.properties 这一部分跟struts相似。里面的内容为键=值的形式,如:Title=测试项目 User=用户名 Password=密码
使用的时候可以通过[ResourceBundle]元数据标签来绑定locale文件,如: <mx:Metadata>
[ResourceBundle("strings")] </mx:Metadata> 即绑定上文提到的strings.properties文件,然后我们可以通过ResoueceManager来读出其中的内容,比如:
var Title : String = resourceManager.getString("strings", 'Title');
或者绑定到控件:
[Bindable]
private var Title:String;
…………
Title = resourceManager.getString("strings", 'Title');
…………
<mx:Label text="{Title}"/>
如此多个项目共享统一资源如果编译的时候没有引用资源文件,则会报相应的资源文件未找到。在build.xml中添加资源文件即可<source-path path-element="${project.dir}/locale/en_US"/><source-path path-element="${project.dir}/locale/zh_CN"/>
(3)编译后的mx文件夹下所有图片大小为0字节
Mx中包括controls和container文件夹,主要包括用到的Flex控件的图片,因此需要在source-path中指定图片的位置,否则找不到图片,大小就为0喽;加入以下脚本即可:
<source-path path-element="${projects.framework}/src"/>大概目录位置是E:\Program Files\Adobe\Flex Builder 3\sdks\3.2.0\frameworks\projects\framework\src 里面包括一个mx文件夹,是Flex用到的所有资源图片的存在位置。
(4) 工程目录中包括mxml时编译不到swc中
因为我们编译的时候首先是读取src文件夹中的所有类,然后指定compc参数的include-classes参数,这时只是指定的所有as文件,而mxml是不属于某个包里面的,因此这里需要使用include-sources参数来指定。具体代码如下: <include-sources dir = "${project.dir}\src\com\supermap\web\controls" includes = "Compass.mxml" />