#import "ViewController.h"

@interface ViewController ()
@property (weak, nonatomic) IBOutlet UIView *redView;
@property (weak, nonatomic) IBOutlet UIImageView *imageV;

@end

@implementation ViewController

- (void)viewDidLoad {
    [super viewDidLoad];
    // Do any additional setup after loading the view, typically from a nib.
}


-(void)touchesBegan:(NSSet<UITouch *> *)touches withEvent:(UIEvent *)event {

    //设置阴影的颜色
    self.imageV.layer.shadowColor = [UIColor blueColor].CGColor;
    //设置阴影的不透明度:0为完全透明,1为不透明
    self.imageV.layer.shadowOpacity = 1;
    //设置阴影偏移量宽高偏移,正数则向右向下平移
    self.imageV.layer.shadowOffset = CGSizeMake(10, 10);
    //设置阴影的模糊的半径
    self.imageV.layer.shadowRadius = 5;


    //边框宽度,往里边走的.
    self.imageV.layer.borderWidth = 2;
    self.imageV.layer.borderColor = [UIColor greenColor].CGColor;


    /**
     *    1:image并不是在layear的图层上,而是在layear的contents上,设置圆角效果是在layear层,并不会影响到contents上的image,要想layer图层和contents有联系,则必须设置self.imageV.layer.masksToBounds,也就是把超过根层也就是layear层的部分裁减掉,所以imageView要设置圆角效果必须加上self.imageV.layer.masksToBounds,而UIView可以不用设置
        2:设置圆形效果:就让UIimageview的圆角cornerRadius等于UIimageview宽度的一半
     */
    //设置圆角
    self.imageV.layer.cornerRadius = 50;
    //把超过根层以外的东西都给裁剪掉(UIview自带的层,我们称它是根层)
    self.imageV.layer.masksToBounds = YES;

    NSLog(@"%@",self.imageV.layer.contents);

}


- (void)UIViewLayer {
    //设置阴影的颜色
    self.redView.layer.shadowColor = [UIColor blueColor].CGColor;
    //设置阴影的不透明度
    self.redView.layer.shadowOpacity = 1;
    self.redView.layer.shadowOffset = CGSizeMake(-30, -30);
    //设置阴影的模糊的半径
    self.redView.layer.shadowRadius = 5;

    //边框宽度,往里边走的.
    self.redView.layer.borderWidth = 2;
    self.redView.layer.borderColor = [UIColor greenColor].CGColor;


    //设置圆角
    self.redView.layer.cornerRadius = 50;
}

@end
1.CALayer简介:
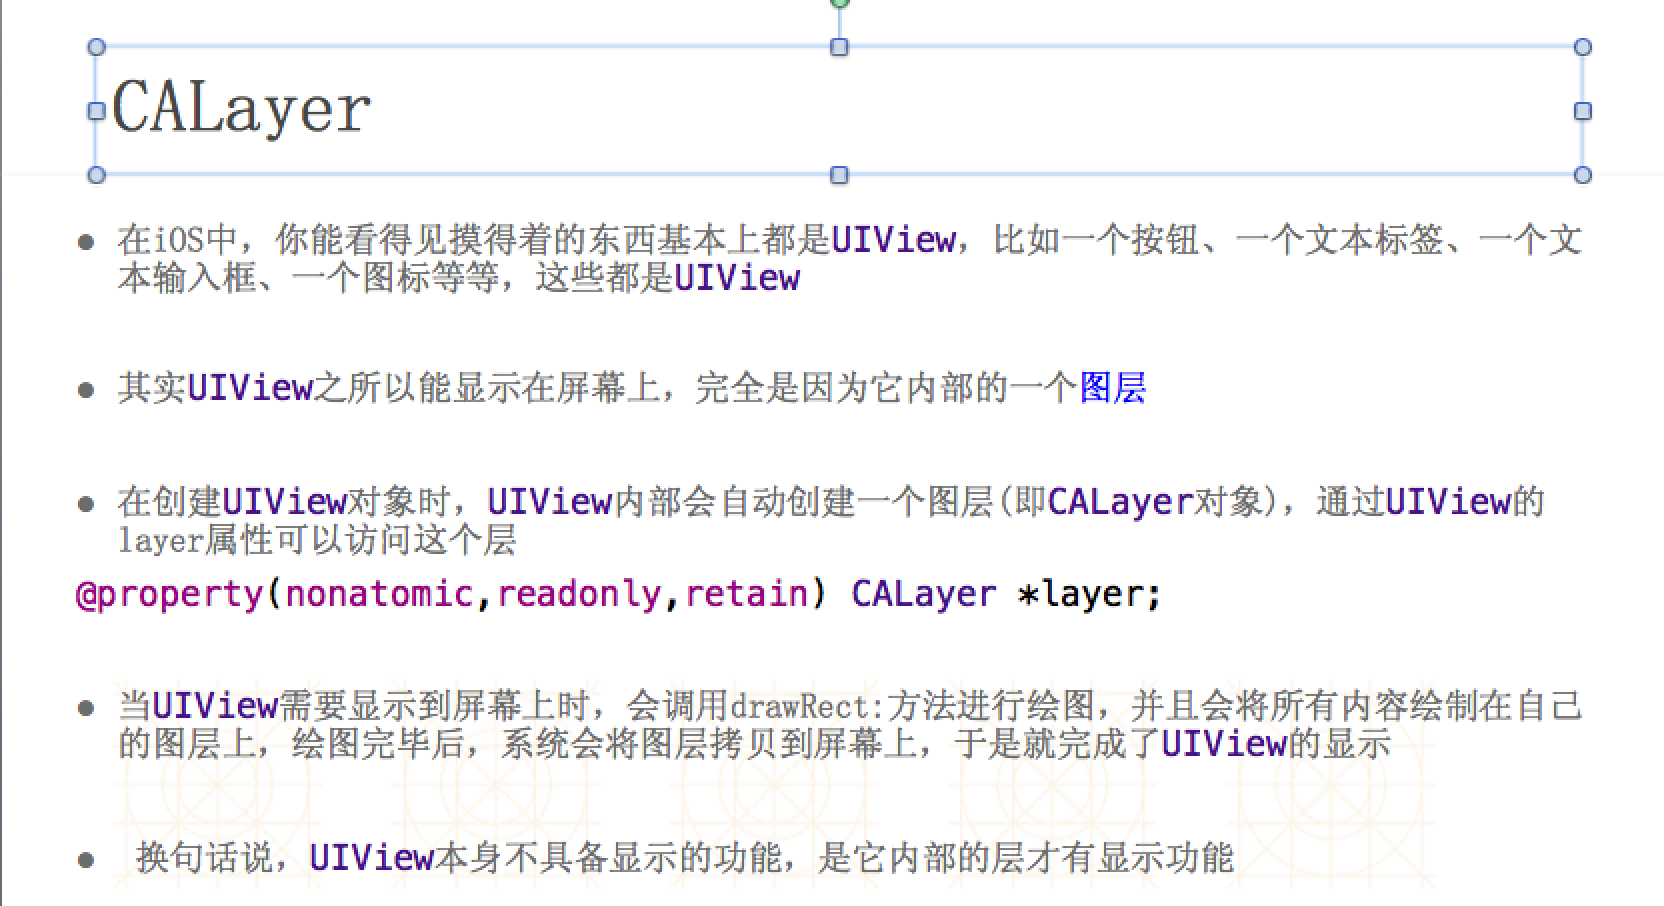
CALayer我们又称它叫做层.
在每个UIView内部都有一个layer这样一个属性.
UIView之所以能够显示,就是因为它里面有这个一个层,才具有显示的功能.
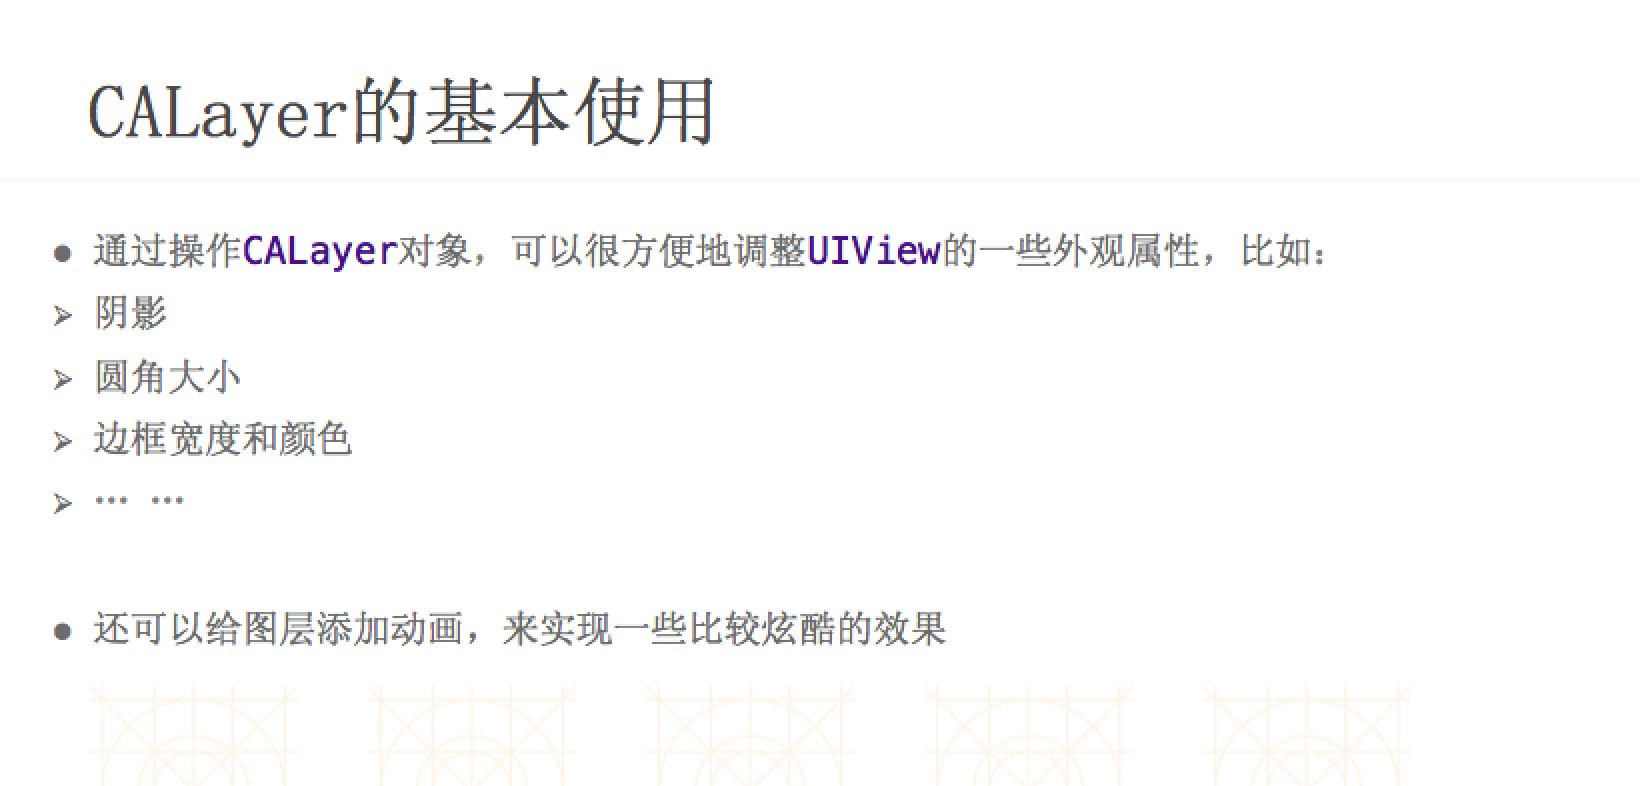
我们通过操作CALayer对象,可以很方便地调整UIView的一些外观属性.
可以给UIView设置阴影,圆角,边框等等...
2.操作layer改变UIView外观.
2.1.设置阴影
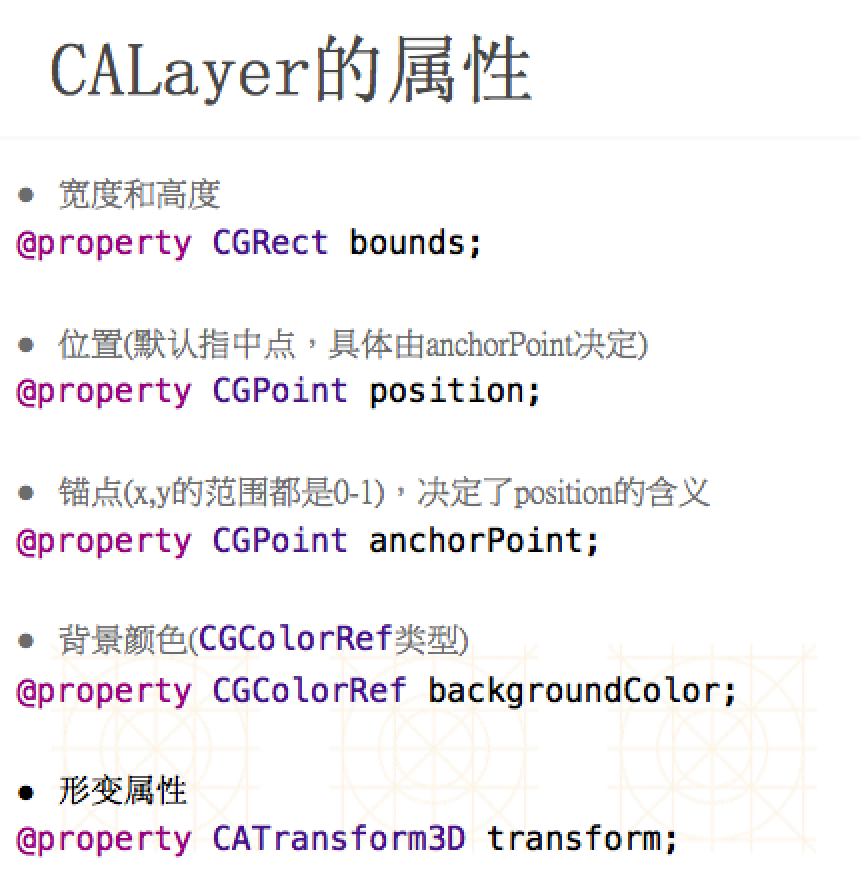
默认图层是有阴影的, 只不过,是透明的
_RedView.layer.shadowOpacity = 1;
设置阴影的圆角
_RedView.layer.shadowRadius =10;
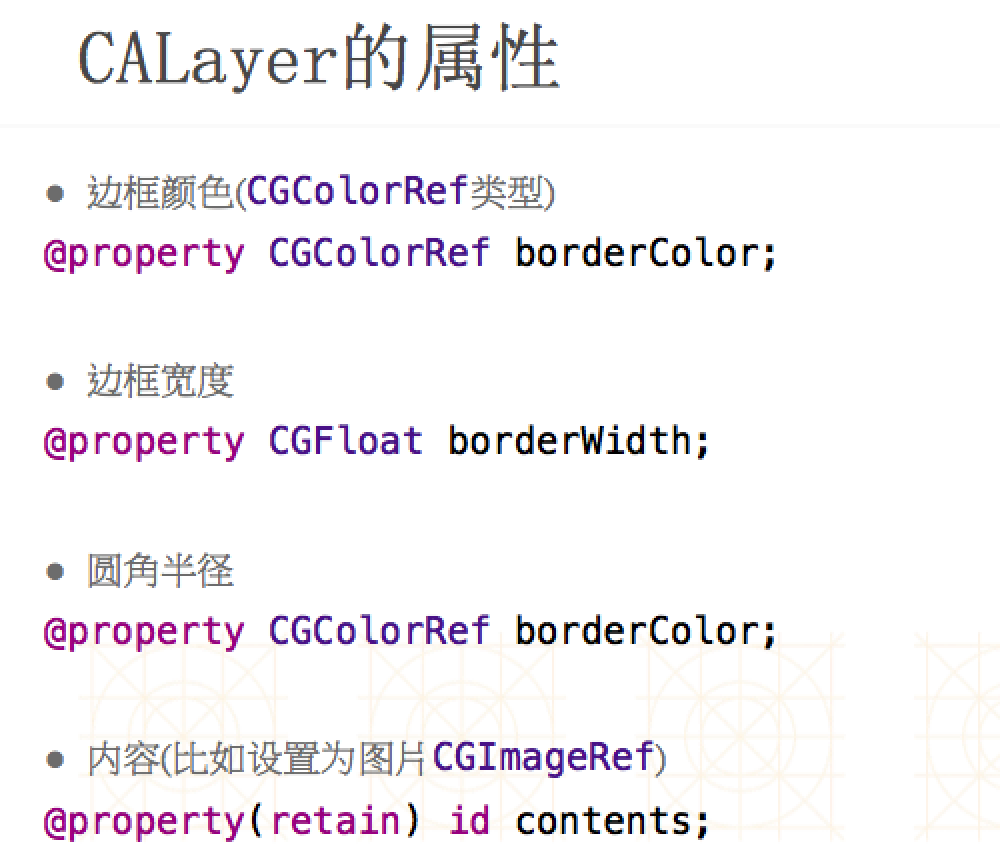
设置阴影的颜色,把UIKit转换成CoreGraphics框架,用.CG开头
_RedView.layer.shadowColor = [UIColor blueColor].CGColor;
2.2.设置边框
设置图层边框,在图层中使用CoreGraphics的CGColorRef
_RedView.layer.borderColor = [UIColor whiteColor].CGColor;
_RedView.layer.borderWidth = 2;
2.3.设置圆角
图层的圆角半径,圆角半径为宽度的一半, 就是一个圆
_RedView.layer.cornerRadius = 50;
3.操作layer改变UIImageView的外观.
设置图形边框
_imageView.layer.borderWidth = 2;
_imageView.layer.borderColor = [UIColor whiteColor].CGColor;
设置图片的圆角半径
_imageView.layer.cornerRadius = 50;
裁剪,超出裁剪区域的部分全部裁剪掉
_imageView.layer.masksToBounds = YES;
注意:UIImageView当中Image并不是直接添加在层上面的.这是添加在layer当中的contents里.
我们设置层的所有属性它只作用在层上面.对contents里面的东西并不起作用.所以我们看不到图片有圆角的效果.
想要让图片有圆角的效果.可以把masksToBounds这个属性设为YES,
当设为YES,把就会把超过根层以外的东西都给裁剪掉.