1.new project,不勾选create from archetype,直接选择
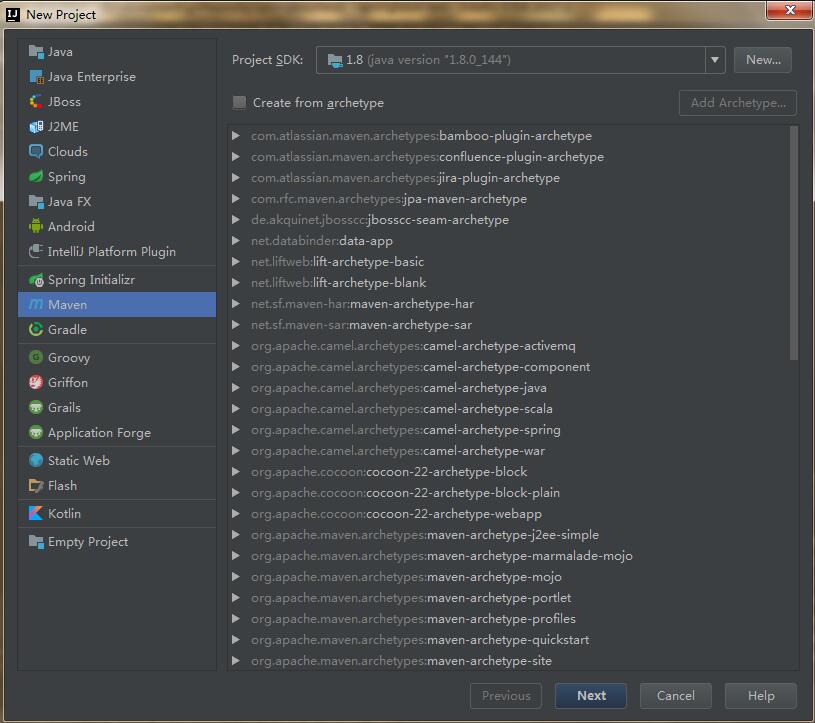
2.next下一步
在Maven依赖管理中,唯一标识一个依赖项是由该依赖项的三个属性构成的,分别是groupId、artifactId以及version。这三个属性可以唯一确定一个组件(Jar包或者War包)。groupId和artifactId是为了保证项目唯一性提出的。
参照maven中的groupId和artifactId到底指的是什么?
groupId:一般分为多段,第一段为域(org: 非营利组织,com:商业组织,cn:中国)。第二段为公司名称,第三段为公司内部的部门,如qa等。
artifactId:项目名称
version: snapshot和正式版本。快照版本和正式版本的主要区别在于:本地获取这些依赖的机制不同。
- 正式版本:如果依赖一个库的正式版本,那构建时会先在仓库中查找是否已经有,如果没有才会去远程拉
- snapshot:依赖snapshot库,每次构建项目时就会去远程拉它所依赖的版本。在配置Maven的Repository的时候中有个配置项,可以配置对于SNAPSHOT版本向远程仓库中查找的频率。频率共有四种,分别是always、daily、interval、never。 
3.pom.xml配置
- 在properties中配置版本信息,接下来可以用${java-version}来使用该版本号
 View Code
1 <properties>
2       <java.version>1.8</java.version>
3 </properties>
- 配置依赖的jar包,以<dependency></dependency>放在<dependencies></dependencies>中
View Code
1 <dependencies>
2         <dependency>
3             <groupId>org.springframework.boot</groupId>
4             <artifactId>spring-boot-starter-web</artifactId>
5         </dependency>
6 </dependencies>
- 在distributionManagement段中配置的是snapshot快照库和release发布库的地址,主要是id和url的配置,配置后就可以通过mvn deploy进行发布了
View Code
1 <distributionManagement>
2    <repository>
3        <id>deployment</id>
4        <name>internal repository for releases</name>
5        <url>http://repo.caimi-inc.com/nexus/content/repositories/releases/</url>
6     </repository>
7 </distributionManagement>
- parent:配置被继承的父项目的具体信息,可以继承父项目的配置信息,如dependencies等
View Code
1 <parent>
2        <groupId>org.springframework.boot</groupId>
3        <artifactId>spring-boot-starter-parent</artifactId>
4        <version>1.1.0</version>
5 </parent>
- 构建中依赖的插件
View Code
1 <build>
2        <plugins>
3            <plugin>
4                <groupId>org.springframework.boot</groupId>
5                <artifactId>spring-boot-maven-plugin</artifactId>
6            </plugin>
7        </plugins>
8 </build>
- 资源配置:也是在build中配置的。无需编译,是一些properties或XML配置文件,构建过程中会往往会将资源文件从源路径复制到指定的目标路径
View Code
 1 <build>
 2    <resources>
 3      <resource>
 4        <targetPath>META-INF/plexus</targetPath>
 5        <filtering>false</filtering>
 6        <directory>${basedir}/src/main/plexus</directory>
 7        <includes>
 8          <include>configuration.xml</include>
 9        </includes>
10        <excludes>
11          <exclude>**/*.properties</exclude>
12        </excludes>
13      </resource>
14    </resources>
15 </build>


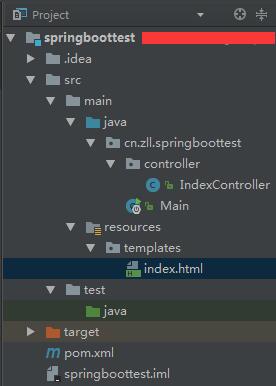
4.项目结构
- src—main下创建java目录,且右键选择mark directory as sources root
- 在java目录下创建包,包名应该全为小写,包名前缀为groupId.artifactId.XXX
- 在包下创建类 Main,作为程序入口
- target是存放编译后的文件
5.添加代码
- 在Main类中添加一个main函数
 1 package cn.zll.testproject.controller; //这个要改成自己的包名
 2 import org.springframework.boot.SpringApplication;
 3 import org.springframework.boot.autoconfigure.SpringBootApplication;
 4 //添加注解SpringBootApplication,是一个复合注解,包含下面三个:
 5 //@Configuration:表示将该类作用springboot配置文件类。
 6 //@EnableAutoConfiguration:表示程序启动时,自动加载springboot默认的配置
 7 //@ComponentScan:表示程序启动是,自动扫描当前包及子包下所有类
 8 @SpringBootApplication public class Main {
 9     public static void main(String[] args){
10         //创建一个SpringApplication
11         SpringApplication app = new SpringApplication(Main.class);
12         app.run(args);
13     }
14 }
- 在包名下创建一个controller包,并添加一个类IndexController
 1 package cn.zll.springboottest.controller;
 2 import org.springframework.stereotype.Controller;
 3 import org.springframework.web.bind.annotation.RequestMapping;
 4 import org.springframework.web.bind.annotation.RequestMethod;
 5
 6 //用Controller注解为控制器
 7 @Controller
 8 public class IndexController {
 9     //拦截/路径的get请求,返回index.html中的内容
10     @RequestMapping(value = "/", method = RequestMethod.GET)
11     public String index(){
12         return "index";
13     }
14 }
- 在resources下添加templates,并添加index.html文档
-
-
注:需要在pom.xml中添加依赖
View Code1 <dependency> 2 <groupId>org.springframework.boot</groupId> 3 <artifactId>spring-boot-starter-thymeleaf</artifactId> 4 </dependency>
-
6.执行
右键Main类,直接Run —> 打开浏览器,输入localhost:8080,就可以访问