一.服务端处理
1.1 ConfigController.getConfig()接口获取配置
@GetMapping
@Secured(action = ActionTypes.READ, parser = ConfigResourceParser.class)
public void getConfig(HttpServletRequest request, HttpServletResponse response,
@RequestParam("dataId") String dataId, @RequestParam("group") String group,
@RequestParam(value = "tenant", required = false, defaultValue = StringUtils.EMPTY) String tenant, //租户信息,对应 Nacos 的命名空间ID字段
@RequestParam(value = "tag", required = false) String tag){
// check tenant,检查名称等有效性(省略...)
// check params,校验参数非空和有效性(省略...)
final String clientIp = RequestUtil.getRemoteIp(request);
inner.doGetConfig(request, response, dataId, group, tenant, tag, clientIp);
}
1.1.1 RequestUtil.getRemoteIp方法尽可能获取真实IP
获取IP是尽可能获取真实的,而不是代理的,如果有NGINX的话,优先使用X_FORWARDED_FOR,取出第一个就是最开始的客户端真实地址。如果都没有的话,只能用RemoteAddr。
public static String getRemoteIp(HttpServletRequest request) {
String xForwardedFor = request.getHeader(X_FORWARDED_FOR);
if (!StringUtils.isBlank(xForwardedFor)) {
return xForwardedFor.split(X_FORWARDED_FOR_SPLIT_SYMBOL)[0].trim();
}
String nginxHeader = request.getHeader(X_REAL_IP);
return StringUtils.isBlank(nginxHeader) ? request.getRemoteAddr() : nginxHeader;
}
1.1.2 ConfigServletInner.doGetConfig
根据groupKey更新缓存的属性,然后根据单例运行是否用mysql,进行mysql查询或者直接用文件零拷贝传输,
因为有个DumpService在初始化的时候会去mysql比对记录,把文件保存到本地/dataconfig-data文件夹中,所以可以直接用零拷贝了。
public String doGetConfig(HttpServletRequest request, HttpServletResponse response, String dataId, String group,
String tenant, String tag, String clientIp) {
final String groupKey = GroupKey2.getKey(dataId, group, tenant); //拼接
String autoTag = request.getHeader("Vipserver-Tag");
String requestIpApp = RequestUtil.getAppName(request);
int lockResult = tryConfigReadLock(groupKey); //首先获取读锁,先从缓存中读,最大重试10次,间隔1
final String requestIp = RequestUtil.getRemoteIp(request);
boolean isBeta = false;
if (lockResult > 0) {
FileInputStream fis = null;
String md5 = Constants.NULL;
long lastModified = 0L;
//获取缓存,包括MD5,lastmodifyedTs,type等..
CacheItem cacheItem = ConfigCacheService.getContentCache(groupKey);
//configType例如yaml
final String configType = (null != cacheItem.getType()) ? cacheItem.getType() : FileTypeEnum.TEXT.getFileType();
File file = null;
ConfigInfoBase configInfoBase = null;
PrintWriter out = null;
md5 = cacheItem.getMd5(); //缓存中的md5值
lastModified = cacheItem.getLastModifiedTs(); //缓存中的最后修改时间
//确定是否直接读取数据(嵌入式存储derby+单机),如果使用mysql,降低数据库读取压力; 如果使用raft + derby,降低leader读取压力;
// persistService.findConfigInfo方法后面有简单分析
if (PropertyUtil.isDirectRead()) {
configInfoBase = persistService.findConfigInfo(dataId, group, tenant);
} else {
file = DiskUtil.targetFile(dataId, group, tenant); //读取本地文件
}
response.setHeader(Constants.CONTENT_MD5, md5);
response.setHeader("Pragma", "no-cache"); // 头部禁用缓存
response.setDateHeader("Expires", 0);
response.setHeader("Cache-Control", "no-cache,no-store");
if (PropertyUtil.isDirectRead()) {
response.setDateHeader("Last-Modified", lastModified);
} else {
fis = new FileInputStream(file);
response.setDateHeader("Last-Modified", file.lastModified());
}
//设置一些头信息后,进行响应输出,如果有本地文件就用零拷贝,否则就用字符流。
if (PropertyUtil.isDirectRead()) {
out = response.getWriter(); //使用字符流
out.print(configInfoBase.getContent());
out.flush();
out.close();
} else {
//操作系统可以将字节直接从文件系统缓存传输到目标通道
fis.getChannel().transferTo(0L, fis.getChannel().size(), Channels.newChannel(response.getOutputStream()));
}
.....
finally { //释放锁 releaseConfigReadLock(groupKey); }
} else if (lockResult == 0) {
//如果获取不到说明配置文件不存在或者有线程正在写配置文件,也不能读,为了保证数据的一致性:
...
}
return HttpServletResponse.SC_OK + "";
}
1.1.3 PersistService.findConfigInfo()查数据库配置
这个方法会直接查询数据库, select **** 这种。
 如果其他数据库用JdbcTemplate操作;
1.2 DumpService将配置文件全部Dump到磁盘
Nacos Config模块有一个特点,会将数据库中的配置信息,dump成文件,
通过直接文件读取的方式,替代直接读取数据库,降低数据库的压力,是的数据库可以更好的处理写操作。

图片来源: https://blog.csdn.net/wangwei19871103/article/details/105814924
1.2.1 DumpService.init() 初始化
spring启动加载时,会执行带有 @PostConstruct 注解的初始化方法;
@PostConstruct
@Override
protected void init() throws Throwable {
if (ApplicationUtils.getStandaloneMode()) {
dumpOperate(processor, dumpAllProcessor, dumpAllBetaProcessor,dumpAllTagProcessor);
return;
}
//非单机模式, 后面章节再分析
}
1.2.2 dumpOperate() 执行dump操作
protected void dumpOperate(DumpProcessor processor, DumpAllProcessor dumpAllProcessor,
DumpAllBetaProcessor dumpAllBetaProcessor, DumpAllTagProcessor dumpAllTagProcessor) throws NacosException {
String dumpFileContext = "CONFIG_DUMP_TO_FILE";
TimerContext.start(dumpFileContext);
// 构建并添加全部配置文件Dump处理器
Runnable dumpAll = () -> dumpAllTaskMgr.addTask(DumpAllTask.TASK_ID, new DumpAllTask());
// 构建并添加全部灰度配置文件Dump处理器
Runnable dumpAllBeta = () -> dumpAllTaskMgr.addTask(DumpAllBetaTask.TASK_ID, new DumpAllBetaTask());
// 构建并添加全部Tag配置文件Dump处理器
Runnable dumpAllTag = () -> dumpAllTaskMgr.addTask(DumpAllTagTask.TASK_ID, new DumpAllTagTask());
//清除历史配置文件信息(xx天之前的历史配置信息全部删除)
Runnable clearConfigHistory = () -> {
// 单机模式返回true, derby + raft 模式 leader节点可以执行此任务
if (canExecute()) {
Timestamp startTime = getBeforeStamp(TimeUtils.getCurrentTime(), 24 * getRetentionDays());
int totalCount = persistService.findConfigHistoryCountByTime(startTime);
if (totalCount > 0) {
// 分页删除历史记录 ; 采用分页的方式,一是为了降低数据库删除数据时的压力,
// 另一方面考虑数据库集群的主从同步延迟的问题(bin-log)
int pageSize = 1000;
int removeTime = (totalCount + pageSize - 1) / pageSize;
while (removeTime > 0) {
persistService.removeConfigHistory(startTime, pageSize); // 分页删除以免批量太大报错
removeTime--;
}
}
}
};
//全量Dump配置信息
dumpConfigInfo(dumpAllProcessor);
// 更新 Beta缓存,先删除文件
DiskUtil.clearAllBeta();
if (persistService.isExistTable(BETA_TABLE_NAME)) {
dumpAllBetaProcessor.process(new DumpAllBetaTask());
}
// 更新 Tag 缓存,先删除文件
DiskUtil.clearAllTag();
if (persistService.isExistTable(TAG_TABLE_NAME)) {
dumpAllTagProcessor.process(new DumpAllTagTask());
}
// add to dump aggr
List<ConfigInfoChanged> configList = persistService.findAllAggrGroup();
if (configList != null && !configList.isEmpty()) {
total = configList.size();
List<List<ConfigInfoChanged>> splitList = splitList(configList, INIT_THREAD_COUNT);
for (List<ConfigInfoChanged> list : splitList) {
MergeAllDataWorker work = new MergeAllDataWorker(list);
work.start();
}
}
// 非单机模式,则Nacos Config存在一个dump文件的心跳记录,可以减少dump文件的开销和任务耗时
if (!ApplicationUtils.getStandaloneMode()) {
Runnable heartbeat = () -> {
String heartBeatTime = TimeUtils.getCurrentTime().toString();
DiskUtil.saveHeartBeatToDisk(heartBeatTime); // 时间信息持久化
};
// 周期性执行任务
ConfigExecutor.scheduleConfigTask(heartbeat, 0, 10, TimeUnit.SECONDS);
// 随机的任务延迟时间
long initialDelay = new Random().nextInt(INITIAL_DELAY_IN_MINUTE) + 10;
ConfigExecutor.scheduleConfigTask(dumpAll, initialDelay, DUMP_ALL_INTERVAL_IN_MINUTE, TimeUnit.MINUTES);
// 周期性执行dump全部灰度配置文件的操作 ,6小时
ConfigExecutor.scheduleConfigTask(dumpAllBeta, initialDelay, DUMP_ALL_INTERVAL_IN_MINUTE, TimeUnit.MINUTES);
// 周期性执行dump全部tag配置文件的操作 ,6小时
ConfigExecutor.scheduleConfigTask(dumpAllTag, initialDelay, DUMP_ALL_INTERVAL_IN_MINUTE, TimeUnit.MINUTES);
}
// 周期性执行清除往期历史配置信息记录
ConfigExecutor.scheduleConfigTask(clearConfigHistory, 10, 10, TimeUnit.MINUTES);
} finally {
TimerContext.end(dumpFileContext, LogUtil.DUMP_LOG);
}
}
1.2.3 dumpConfigInfo()
作用: 主要是将数据库中的所有ConfigInfo查询出来写到服务器的磁盘中
参数: dumpAllProcessor, 这个是TaskProcessor 任务处理器;处理器中有个 process()方法; 最终执行任务的时候就是执行这个方法的;
private void dumpConfigInfo(DumpAllProcessor dumpAllProcessor) throws IOException {
int timeStep = 6;
Boolean isAllDump = true;
// initial dump all
FileInputStream fis = null;
Timestamp heartheatLastStamp = null;
//判断是否快速启动,即配置文件中的isQuickStart默认false ,
if (isQuickStart()) {
File heartbeatFile = DiskUtil.heartBeatFile();
if (heartbeatFile.exists()) {
fis = new FileInputStream(heartbeatFile);
String heartheatTempLast = IoUtils.toString(fis, Constants.ENCODE);
heartheatLastStamp = Timestamp.valueOf(heartheatTempLast);
//如果上一次服务正常的时间距离现在不超过6个小时; 那么设置 isAllDump = false;表示不需要全量Dump
if (TimeUtils.getCurrentTime().getTime() - heartheatLastStamp.getTime()
< timeStep * 60 * 60 * 1000) {
isAllDump = false;
}
}
if (isAllDump) {
DiskUtil.clearAll(); //先删除本地file
dumpAllProcessor.process(new DumpAllTask()); //处理全部配置数据
} else {
//非全量dump,下面小节1.2.5介绍.dumpChangeProcessor
Timestamp beforeTimeStamp = getBeforeStamp(heartheatLastStamp, timeStep);
DumpChangeProcessor dumpChangeProcessor = new DumpChangeProcessor(this, beforeTimeStamp, TimeUtils.getCurrentTime());
dumpChangeProcessor.process(new DumpChangeTask());
// 文件的 MD5 检查任务
Runnable checkMd5Task = () -> {
// 直接根据内存缓存中的配置信息的数据,进行快速检查每个配置文件信息的变更情况
List<String> diffList = ConfigCacheService.checkMd5();
for (String groupKey : diffList) {
// 将对应格式的数据进行解析
String[] dg = GroupKey.parseKey(groupKey);
String dataId = dg[0];
String group = dg[1];
String tenant = dg[2];
// 直接查找对应的配置文件信息
ConfigInfoWrapper configInfo = persistService.queryConfigInfo(dataId, group, tenant);
// 进行变更判断并dump出文件
ConfigCacheService.dumpChange(dataId, group, tenant, configInfo.getContent(),
configInfo.getLastModified());
}
};
// 进行周期任务调度执行
ConfigExecutor.scheduleConfigTask(checkMd5Task, 0, 12, TimeUnit.HOURS);
}
}
DiskUtil.heartBeatFile() 获取心跳文件
心跳文件在 {NACOS_HOME}/status/heartBeat.txt,这是一个心跳文件,每十秒就会把当前时间写入到这个文件中;
作用: (断点续传) 为了能够快速启动应用,可以选择不需要全部Dump所有的配置文件,因为上一次可能已经Dump了文件在磁盘中了,
如果配置很大的话,走IO还是会花费一定的时间的; 所以每十秒来持久化一次当前时间,用于记录上一次服务正常距离现在有多长时间;
假设服务宕机了,半个小时之后才启动成功,那么我们只需要将这半小时之内数据库中的配置变化重新Dump到磁盘中就行了,不需要DumpAll;
1.2.4 DumpAllProcessor.process()-全量dump
DumpAllProcessor.process()方法
@Override
public boolean process(NacosTask task) {
long currentMaxId = persistService.findConfigMaxId(); //查询数据库最大id
long lastMaxId = 0;
while (lastMaxId < currentMaxId) {
//分页获取数据库的数据,每次1000
Page<ConfigInfoWrapper> page = persistService.findAllConfigInfoFragment(lastMaxId, PAGE_SIZE);
if (page != null && page.getPageItems() != null && !page.getPageItems().isEmpty()) {
for (ConfigInfoWrapper cf : page.getPageItems()) {
long id = cf.getId();
lastMaxId = id > lastMaxId ? id : lastMaxId;
// AggrWhitelist是Nacos页面自定义的一个DataId; 如果ConfigInfo的DataId是这个值的话就会被单独解析,
if (cf.getDataId().equals(AggrWhitelist.AGGRIDS_METADATA)) {
AggrWhitelist.load(cf.getContent());
}
// ClientIpWhiteList也是Nacos自己定义的一个预留配置DataId,Ip白名单
if (cf.getDataId().equals(ClientIpWhiteList.CLIENT_IP_WHITELIST_METADATA)) {
ClientIpWhiteList.load(cf.getContent());
}
// SwitchService也是Nacos内部预留的一个配置;DataId是 com.alibaba.nacos.meta.switch ;
//开发者可以配置这个里面的属性,来进行一些设置内部属性的操作;
if (cf.getDataId().equals(SwitchService.SWITCH_META_DATAID)) {
SwitchService.load(cf.getContent());
}
//dump方法里面会校验MD5是否改变并更新,真正的磁盘写入操作
boolean result = ConfigCacheService.dump(cf.getDataId(), cf.getGroup(), cf.getTenant(), cf.getContent(), cf.getLastModified(), cf.getType());
}
} else {
lastMaxId += PAGE_SIZE;
}
return true;
}
ConfigService.dump()方法真正的磁盘写入操作;
这个方法首先将配置保存到磁盘文件中,并且缓存配置信息的MD5到内存中;
如果配置信息不一致(MD5不一致),则将会发送一个通知事件 LocalDataChangeEvent告知本地数据有更改;
CacheItem 是配置信息的对象;保存着配置信息的一些信息,但是没有保存Content,只保存了content的MD5;
/*** Save config file and update md5 value in cache. */
public static boolean dump(String dataId, String group, String tenant, String content, long lastModifiedTs,
String type) {
String groupKey = GroupKey2.getKey(dataId, group, tenant);
//如果内存中没有当前配置的缓存 CacheItem,则组装对象保存进去;这时md5是空字符串;
CacheItem ci = makeSure(groupKey);
ci.setType(type);
final int lockResult = tryWriteLock(groupKey); //获取写锁,没获取到则报错或返回false
//计算content的MD5
final String md5 = MD5Utils.md5Hex(content, Constants.ENCODE);
if (md5.equals(ConfigCacheService.getContentMd5(groupKey))) {
...
} else if (!PropertyUtil.isDirectRead()) {
//上面计算的md5跟内存 CacheItem 中的md5做比较(第一次肯定不相等),如果不相等则将文件保存到磁盘中;
DiskUtil.saveToDisk(dataId, group, tenant, content);
}
//updateMd5方法中,如果MD5不相同,则更新 CacheItem 中的MD5属性和lastModifiedTs属性;
// lastModifiedTs是表示最后更新时间; 如果MD5不相同,还要发送通知告知数据有变更;
updateMd5(groupKey, md5, lastModifiedTs);
finally { releaseWriteLock(groupKey); }
}
updateMd5方法:
public static void updateMd5(String groupKey, String md5, long lastModifiedTs) {
CacheItem cache = makeSure(groupKey);
if (cache.md5 == null || !cache.md5.equals(md5)) {
cache.md5 = md5;
cache.lastModifiedTs = lastModifiedTs;
NotifyCenter.publishEvent(new LocalDataChangeEvent(groupKey));
}
}
LongPollingService监听LocalDataChangeEvent事件
@Override
public void onEvent(Event event) {
//SwitchService配置中的一个属性 isFixedPolling; 是否固定长轮询
if (isFixedPolling()) {
// Ignore.
} else {
if (event instanceof LocalDataChangeEvent) {
LocalDataChangeEvent evt = (LocalDataChangeEvent) event;
ConfigExecutor.executeLongPolling(new DataChangeTask(evt.groupKey, evt.isBeta, evt.betaIps));
}
}
最终执行DataChangeTask
class DataChangeTask implements Runnable {
@Override
public void run() {
ConfigCacheService.getContentBetaMd5(groupKey);
//1.遍历所有的长轮询订阅者者
for (Iterator<ClientLongPolling> iter = allSubs.iterator(); iter.hasNext(); ) {
ClientLongPolling clientSub = iter.next();
if (clientSub.clientMd5Map.containsKey(groupKey)) {
if (isBeta && !CollectionUtils.contains(betaIps, clientSub.ip)) {
continue; // 2. 如果是beta发布且不在beta列表直接跳过
}
if (StringUtils.isNotBlank(tag) && !tag.equals(clientSub.tag)) {
continue; // 3.如果tag发布且不在tag列表直接跳过
}
getRetainIps().put(clientSub.ip, System.currentTimeMillis());
iter.remove(); // Delete subscribers' relationships.
//4.发送Http请求通知所有未被上面2、3过滤掉的的订阅者最新的配置数据ConfigInfo
clientSub.sendResponse(Arrays.asList(groupKey));
}
}
}
}
1.2.5 DumpChangeProcessor.process()-非全量dump
即Dump有变化的数据的执行器;
public class DumpChangeProcessor implements NacosTaskProcessor {
@Override
public boolean process(NacosTask task) {
long startUpdateMd5 = System.currentTimeMillis();
//1.查询数据库所有的配置文件
List<ConfigInfoWrapper> updateMd5List = persistService.listAllGroupKeyMd5();
//2.将所有的配置文件缓存到内存中,并通知所有订阅的客户端
for (ConfigInfoWrapper config : updateMd5List) {
final String groupKey = GroupKey2.getKey(config.getDataId(), config.getGroup());
ConfigCacheService.updateMd5(groupKey, config.getMd5(), config.getLastModified());
}
long endUpdateMd5 = System.currentTimeMillis();
long startDeletedConfigTime = System.currentTimeMillis();
//3. 从 his_config_info 历史表中找到从上一次心跳时间(heartBeat.txt)到现在的所有被删除记录,
// his_config_info 记录的就是历史的配置文件;
List<ConfigInfo> configDeleted = persistService.findDeletedConfig(startTime, endTime);
//4. 遍历拿到的历史配置数据的dataId,group,Tenant;然后去config_info表中查找能不能查到数据
// 如果能查到,说明配置不是被删除了,只是修改了content;
// 如果不能查到,说明整个配置文件都被删除了;则将磁盘对应的配置文件删除;
并且通知订阅的客户端数据变更;
for (ConfigInfo configInfo : configDeleted) {
if (persistService.findConfigInfo(configInfo.getDataId(), configInfo.getGroup(), configInfo.getTenant())
== null) {
ConfigCacheService.remove(configInfo.getDataId(), configInfo.getGroup(), configInfo.getTenant());
}
}
long endDeletedConfigTime = System.currentTimeMillis();
final long startChangeConfigTime = System.currentTimeMillis();
//5. config_info表中查找 从上一次心跳时间(heartBeat.txt)到现在的所有有被修改过的配置数据,
// 然后执行 ConfigService.dumpChange 将这个改过的配置Dump的磁盘中,并通知;
List<ConfigInfoWrapper> changeConfigs = persistService.findChangeConfig(startTime, endTime);
for (ConfigInfoWrapper cf : changeConfigs) {
boolean result = ConfigCacheService.dumpChange(cf.getDataId(), cf.getGroup(), cf.getTenant(), cf.getContent(), cf.getLastModified());
}
//6. load Nacos内置的一些DataId配置:ClientIpWhiteList,AggrWhitelist,SwitchService
ConfigCacheService.reloadConfig();
long endChangeConfigTime = System.currentTimeMillis();
return true;
}
}
每隔12个小时全量Dump一次数据
ConfigExecutor.scheduleConfigTask(checkMd5Task, 0, 12, TimeUnit.HOURS);
public static void scheduleConfigTask(Runnable command, long initialDelay, long delay, TimeUnit unit) {
TIMER_EXECUTOR.scheduleWithFixedDelay(command, initialDelay, delay, unit);
}
另外,还有部分逻辑在 1.2.2 dumpOperate()方法中;
二.客户端读取配置
2.1 服务启动相关配置
spring-cloud-alibaba-nacos-config工程中 META-INFspring.factories文件注入的类;
org.springframework.cloud.bootstrap.BootstrapConfiguration=
com.alibaba.cloud.nacos.NacosConfigBootstrapConfiguration
org.springframework.boot.autoconfigure.EnableAutoConfiguration=
com.alibaba.cloud.nacos.NacosConfigAutoConfiguration,
com.alibaba.cloud.nacos.endpoint.NacosConfigEndpointAutoConfiguration
org.springframework.boot.diagnostics.FailureAnalyzer=
com.alibaba.cloud.nacos.diagnostics.analyzer.NacosConnectionFailureAnalyzer
2.1.1 NacosConfigBootstrapConfiguration
nacosConfigProperties实例和nacosPropertySourceLocator实例注入。
@Configuration
@ConditionalOnProperty(name = "spring.cloud.nacos.config.enabled", matchIfMissing = true)
public class NacosConfigBootstrapConfiguration {
@Bean
@ConditionalOnMissingBean
public NacosConfigProperties nacosConfigProperties() {
return new NacosConfigProperties();
}
@Bean
public NacosPropertySourceLocator nacosPropertySourceLocator(
NacosConfigProperties nacosConfigProperties) {
return new NacosPropertySourceLocator(nacosConfigProperties);
}
}
2.1.2 NacosPropertySourceLocator
实现接口PropertySourceLocator;
locate()
先准备设置一堆属性,然后进行共享配置和额外配置的加载,主要是loadApplicationConfiguration。
@Override
public PropertySource<?> locate(Environment env) {
//获取配置服务实例,NacosFactory根据properties反射方式创建
ConfigService configService = nacosConfigProperties.configServiceInstance();
long timeout = nacosConfigProperties.getTimeout();
nacosPropertySourceBuilder = new NacosPropertySourceBuilder(configService, timeout); //属性源建造器,timeout为超时30秒
String name = nacosConfigProperties.getName(); //dataid的名字
String dataIdPrefix = nacosConfigProperties.getPrefix(); //前缀
if (StringUtils.isEmpty(dataIdPrefix)) {
dataIdPrefix = name;
}
//前缀为空的话默认就是spring.application.name
if (StringUtils.isEmpty(dataIdPrefix)) {
dataIdPrefix = env.getProperty("spring.application.name");
}
//创建符合属性源
CompositePropertySource composite = new CompositePropertySource(NACOS_PROPERTY_SOURCE_NAME);
loadSharedConfiguration(composite); //共享配置,主要是默认组里面的
loadExtConfiguration(composite); // 额外配置
loadApplicationConfiguration(composite, dataIdPrefix, nacosConfigProperties, env);
return composite;
}
loadApplicationConfiguration()
先获取配置的扩展名和分组,根据分组配置文件加载和激活的环境加载,也就是我们经常用激活环境的配置文件xxx-dev-yaml这种。
加载后的信息都要放入CompositePropertySource符合属性里并返回。
private void loadApplicationConfiguration(
CompositePropertySource compositePropertySource, String dataIdPrefix,
NacosConfigProperties properties, Environment environment) {
String fileExtension = properties.getFileExtension(); //扩展名,比如yml
String nacosGroup = properties.getGroup(); //分组,默认DEFAULT_GROUP
//根据分组配置文件加载
loadNacosDataIfPresent(compositePropertySource,
dataIdPrefix + DOT + fileExtension, nacosGroup, fileExtension, true);
for (String profile : environment.getActiveProfiles()) { //有环境配置的更高级别,比如dev,prod
String dataId = dataIdPrefix + SEP1 + profile + DOT + fileExtension;
//加载环境配置
loadNacosDataIfPresent(compositePropertySource, dataId, nacosGroup,
fileExtension, true);
}
}
loadNacosDataIfPresent方法
private void loadNacosDataIfPresent(
final CompositePropertySource composite,
final String dataId, final String group, String fileExtension,
boolean isRefreshable) {
if (NacosContextRefresher.getRefreshCount() != 0) { //刷新过了
NacosPropertySource ps;
if (!isRefreshable) { //不刷新,直接缓存取
ps = NacosPropertySourceRepository.getNacosPropertySource(dataId);
}
else {
ps = nacosPropertySourceBuilder.build(dataId, group, fileExtension, true);
}
composite.addFirstPropertySource(ps);
}
else {
NacosPropertySource ps = nacosPropertySourceBuilder.build(dataId, group,
fileExtension, isRefreshable);
composite.addFirstPropertySource(ps);
}
}
NacosPropertySourceBuilder的build方法
先加载数据,然后结果封装成NacosPropertySource,放进缓存(并发hashmap)。
NacosPropertySource build(String dataId, String group, String fileExtension, boolean isRefreshable) {
Properties p = loadNacosData(dataId, group, fileExtension);
NacosPropertySource nacosPropertySource = new NacosPropertySource(group, dataId,
propertiesToMap(p), new Date(), isRefreshable);
NacosPropertySourceRepository.collectNacosPropertySources(nacosPropertySource);
return nacosPropertySource;
}
loadNacosData()
用NacosConfigService来加载,加载到了就解析成LinkedHashMap返回,否则就是个空的LinkedHashMap。
private Properties loadNacosData(String dataId, String group, String fileExtension) {
String data = null;
//获取到的是字符串,需要后面根据文件类型解析
data = configService.getConfig(dataId, group, timeout);
if (!StringUtils.isEmpty(data)) {
//properties格式配置文件
if (fileExtension.equalsIgnoreCase("properties")) {
Properties properties = new Properties();
properties.load(new StringReader(data));
return properties;
}
//yml和yaml格式配置文件
else if (fileExtension.equalsIgnoreCase("yaml")
|| fileExtension.equalsIgnoreCase("yml")) {
YamlPropertiesFactoryBean yamlFactory = new YamlPropertiesFactoryBean();
yamlFactory.setResources(new ByteArrayResource(data.getBytes()));
return yamlFactory.getObject();
}
return EMPTY_PROPERTIES; //返回空的数据
}
2.2 NacosConfigService
NacosConfigService结构在下面小节介绍。
2.2.1 getConfig()
@Override
public String getConfig(String dataId, String group, long timeoutMs) throws NacosException {
return getConfigInner(namespace, dataId, group, timeoutMs);
}
2.2.2 getConfigInner()方法
首先优先从本地获取,再次从网络获取,否则从本地快照缓存文件获取;
private String getConfigInner(String tenant, String dataId, String group, long timeoutMs) throws NacosException {
group = null2defaultGroup(group); //默认组
ParamUtils.checkKeyParam(dataId, group); //检查参数
ConfigResponse cr = new ConfigResponse(); // 创建响应
cr.setDataId(dataId);
cr.setTenant(tenant);
cr.setGroup(group);
/ 优先使用本地配置,比如C:Users600336 acosconfigfixed-localhost_8848_nacosdataconfig-data目录中获取相应配置文件
String content = LocalConfigInfoProcessor.getFailover(agent.getName(), dataId, group, tenant);
if (content != null) {
cr.setContent(content);
configFilterChainManager.doFilter(null, cr);
content = cr.getContent();
return content;
}
// 如果不本地不存在的话,就从网络读,下一节分析
content = worker.getServerConfig(dataId, group, tenant, timeoutMs);
cr.setContent(content);
configFilterChainManager.doFilter(null, cr);
content = cr.getContent();
return content;
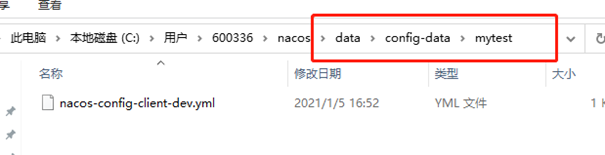
//如果上面都没获取到,则获取本地快照缓存文件内容,
//比如 xxxnacosconfigfixed-localhost_8848_nacossnapshotmytest acos-config-client.yml
dataId, group, tenant, ContentUtils.truncateContent(content));
content = LocalConfigInfoProcessor.getSnapshot(agent.getName(), dataId, group, tenant);
cr.setContent(content);
configFilterChainManager.doFilter(null, cr);
content = cr.getContent();
return content;
}
2.2.3 ClientWorker.getServerConfig()
用代理请求/v1/cs/configs,传参数dataId,group,tenant获取配置文件。
public String getServerConfig(String dataId, String group, String tenant, long readTimeout)
throws NacosException {
... //参数group空则默认组
HttpResult result = null;
List<String> params = null;
if (StringUtils.isBlank(tenant)) {
params = Arrays.asList("dataId", dataId, "group", group);
} else {
params = Arrays.asList("dataId", dataId, "group", group, "tenant", tenant);
}
result = agent.httpGet(Constants.CONFIG_CONTROLLER_PATH, null, params, agent.getEncode(), readTimeout);
switch (result.code) {
case HttpURLConnection.HTTP_OK:
LocalConfigInfoProcessor.saveSnapshot(agent.getName(), dataId, group, tenant, result.content);
return result.content;
}
}
2.3 NacosConfigService大致结构

图片来源:https://blog.csdn.net/wangwei19871103/article/details/105738140
由于版本问题,可能结构有区别。
2.3.1 创建配置服务ConfigService
客户端启动时候, 前面介绍的NacosPropertySourceLocator.locate()方法中创建,
ConfigService configService = nacosConfigProperties.configServiceInstance();
调用:
此时会初始化一些配置到properties中;
configService = NacosFactory.createConfigService(properties);
其实就是反射出NacosConfigService,然后获取有参构造方法,反射创建实例。
public static ConfigService createConfigService(Properties properties) throws NacosException {
Class<?> driverImplClass = Class.forName("com.alibaba.nacos.client.config.NacosConfigService");
Constructor constructor = driverImplClass.getConstructor(Properties.class);
ConfigService vendorImpl = (ConfigService) constructor.newInstance(properties);
return vendorImpl;
}
2.3.2 NacosConfigService构造方法
内部组件有:
ServerHttpAgent : http请求的代理,
MetricsHttpAgent : 包装了ServerHttpAgent,加了计时的功能,
ClientWorker : 做配置文件检查。
public NacosConfigService(Properties properties) throws NacosException {
String encodeTmp = properties.getProperty(PropertyKeyConst.ENCODE);
if (StringUtils.isBlank(encodeTmp)) {
encode = Constants.ENCODE; //默认设置utf-8
} else {
encode = encodeTmp.trim();
}
initNamespace(properties);
agent = new MetricsHttpAgent(new ServerHttpAgent(properties));
agent.start();
worker = new ClientWorker(agent, configFilterChainManager, properties);
}
2.3.3 ServerHttpAgent
public ServerHttpAgent(Properties properties) throws NacosException {
serverListMgr = new ServerListManager(properties);
init(properties); //设置编码,密码,最大重试次数
}
2.3.4 ServerListManager.start()
ServerListManager用来管理注册中心集群列表;
agent.start(); 最终调用到 ServerListManager的start方法;
public synchronized void start() throws NacosException {
if (isStarted || isFixed) {
return;
}
//这里会创建任务,从nameserver获取serverlist
GetServerListTask getServersTask = new GetServerListTask(addressServerUrl);
//重试5次
for (int i = 0; i < initServerlistRetryTimes && serverUrls.isEmpty(); ++i) {
//如果有改变则发起ServerlistChangeEvent事件
getServersTask.run();
this.wait((i + 1) * 100L);
if (serverUrls.isEmpty()) { ...抛服务器异常... }
}
//无延迟开始调度,每30秒一次
TimerService.scheduleWithFixedDelay(getServersTask, 0L, 30L, TimeUnit.SECONDS);
isStarted = true;
}
2.4 ClientWorker
参数:
agent:http代理,MetricsHttpAgent对象,
ConfigFilterChainManager : 过滤器管理器 ,默认里面没有过滤器,可以addFilter自己加。
这里也开启了一个单线程的执行器,执行checkConfigInfo检查配置任务,每10毫秒一次,去检查当前的配置数量,
如果超过一个轮询任务的限制数量,默认3000个,就开启一个新的任务去做。
@SuppressWarnings("PMD.ThreadPoolCreationRule")
public ClientWorker(final HttpAgent agent, final ConfigFilterChainManager configFilterChainManager, final Properties properties) {
this.agent = agent;
this.configFilterChainManager = configFilterChainManager;
init(properties); // 初始化超时时间
executor = Executors.newScheduledThreadPool(1, new ThreadFactory() {
@Override
public Thread newThread(Runnable r) {
Thread t = new Thread(r);
t.setName("com.alibaba.nacos.client.Worker." + agent.getName());
t.setDaemon(true);
return t;
}
});
//有cpu核数的线程,用来做长轮询的,每次检查配置,如果LongPollingRunnable任务的配置缓存超过一定数量,
// 默认3000个,就要去开启一个新任务去检查配置
executorService = Executors.newScheduledThreadPool(Runtime.getRuntime().availableProcessors(), new ThreadFactory() {
@Override
public Thread newThread(Runnable r) {
Thread t = new Thread(r);
t.setName("com.alibaba.nacos.client.Worker.longPolling." + agent.getName());
t.setDaemon(true);
return t;
}
});
//配置检查
executor.scheduleWithFixedDelay(new Runnable() {
@Override
public void run() {
checkConfigInfo();
}
}, 1L, 10L, TimeUnit.MILLISECONDS);
}
checkConfigInfo()方法后续会分析到;
参考:
https://blog.csdn.net/wangwei19871103/article/details/105814924 ,
https://blog.csdn.net/somenzz/article/details/100518028 ,
https://www.liaochuntao.cn/2019/09/16/java-web-54/ ,
https://www.liaochuntao.cn/categories/nacos/ ,
https://blog.csdn.net/wangwei19871103/article/details/105729211 ,
官方api : https://nacos.io/zh-cn/docs/open-api.html