注:本文为转载,但该内容本人已亲身尝试,确认该方法可行,代码有点小的改动,转载用作保存与分享。
原作者地址:http://gundumw100.iteye.com/blog/853967
个人吐嘈:据说TabWidget已经过时了,取而代之的是Fragment,但关于这个Fragment暂时还没时间研讨,现使用的是TabWidget方法,个人感觉实现出来的效果还是很不错的。
自定义TabHost:不用继承TabActivity,具体代码如下:
定义布局文件:activity_main.xml
<?xml version="1.0" encoding="utf-8"?>
<TabHost xmlns:android="http://schemas.android.com/apk/res/android"
 android:id="@+id/TabHost01" android:layout_width="fill_parent"
 android:layout_height="fill_parent">
 <LinearLayout android:layout_width="fill_parent"
 android:orientation="vertical" android:layout_height="fill_parent">
 <TabWidget android:id="@android:id/tabs"
 android:layout_width="fill_parent"
 android:layout_height="wrap_content" />
 <FrameLayout android:id="@android:id/tabcontent"
 android:layout_width="fill_parent"
 android:layout_height="fill_parent">
 <LinearLayout android:id="@+id/LinearLayout1"
 android:layout_width="fill_parent"
 android:layout_height="wrap_content">
 <TextView android:text="two"
 android:id="@+id/TextView02" android:layout_width="fill_parent"
 android:layout_height="wrap_content">
 </TextView>
 </LinearLayout>
 <LinearLayout android:id="@+id/LinearLayout2"
 android:layout_width="fill_parent"
 android:layout_height="wrap_content">
 <ScrollView
 android:id="@+id/Scroll01"
 android:layout_width="fill_parent"
 android:layout_height="fill_parent"
 android:scrollbars="vertical"
 android:background="@android:color/white" >
 <LinearLayout
 android:layout_width="fill_parent"
 android:layout_height="wrap_content"
 android:orientation="vertical"
 android:padding="2dp">
 <TextView
 android:id="@+id/title01"
 android:layout_width="fill_parent"
 android:layout_height="wrap_content"
 android:gravity="center_horizontal"
 android:textSize="20sp"
 android:text="员工信息查询测试"
 android:padding="5dp"/>
 <TextView
 android:layout_width="fill_parent"
 android:layout_height="wrap_content"
 android:padding="4dp"
 android:textSize="20sp"
 android:text="测试
测试
测试
测试
测试
测试
测试
测试
测试
测试
测试
测试
测试
测试
测试
测试
测试
测试
测试
测试
测试
测试
测试
测试
测试
测试
"
 android:layout_weight="1"/>
 </LinearLayout>
 </ScrollView>
 </LinearLayout>
 <LinearLayout android:id="@+id/LinearLayout3"
 android:layout_width="wrap_content"
 android:layout_height="wrap_content">
 <TextView android:text="three"
 android:id="@+id/TextView03" android:layout_width="fill_parent"
 android:layout_height="wrap_content">
 </TextView>
 </LinearLayout>
 </FrameLayout>
 </LinearLayout>
</TabHost>
编写Java代码:
package com.example.test2;

import android.app.Activity;
import android.os.Bundle;
import android.util.Log;
import android.view.LayoutInflater;
import android.widget.TabHost;

public class MainActivity extends Activity {
 /** Called when the activity is first created. */
 private TabHost tabHost;

 @Override
 public void onCreate(Bundle savedInstanceState) {
 super.onCreate(savedInstanceState);
 setContentView(R.layout.activity_main);
 try{
 tabHost = (TabHost) this.findViewById(R.id.TabHost01);
 tabHost.setup();

 tabHost.addTab(tabHost.newTabSpec("tab_1")
 .setContent(R.id.LinearLayout1)
 //.setIndicator("TAB1",this.getResources().getDrawable(R.drawable.img01)));
 .setIndicator("TAB1"));
 tabHost.addTab(tabHost.newTabSpec("tab_2")
 .setContent(R.id.LinearLayout2)
 //.setIndicator("TAB2",this.getResources().getDrawable(R.drawable.img01)));
 .setIndicator("TAB2"));
 tabHost.addTab(tabHost.newTabSpec("tab_3")
 .setContent(R.id.LinearLayout3)
 //.setIndicator("TAB3",this.getResources().getDrawable(R.drawable.img01)));
 .setIndicator("TAB3"));
 tabHost.setCurrentTab(1);
 }catch(Exception ex){
 ex.printStackTrace();
 Log.d("EXCEPTION", ex.getMessage());
 }

 }
 }
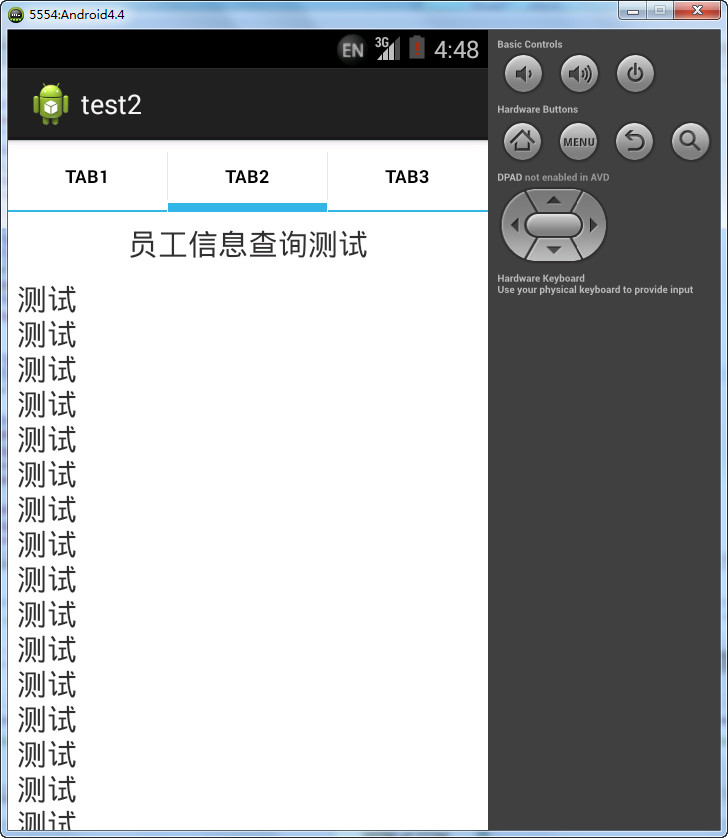
运行图:
本人提供Demo下载:点击此处下载Demo
-全文完-