什么是Zuul:
在之前的演示中,我们都是演示微服务内部之间的调用,那么如何将微服务整合起来对外提供统一的请求验证规则和服务呢,这时我们就要样到Zuul了,它是微服务集群的网关。网关的好处是可以将集群的服务都隐藏才网关后面,这种做法对外部客户端来说,无需关心集群的内部结构,只需关心网关的配置等信息,对于集群内部服务来说,不用暴露过多的信息,提升了集群的安全性。Spring Cloud同样对Zuul进行了封装,将之整合到spring-cloud-netflix项目中。
Zuul的功能:
Zuul将外部的请求过程划分为不同的阶段,每个阶段都提供了一系列过滤器,这些过滤器可以帮助我们实现以下功能:
身份验证和安全性
观察和监控
动态路由:将请求路由到不同的服务集群
负载分配:设置每种请求的处理能力,删除那些超出限制的请求
静态响应处理:提供一些静态的过滤器,直接响应一些请求,而不将他们发到集群内部
路由的多样化:除了Spring Cloud内部微服务,还可以路由到外部服务
好了啰嗦完了,现在我们看看在Spring Cloud中如何使用Zuul。
先看一个我在网上抠过来的图,客户端或者浏览器要访问微服务会首先进入Zuul,然后Zuul会对请求进行验证过滤,请求合法则根据路由规则找到对应的服务调用者,服务调用者也可能会请求其他服务提供者,最后响应给Zuul,然后Zuul返回给客户端或浏览器。

本节要演示的项目结构如下:
eureka-server: 集群服务器
first-service-provider: 服务提供者
first-service-invoker: 服务调用者
zuul-gateway: 微服务集群网关
需要源码的盆友请到github下载:
https://github.com/aharddreamer/chendong/tree/master/springcloud/zuul-CSDN
我们先来个测试接口跑跑流程:
在first-service-provider中加一个message接口,返回一个字符串;
在first-service-invoker中加一个test接口,请求provider中的message接口,返回message信息;
在zuul-gateway中添加一些必要的依赖和配置,配置路径以hello开头的路由到first-service-invoker,然后在浏览器访问/hello/test 试试,请求会自动路由到first-service-invoker中的test接口。
eureka-server和之前一样,只是一个注册服务器,一般不做什么改动。
以下是代码详情:
first-service-provider:
添加一个/message接口

first-service-invoker:
再启动类中加入Feign的配置,因为我们要call service-provider的接口:

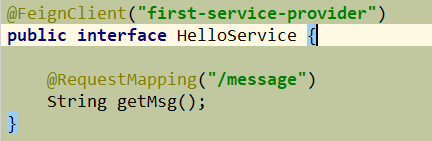
HelloService:
HelloController:

zuul-gateway:
要保证这些个玩意儿在POM的依赖中哦:
<dependencyManagement>
<dependencies>
<dependency>
<groupId>org.springframework.cloud</groupId>
<artifactId>spring-cloud-dependencies</artifactId>
<version>Dalston.SR1</version>
<type>pom</type>
<scope>import</scope>
</dependency>
</dependencies>
</dependencyManagement>
<dependencies>
<dependency>
<groupId>org.springframework.cloud</groupId>
<artifactId>spring-cloud-starter-eureka</artifactId>
</dependency>
<dependency>
<groupId>org.springframework.cloud</groupId>
<artifactId>spring-cloud-starter-zuul</artifactId>
</dependency>
<dependency>
<groupId>org.apache.httpcomponents</groupId>
<artifactId>httpclient</artifactId>
<version>4.5.5</version>
</dependency>
<dependency>
<groupId>com.fasterxml.jackson.core</groupId>
<artifactId>jackson-core</artifactId>
<version>2.9.8</version>
</dependency>
<dependency>
<groupId>com.fasterxml.jackson.core</groupId>
<artifactId>jackson-databind</artifactId>
<version>2.9.8</version>
</dependency>
</dependencies>
另外启动类中需要有这个注解,表示启用Zuul的代理功能:

再就是配置了,我们在application.properties中加入这些配置:
spring.application.name=zuul-gateway

server.port=9100

eureka.instance.hostname=localhost

eureka.client.service-url.default-zone=http://localhost:8761/eureka/

zuul.routes.hello.path=/hello/**

zuul.routes.hello.serviceId=first-service-invoker
第一二行是微服务的名称和端口号,第三四行是注册eureka服务器,使他可以配合集群使用。第五六行是zuul的配置,hello是配置的route名称,表示只要是访问localhost:9100进来的请求是以/hello开头的,都会路由到first-service-provider服务实例上,也就是说访问localhost:9100/hello/test实际上是访问localhost:9000/test。
OK, 依次启动eureka-server, first-service-provider, first-service-invoker, zuul-gateway
然后在浏览其中访问localhost:9100/hello/test试试:

返回的结果是service-provider中的message,为啥呢,很简单,仔细看上面流程图。
Ribbon路由:
刚才演示的这种路由方式。
zuul.routes.hello.path=/hello/**
zuul.routes.hello.serviceId=first-service-invoker
简单路由:
Zuul有很多种路由方式,简单路由就是将所有请求都直接转发到源服务:
比如在application.properties中加入以下配置:
zuul.routes.test.path=/routeTest/baidu

zuul.routes.test.url=https://www.baidu.com
重新启动zuul-gateway,访问以下URL,会跳转到百度
http://localhost:9100/routeTest/baidu
跳转路由:
除了简单路由外,也支持跳转路由,当外部访问网关的A地址时会跳转到B地址,处理跳转路由的过滤器为SendForwardFilter。
在zuul-gateway里面添加一个API,测试forward,接口真实路径是:localhost:9100/test/sayhello

配置一下zuul,下面这两个配置表示所有请求路径为/testForward/的都会forward到/test/sayhello
zuul.routes.testForward.path=/testForward/**

zuul.routes.testForward.url=forward:/test/sayhello
重启zuul-gateway,浏览器测试下:

自定义路由规则:

PatternServiceRouteMapper的第一个参数为服务实例ID,第二个为路由的path。访问module/**的请求都会被路由到zuul-module-service的微服务上。
忽略路由:
可以通过这个属性来设置不进行路由的URL:
zuul.ignored-patterns=/test/noRoute