安装配置bochs之前先写一个简单的引导扇区用来测试:
org 07c00h
mov ax,cs
mov ds,ax
mov es,ax
call DispStr
jmp $


DispStr:
mov ax,BootMessage
mov bp,ax
mov cx,16 ;串长度
mov ax,01301h
mov bx,000ch ;颜色
mov dl,0
int 10h ;10号中断
ret

BootMessage:
db "Hello, os world!"
times 510-($-$$) db 0 ;填充剩下的空间,使生成的二进制代码为512字节
dw 0xaa55
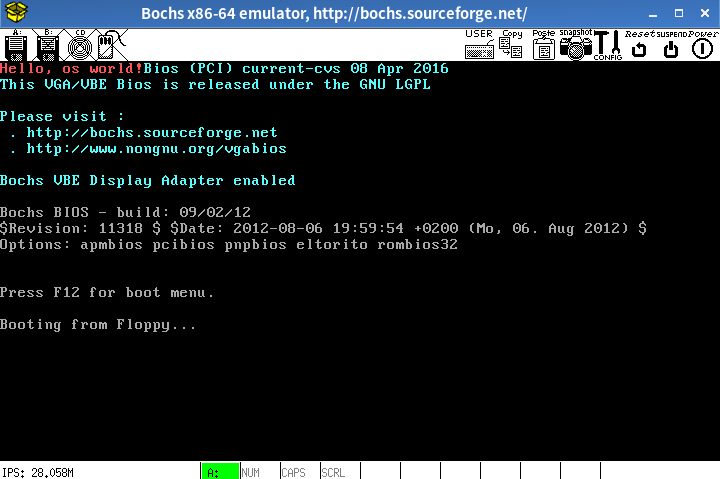
这段代码会输出Hello, os world!,保存为boot.asm
接着:
- 安装bochs及相关软件
sudo apt-get install vgabios bochs bochs-x bximage nasm - 编译boot.asm
nasm boot.asm -o boot.bin - 使用bximage生成磁盘映像
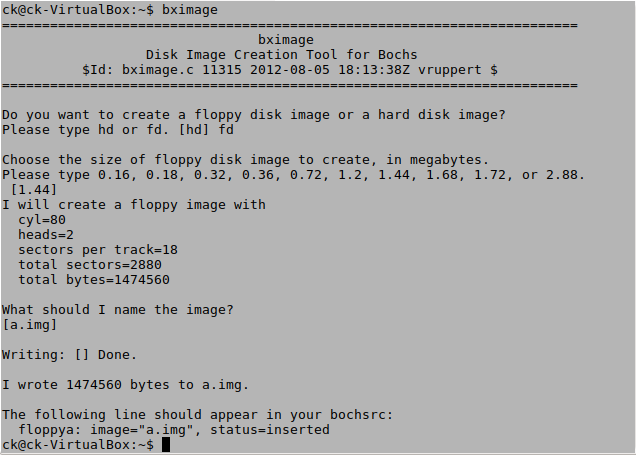
- 将引导扇区写进映像
dd if =boot.bin of=a.img bs=512 count=1 conv=notrunc - 写.bochsrc配置文件
# how much memory the emulated machine will have
megs: 32
# filename of ROM images
# BIOS已经修改,地址可以不加,可以根据文件大小进行推断,如里加地址要与文件大小相匹配
romimage: file=$BXSHARE/BIOS-bochs-latest
vgaromimage: file=$BXSHARE/VGABIOS-lgpl-latest
# what disk images will be used
# 配置镜像名
floppya: 1_44=a.img, status=inserted
# choose the boot disk.
boot: floppy
# where do we send log messages?
log: bochsout.txt
# disable the mouse, since Finix is text only
mouse: enabled=0
# enable key mapping, using US layout as default.
# 键盘的映射方式也改变了
keyboard: keymap=$BXSHARE/keymaps/x11-pc-us.map
- 启动bochs
bochs
接着输入c