现在在公司基本都转git了,git的好处或者说和svn的区别了,在这里就多说了,使用源码包直接安装。
如果自己想创建git项目,可以在阿里云code上创建:https://code.aliyun.com/
卸载centos自带老版本git:yum -y remove git
源码安装 Git之前需要安装 Git 依赖的库:curl、zlib、openssl、expat,还有libiconv。命令如下:
sudo yum install curl-devel expat-devel gettext-devel openssl-devel zlib-devel
sudo yum install curl-devel expat-devel gettext-devel openssl-devel zlib-develtar -zxvf git-2.12.0.tar.gz
cd git-2.12.0/
make configure
./configure --prefix=/usr/local/git-2.12.0
make all doc info
make install install-doc install-html install-info
参考文档:https://git-scm.com/book/zh/v2/%E8%B5%B7%E6%AD%A5-%E5%AE%89%E8%A3%85-Git
期间会报的错误:
报错1:EGIN failed--compilation aborted at Makefile.PL line 3.
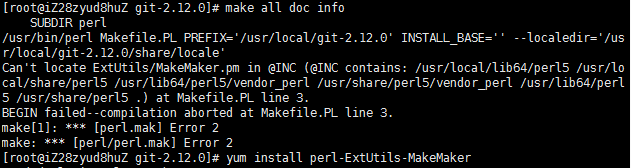
解决方案:yum install perl-ExtUtils-MakeMaker
参考文档:http://blog.163.com/hehaifeng1984@126/blog/static/69001136201483101011798/
报错2:/bin/sh: line 1: docbook2x-texi: command not found
首先下载docbook2X-0.8.8-17.sdl7.x86_64.rpm
下载地址:https://centos.pkgs.org/7/puias-unsupported-x86_64/docbook2X-0.8.8-17.sdl7.x86_64.rpm.html
安装:yum -y install openjade texinfo perl perl-XML-SAX.noarch
rpm -ivh docbook2X-0.8.8-17.sdl7.x86_64.rpm
find / -name db2x_docbook2texi
cd /usr/bin/
ln -s db2x_docbook2texi docbook2x-texi

参考文档:http://www.codeweblog.com/%E5%8E%9F%E5%88%9B-centos6-4-%E4%B8%8B%E6%BA%90%E7%A0%81%E5%AE%89%E8%A3%85-git

vim /etc/profile 添加变量:/usr/local/git-2.12.0/bin
source /etc/profile

linux设置git记住用户名密码:
在终端下执行  git config --global credential.helper store
可以看到~/.gitconfig文件,会多了一项:
[credential]
helper = store

也可以手动在本地的工程文件夹的.git下打开config文件
添加:
[credential]
helper = store
再输入一次用户名密码后就可以保存住了。
在同一目录下会自动生成.git-credentials文件
参考地址:http://www.cnblogs.com/liruixin/p/6279132.html

git中忽略文件权限或文件拥有者的改变
在发布项目到线上时,很多时候需要修改文件的权限,如果是使用git版本管理软件来发布的话,那么下次更新线上文件的时候就会提示文件冲突。明明文件没有修改,为什么会冲突呢?原来git把文件权限也算作文件差异的一部分。下面笔者自己做了个简单的例子来演示这种情况。
1、修改版本库的文件的权限,然后使用diff查看下改变。
$ chmod 777 pack.php
$ git diff pack.php

git文件权限修改示例
可以看到git把文件权限也列入了版本管理。
2、在另外一个地方clone这个版本库,修改pack.php文件,然后提交。
3、在原版本库下面更新内容。
$ git pull

git文件权限修改引起的冲突
可以看到提示冲突。
解决办法:
git中可以加入忽略文件权限的配置,具体如下:
$ git config core.filemode false  // 当前版本库
$ git config --global core.fileMode false // 所有版本库
这样就设置了忽略文件权限。查看下配置:
$ cat .git/config // 查看git的配置文件
git忽略文件权限的配置
这时候再更新代码就OK了。
参考网址:http://www.cnblogs.com/itsharehome/p/4866837.html
如何 clone git 项目到一个非空目录
如果我们往一个非空的目录下 clone git 项目,就会提示错误信息:
fatal: destination path '.' already exists and is not an empty directory.
解决的办法是:
1. 进入非空目录,假设是 /workdir/proj1
2. git clone --no-checkout https://git.oschina.net/NextApp/platform.git tmp
3. mv tmp/.git . #将 tmp 目录下的 .git 目录移到当前目录
4. rmdir tmp
5. git reset --hard HEAD
然后就可以进行各种正常操作了。
参考网址:http://www.oschina.net/question/54100_167919?sort=time
eclipse添加.gitignore 参考这个文档,写的已经很详细了:http://blog.csdn.net/wangjun5159/article/details/51448272
windows下记住用户名密码
先创建存储用户名密码的文件 ,在home文件夹,一般是 C:Documents and SettingsAdministrator下建立文件.git-credentials(windows下不允许直接创建以.开头的文件,所以有一个小技巧:先创建一个文件名叫 )git-credentials 然后进入 git bash 使用命令:
mv git-credentials .git-credentials
用记事本打开这文件输入,如果用户名中有@,那么使用%代替:
https://{username}:{password}@github.com
例:https://xiaoerlang:654321@github.com
保存;
进入 git bash,然后输入:
git config –global credential.helper store
执行完后去查看 C:Documents and SettingsAdministrator.gitconfig 这个文件,发现多了一项: [credential]
helper = store
就成功了。
然后要重开 git bash 窗口,再push就不用输入用户名密码
转载文档:https://blog.csdn.net/thini/article/details/50578823
或者直接执行git config --global credential.helper store 这样第一次pull或push需要输入用户名和密码,之后就不用再输入了。
同样,如果输入一个错误账号被记住了,
这时候再次pull时会一直提示Authentication failed 这时候需要清楚记忆,git config --system --unset credential.helper。会清除所以账户密码,然后就可以重新操作了!
有时需要设置用户名和邮箱
git config--global user.name "username"
git config--global user.email "email"
同样当git注册时的邮箱发生变化后,可以通过config命令进行修改。