yii migrate/create create_blog_table

该命令生成的迁移文件位于 advancedconsolemigrations 目录,可能你已经注意到了,yii migrate 命令已经在迁移文件中为我们添加了主键ID和表名,接下来我们要编辑该文件修改表名以及添加更多的列到数据表blog:
 */
class m160525_153315_create_blog_table extends Migration
{
    /**
     * @inheritdoc
     */
    public function up()
    {
        $this->createTable('blog', [
            'id' => $this->primaryKey(),
            'title' => $this->string(100)->notNull()->defaultValue(''),
            'content' => $this->text(),
            'create_time' => $this->datetime(),
        ]);
    }

    /**
     * @inheritdoc
     */
    public function down()
    {
        $this->dropTable('blog');
    }
}
运行迁移之前,我们先把数据库配置一番,打开commonconfigmain-local.php文件,我们看到components下面的db配置,参考如下配置就好
'components' => [
    'db' => [
        'class' => 'yiidbConnection',
        // 修改host 和dbname 之前需要手动创建了dbname才可以
        'dsn' => 'mysql:host=localhost;dbname=advanced',
        //登录数据库的账号
        'username' => 'root',
        //登录数据库的密码
        'password' => '',
        'charset' => 'utf8',
    ],
    // other code
],
本文实例讲述了Yii使用migrate命令执行sql语句的方法。分享给大家供大家参考,具体如下:
Yii2自带一个强大的命令行管理工具,在windows下打卡cmd命令窗口,切换到Yii项目所在目录(包含Yii.bat),就可以在cmd中运行Yii命令了。
使用Yii migrate命令执行sql语句:
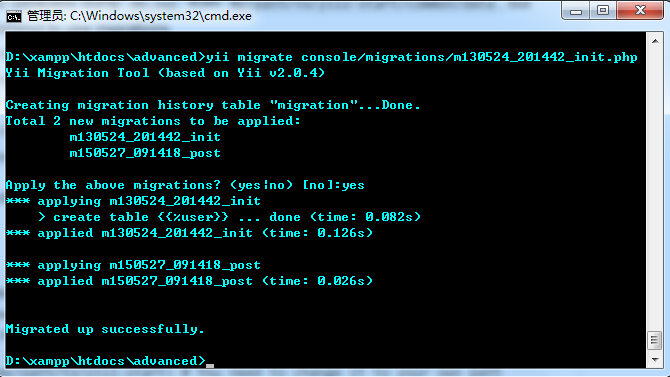
如在路径为/console/migrations/m130524_201442_init.php这个文件定义了一张User表的sql,我们要执行这个sql来生成数据表,就运行
|
1
|
yii migrate console/migrations/m130524_201442_init.php |
migrate是Yii用于数据迁移的命令,这只是其中一个用法。
转自:小谈博客 http://www.tantengvip.com/2015/05/yii-migrate-sql/
更多关于Yii相关内容感兴趣的读者可查看本站专题:《Yii框架入门及常用技巧总结》、《php优秀开发框架总结》、《smarty模板入门基础教程》、《php日期与时间用法总结》、《php面向对象程序设计入门教程》、《php字符串(string)用法总结》、《php+mysql数据库操作入门教程》及《php常见数据库操作技巧汇总》