一、概述
运行环境:Node.js、npm、Truffle、Solidity等
  root@keke:~/go-ethereum# node -v
  v8.9.4
  root@keke:~/go-ethereum# npm -v
  5.7.1
solidity 安装
# npm install -g solc --save
安装solidity的开发框架Truffle4
# npm install -g truffle --save
装开发客户端,在本地模拟以太坊运行环境
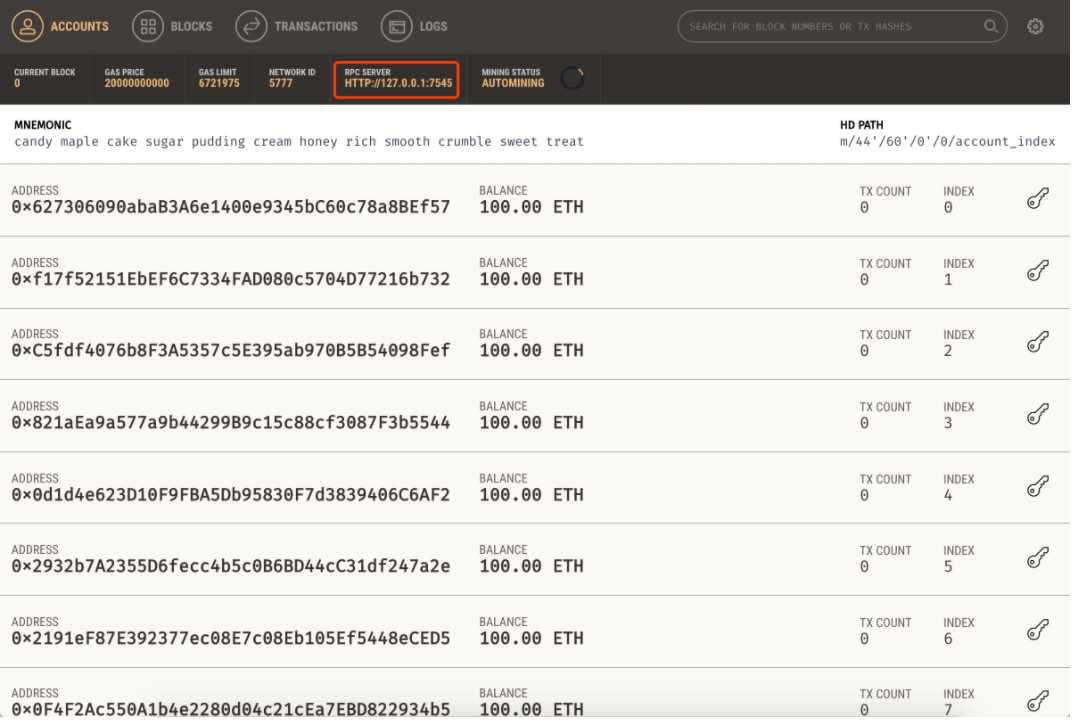
当开发基于Truffle4的应用时,我们推荐使用EthereumJS TestRPC。它是一个完整的在内存中的区块链,仅仅存在于你开发的设备上。它在执行交易时是实时返回,而不等待默认的出块时间,这样你可以快速验证你新写的代码,当出现错误时,也能即时反馈给你。它同时还是一个支持自动化测试的功能强大的客户端。Truffle4充分利用它的特性,能将测试运行时间提速近90%。
EtherumJS TestRPC安装好的截图如下,红框内的为RPC Server地址:http://127.0.0.1 ,在后续配置中将会用到。
项目初始化
localhost:# mkdir -p truffle4-demo
localhost:#  cd truffle4-demo
localhost:/root/truffle4-demo # truffle init
项目目录结构如下:
root@keke:~/truffle4-demo# tree -L 2
.
├── contracts
│ └── Migrations.sol
├── migrations
│ └── 1_initial_migration.js
├── test
├── truffle-config.js
└── truffle.js
3 directories, 4 files
新建合约
root@keke:~/truffle4-demo# cat contracts/demo.sol
pragma solidity ^0.4.17;

contract Test{
    function sayHi() returns (string){
        return "hello world";
    }
}
修改migrations/1_initial_migration.js 如下:
root@keke:~/truffle4-demo# cat migrations/1_initial_migration.js
var Migrations = artifacts.require("./Migrations.sol");

/ /加入自定义合约

var demo = artifacts.require("./demo.sol");
module.exports = function(deployer) {
  deployer.deploy(Migrations);
  //部署引入自定义合约
  deployer.deploy(demo);
};
修改truffle.js配置,信息如截图所示:
networks: {
    development: {
        host: "localhost",
        port: 7545,
        network_id: "*"
    }
}
编译、运行合约:
root@keke:~/truffle4-demo# truffle  compile   #此时会在./build目录下生成编译后的文件,格式为:*.json。
root@keke:~/truffle4-demo# truffle migrate    #部署合约至开发客户端上
truffle migrate --reset来强制重编译并发布所有合约
控制台调用合约:
root@keke:~/truffle4-demo# truffle console
truffle(development)> Demo.deployed().then(function(instance){return instance.sayHi.call();});
'hello world'
NodeJS集成Truffle4
在NodeJS环境使用Truffle4合约,需要手动集成这Web3、truffle-contract两个模块。在集成前,我们需要创建工程的npm包管理环境,首先进入truffle4-demo工程目录,使用npm init来初始化工程的npm包管理环境:
root@keke:~/truffle4-demo# npm init #生成json配置文件
安装truffle-contract包(安装truffle-contract包时,会自动安装Web3,故无需再次安装web3包):
root@keke:~/truffle4-demo# npm install truffle-contract --save
编写Node.js调用合约代码,在项目根目录下创建testWeb3.js文件
//要在NodeJS中使用Truffle,我们要先引入web3
var Web3 = require('web3');
var contract = require("truffle-contract");

//http://localhost:7545地址为开发客户端地址
var provider = new Web3.providers.HttpProvider("http://localhost:7545");

//使用truffle-contract包的contract()方法
//请务必使用你自己编译的Demo.json文件内容
var Demo = contract(
    **此处输入为./build/contracts/Demo.json文件中的内容**
);

Demo.setProvider(provider);

//没有默认地址,会报错
//UnhandledPromiseRejectionWarning: Unhandled promise rejection (rejection id: 3): Error: invalid address
//务必设置为自己的钱包地址,如果不知道,可通过开发者客户端查看

Demo.defaults({
    from : "0x396FE5d2FA697F62C2C2A8bb48811E87A72D3d03"
});

var instance;

Demo.deployed().then(function(instance){
    return instance.sayHi.call();
}).then(function(result){
    console.log(result);
});
运行合约:
root@keke:~/truffle4-demo# node testWeb3.js
'hello world'