下载之后,将我们的安装包上传到第三台机器的/export/softwares目录下面去
第一步:上传并解压安装包
将我们的hive的安装包上传到第三台服务器(只需要安装集群中某一台)的/export/softwares路径下,然后进行解压
cd /export/softwares/
tar -zxvf apache-hive-2.1.1-bin.tar.gz -C ../servers/
第二步:安装mysql
第一步:在线安装mysql相关的软件包
yum install mysql mysql-server mysql-devel
第二步:启动mysql的服务
/etc/init.d/mysqld start
第三步:通过mysql安装自带脚本进行设置
/usr/bin/mysql_secure_installation
第四步:进入mysql的客户端然后进行授权
grant all privileges on *.* to 'root'@'%' identified by '123456' with grant option;
flush privileges;
第三步:修改hive的配置文件
修改hive-env.sh
cd /export/servers/apache-hive-2.1.1-bin/conf
cp hive-env.sh.template hive-env.sh
HADOOP_HOME=/export/servers/hadoop-2.7.5
export HIVE_CONF_DIR=/export/servers/apache-hive-2.1.1-bin/conf
修改hive-site.xml
cd /export/servers/apache-hive-2.1.1-bin/conf
vim hive-site.xml
第四步:添加mysql的连接驱动包到hive的lib目录下
hive使用mysql作为元数据存储,必然需要连接mysql数据库,所以我们添加一个mysql的连接驱动包到hive的安装目录下,然后就可以准备启动hive了
将我们准备好的mysql-connector-java-5.1.38.jar 这个jar包直接上传到 /export/servers/apache-hive-2.1.1-bin/lib 这个目录下即可
至此,hive的安装部署已经完成,接下来我们来看下hive的三种交互方式
第五步:配置hive的环境变量
node03服务器执行以下命令配置hive的环境变量
sudo vim /etc/profile
export HIVE_HOME=/export/servers/apache-hive-2.1.1-bin
export PATH=:$HIVE_HOME/bin:$PATH
2.6. Hive 的交互方式
第一种交互方式 bin/hive
cd /export/servers/apache-hive-2.1.1-bin/
bin/hive
创建一个数据库
create database if not exists mytest;
第二种交互方式:使用sql语句或者sql脚本进行交互
不进入hive的客户端直接执行hive的hql语句
cd /export/servers/apache-hive-2.1.1-bin
bin/hive -e "create database if not exists mytest;"
或者我们可以将我们的hql语句写成一个sql脚本然后执行
cd /export/servers
vim  hive.sql
create database if not exists mytest;
use mytest;
create table stu(id int,name string);
通过hive -f 来执行我们的sql脚本 (定时运行,生产环境使用最多)
bin/hive -f /export/servers/hive.sql
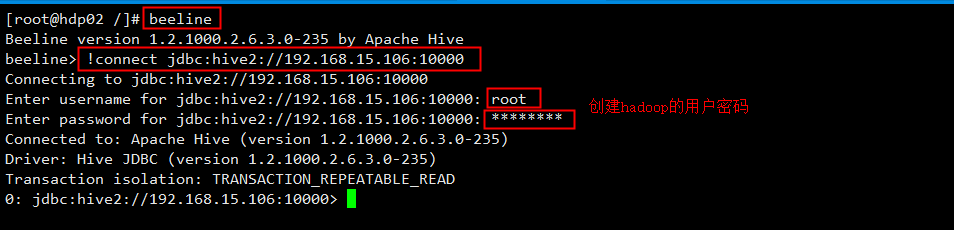
第三种交互方式:beeline
3. Hive 的基本操作
###3.1 数据库操作
####3.1.1 创建数据库
create database if not exists myhive;
use  myhive;
说明:hive的表存放位置模式是由hive-site.xml当中的一个属性指定的
<name>hive.metastore.warehouse.dir</name>
<value>/user/hive/warehouse</value>
####3.1.2 创建数据库并指定位置
create database myhive2 location '/myhive2';
####3.1.3 设置数据库键值对信息
数据库可以有一些描述性的键值对信息,在创建时添加:
create database foo with dbproperties ('owner'='itcast', 'date'='20190120');
查看数据库的键值对信息:
describe database extended foo;
修改数据库的键值对信息:
alter database foo set dbproperties ('owner'='itheima');
####3.1.4 查看数据库更多详细信息
desc database extended myhive2;
####3.1.5 删除数据库
删除一个空数据库,如果数据库下面有数据表,那么就会报错
drop database myhive2;
强制删除数据库,包含数据库下面的表一起删除
drop database myhive cascade;
3.2 数据库表操作
####3.2.1 创建表的语法:
create [external] table [if not exists] table_name (
col_name data_type [comment '字段描述信息']
col_name data_type [comment '字段描述信息'])
[comment '表的描述信息']
[partitioned by (col_name data_type,...)]    //分区
[clustered by (col_name,col_name,...)]       //分桶
[sorted by (col_name [asc|desc],...) into num_buckets buckets]  //排序
[row format row_format]  //表数据文件分隔符
[storted as ....]        //数据存储类型
[location '指定表的路径']
说明:
创建一个指定名字的表。如果相同名字的表已经存在,则抛出异常;用户可以用 IF NOT EXISTS 选项来忽略这个异常。
可以让用户创建一个外部表,在建表的同时指定一个指向实际数据的路径(LOCATION),Hive 创建内部表时,会将数据移动到数据仓库指向的路径;若创建外部表,仅记录数据所在的路径,不对数据的位置做任何改变。在删除表的时候,内部表的元数据和数据会被一起删除,而外部表只删除元数据,不删除数据。
表示注释,默认不能使用中文
表示使用表分区,一个表可以拥有一个或者多个分区,每一个分区单独存在一个目录下 .
-
-
指定排序字段和排序规则
-
指定表文件字段分隔符
指定表文件的存储路径
####3.2.2 内部表的操作
创建表时,如果没有使用external关键字,则该表是内部表(managed table)
| 分类 | 类型 | 描述 | 字面量示例 |
|---|---|---|---|
| 原始类型 | BOOLEAN | true/false | TRUE |
| TINYINT | 1字节的有符号整数, -128~127 | 1Y | |
| SMALLINT | 2个字节的有符号整数,-32768~32767 | 1S | |
| INT | 4个字节的带符号整数 | 1 | |
| BIGINT | 8字节带符号整数 | 1L | |
| FLOAT | 4字节单精度浮点数 | 1.0 | |
| DOUBLE | 8字节双精度浮点数 | 1.0 | |
| DEICIMAL | 任意精度的带符号小数 | 1.0 | |
| STRING | 字符串,变长 | “a”,’b’ | |
| VARCHAR | 变长字符串 | “a”,’b’ | |
| CHAR | 固定长度字符串 | “a”,’b’ | |
| BINARY | 字节数组 | 无法表示 | |
| TIMESTAMP | 时间戳,毫秒值精度 | 122327493795 | |
| DATE | 日期 | ‘2016-03-29’ | |
| INTERVAL | 时间频率间隔 | ||
| 复杂类型 | ARRAY | 有序的的同类型的集合 | array(1,2) |
| MAP | key-value,key必须为原始类型,value可以任意类型 | map(‘a’,1,’b’,2) | |
| STRUCT | 字段集合,类型可以不同 | struct(‘1’,1,1.0), named_stract(‘col1’,’1’,’col2’,1,’clo3’,1.0) | |
| UNION | 在有限取值范围内的一个值 | create_union(1,’a’,63) |
use myhive;
create table stu(id int,name string);
insert into stu values (1,"zhangsan"); #插入数据 insert指令效率比较慢,产生较多的小文件 默认分隔符�01
select * from stu;
create table if not exists stu2(id int ,name string) row format delimited fields terminated by ' ';
create table if not exists stu2(id int ,name string) row format delimited fields terminated by ' ' location '/user/stu2';
create table stu3 as select * from stu2; # 通过复制表结构和表内容创建新表
create table stu4 like stu;
desc formatted stu2;
.
drop table stu4;
####3.2.3外部表的操作
外部表因为是指定其他的hdfs路径的数据加载到表当中来,所以hive表会认为自己不完全独占这份数据,所以删除hive表的时候,数据仍然存放在hdfs当中,不会删掉.
每天将收集到的网站日志定期流入HDFS文本文件。在外部表(原始日志表)的基础上做大量的统计分析,用到的中间表、结果表使用内部表存储,数据通过SELECT+INSERT进入内部表。
分别创建老师与学生表外部表,并向表中加载数据
create external table teacher (t_id string,t_name string) row format delimited fields terminated by ' ';
create external table student (s_id string,s_name string,s_birth string , s_sex string ) row format delimited fields terminated by ' ';
load data local inpath '/export/servers/hivedatas/student.csv' into table student;
load data local inpath '/export/servers/hivedatas/student.csv' overwrite into table student;
cd /export/servers/hivedatas
hdfs dfs -mkdir -p /hivedatas
hdfs dfs -put techer.csv /hivedatas/
load data inpath '/hivedatas/techer.csv' into table teacher;
####3.2.4分区表的操作
在大数据中,最常用的一种思想就是分治,我们可以把大的文件切割划分成一个个的小的文件,这样每次操作一个小的文件就会很容易了,同样的道理,在hive当中也是支持这种思想的,就是我们可以把大的数据,按照每月,或者天进行切分成一个个的小的文件,存放在不同的文件夹中.
create table score(s_id string,c_id string, s_score int) partitioned by (month string) row format delimited fields terminated by ' ';
create table score2 (s_id string,c_id string, s_score int) partitioned by (year string,month string,day string) row format delimited fields terminated by ' ';
load data local inpath '/export/servers/hivedatas/score.csv' into table score partition (month='201806');
load data local inpath '/export/servers/hivedatas/score.csv' into table score2 partition(year='2018',month='06',day='01');
select * from score where month = '201806' union all select * from score where month = '201805';
show partitions score;
alter table score add partition(month='201805');
alter table score drop partition(month = '201806');
分桶,就是将数据按照指定的字段进行划分到多个文件当中去,
开启 Hive 的分桶功能
set hive.enforce.bucketing=true;
设置 Reduce 个数
set mapreduce.job.reduces=3;
创建分桶表
create table course (c_id string,c_name string,t_id string) clustered by(c_id) into 3 buckets row format delimited fields terminated by ' ';
桶表的数据加载,由于通标的数据加载通过hdfs dfs -put文件或者通过load data均不好使,只能通过insert overwrite
创建普通表,并通过insert overwriter的方式将普通表的数据通过查询的方式加载到桶表当中去
创建普通表
create table course_common (c_id string,c_name string,t_id string) row format delimited fields terminated by ' ';
普通表中加载数据
load data local inpath '/export/servers/hivedatas/course.csv' into table course_common;
通过insert overwrite给桶表中加载数据
insert overwrite table course select * from course_common cluster by(c_id);
###3.3 修改表结构
alter table old_table_name rename to new_table_name;
把表score4修改成score5
alter table score4 rename to score5;
-
查询表结构
desc score5;
-
添加列
alter table score5 add columns (mycol string, mysco int);
-
更新列
alter table score5 change column mysco mysconew int;
-
删除表
drop table score5;
1.8. hive表中加载数据
直接向分区表中插入数据
create table score3 like score;
insert into table score3 partition(month ='201807') values ('001','002','100');
通过查询插入数据
通过load方式加载数据
load data local inpath '/export/servers/hivedatas/score.csv' overwrite into table score partition(month='201806');
通过查询方式加载数据
create table score4 like score;
insert overwrite table score4 partition(month = '201806') select s_id,c_id,s_score from score;