1、consent页面(Index.cshtml)上新增相关按钮(红色部分代码)
@using CodeAuthMvc.Models;
@model ConsentViewModel
<p>Consent Page</p>

<div class="row page-header">
    <div class="col-sm-10">
        @if(string.IsNullOrWhiteSpace(Model.ClientLogoUrl))
        {
           <div><img src="@Model.ClientLogoUrl" /></div>
        }
        <h1>
            @Model.ClientName
            <small>希望使用您的账户</small>
        </h1>
    </div>

</div>

<div class="row">
    <div class="=col-sm-8">
        <form asp-action="Index">
            <input type="hidden" asp-for="ReturnUrl" value="@Model.ReturnUrl" />
            @if (Model.IdentityScopes.Any()) //输出内容
            {
                <div>
                    <div class="panel-heading">
                        <span class="glyphicon glyphicon-user"></span>
                        用户信息
                    </div>
                    <ul class="list-group">
                        @foreach (var scope in Model.IdentityScopes)
                        {
                            @Html.Partial("_ScopeItemList", scope)
                        }
                    </ul>
                </div>
            }
            @if (Model.ResourceScopes.Any())
            {
                <div>
                    <div class="panel-heading">
                        <span class="glyphicon glyphicon-tasks"></span>
                        应用权限
                    </div>
                    <ul class="list-group">
                        @foreach (var scope in Model.ResourceScopes)
                        {
                            @Html.Partial("_ScopeItemList", scope)
                        }
                    </ul>
                </div>
            }

            <div>
                <label>
                    <input type="checkbox" asp-for="RememberConsent" />
                    <strong>记住我的选择</strong>
                </label>
            </div>
            <div>
                <input type="submit" value="yes" name="button" class="btn btn-primary"  autofocus>同意</input>
                <input type="submit" value="no" name="button"  >取消</input>

            </div>
        </form>
    </div>


</div>
2、_ScopeItemList页面新增相关代码(红色部分) 当控件位disable时,该控件的值不会作为表单内容发送,这里做一下处理
@using CodeAuthMvc.Models;
@model ScopeViewModel
<li>
    <label>
        <input type="checkbox" name="ScopesConsented" id="scopes_@Model.Name" value="@Model.Name" checked="@Model.Checked" disabled="@Model.Required" />
        @if(@Model.Required)
        {
            <input type="hidden" name="ScopesConsented" value="@Model.Name" />
        }
        <strong>@Model.Name</strong>
        @if (Model.Emphasize)
        {
            <span class="glyphicon glyphicon-exclamation-sign"></span>
        }
    </label>
    @if (string.IsNullOrWhiteSpace(Model.Description))
    {
        <div>
            <label for="scopes_@Model.Name">@Model.Description</label>
        </div>
    }
</li>
3、新增一个登陆完成后接收表单信息的inpuModel
 public class ConsentInputModel
    {
        public string Button { get; set; }
        public IEnumerable<string> ScopesConsented { get; set; }

        public bool RememberConsent { get; set; }

        public string ReturnUrl { get; set; }

    }
4、由于当用户点击取消或者出现错误的时候,需要保存表单页面的状态,修改consentviewmodel
public class ConsentViewModel:ConsentInputModel
    {
        public string ClientId { get; set; }
        public string ClientName { get; set; }
        public string ClientLogoUrl { get; set; }

        public string ClientUrl { get; set; }
        /// <summary>
        /// Identity资源列表
        /// </summary>
        public IEnumerable<ScopeViewModel> IdentityScopes { get; set; }
        /// <summary>
        /// Resource资源列表
        /// </summary>
        public IEnumerable<ScopeViewModel> ResourceScopes { get; set; }


    }
5、新增点击按钮的响应逻辑
  public class ConsentController : Controller
    {
        private readonly IClientStore _clientStore;
        private readonly IResourceStore _resourceStore;
        private readonly IIdentityServerInteractionService _identityServerInteractionService;

          public ConsentController(IClientStore clientStore, IResourceStore resourceStore, IIdentityServerInteractionService identityServerInteractionService)
        {
            _clientStore = clientStore;
            _resourceStore = resourceStore;
            _identityServerInteractionService = identityServerInteractionService;
        }

        private async Task<ConsentViewModel> BuildConsentViewModel(string returnUrl)
        {
            var request = await _identityServerInteractionService.GetAuthorizationContextAsync(returnUrl); //通过url获取请求信息
            if (request == null)
                return null;

            var client = await _clientStore.FindEnabledClientByIdAsync(request.Client.ClientId);  //根据id获取客户端信息
            var resources = await _resourceStore.FindEnabledResourcesByScopeAsync(request.Client.AllowedScopes);   //获取resourse 的信息

            return CreateConsentViewModel(request, client, resources, returnUrl);
        }

        private ConsentViewModel CreateConsentViewModel(AuthorizationRequest request, Client client, Resources resources,string returnUrl)
        {
            var vm = new ConsentViewModel();
            vm.ClientName = client.ClientName;
            vm.ClientLogoUrl = client.LogoUri;
            vm.ClientUrl = client.ClientUri;
            vm.RememberConsent = client.AllowRememberConsent;
            vm.IdentityScopes = resources.IdentityResources.Select(i => CreateScopeViewModel(i));
            vm.ResourceScopes = resources.ApiScopes.Select(i => CreateScopeViewModel(i));
            vm.ReturnUrl = returnUrl;
            return vm;
        }

        private ScopeViewModel CreateScopeViewModel(IdentityResource identityResource)
        {
            return new ScopeViewModel
            {
                Name = identityResource.Name,
                DisplayName = identityResource.DisplayName,
                Description = identityResource.Description,
                Required = identityResource.Required,
                Checked = identityResource.Required,
                Emphasize = identityResource.Emphasize
            };
        }
        private ScopeViewModel CreateScopeViewModel(ApiScope scope)
        {
            return new ScopeViewModel
            {
                Name = scope.Name,
                DisplayName = scope.DisplayName,
                Description = scope.Description,
                Required = scope.Required,
                Checked = scope.Required,
                Emphasize = scope.Emphasize
            };
        }
        [Route("consent")]
        [HttpGet]
        public async Task<IActionResult> Index(string returnUrl)
        {
            var model = await BuildConsentViewModel(returnUrl);
            return View(model);
        }
        [Route("Index")]
        [HttpPost]
        public async Task<IActionResult> Index(ConsentInputModel inputModel)
        {
            ConsentResponse consentResponse=null;
            if(inputModel.Button=="no")
            {
               // consentResponse = null;
            }
            else if(inputModel.Button == "yes")
            {
                if (inputModel.ScopesConsented != null&&inputModel.ScopesConsented.Any())
                {
                    consentResponse = new ConsentResponse
                    {
                        RememberConsent = inputModel.RememberConsent,
                        ScopesValuesConsented = inputModel.ScopesConsented
                    };
                }
            }
            if (consentResponse != null)
            {
                //通过url拿到请求
                var request =await _identityServerInteractionService.GetAuthorizationContextAsync(inputModel.ReturnUrl);
                await  _identityServerInteractionService.GrantConsentAsync(request,consentResponse); //告诉identityserver 用户做了哪些授权
                return Redirect(inputModel.ReturnUrl);
            }
            else
            {
                var consentViewModel = await BuildConsentViewModel(inputModel.ReturnUrl);
                return View(consentViewModel);
            }

        }
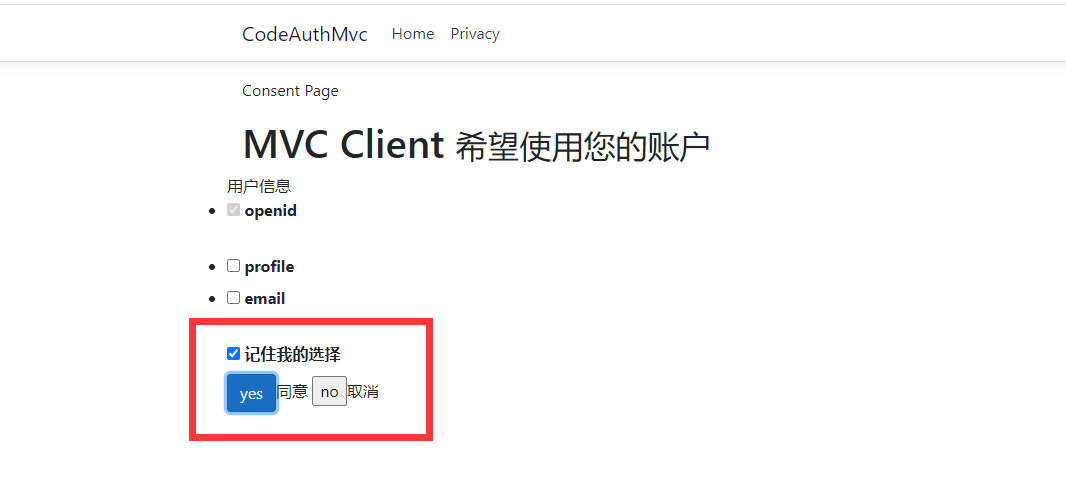
8、运行访问5004并登陆成功后显示下图
点击yes后跳转到5004主页。