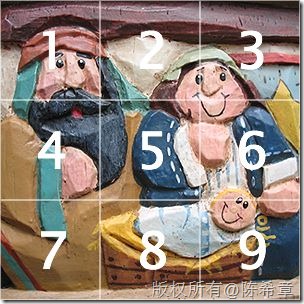
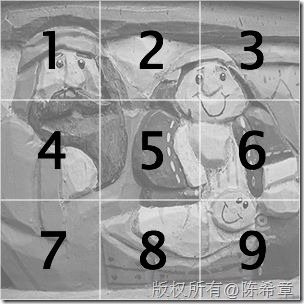
在网页中,我们会用到大量的图片,其中大部分是作为背景存在的。大家都会用Background-image的属性指定图片。但今天重点演示一下使用background-position的妙用
<!DOCTYPE html PUBLIC "-//W3C//DTD XHTML 1.0 Transitional//EN" "http://www.w3.org/TR/xhtml1/DTD/xhtml1-transitional.dtd">
<html xmlns="http://www.w3.org/1999/xhtml">
<head>
    <title></title>
    <style type="text/css">
        ul
        {
             300px;
            height: 300px;
            margin: 0px auto;
            padding: 0px;
            overflow: hidden;
            background: transparent url(images/menu_gray.jpg);
        }
        li
        {
            list-style-type: none;
             100px;
            height: 100px;
            float: left;
        }
        li a
        {
            display: block;
             100px;
            height: 100px;
            text-decoration: none;
            background: transparent url(images/menu_color.jpg) no-repeat 500px 500px;
        }
        a#item1:hover
        {
            background-position: 0 0;
        }
        a#item2:hover
        {
            background-position: -100px 0;
        }
        a#item3:hover
        {
            background-position: -200px 0;
        }
        a#item4:hover
        {
            background-position: 0 -100px;
        }
        a#item5:hover
        {
            background-position: -100px -100px;
        }
        a#item6:hover
        {
            background-position: -200px -100px;
        }
        a#item7:hover
        {
            background-position: 0 -200px;
        }
        a#item8:hover
        {
            background-position: -100px -200px;
        }
        a#item9:hover
        {
            background-position: -200px -200px;
        }
    </style>
</head>
<body>
    <ul>
        <li><a id="item1" href="#" title="Item 1"></a></li>
        <li><a id="item2" href="#" title="Item 2"></a></li>
        <li><a id="item3" href="#" title="Item 3"></a></li>
        <li><a id="item4" href="#" title="Item 4"></a></li>
        <li><a id="item5" href="#" title="Item 5"></a></li>
        <li><a id="item6" href="#" title="Item 6"></a></li>
        <li><a id="item7" href="#" title="Item 7"></a></li>
        <li><a id="item8" href="#" title="Item 8"></a></li>
        <li><a id="item9" href="#" title="Item 9"></a></li>
    </ul>
</body>
</html>
情况是这样的,我们希望将一个图片切割为9个部分,每个部分当鼠标滑过的时候,都可以实现单独地变成灰色的效果。
我们有两张图片


我们首先需要显示第一张照片,然后当用户将鼠标滑过某一个方块的时候,应该将图片切换为灰色的部分。


由此可见,css是多么强大并且有创造力


