1、因为FastDfs是用C语言开发的,安装需要用到gcc编译工具,所以首先安装gcc编译工具
yum install -y gcc gcc-c++
2、FastDFS依赖libevent库,需要安装libevent。
yum -y install libevent
3、安装libfastcommon工具,在github上下载master分支,上传后进行解压、编译和安装
unzip libfastcommon-master.zip
cd libfastcommon-master
./make.sh
./make.sh install
4、libfastcommon安装好后会在/usr/lib64 目录下生成 libfastcommon.so 库文件,将 libfastcommon.so 拷贝到/usr/lib
cp libfastcommon.so /usr/lib
5、将FastDfs的安装包上传后,进行解压、编译和安装
tar -zxvf fastdfs-5.11.tar.gz
cd fastdfs-5.11
./make.sh
./make.sh install
6、安装成功后将conf下的文件拷贝到/etc/fdfs/下
cp /usr/local/FastDFS/conf/* /etc/fdfs/
配置和启动tracker
7、进入/etc/fdfs目录下,拷贝tracker.conf.sample为tracker.conf
cd /etc/fdfs/
cp tracker.conf.sample tracker.conf
8、修改tracker.conf中内容base_path和http.server_port
base_path:用于存储日志、分组信息和服务器列表的位置
http.server_port:为配置http端口
base_path=/home/fastdfs
http.server_port=80  #配置http端口
9、启动tracker,运行命令如下:
/usr/bin/fdfs_trackerd /etc/fdfs/tracker.conf restart
配置和启动storage
切换到目录 /etc/fdfs/,修改storage.conf,如果没有此文件的的话,则拷贝一份storage.conf.sample 为storage.conf
cp storage.conf.sample storage.conf
vim storage.conf
修改内容如下:
group_name=group1 修改组名
base_path=/home/yuqing/fastdfs 修改为自己定义的路径,在这里修改为 base_path=/home/fastdfs
store_path0=/home/yuqing/fastdfs 修改文件存储路径,在这里修改为 store_path0=/home/fdfs_storage
tracker_server=192.168.209.121:22122 配置tracker服务器IP
http.server_port : 配置http端口
10、启动storage,运行命令如下:
/usr/bin/fdfs_storaged /etc/fdfs/storage.conf restart
11、测试是否安装成功
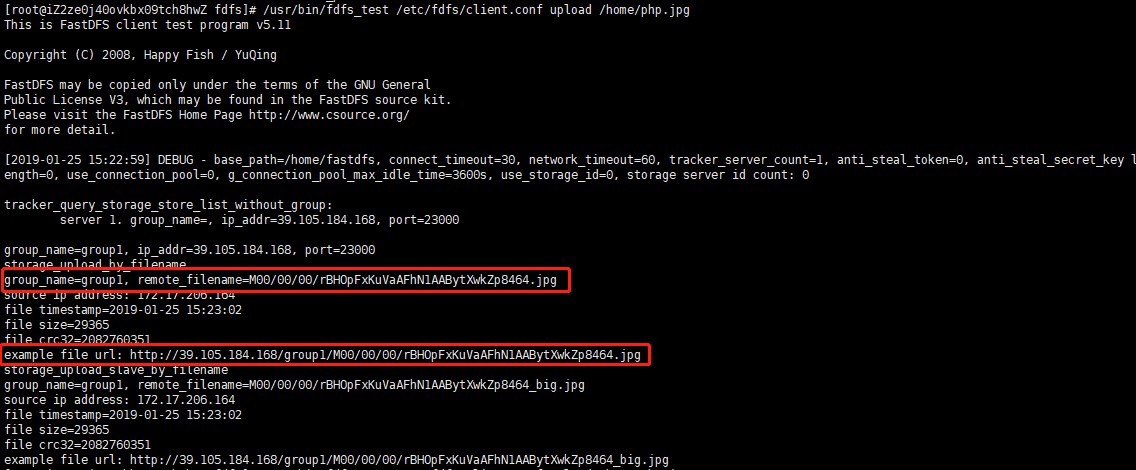
我们随便上传个文件或图片,在这里上传了张php.jpg的图片到/home路径下,通过如下命令进行测试是否安装配置成功
/usr/bin/fdfs_test /etc/fdfs/client.conf upload /home/php.jpg
看到如下结果表示安装成功,第一个被标识的为文件的存储路径,第二个为文件URL地址
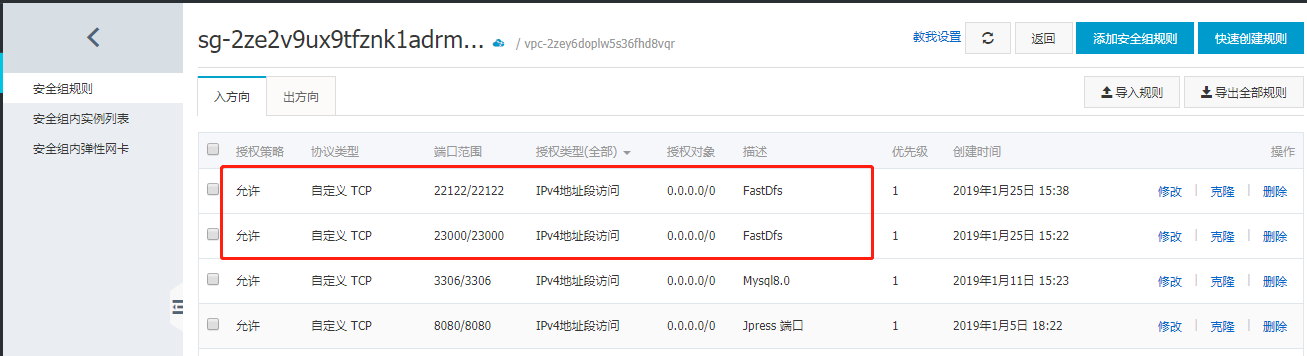
注意在阿里云上运行上述命令测试时会报如下错误

先后提示22122和23000端口无法连接,需要在阿里云的管理控制台添加安全组规则,配置如下: