本帖来演示下SpringBoot下,实用Spring-Data-Jpa来实现CRUD操作,视图层采用Freemarker
这里我们先把application.properties修改成application.yml 主流格式
内容也改成yml规范格式
server:
port: 8888 context-path: / helloWorld: spring Bootu5927u7237u4F60u597D msyql: jdbcName: com.mysql.jdbc.Driver dbUrl: jdbc:mysql://localhost:3306/db_diary userName: root password: 123456spring: datasource: driver-class-name: com.mysql.jdbc.Driver url: jdbc:mysql://localhost:3306/db_book username: root password: 123456 jpa: hibernate.ddl-auto: update show-sql: trueyml格式有个注意点 冒号后面一定要加个空格
还有我们把context-path改成/方便开发应用
先写一个BookDao接口
import org.springframework.data.jpa.repository.JpaRepository;
import com.java1234.entity.Book;/** * 图书Dao接口 * @author user * */public interface BookDao extends JpaRepository<Book, Integer>{}要求实现JpaRepository
再写一个BookController类
import javax.annotation.Resource;
import org.springframework.stereotype.Controller;import org.springframework.web.bind.annotation.GetMapping;import org.springframework.web.bind.annotation.PathVariable;import org.springframework.web.bind.annotation.PostMapping;import org.springframework.web.bind.annotation.RequestMapping;import org.springframework.web.bind.annotation.RequestMethod;import org.springframework.web.servlet.ModelAndView;import com.java1234.dao.BookDao;import com.java1234.entity.Book;/** * Book控制类 * @author user * */@Controller@RequestMapping("/book")public class BookController { @Resource private BookDao bookDao; /** * 查询所有图书 * @return */ @RequestMapping(value="/list") public ModelAndView list(){ ModelAndView mav=new ModelAndView(); mav.addObject("bookList", bookDao.findAll()); mav.setViewName("bookList"); return mav; } /** * 添加图书 * @param book * @return */ @RequestMapping(value="/add",method=RequestMethod.POST) public String add(Book book){ bookDao.save(book); return "forward:/book/list"; } @GetMapping(value="/preUpdate/{id}") public ModelAndView preUpdate(@PathVariable("id") Integer id){ ModelAndView mav=new ModelAndView(); mav.addObject("book", bookDao.getOne(id)); mav.setViewName("bookUpdate"); return mav; } /** * 修改图书 * @param book * @return */ @PostMapping(value="/update") public String update(Book book){ bookDao.save(book); return "forward:/book/list"; } /** * 删除图书 * @param id * @return */ @RequestMapping(value="/delete",method=RequestMethod.GET) public String delete(Integer id){ bookDao.delete(id); return "forward:/book/list"; }}实现了 CRUD
这里的@GetMapping(value="xxx") 类似 @RequestMapping(value="xxx",method=RequestMethod.GET)
以及@PostMapping(value="xxx") 类似 @RequestMapping(value="xxx",method=RequestMethod.POST)
bookList.ftl 展示数据
<!DOCTYPE html>
<html><head><meta charset="UTF-8"><title>图书管理页面</title></head><body><a href="/bookAdd.html">添加图书</a> <table> <tr> <th>编号</th> <th>图书名称</th> <th>操作</th> </tr> <#list bookList as book> <tr> <td>${book.id}</td> <td>${book.bookName}</td> <td> <a href="/book/preUpdate/${book.id}">修改</a> <a href="/book/delete?id=${book.id}">删除</a> </td> </tr> </#list> </table> </body></html>bookAdd.html 图书添加页面
<!DOCTYPE html>
<html><head><meta charset="UTF-8"><title>图书添加页面</title></head><body><form action="book/add" method="post">图书名称:<input type="text" name="bookName"/><br/><input type="submit" value="提交"/></form></body></html>bookUpdate.ftl图书修改页面
<!DOCTYPE html>
<html><head><meta charset="UTF-8"><title>图书更新页面</title></head><body><form action="/book/update" method="post"><input type="hidden" name="id" value="${book.id}"/>图书名称:<input type="text" name="bookName" value="${book.bookName}"/><br/><input type="submit" value="提交"/></form></body></html>浏览器请求:http://localhost:8888/book/list
进入:
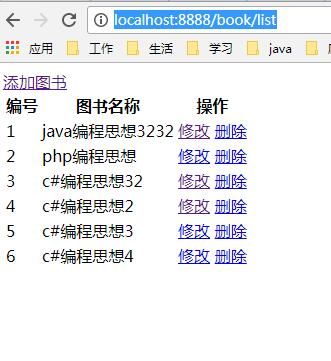
点击 “添加图书”:
进入:
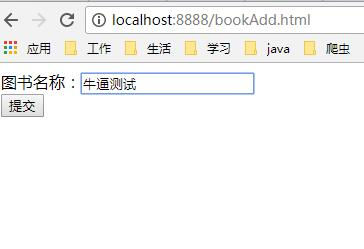
我们随便输入名称,点击“提交”,
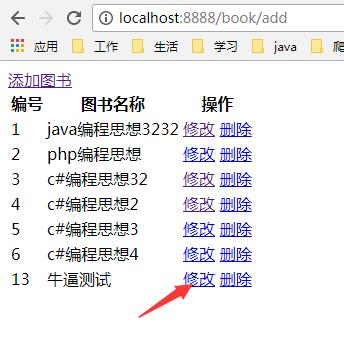
转发执行到列表页面,然后点“修改”,

进入修改页面,修改下名称,点击“提交”,

再次转发到列表页面,我们点击“删除”,
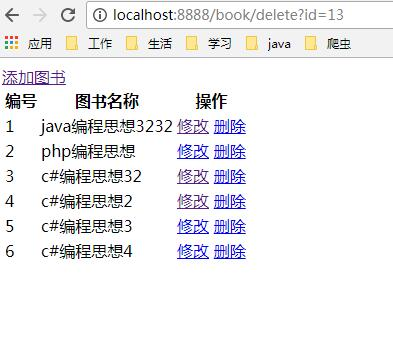
删掉数据后,再次转发到列表页面;