0 集群搭建
1.安装unzip yum install unzip
2.所有集群节点创建新用户 useradd el
3.所有集群节点给el用户设置密码passwd el方便记忆使用的rootroot
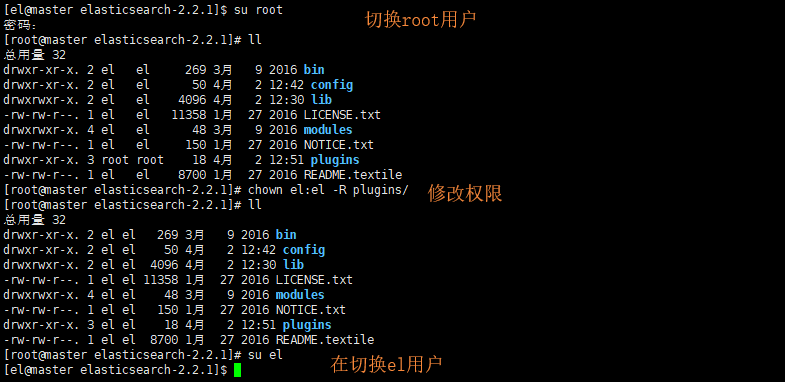
4.所有集群节点创建安装目录和赋予使用权限--》并转换用户
mkdir -p /opt/es
ll /opt/
chown el:el /opt/es
ll /opt/
su el

5.上传安装部署包到master
6.解压到刚刚创建的目录unzip elasticsearch-2.2.1.zip -d /opt/es/(注意是否是普通用户解压的)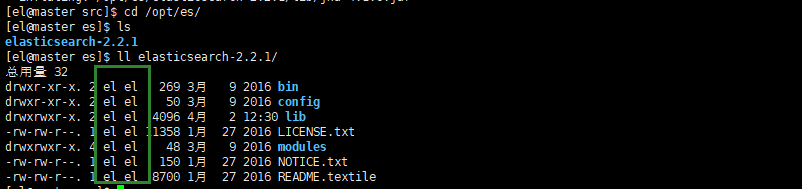
7.修改conf
cd elasticsearch-2.2.1/config/
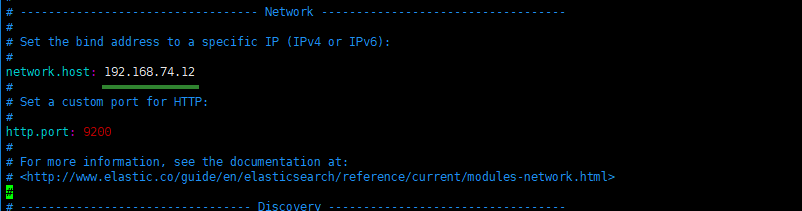
vim elasticsearch.yml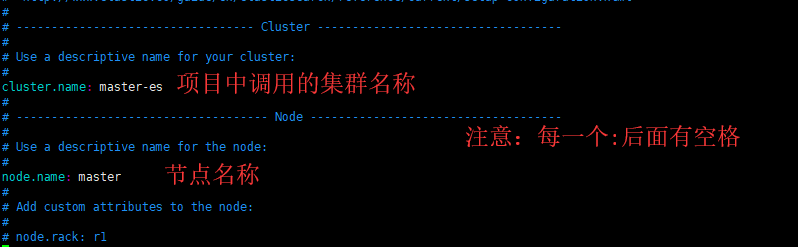
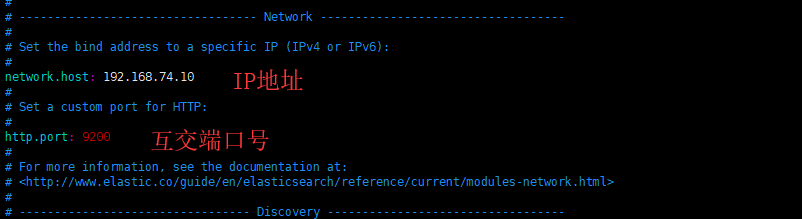
末尾增加防脑裂:
discovery.zen.ping.multicast.enabled: false
discovery.zen.ping.unicast.hosts: ["192.168.74.10","192.168.74.11", "192.168.74.12"]
discovery.zen.ping_timeout: 120s
client.transport.ping_timeout: 60s
8.目前已经配置好了,但是不忙分发,加个可视化插件
9.分发(输入yes再输入上面设置的el密码)
scp -r elasticsearch-2.2.1/ el@slave1:`pwd`
scp -r elasticsearch-2.2.1/ el@slave2:`pwd`
10.修改2个从机器的配置文件
vim /opt/es/elasticsearch-2.2.1/config/elasticsearch.yml- slave1


- slave2

11.配置环境变量
vim ~/.bashrc


#Elasticsearch
EL_HOME=/opt/es/elasticsearch-2.2.1
PATH=$PATH:$EL_HOME/bin

source ~/.bashrc
12.集群所有节点执行脚本启动el集群
13.如果能看见如下信息就是启动成功了
- master

- slave1

- slave2

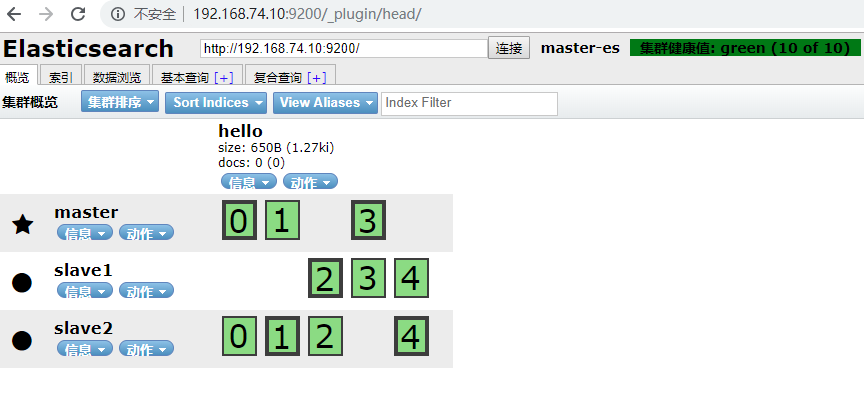
14.使用浏览器查看(对比原生态的和插件的)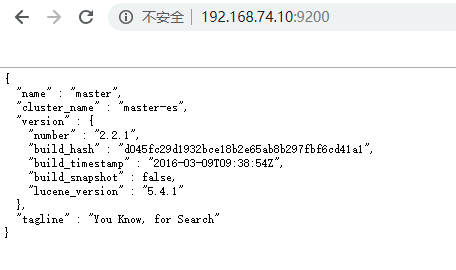

1 IK分词器安装
1.找到安装el的目录下的插件目录,上传IK包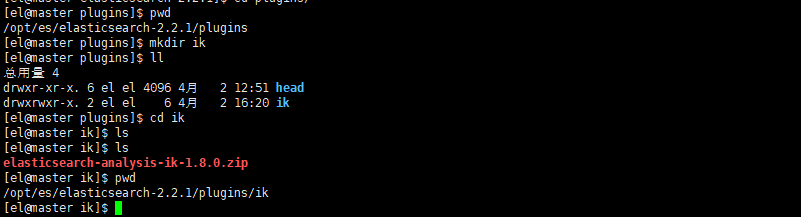
2.解压unzip elasticsearch-analysis-ik-1.8.0.zip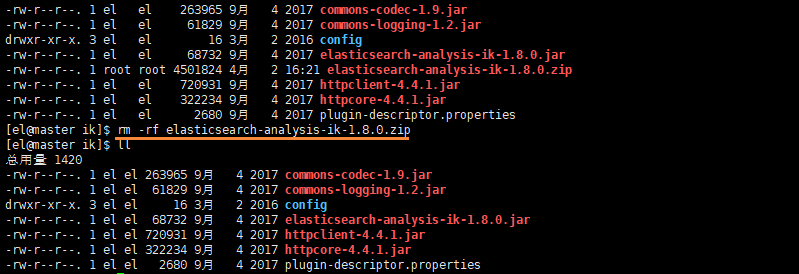
3.修改配置文件vim + plugin-descriptor.properties
4.回到plugins目录,分发
scp -r ik/ el@slave1:`pwd`
scp -r ik/ el@slave2:`pwd`
2 使用
2.1 CURL命令
- 简单认为是可以在命令行下访问url的一个工具
- curl是利用URL语法在命令行方式下工作的开源文件传输工具,使用curl可以简单实现常见的get/post请求。
- curl
- -X 指定http请求的方法(HEAD GET POST PUT DELETE)
- -d 指定要传输的数据
2.1.1创建索引库curl -XPUT http://192.168.74.10:9200/hello/

2.1.2删除索引库curl -XDELETE http://192.168.74.10:9200/hello1/
2.1.3数据操作-普通添加
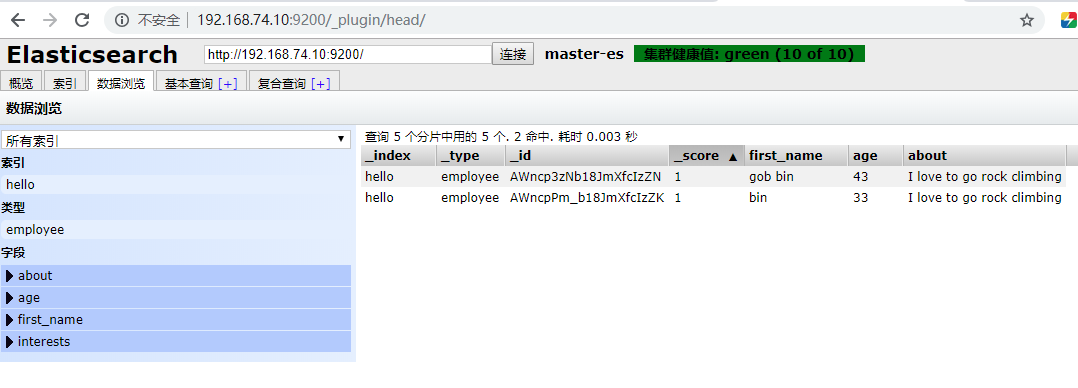
curl -XPOST http://192.168.74.10:9200/hello/employee -d '
{
 "first_name" : "bin",
 "age" : 33,
 "about" : "I love to go rock climbing",
 "interests": [ "sports", "music" ]
}'

curl -XPOST http://192.168.74.10:9200/hello/employee -d '
{
 "first_name" : "gob bin",
 "age" : 43,
 "about" : "I love to go rock climbing",
 "interests": [ "sports", "music" ]
}'
2.1.4数据操作-追加列
curl -XPOST http://192.168.74.10:9200/hello/employee -d '
{
 "first_name" : "pablo",
 "age" : 33,
 "about" : "I love to go rock climbing",
 "interests": [ "sports", "music" ],
 "sex": "man",
 "last_name" : "bin"
}'
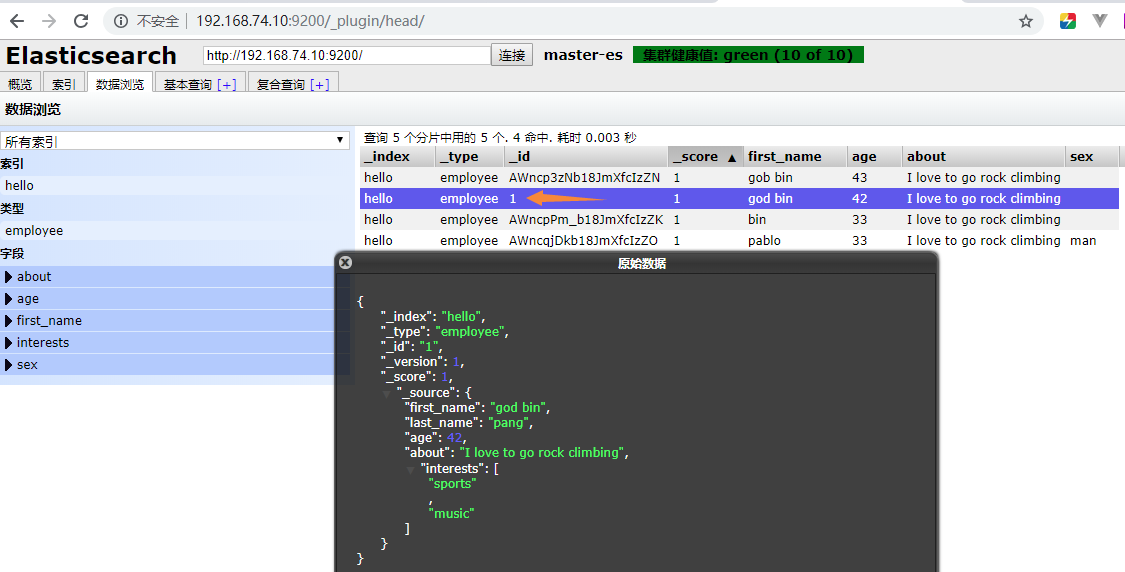
2.1.5数据操作-put指定id添加(如果是新的id就是创建,如果是老的id那么更新)
curl -XPUT http://192.168.74.10:9200/hello/employee/1 -d '
{
 "first_name" : "god bin",
 "last_name" : "pang",
 "age" : 42,
 "about" : "I love to go rock climbing",
 "interests": [ "sports", "music" ]
}'
2.1.6数据操作-根据document的id来获取数据
curl -XGET http://192.168.74.10:9200/hello/employee/1
curl -XGET http://192.168.74.10:9200/hello/employee/1?pretty
2.1.7数据操作-根据field来查询数据:
curl -XGET http://192.168.74.10:9200/hello/employee/_search?q=first_name="bin"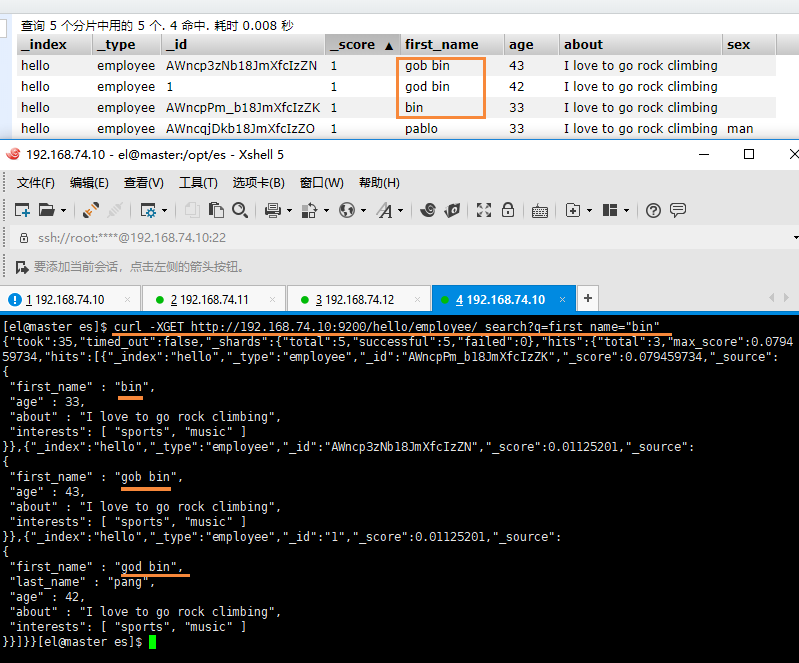
2.1.8数据操作-根据field来查询数据:match
curl -XGET http://192.168.74.10:9200/hello/employee/_search?pretty -d '
{
 "query":
  {"match":
   {"first_name":"bin"}
  }
}'
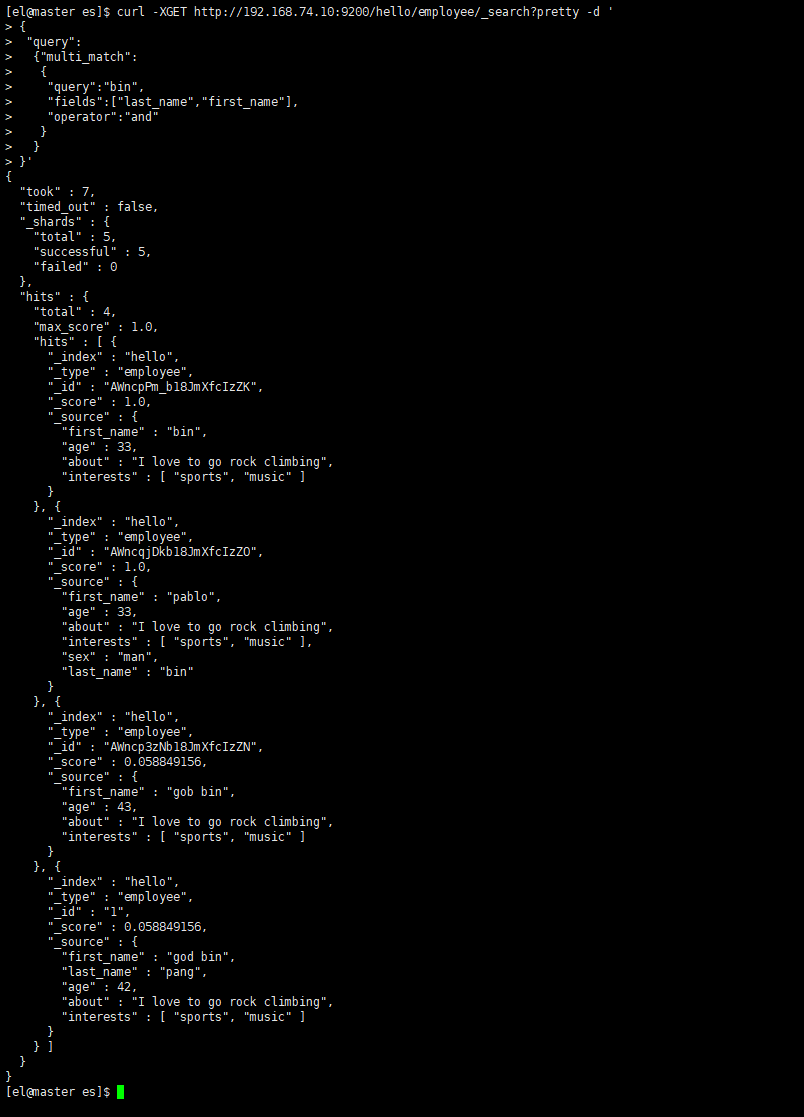
- 对多个field发起查询:multi_match
curl -XGET http://192.168.74.10:9200/hello/employee/_search?pretty -d '
{
 "query":
  {"multi_match":
   {
    "query":"bin",
    "fields":["last_name","first_name"],
    "operator":"and"
   }
  }
}'
2.1.9数据操作-多个term对多个field发起查询:bool(boolean)
- 组合查询,must,must_not,should
- must + must : 交集
- must +must_not :差集
- should+should : 并集
curl -XGET http://192.168.74.10:9200/hello/employee/_search?pretty -d '
{
 "query":
  {"bool" :
   {
    "must" :
     {"match":
      {"first_name":"bin"}
     },
    "must" :
     {"match":
      {"age":33}
     }
   }
  }
}'

curl -XGET http://192.168.74.10:9200/hello/employee/_search?pretty -d '
{
 "query":
  {"bool" :
   {
    "must" :
     {"match":
      {"first_name":"bin"}
     },
    "must_not" :
     {"match":
      {"age":33}
     }
   }
  }
}'

curl -XGET http://192.168.74.10:9200/hello/employee/_search?pretty -d '
{
 "query":
  {"bool" :
   {
    "must_not" :
     {"match":
      {"first_name":"bin"}
     },
    "must_not" :
     {"match":
      {"age":33}
     }
   }
  }
}'
2.1.10数据操作-区间查询
查询first_name=bin的,年龄不能在20岁到33岁之间的
curl -XGET http://192.168.74.10:9200/hello/employee/_search -d '
{
 "query":
  {"bool" :
   {
   "must" :
    {"term" :
     { "first_name" : "bin" }
    }
   ,
   "must_not" :
    {"range":
     {"age" : { "from" : 20, "to" : 33 }
    }
   }
   }
  }
}'
2.1.11修改配置
curl -XPUT 'http://192.168.74.10:9200/test2/' -d'{"settings":{"number_of_replicas":2}}'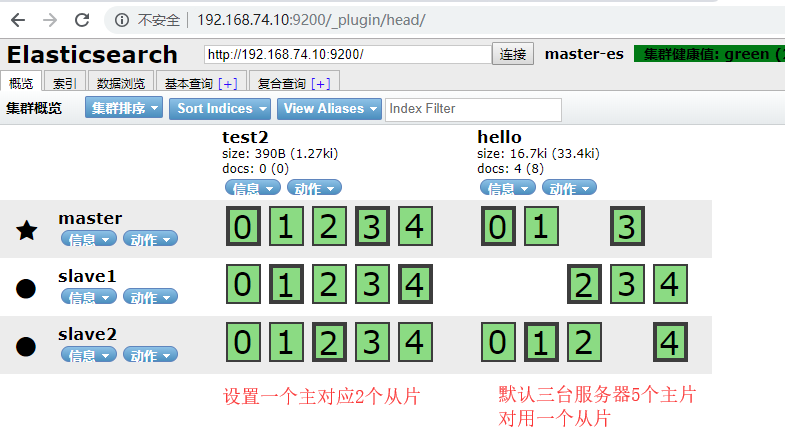
curl -XPUT 'http://192.168.74.10:9200/test3/' -d'{"settings":{"number_of_shards":3,"number_of_replicas":3}}'
注意事项
- 需要jdk环境1.7以上
- Elasticsearch Kibana 的下载地址统一为https://www.elastic.co/downloads/
- 问题排查可以登录https://discuss.elastic.co/c论坛查找相关信息
- 只允许普通用户操作,不允许root用户
- 注意:因为elasticsearch有远程执行脚本的功能所以容易中木马病毒,所以不允许用root用户启动,root用户是起不来的,赋权限,用一般的用户启动
参考文献:https://www.cnblogs.com/hts-technology/p/8556279.html