使用opecv读取USB摄像头时候,无法显示图像。
设置
首先查看虚拟机Ubuntu检测摄像头是否已正常插入:
ls /dev/video*
结果为:

设置虚拟机USB属性:
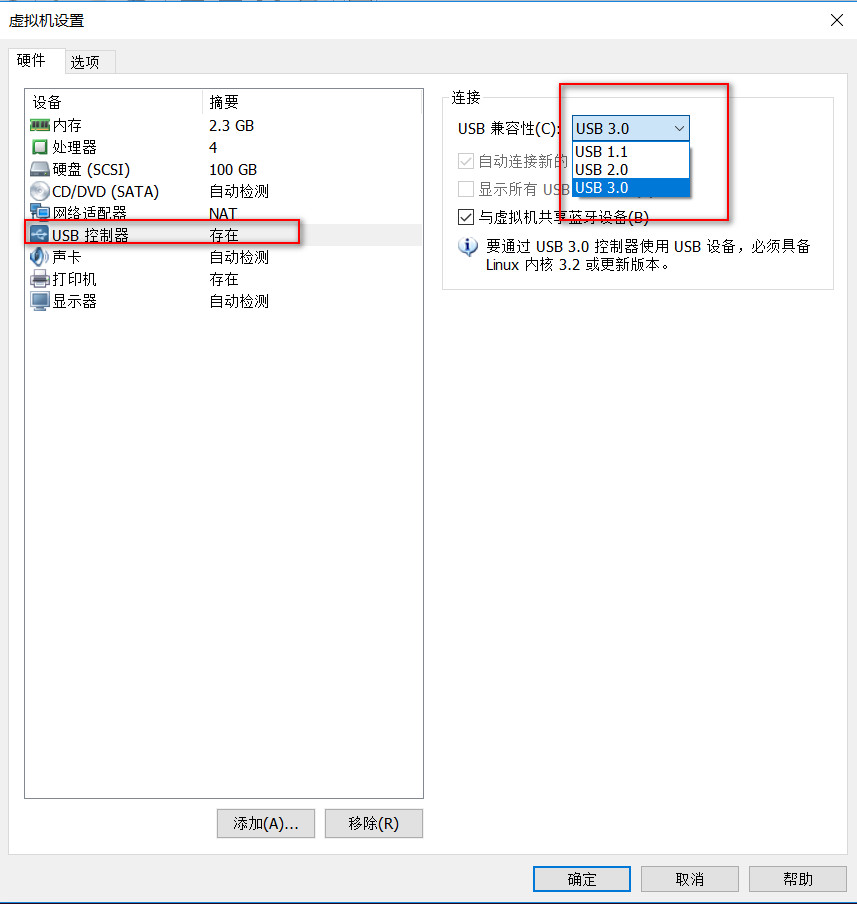
USB的兼容性设置为USB3.0。

将USB连接到虚拟机上。
程序
#include <sys/types.h>
#include <sys/stat.h>
#include <fcntl.h>
#include <stdio.h>
#include <stdlib.h>
#include <string.h>
#include <unistd.h>
#include <pthread.h>
#include <errno.h>
#include <sys/socket.h>
#include <netinet/in.h>
#include <time.h>
#include <math.h>
#include <sys/ioctl.h>
#include <linux/fb.h>
#include <iostream>
#include <signal.h>
#include <string>
#include <iostream>


#include <opencv2/opencv.hpp>

using namespace cv;
using namespace std;


int main()
{
    VideoCapture capture(1);
    if(capture.isOpened())
    {
        cout<<"success"<<endl;
    }

    Mat frame;
    while (capture.isOpened())
    {
	capture >> frame;
  	if (!frame.empty())
        {
            //imshow("edges", frame);
	    imwrite("test.bmp",frame);
 	    imshow("capture", frame);
	    //cout<<"can get ";
        }
        else
        {
            //cout<<"can not get";
        }

        if(waitKey(10) == 27)
            break;
    }


    return 0;
}
Makefile
LIBS += -L /usr/lib/ -lstdc++
LIBS += `pkg-config --libs opencv`

TARGET = test

target:
	$(CC) $(CFLAGS) -o  $(TARGET)   $(SRCS) $(INC) $(LIBS)
    	#*****************finished building*****************

clean:
	rm -f $(TARGET)
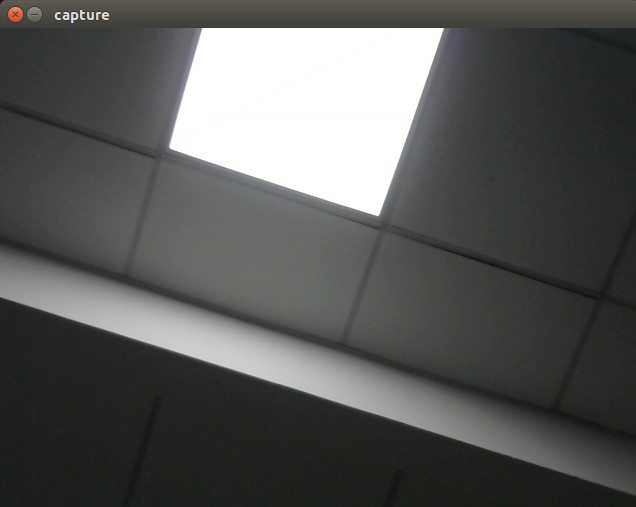
成功打开:
注意
capture(0)是笔记本摄像头,capture(1)是USB摄像头。